3. A Processing example, Pre-annotation
To illustrate how you can use a Processing, let's see one of the most useful examples : **Pre-annotation with a Model from your Registry (or our HUB)**
Let's assume that we want to annotate all the cars and pedestrians in our Sample Dataset.
First, we are going to check in the Model Registry if we have a Model Version suitable for the task.

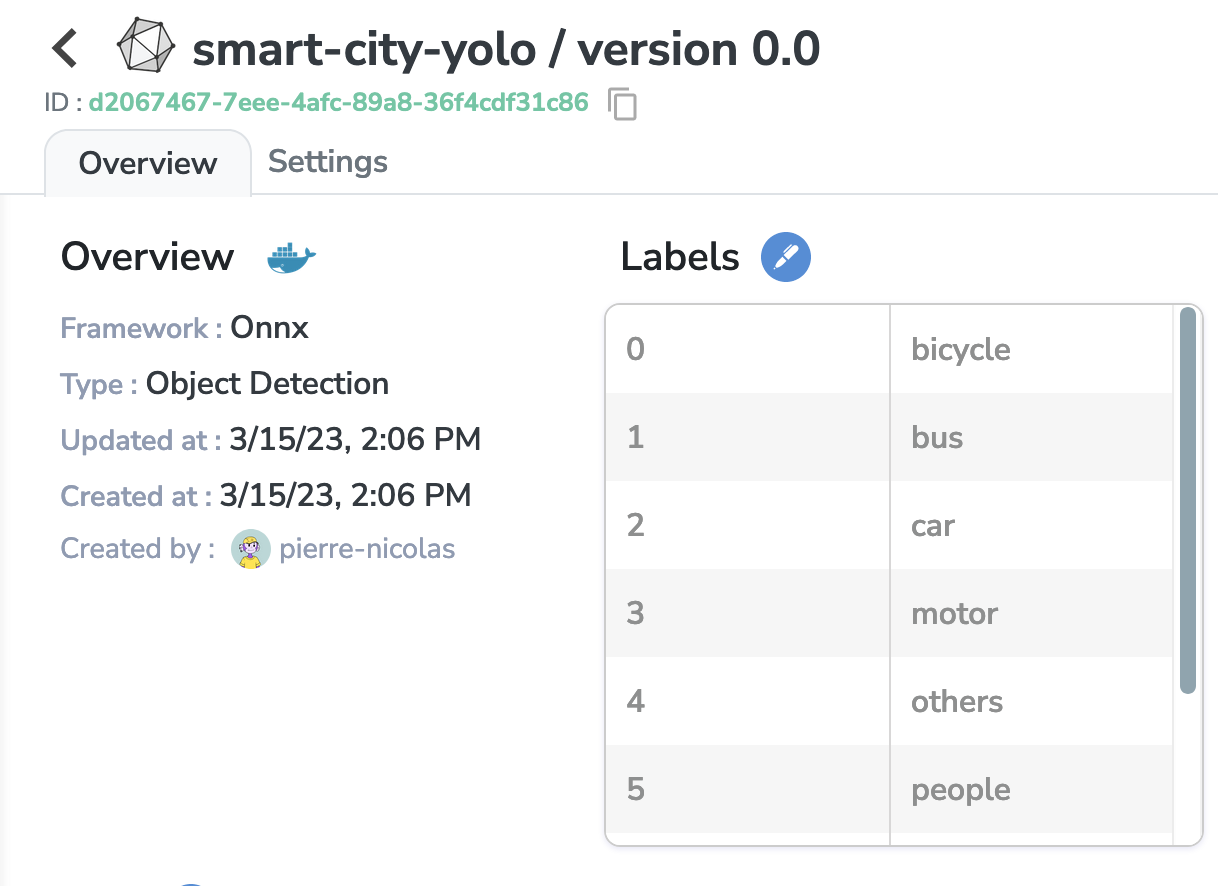

Great! This model has been trained on many labels, and among them there are car and people, so it should be apt to pre-annotate my Dataset 😁
But first, let's go back to my Dataset and create the Labels that we want our model to annotate (in the settings).
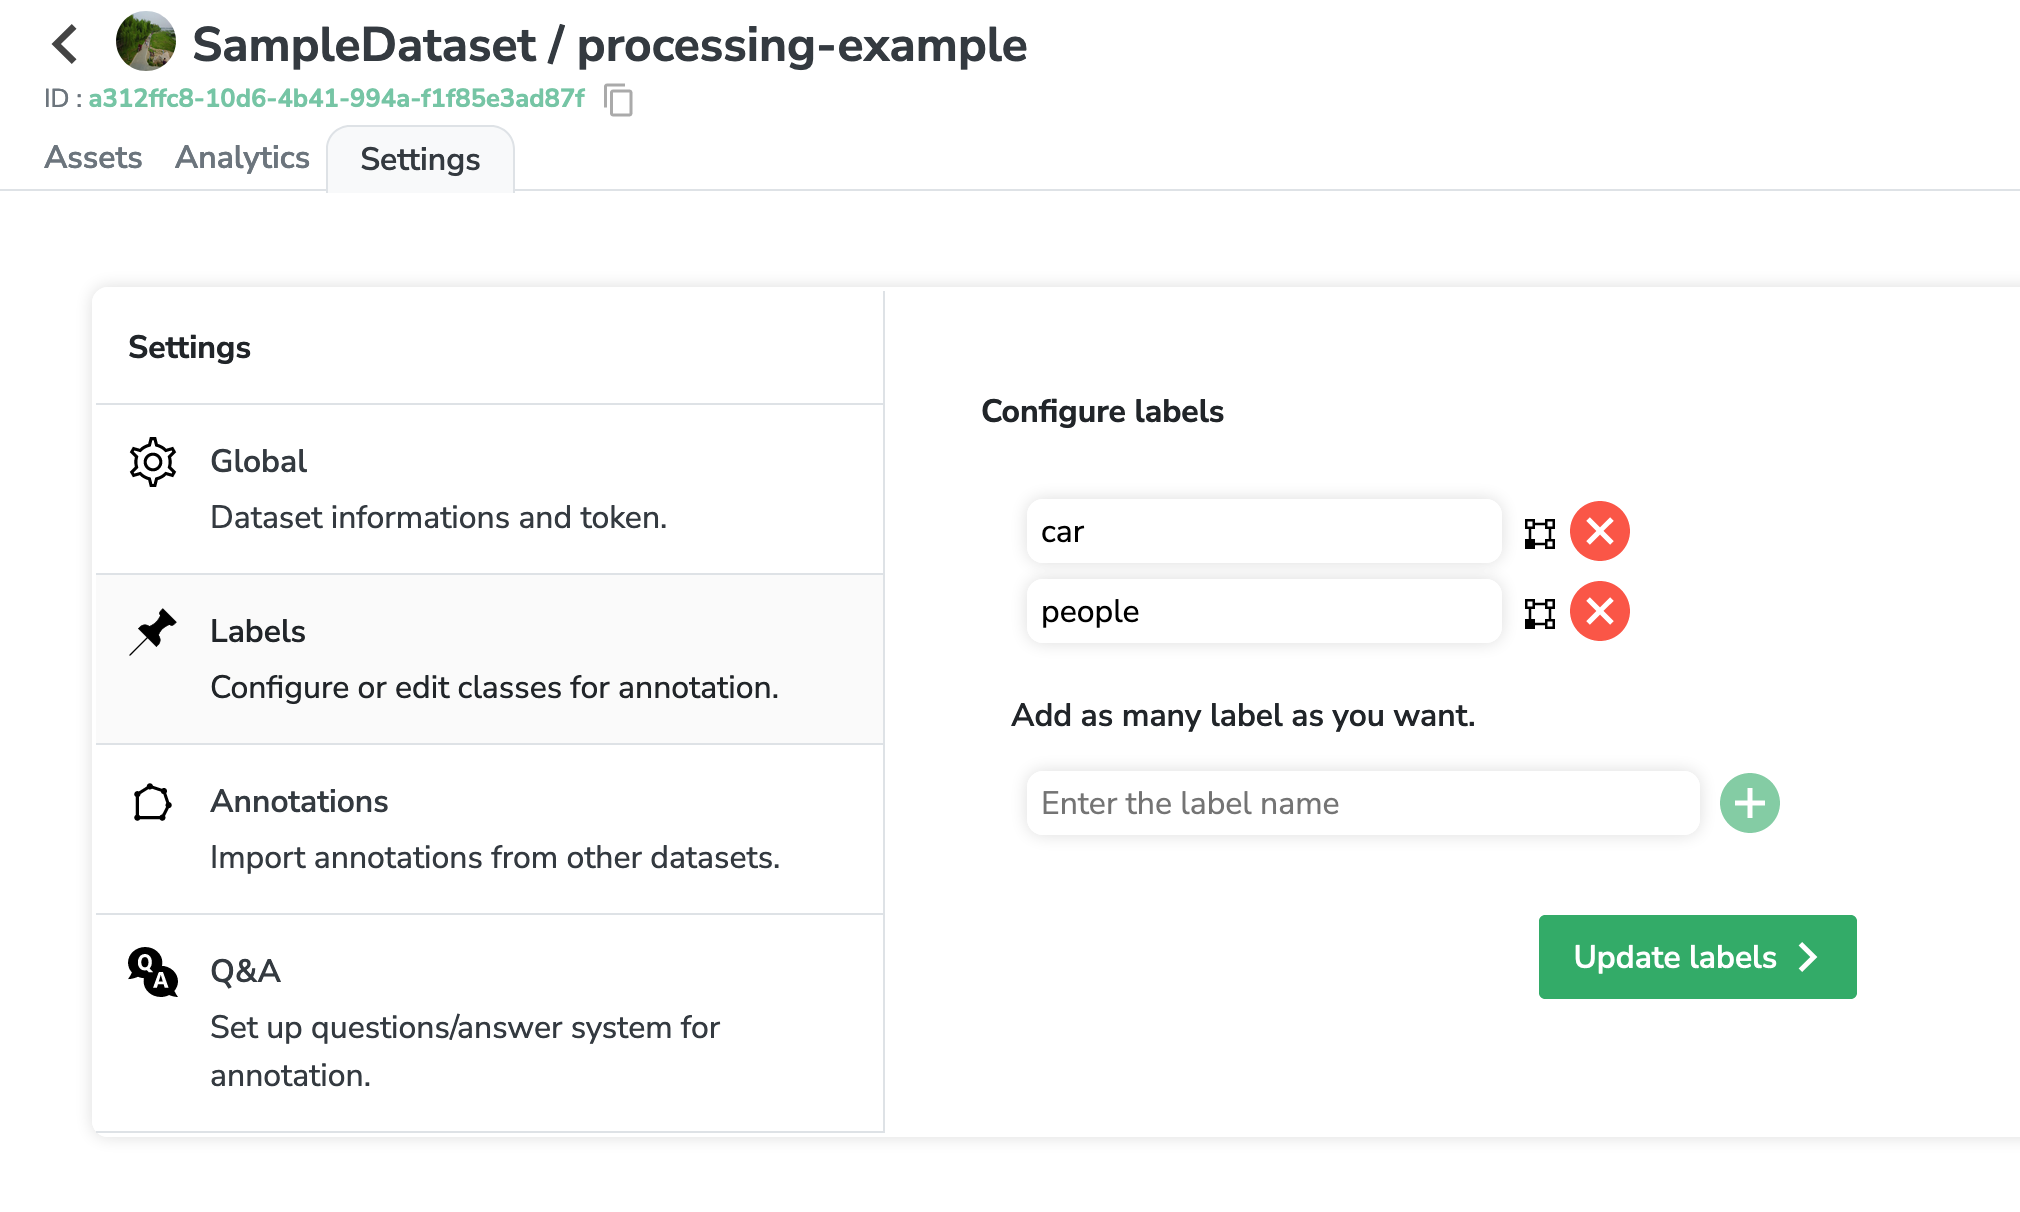
Now that the labels are set up, our model will know which classes to predict.
Let's go back to my Dataset Version overview page and click on that little process button
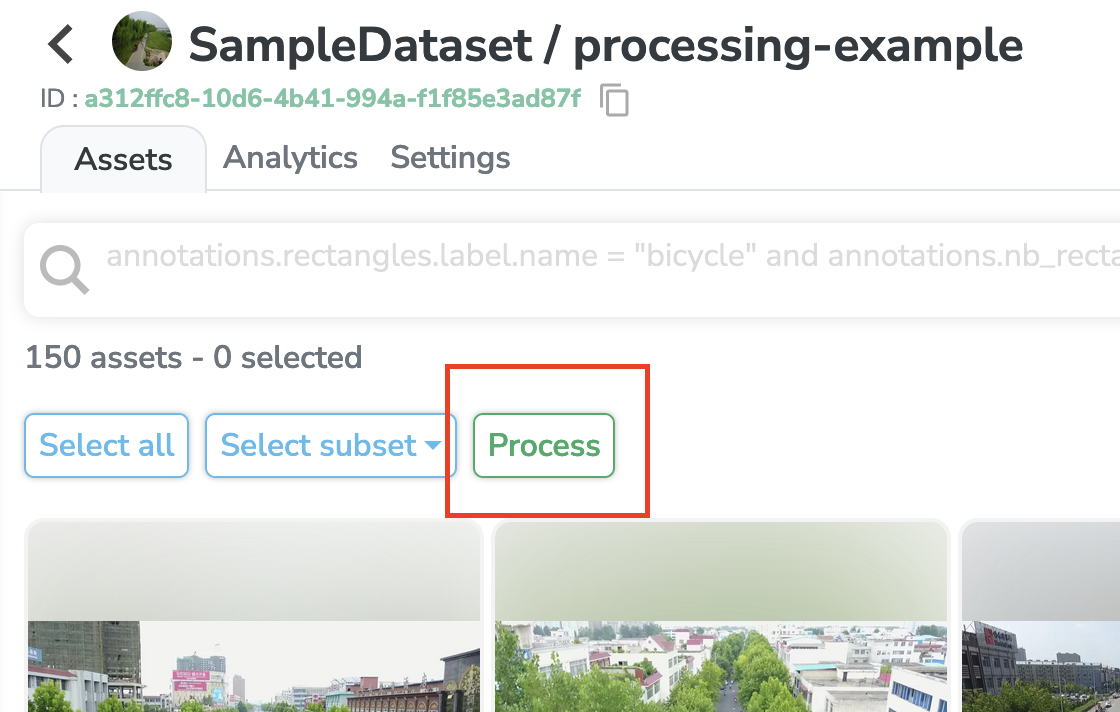
After clicking on this button, a modal where you can select a Processing will open
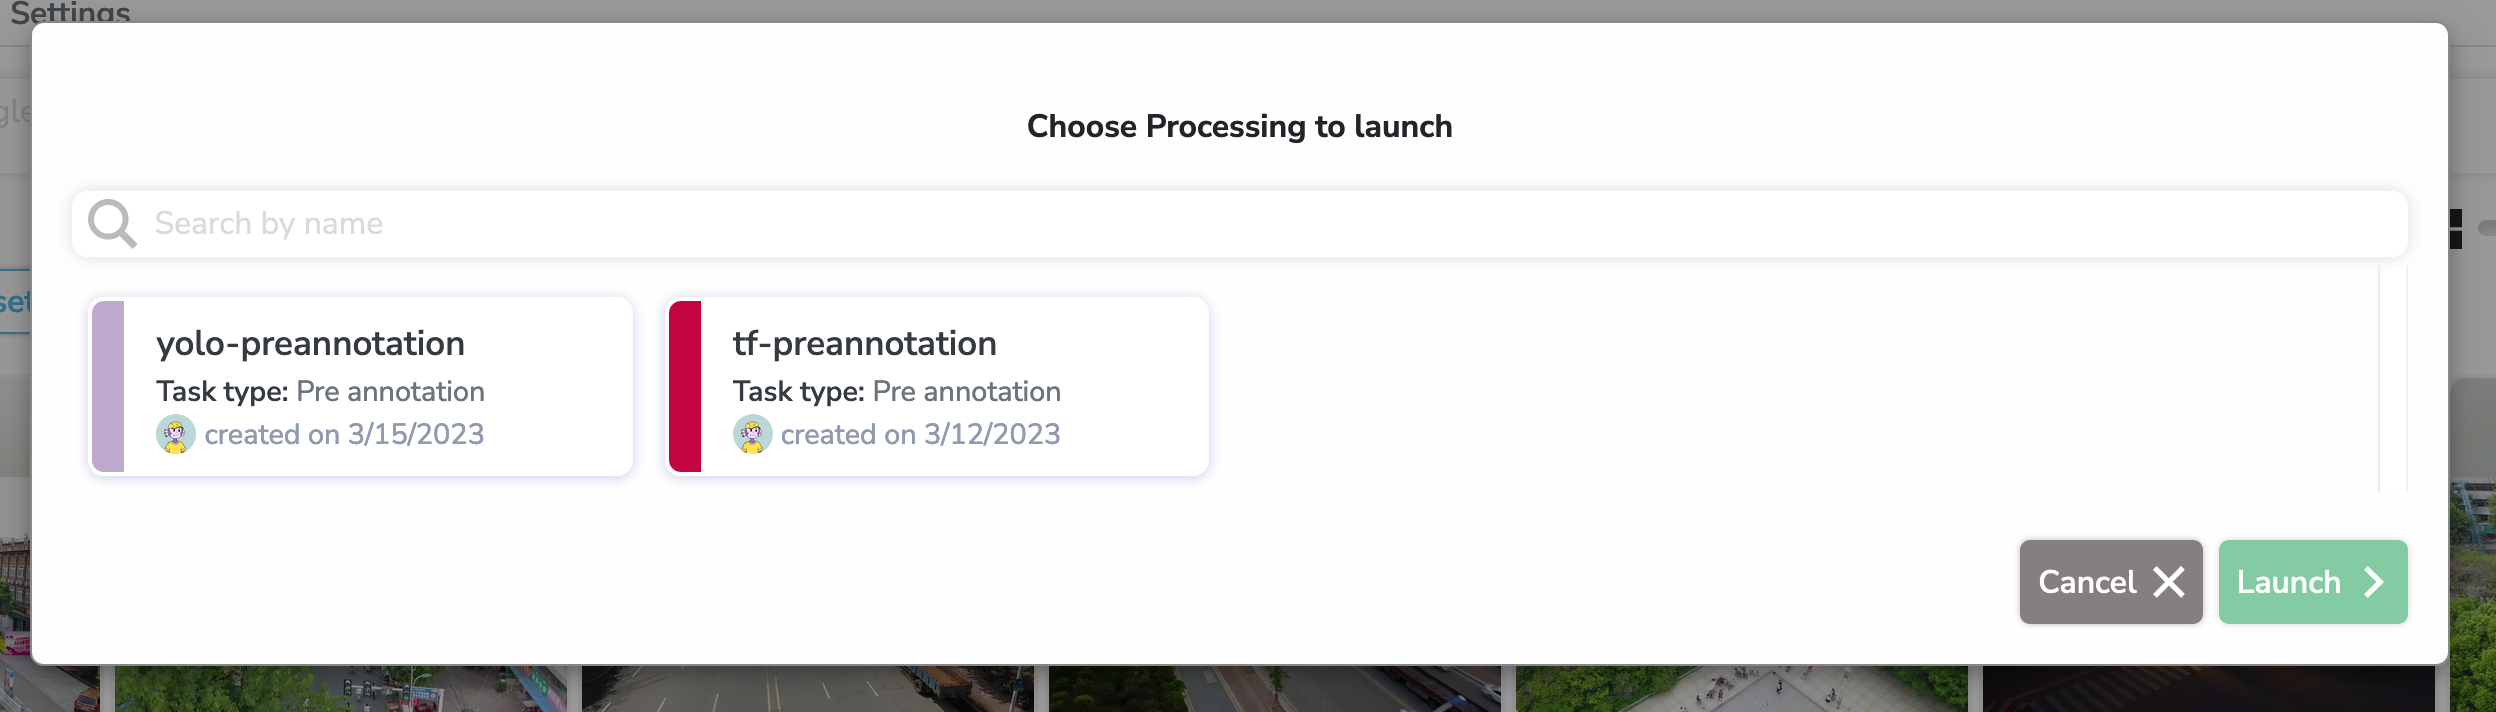
As we have decided, we are going to pre-annotate using a YOLO Model. Which means that we can select the yolo-preannotation Processing. A new menu to select the Model will open:
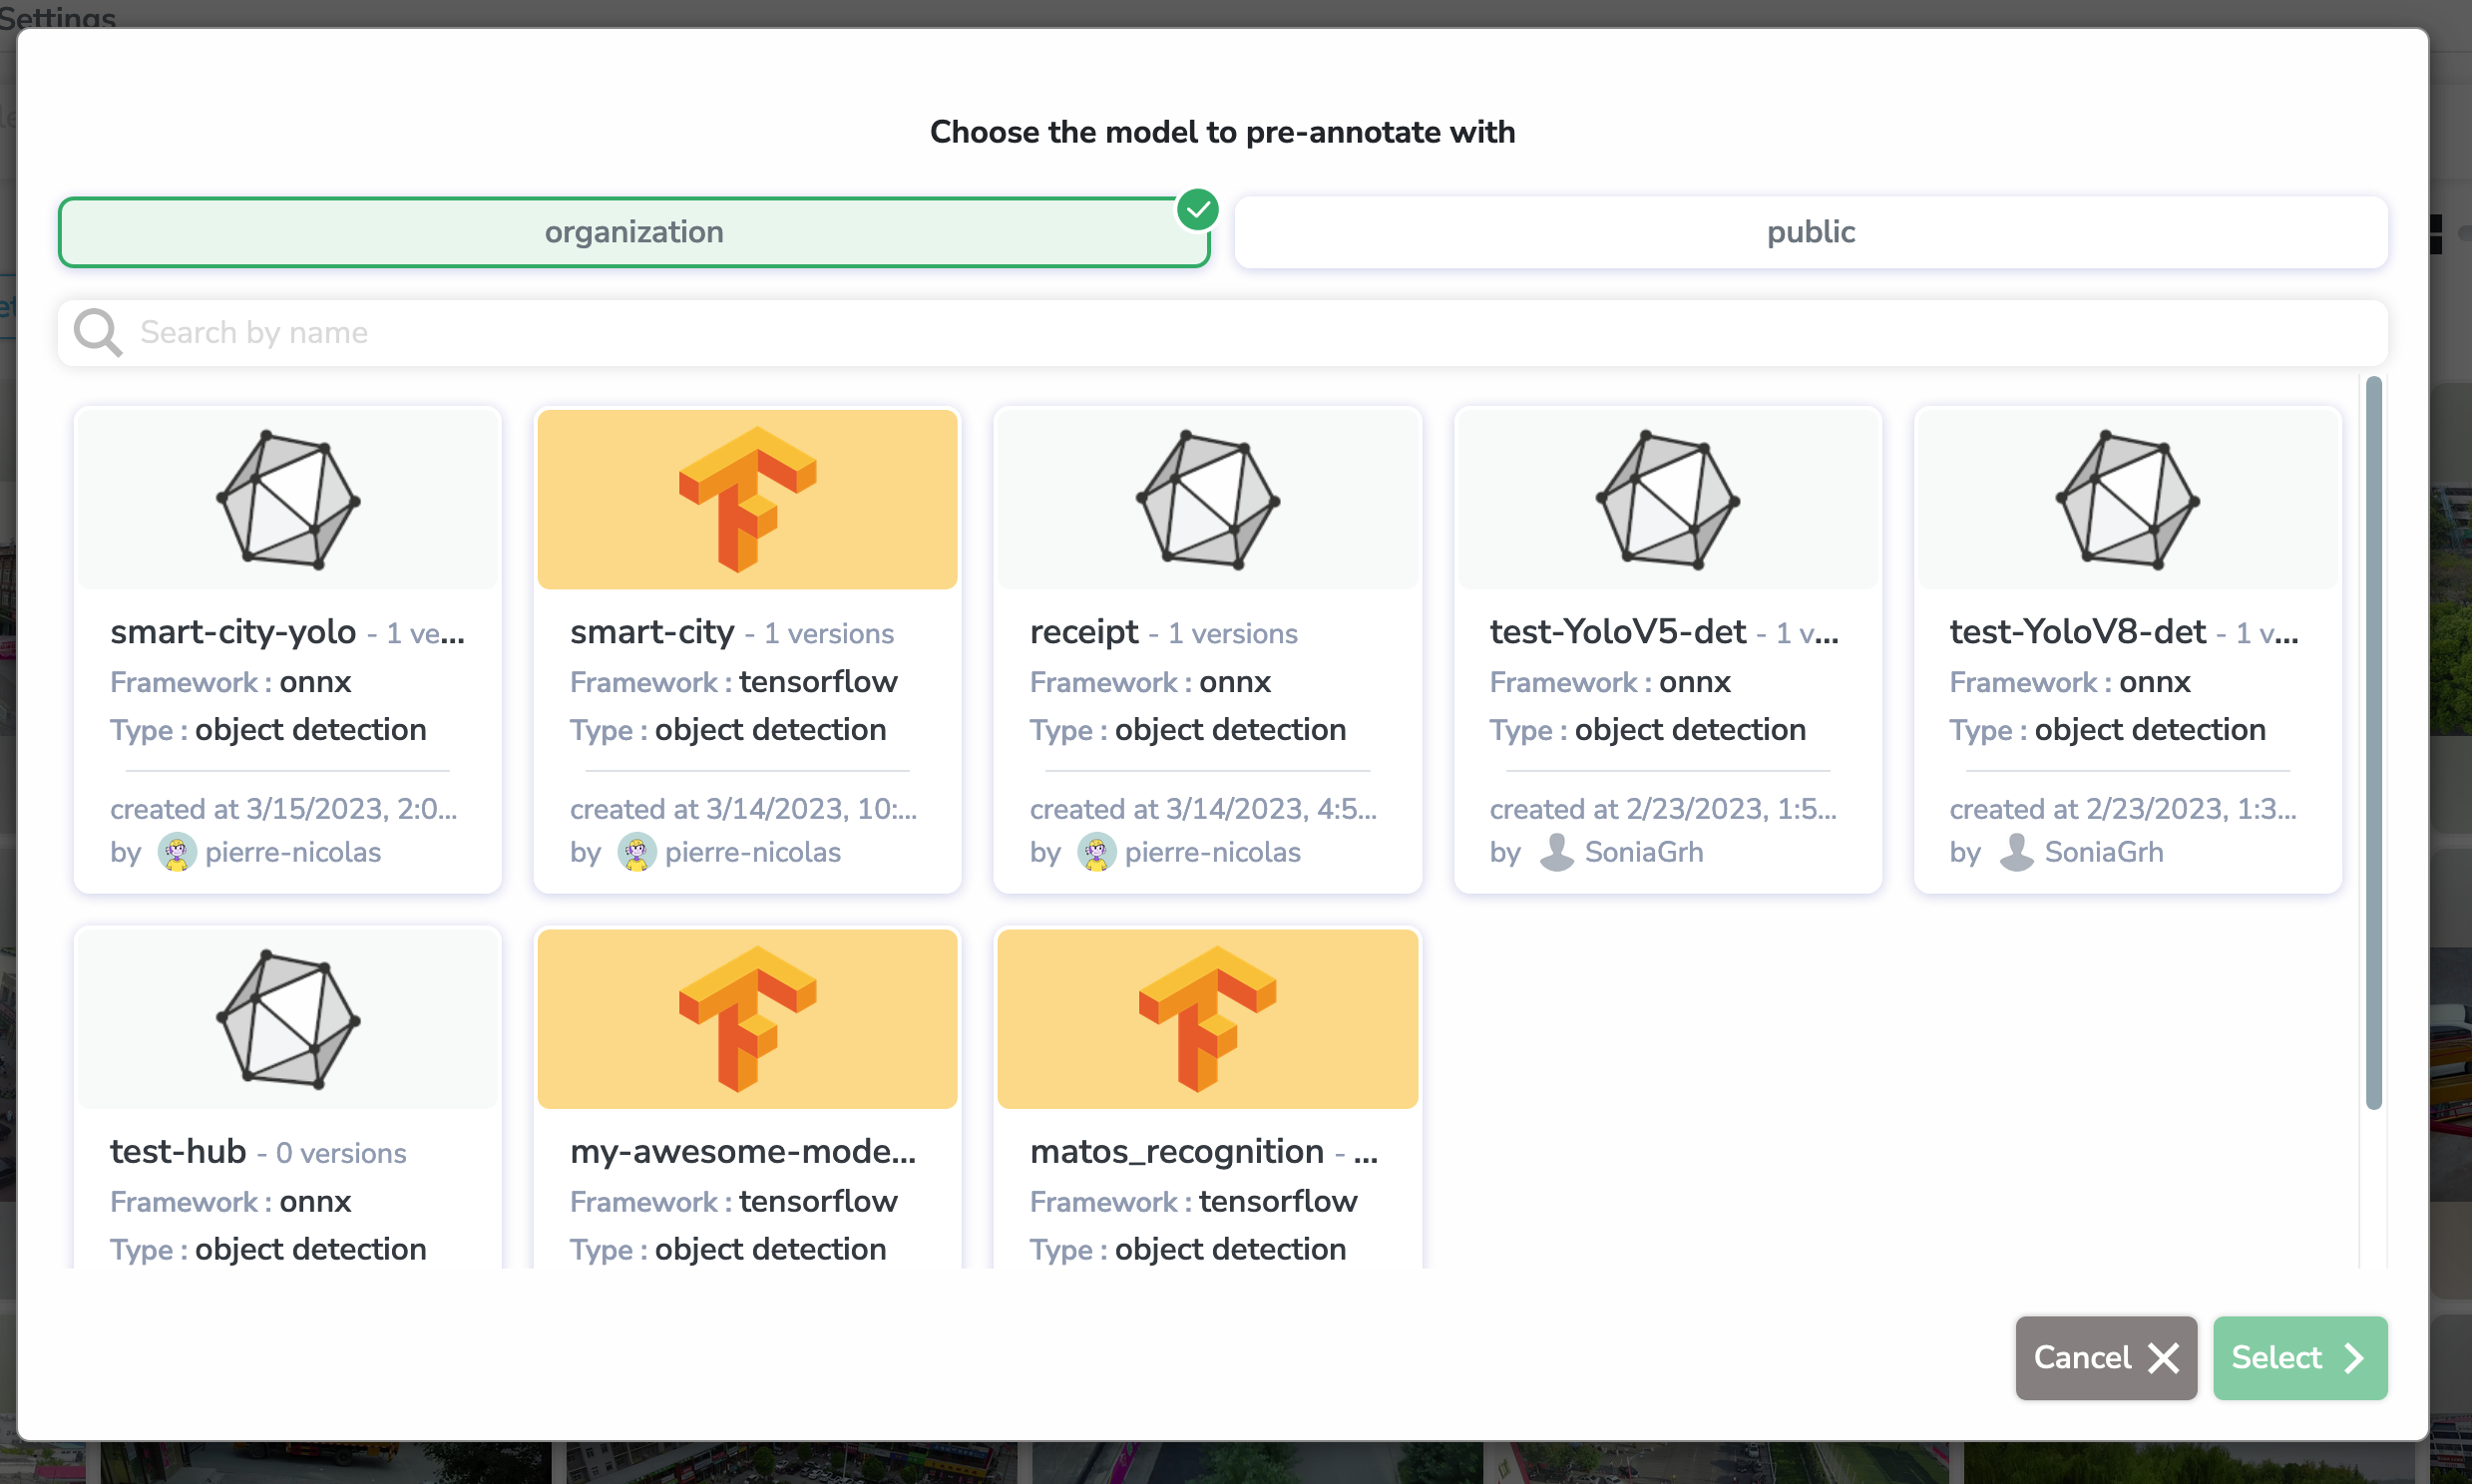
Let's select our smart-city-yolo Model
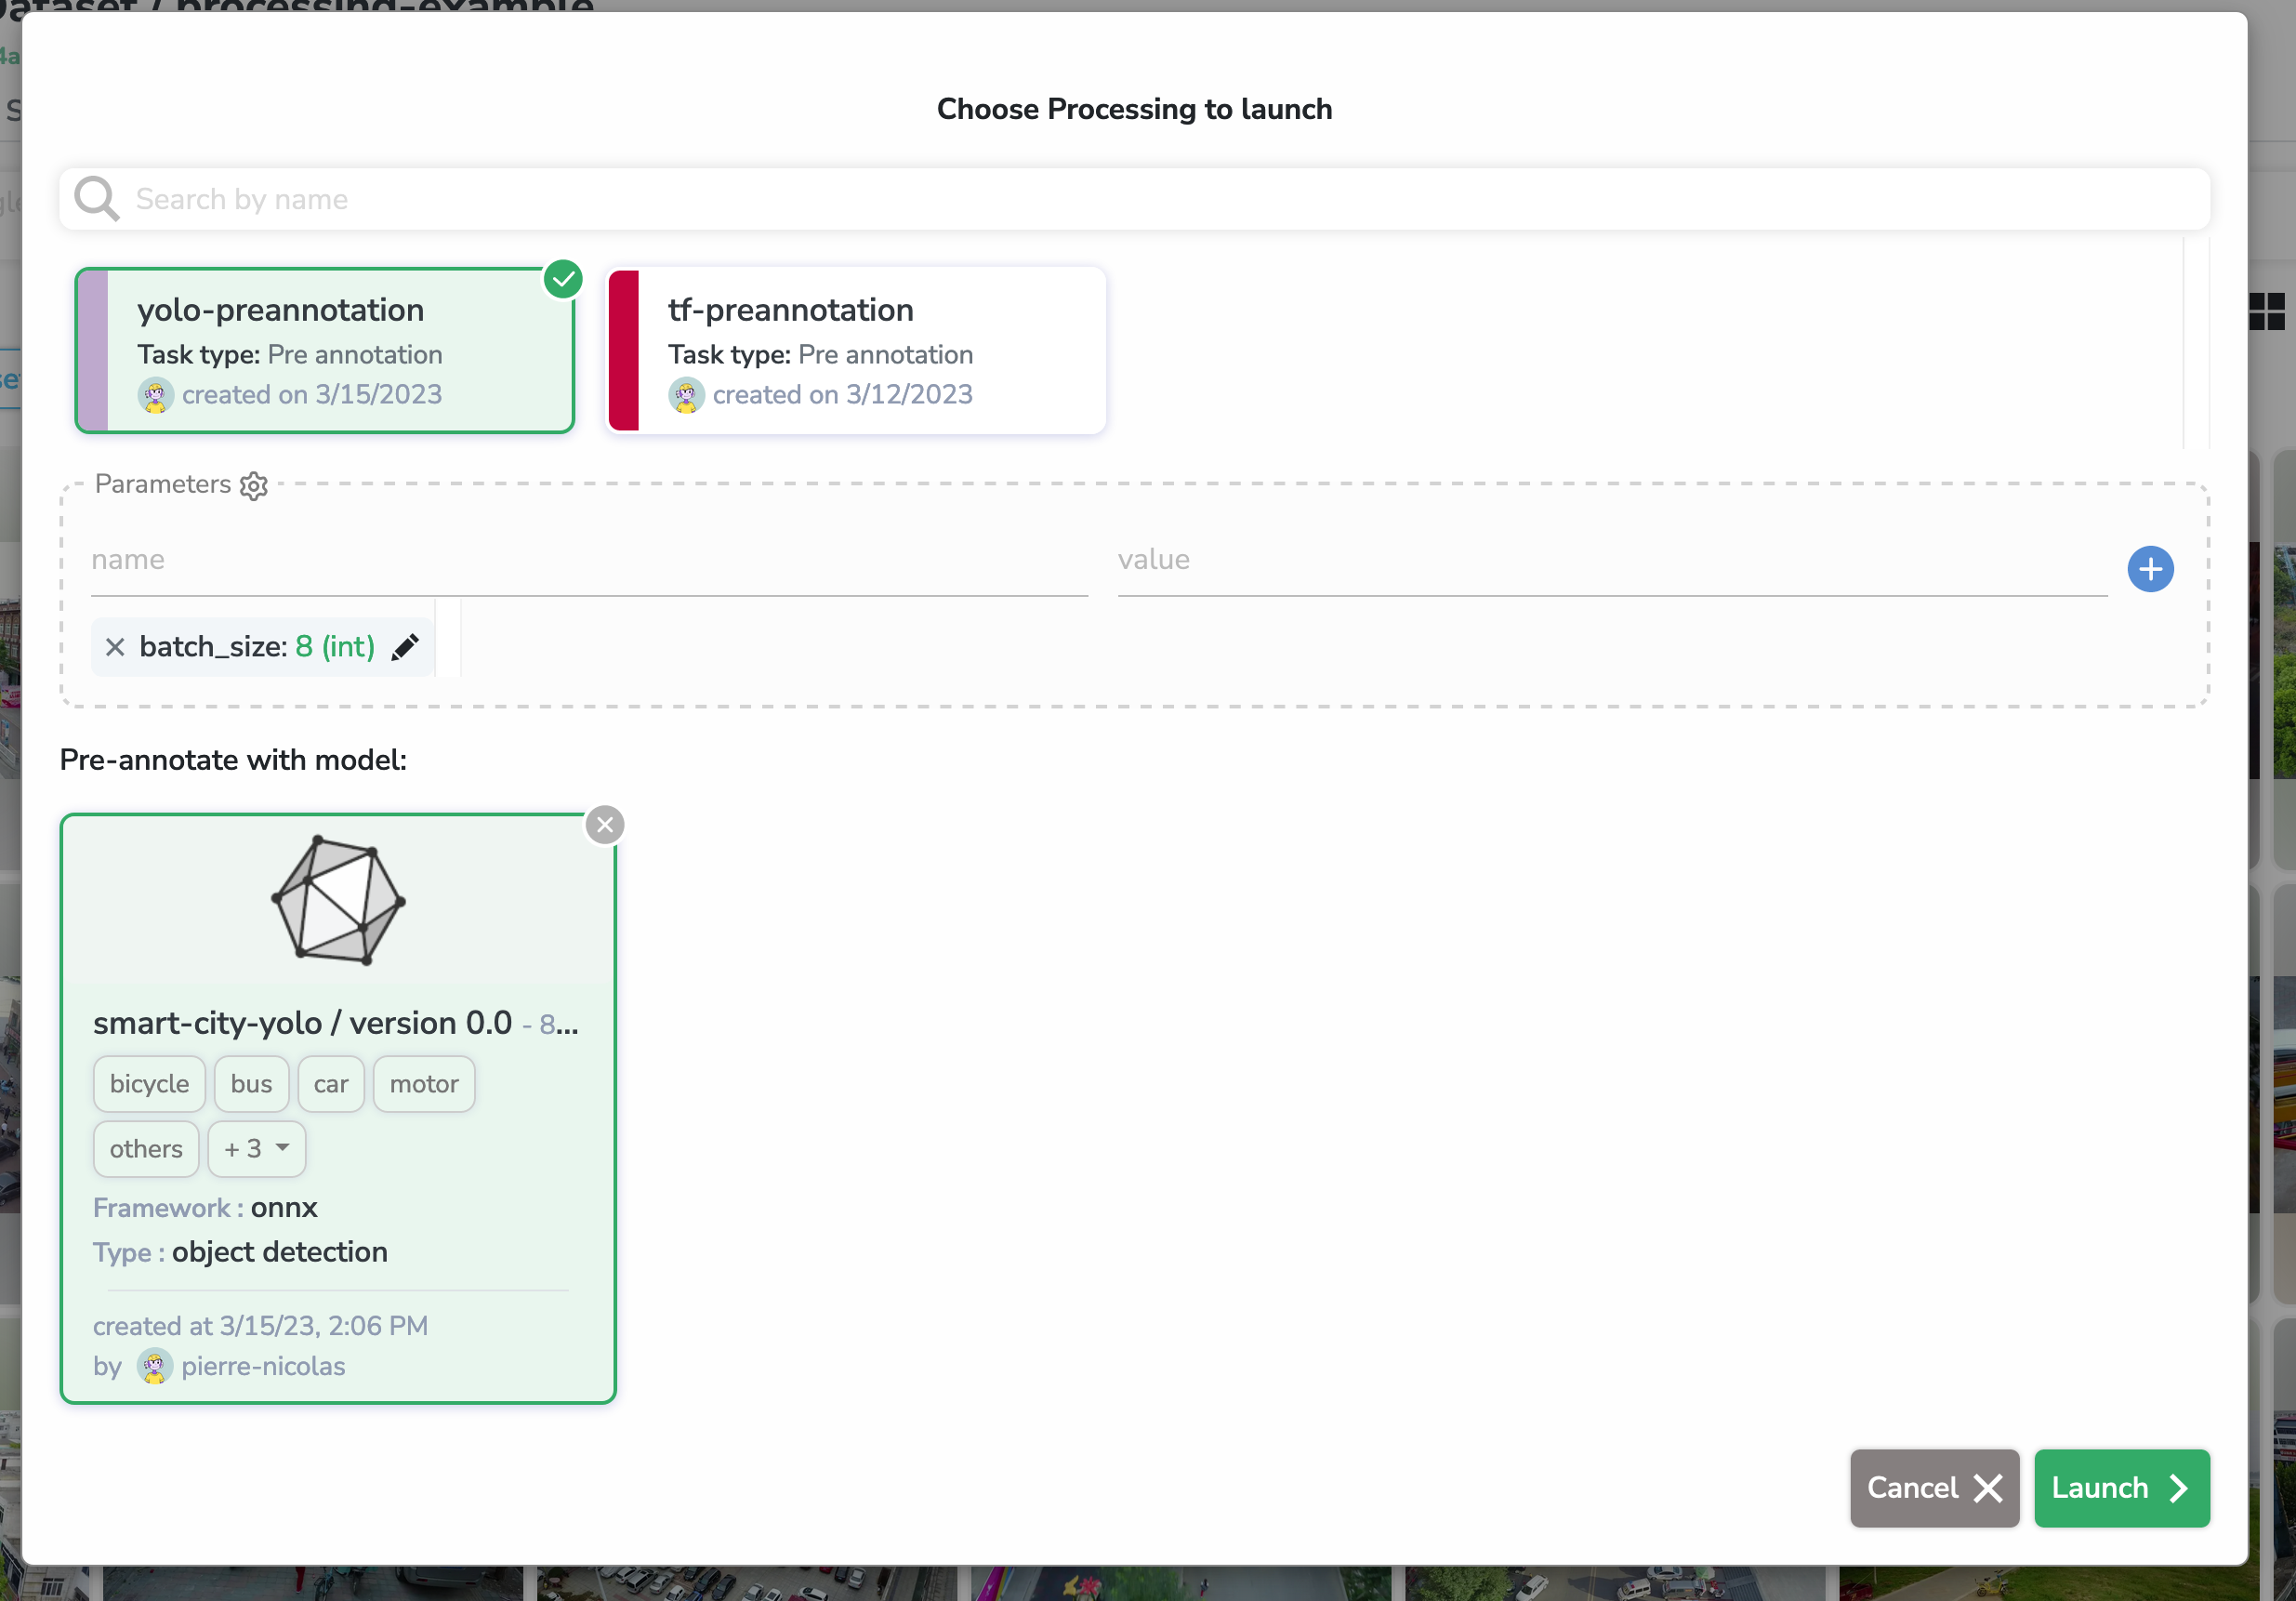
As we saw in the previous section, we can now edit (if we want) the default parameters of this Processing. We could increase the prediction batch_size for example, but let's keep it at 8 for now.
Now let's finally Launch our Processing !
When you launch a Processing, it creates a Job running in the background. You can access the status and many more information about it in the Jobs tab of the navbar.
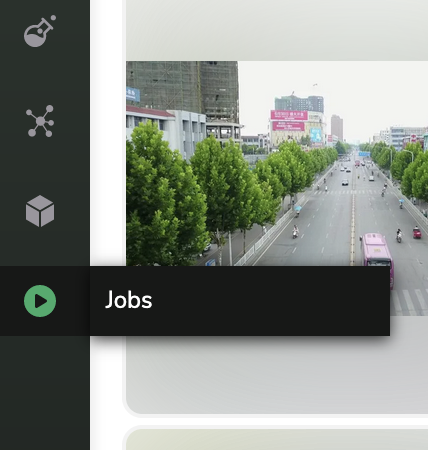
In this page, you can see the history of all the jobs that ran or are currently running on your different Datasets.
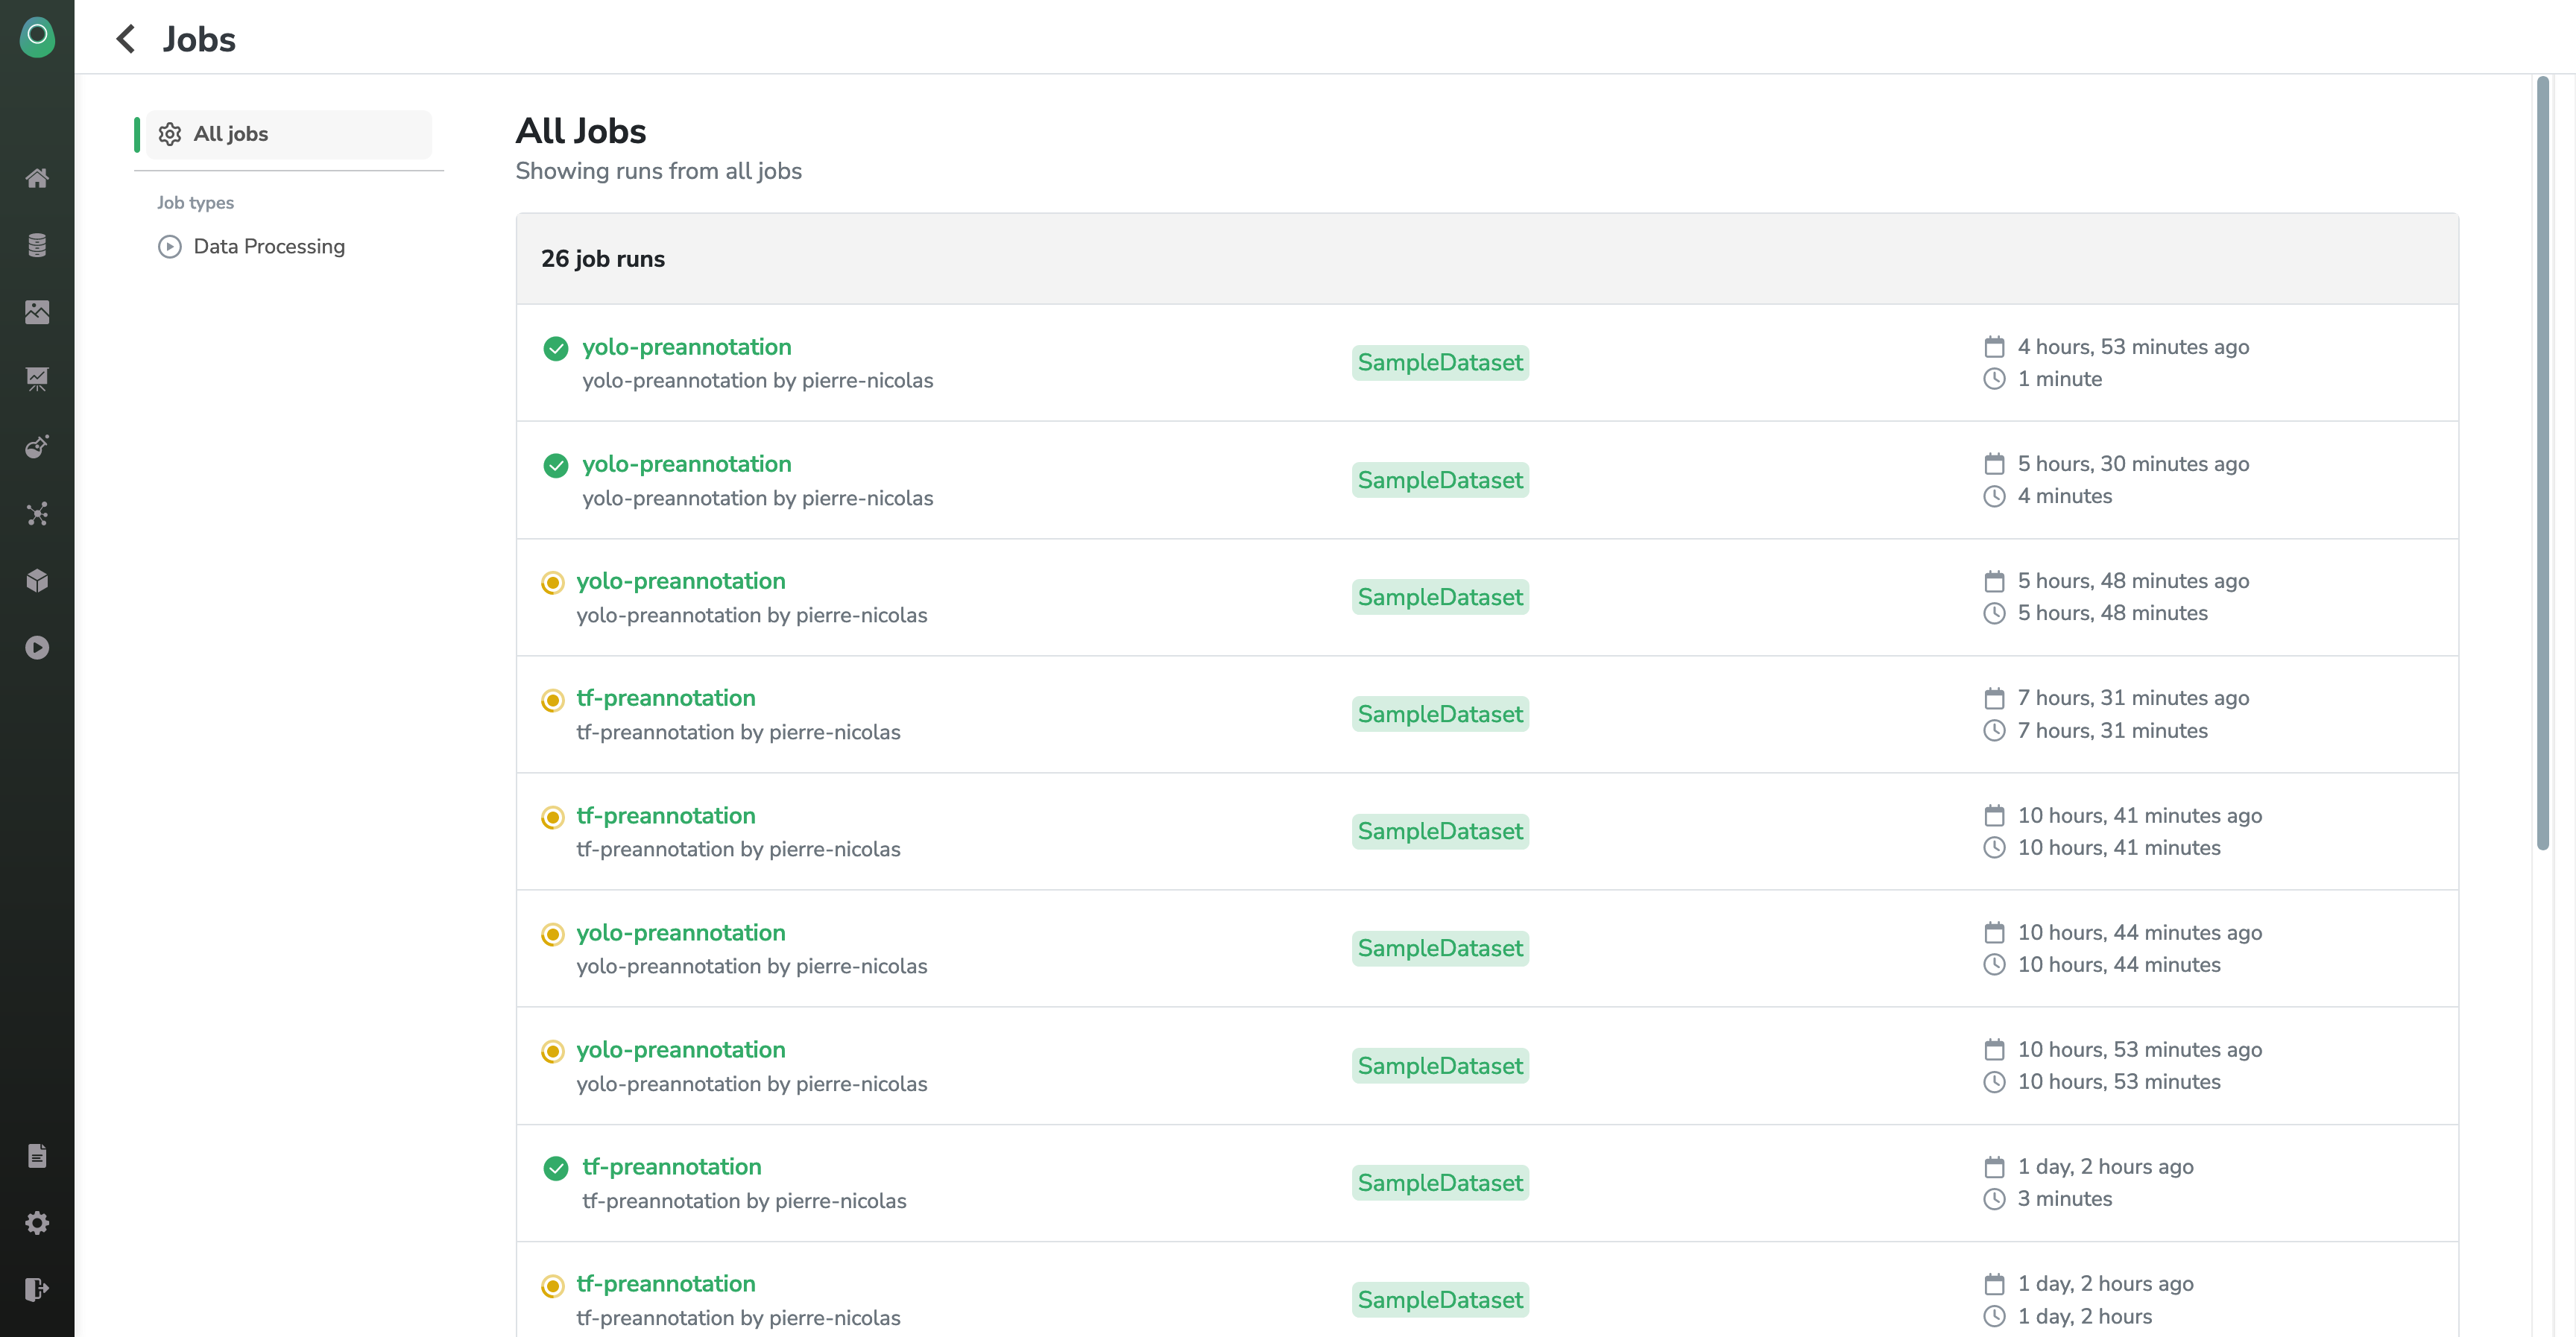
If you just launched a Processing, you should see it at the top of the list. Let's inspect our freshly launched pre-annotation job.
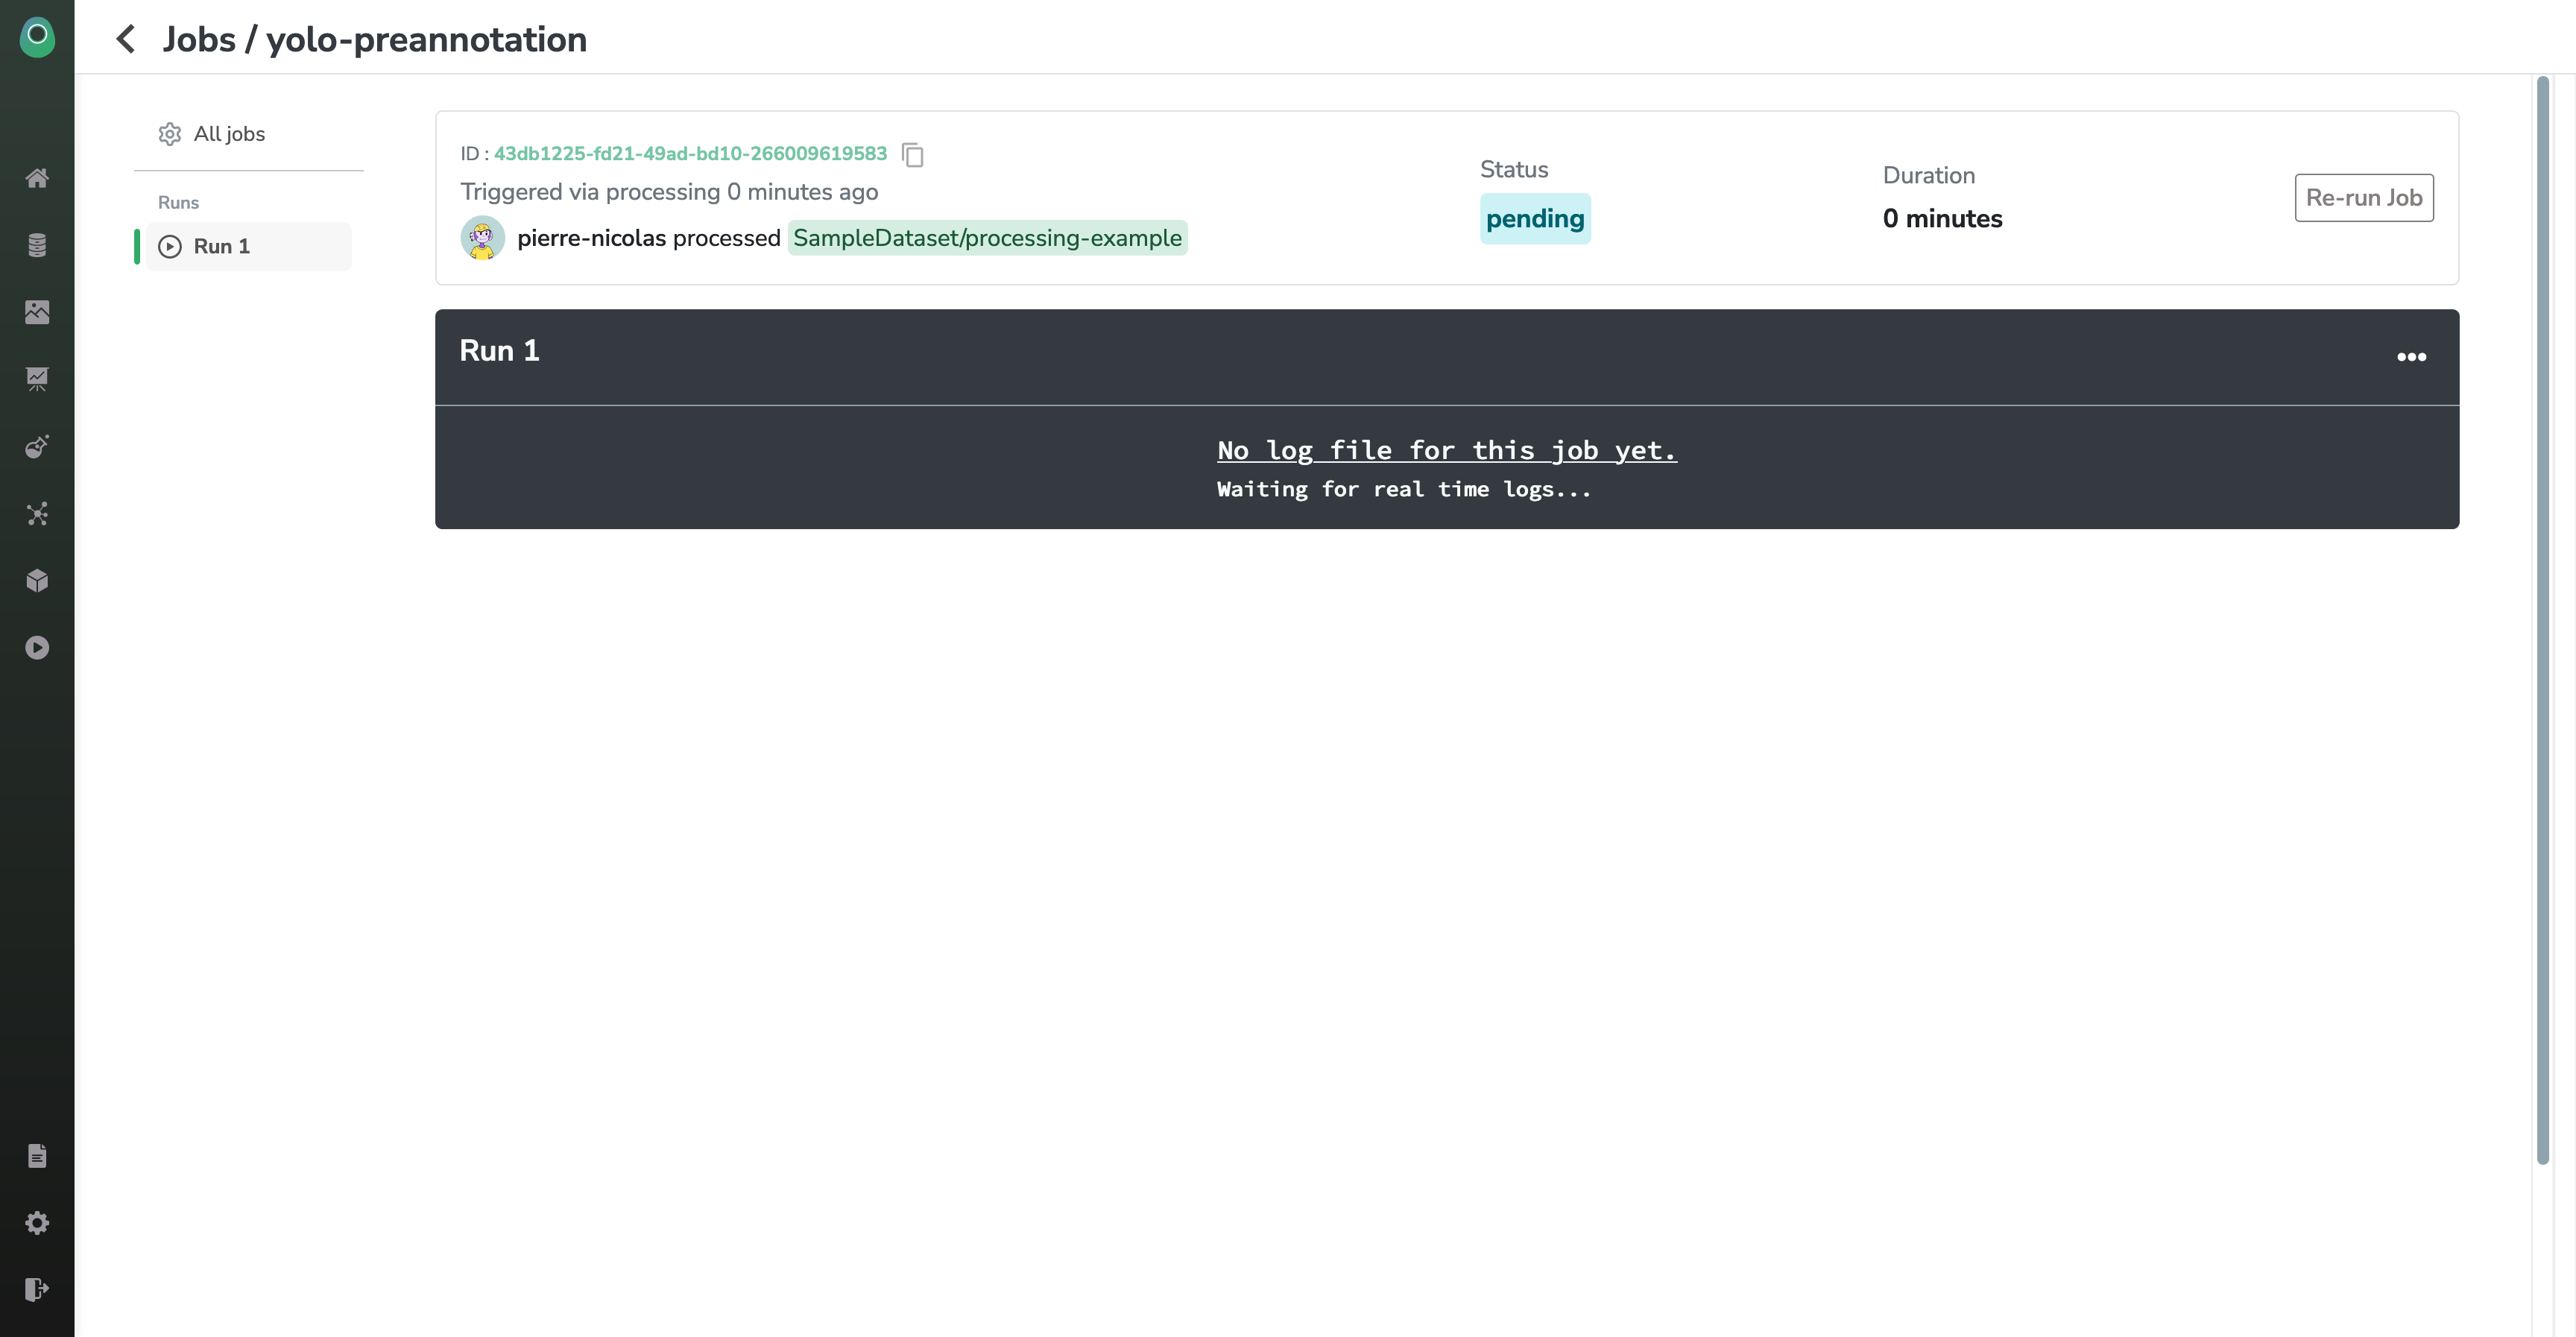
When you launch a Processing, there will be a short moment when the status will be pending. Once your Job has been scheduled (and you start being billed), the status will change to running and you will see some logs being displayed in real time (those come from the stdout of the server it runs on)

In this way, you can really track the progress and the status of your Job and check that everything is going well.
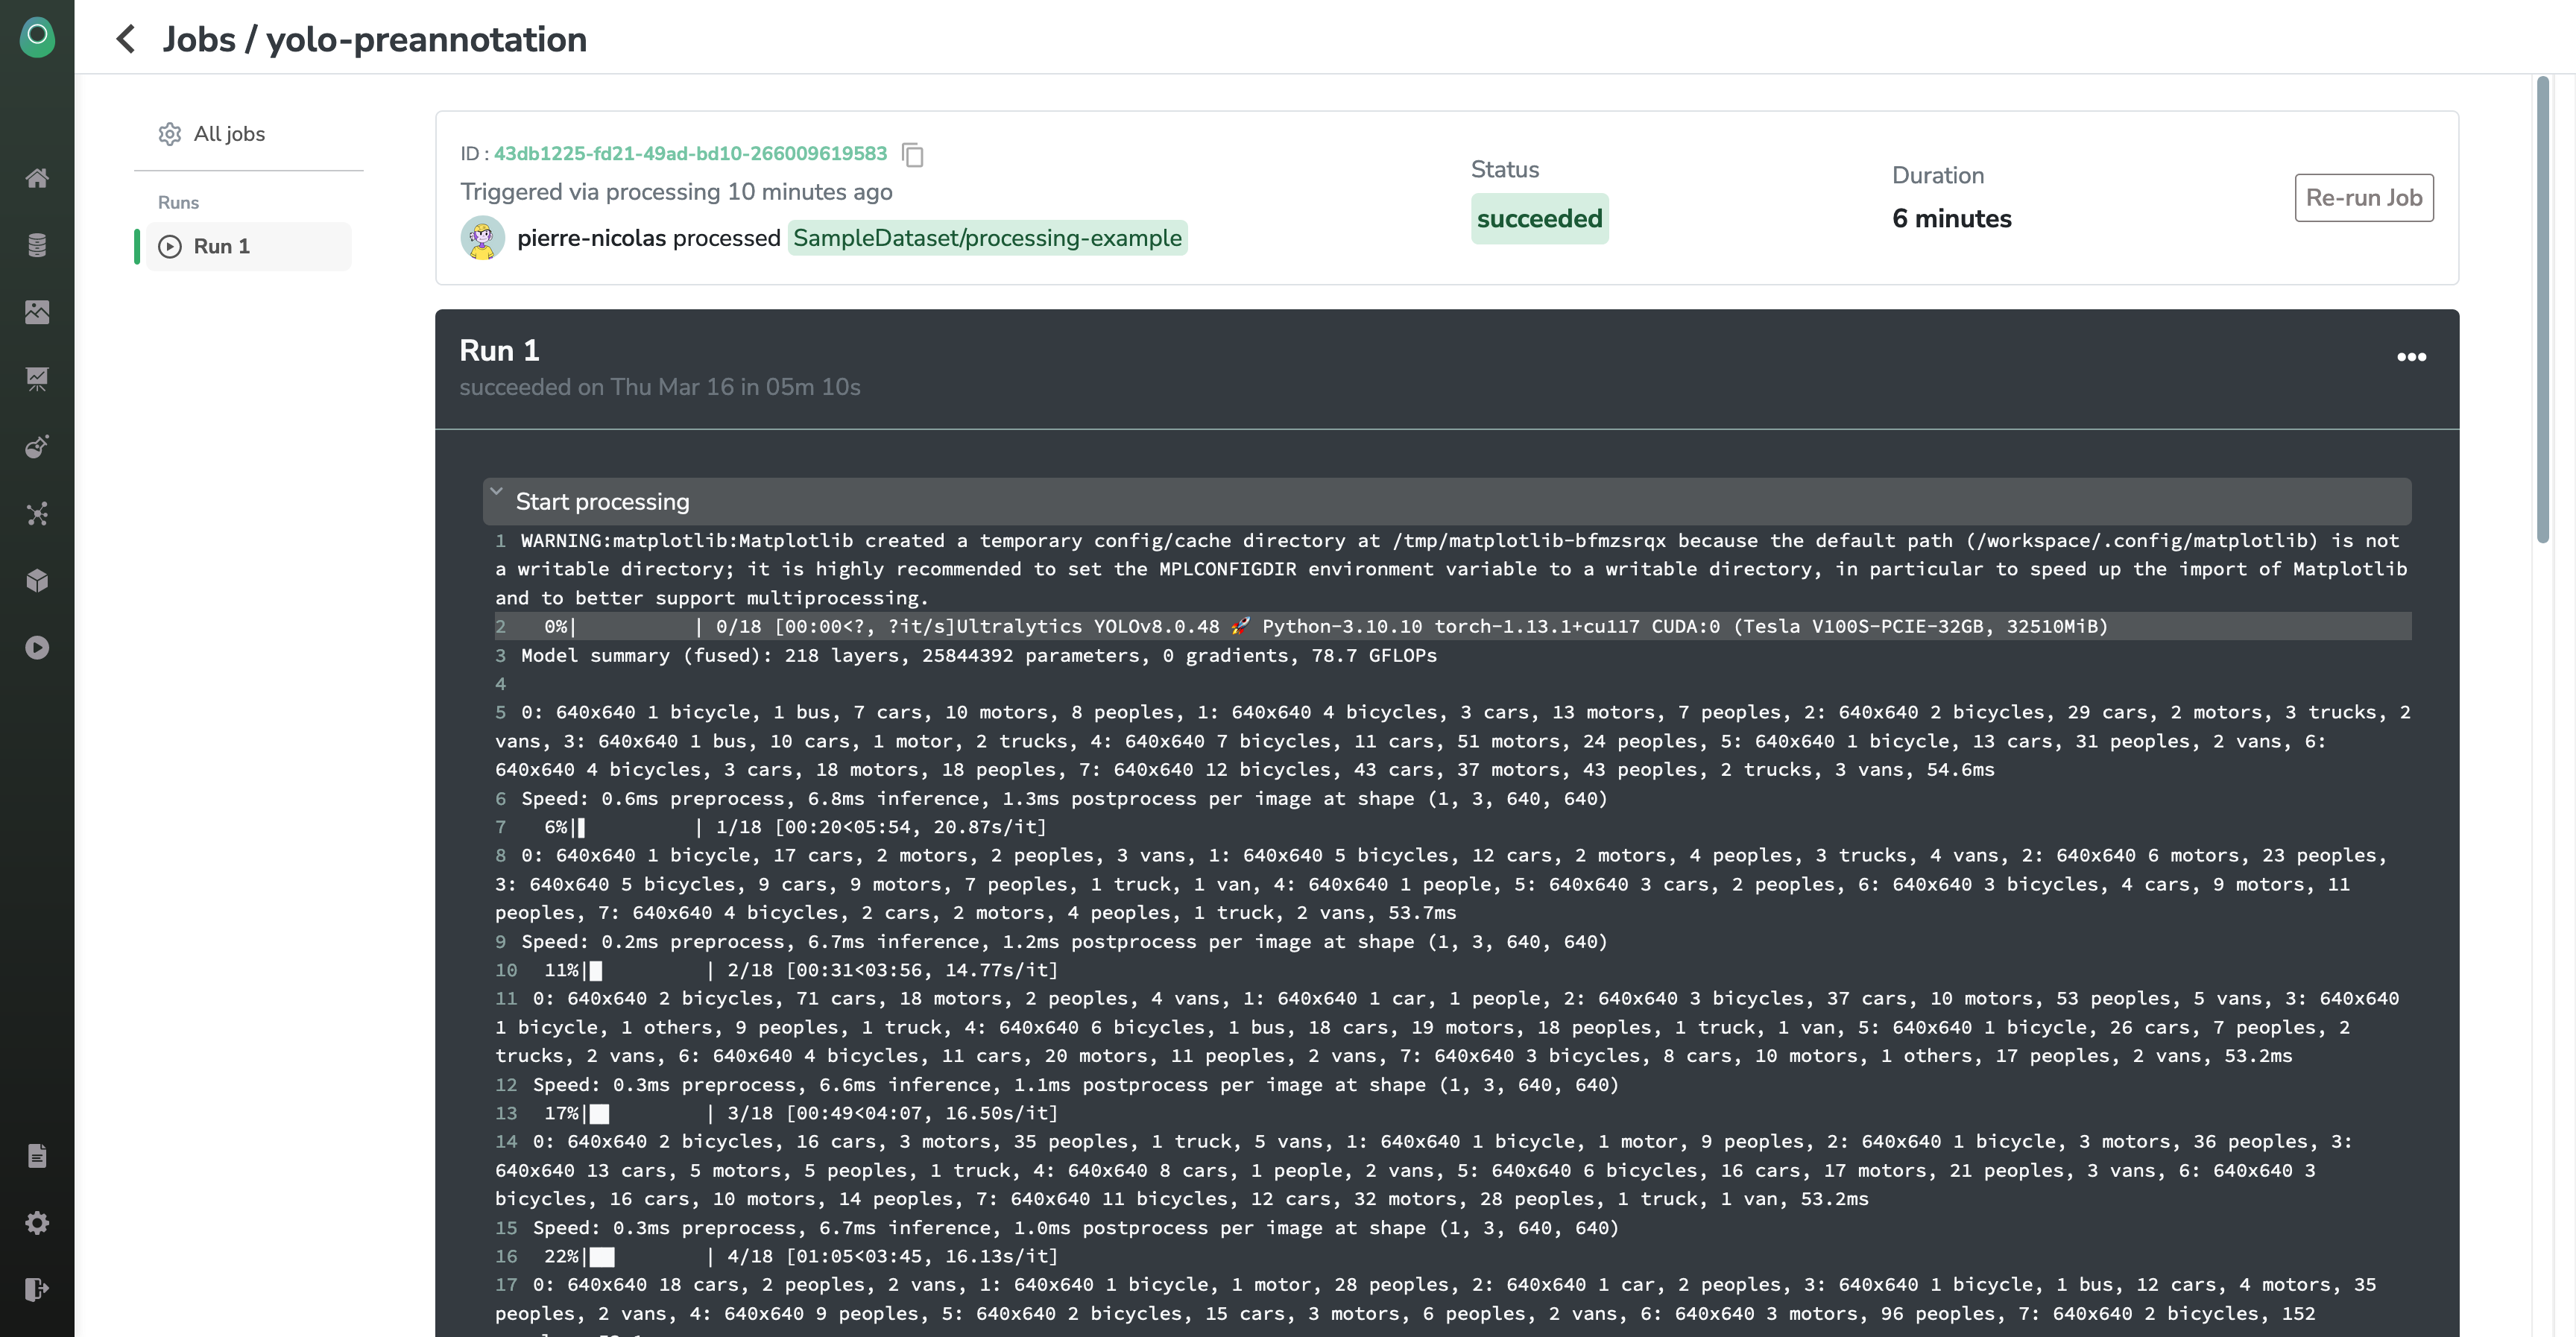
Once your job is over, you will have access to the full history of logs, the total running time, and the status will switch to succeeded (or 'failed', if there were issues at runtime).
Your job will fail sometimes, but you'll be able to find the issue thanks to the stacktrace in the job logs:
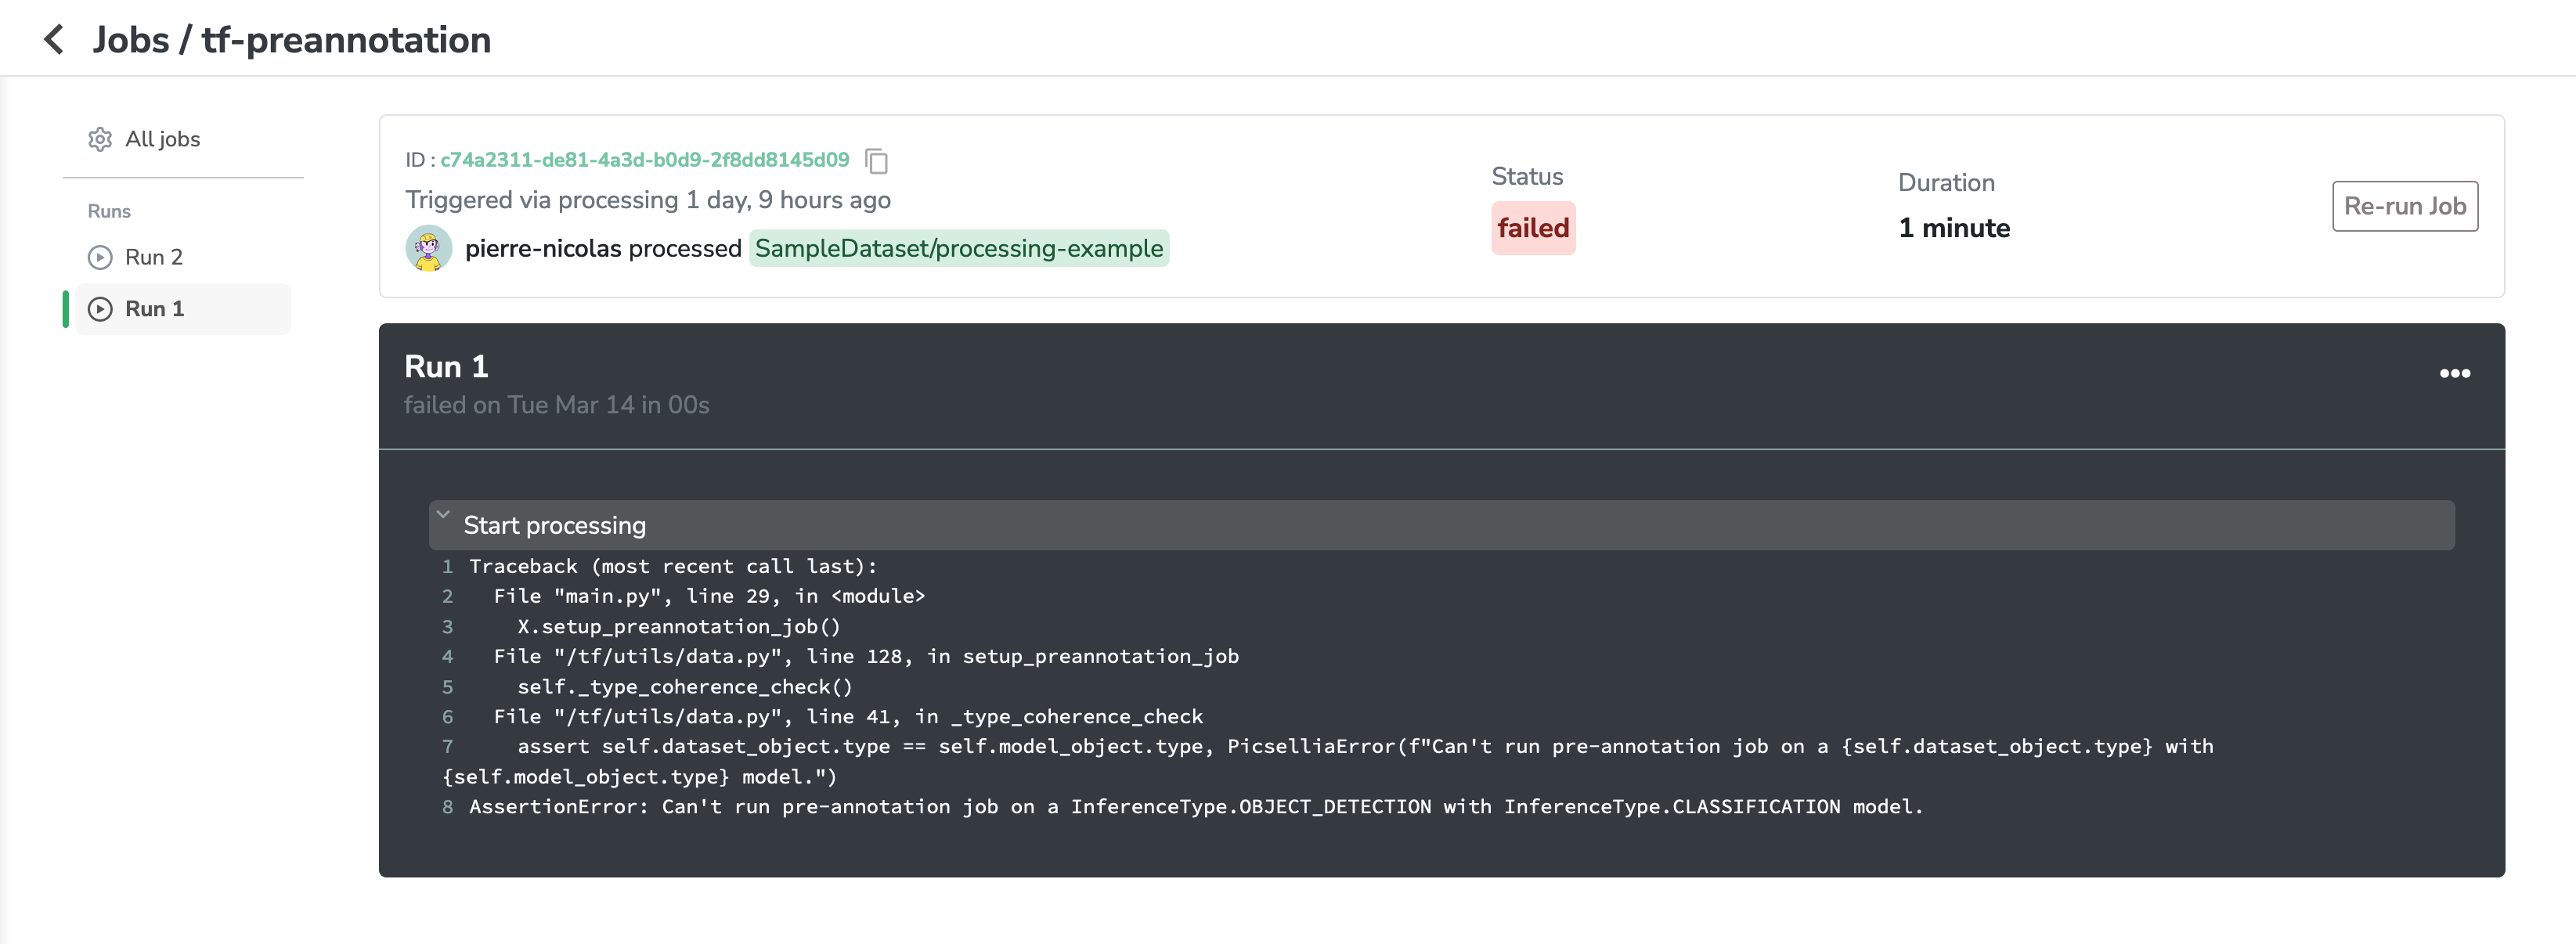
Once you have detected the issue, you have fixed it, and you have updated your Processing's Docker Image, you can click on the "Re-run Job" button. This will create and launch a second Run just like the one on the left of the screen.
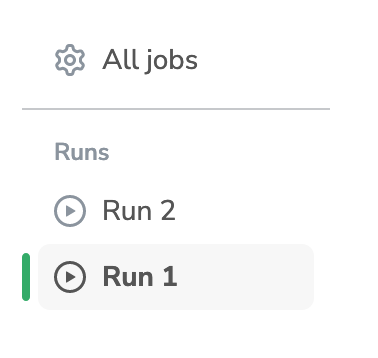
You can retry your Job as many times as you want, as long as there is no active run (meaning no run in the pending or running job)
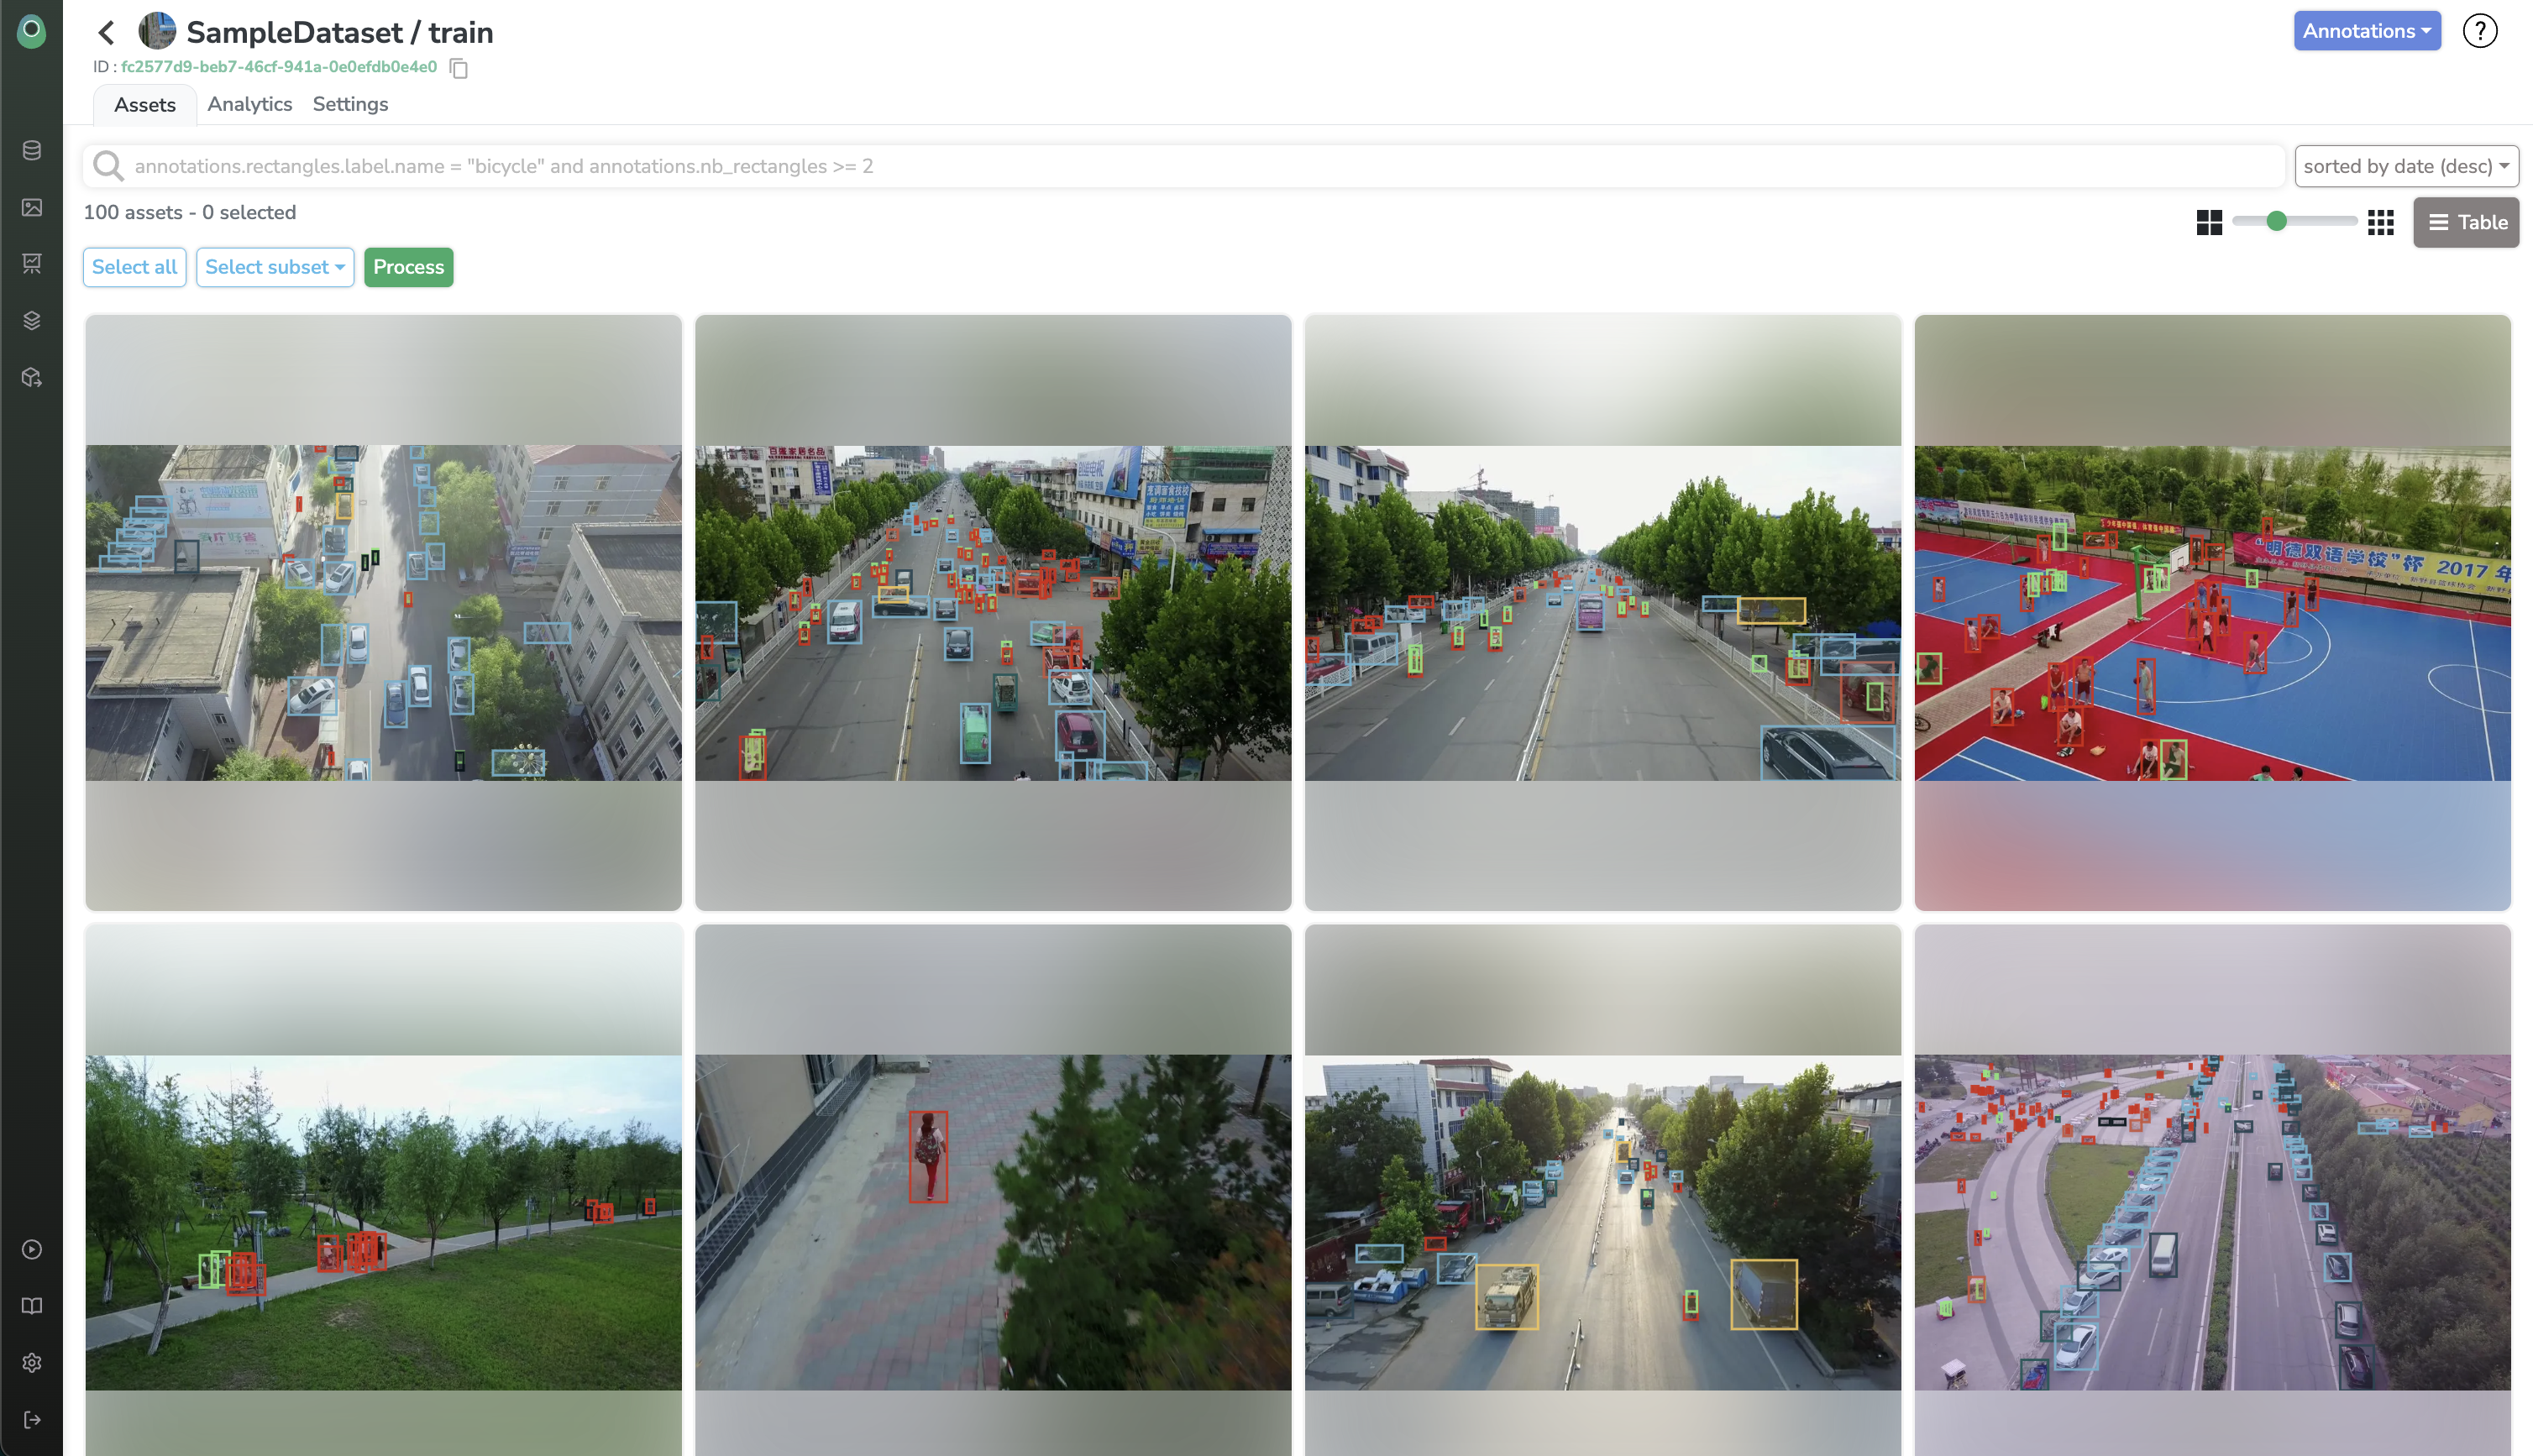
Now that our job has finished, let's have a look at our Dataset Version! It should be fully annotated with cars and pedestrians!
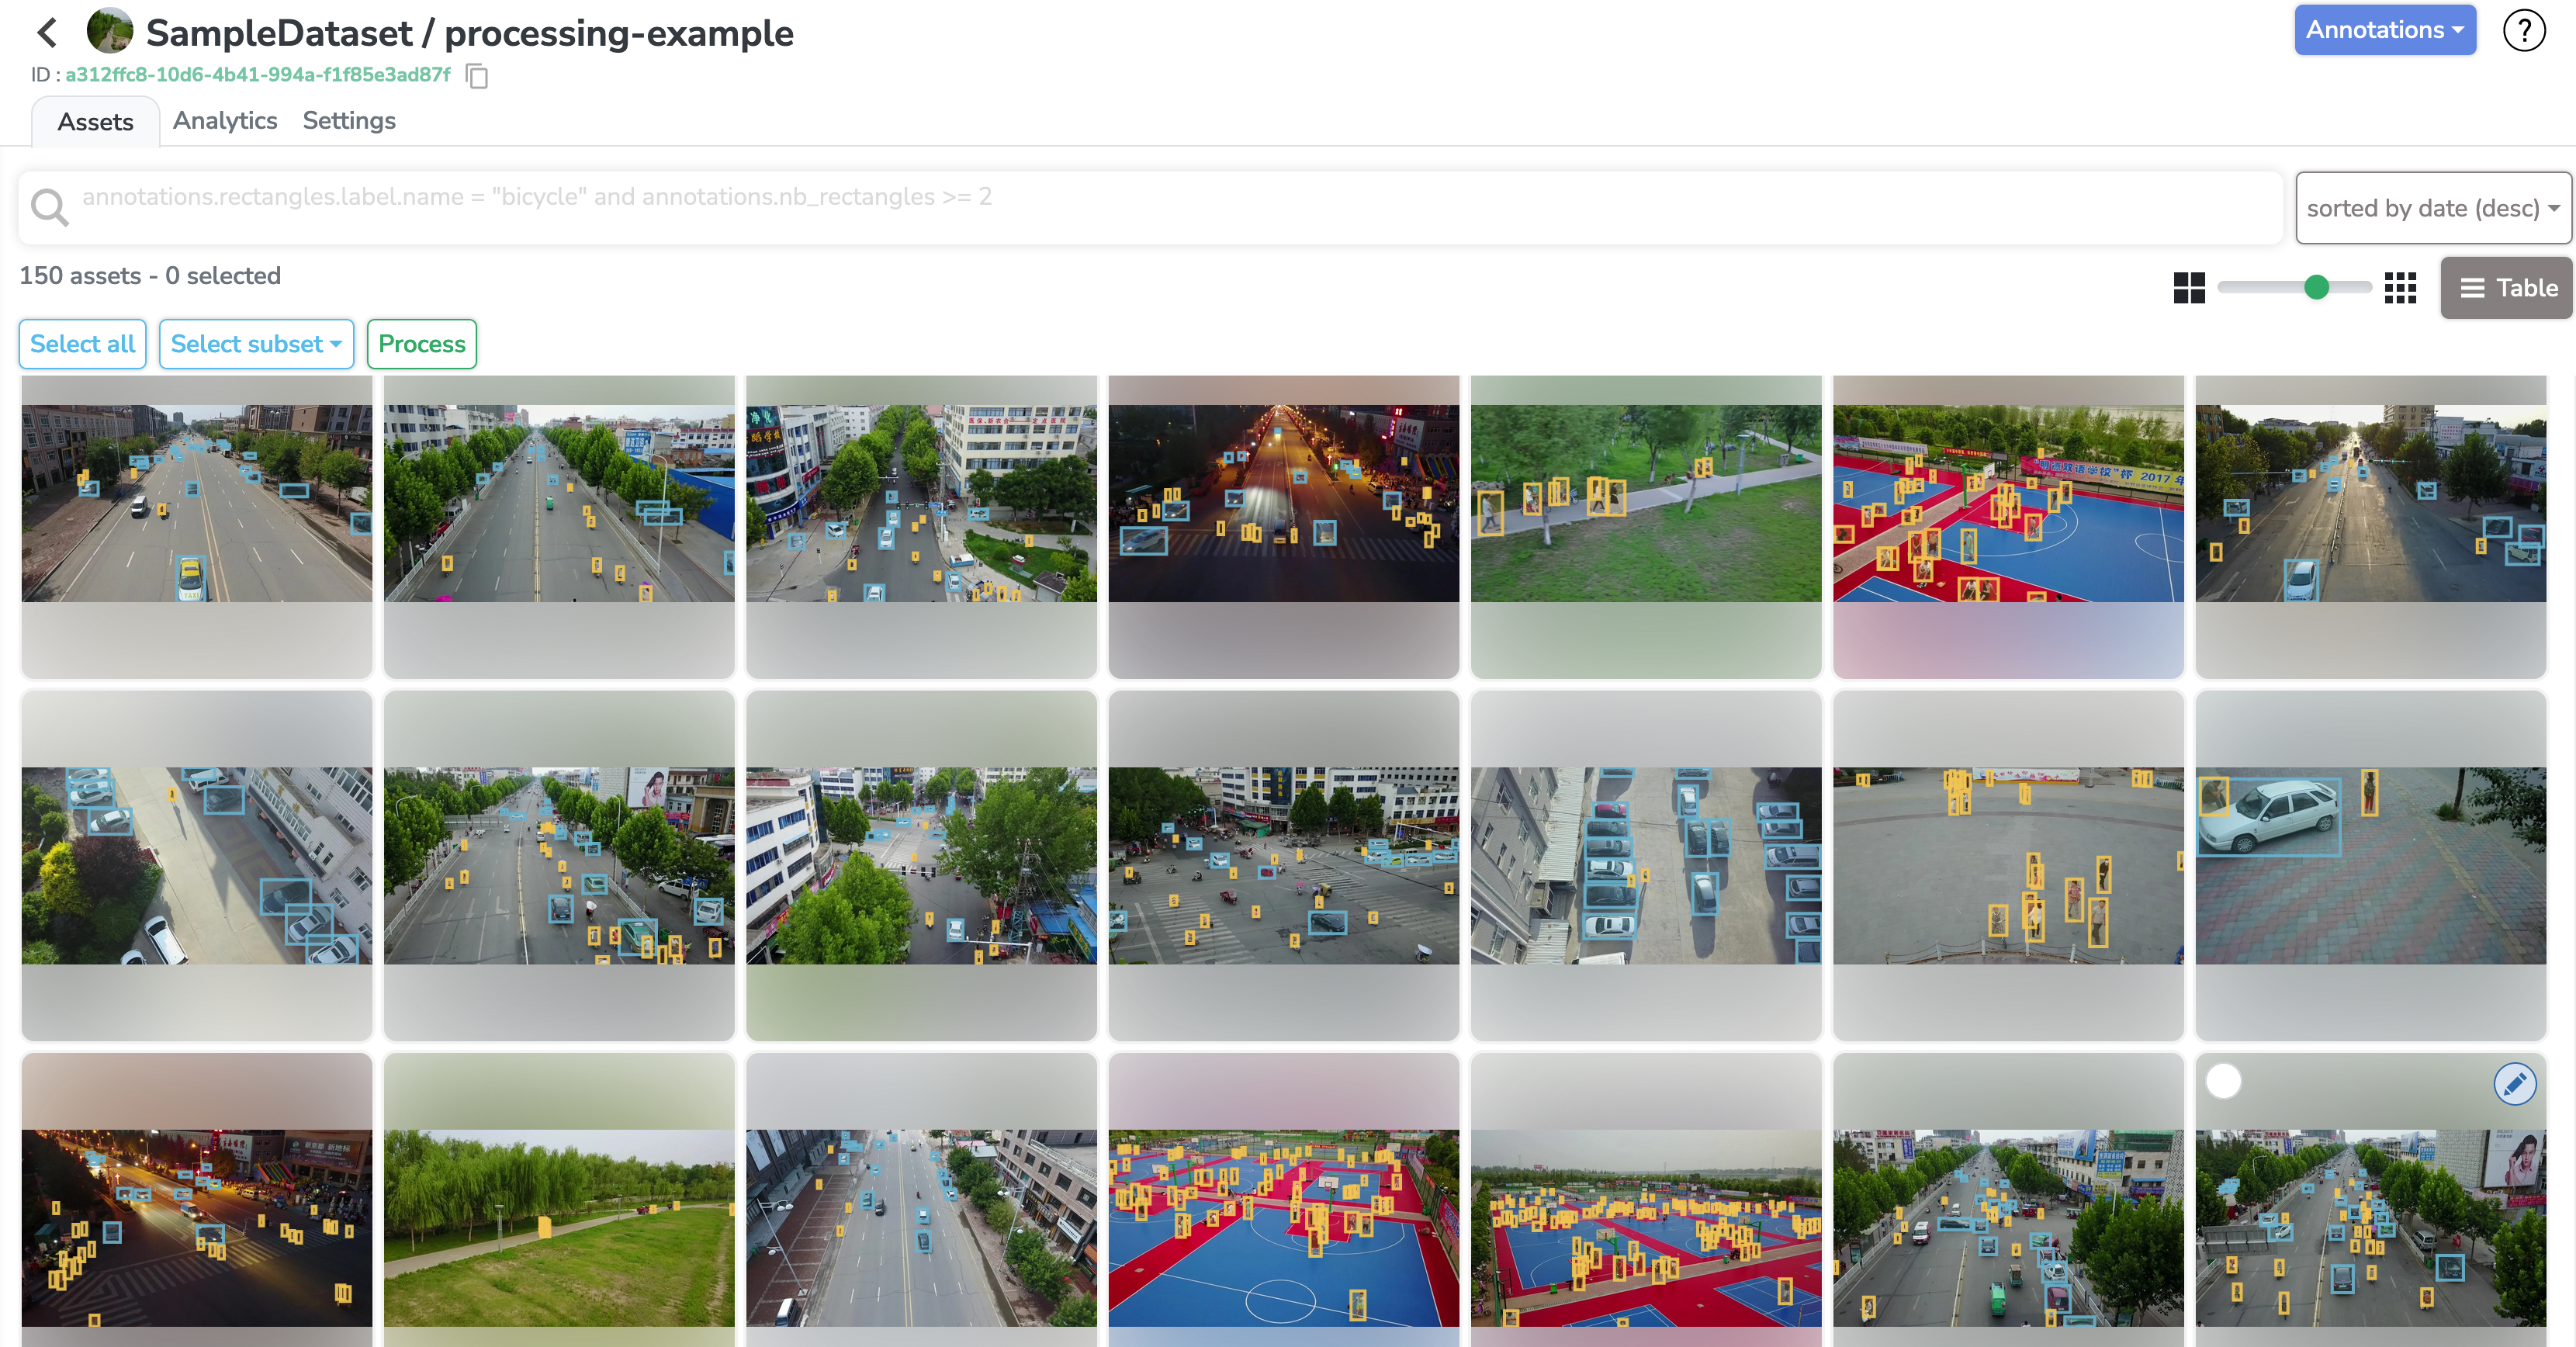
That's a full success 😎 Our Dataset has been nicely pre-annotated by our model with barely no efforts. That's the power of Data Processings on Picsellia 😉
Updated 11 months ago
If you want to learn more about how to create your own Processings and get the most out of them, please follow on the next sections of this guide!