Dataset - Tagging system
Already existing in the Datalake, the DatasetVersion also embeds a dedicating system.
1. Introducing AssetTag by Picsellia
AssetTag by PicselliaA tag is an object you can name and attach to one or several Picsellia objects mainly to structure and retrieve easily these objects among others. As there are tagging systems related to different objects on Picsellia (Datalake, Dataset..), any tag related to the DatasetVersion is called an AssetTag.
Any Asset can have as many AssetTag as possible attached to it.
This additional level of abstraction aims at giving you a way to create your own Asset structure inside your DatasetVersion. This way you can retrieve & browse among Asset searching for Asset having one or several Assetag attached.
It is important to note that, each DatasetVersion has its own independent tagging system. Having such a tagging system that is local to the current DatasetVersion, will allow you to structure and organize your Asset to fit your needs.
AAssetTagis not a label or an annotationIt's only a tool to help you Organizing your
Assetin Picsellia.
Obviously, you are free to use AssetTag as you want and organize your DatasetVersion the way that suits you!
For example, a common use of AssetTag is to use them to create a sub-division of the DatasetVersion (i. train/test/val).
AssetTagare powerfulYou can use the Query Language to retrieve or filter your
AssetusingAssetTag.
2. Creating, Editing, and Deleting AssetTag
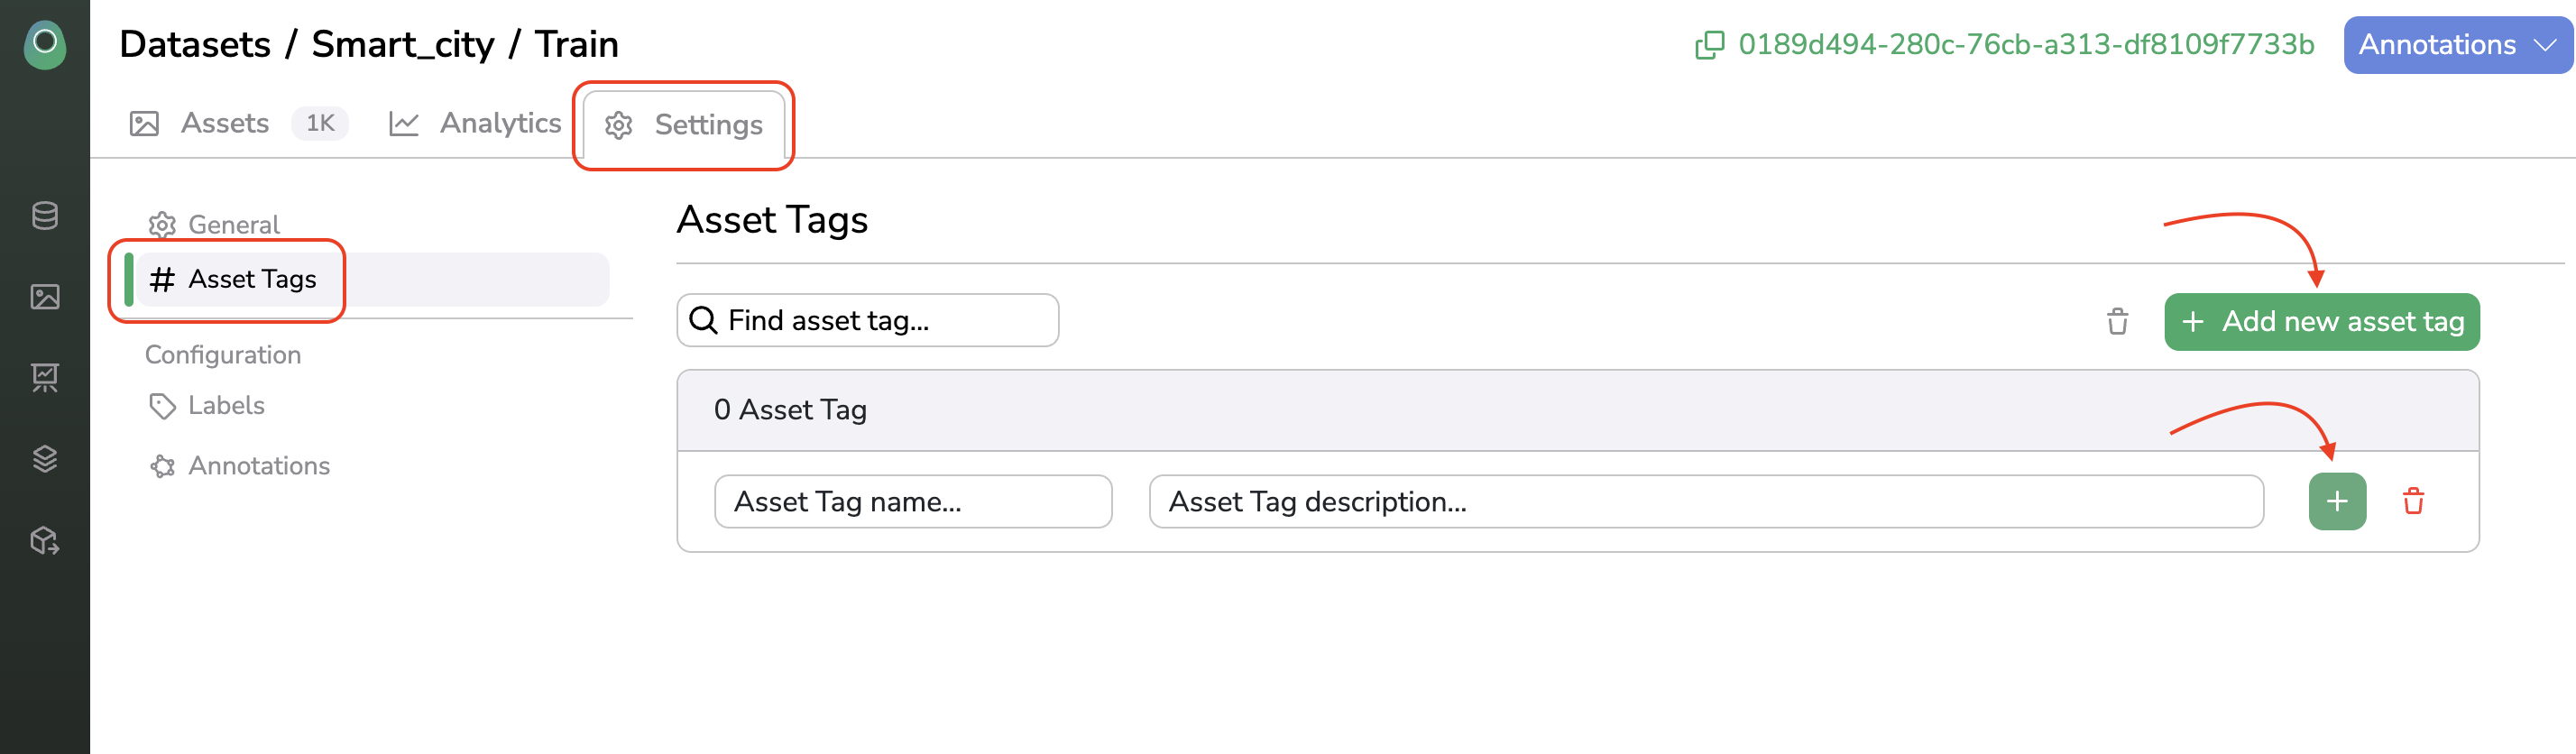
AssetTagFor creating, modifying, or removing a AssetTag, you can access the Settings page of your DataSetVersion and go to the Tags tab.
To create a new AssetTag, simply click on Add new tag. This adds a new entry to the AssetTag list, where you can provide a name and description for the new AssetTag.
The AssetTag is established when you click the + icon.
Creating an AssetTagfrom Settings
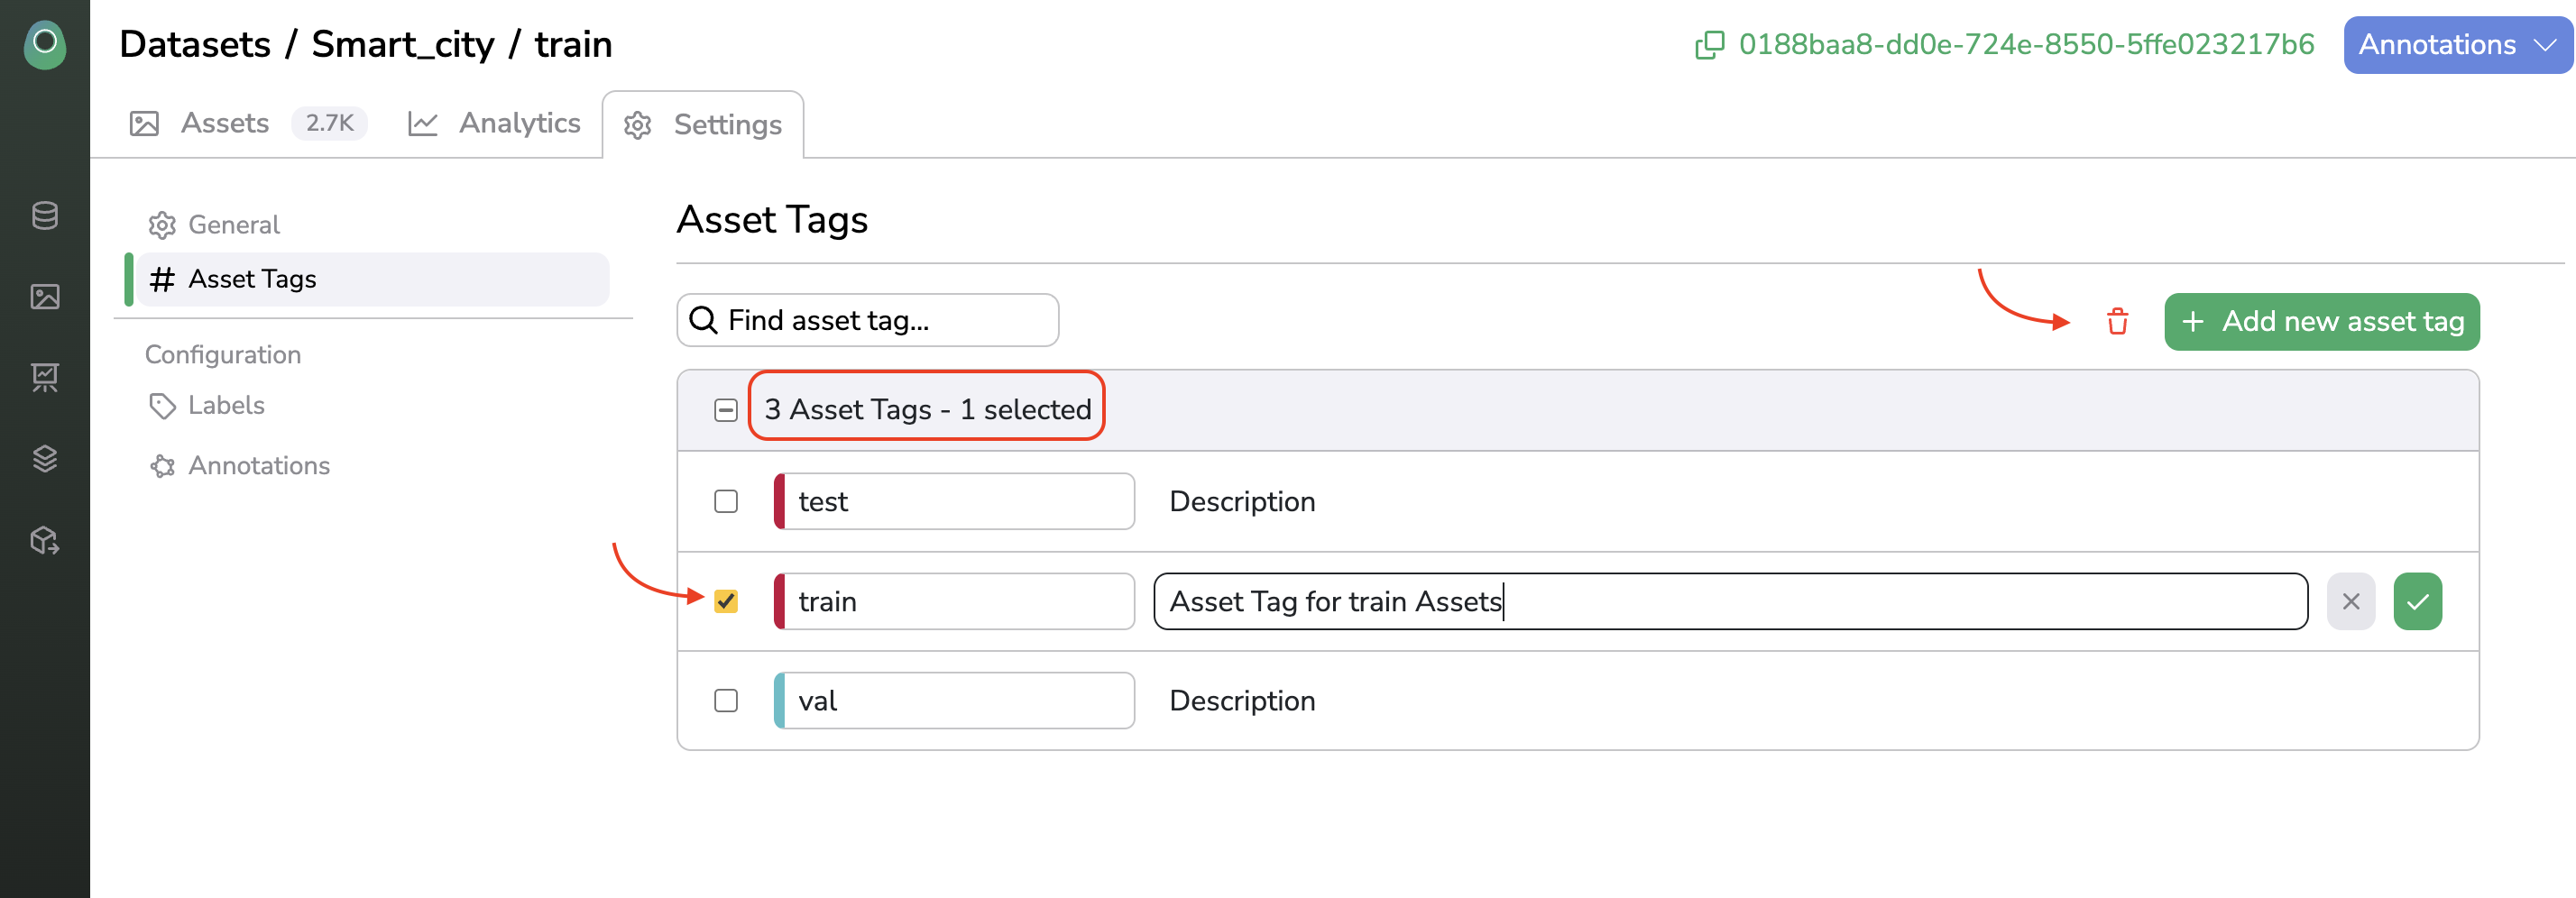
You can also change the name and description of an existing AssetTag, or delete it using the trash icon after selecting it.
Deleting an AssetTagfrom Settings
3. Attach AssetTag to your Asset
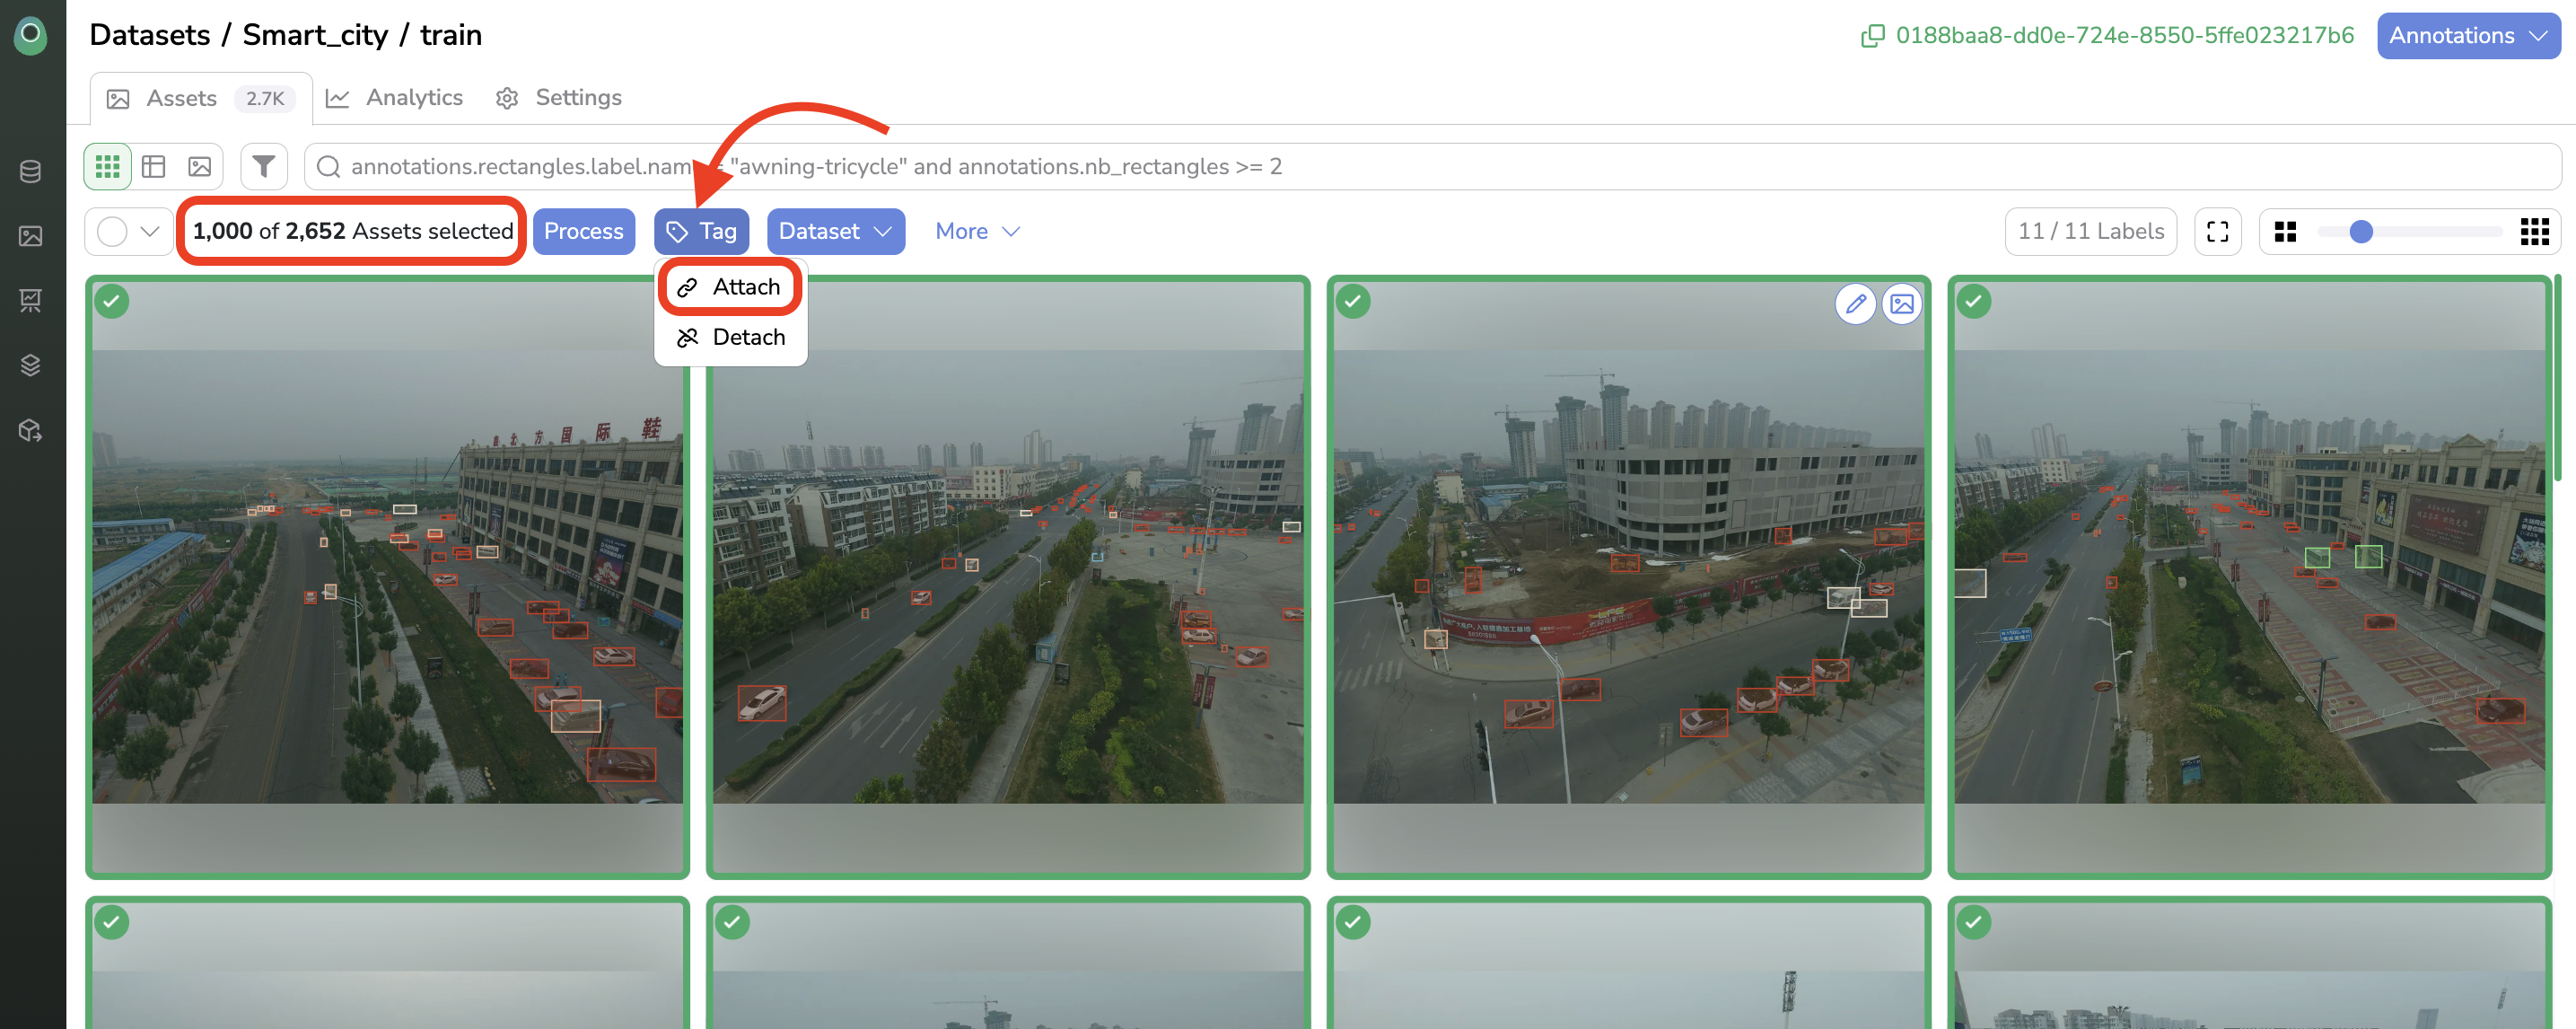
AssetTag to your AssetTagging your Asset is quite easy, from the Assets overview you can select the images to be tagged and click on Tag > Attach:
Then you can choose the AssetTag to be attached to the selected Asset from the list of existing AssetTag and click on Attach as shown below:
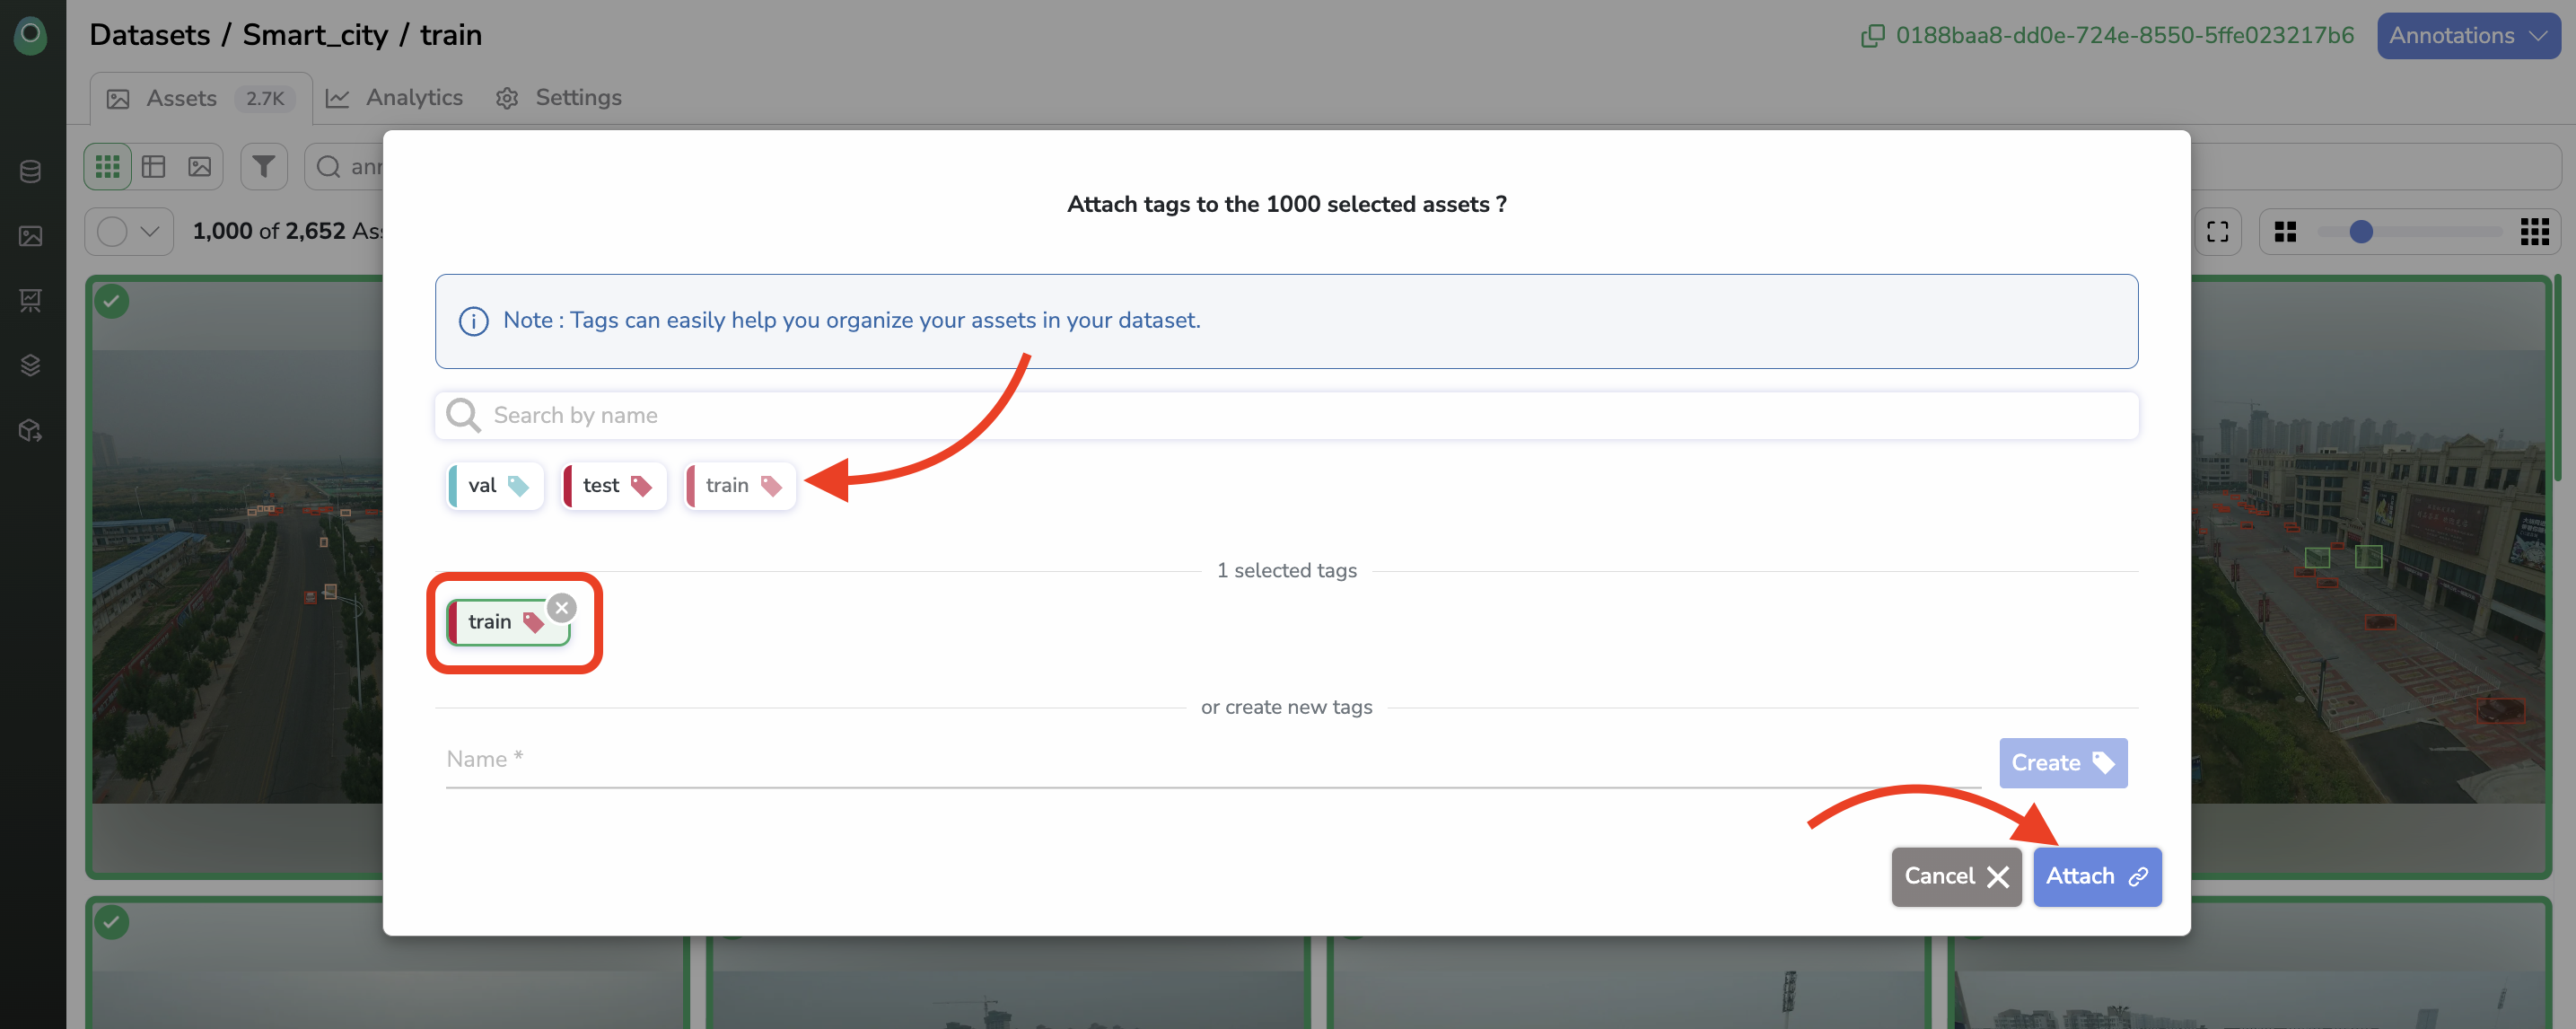
You can also create new AssetTag that will be attached to the selected Asset from the AssetTag attachment modal as shown below:

4. Visualize the AssetTag on your Asset
AssetTag on your AssetNow that you know how to create and attach AssetTag to your Asset to structure and organize your DatasetVersion, we will see how to leverage them to access easily the Asset you need from your DatasetVersion.
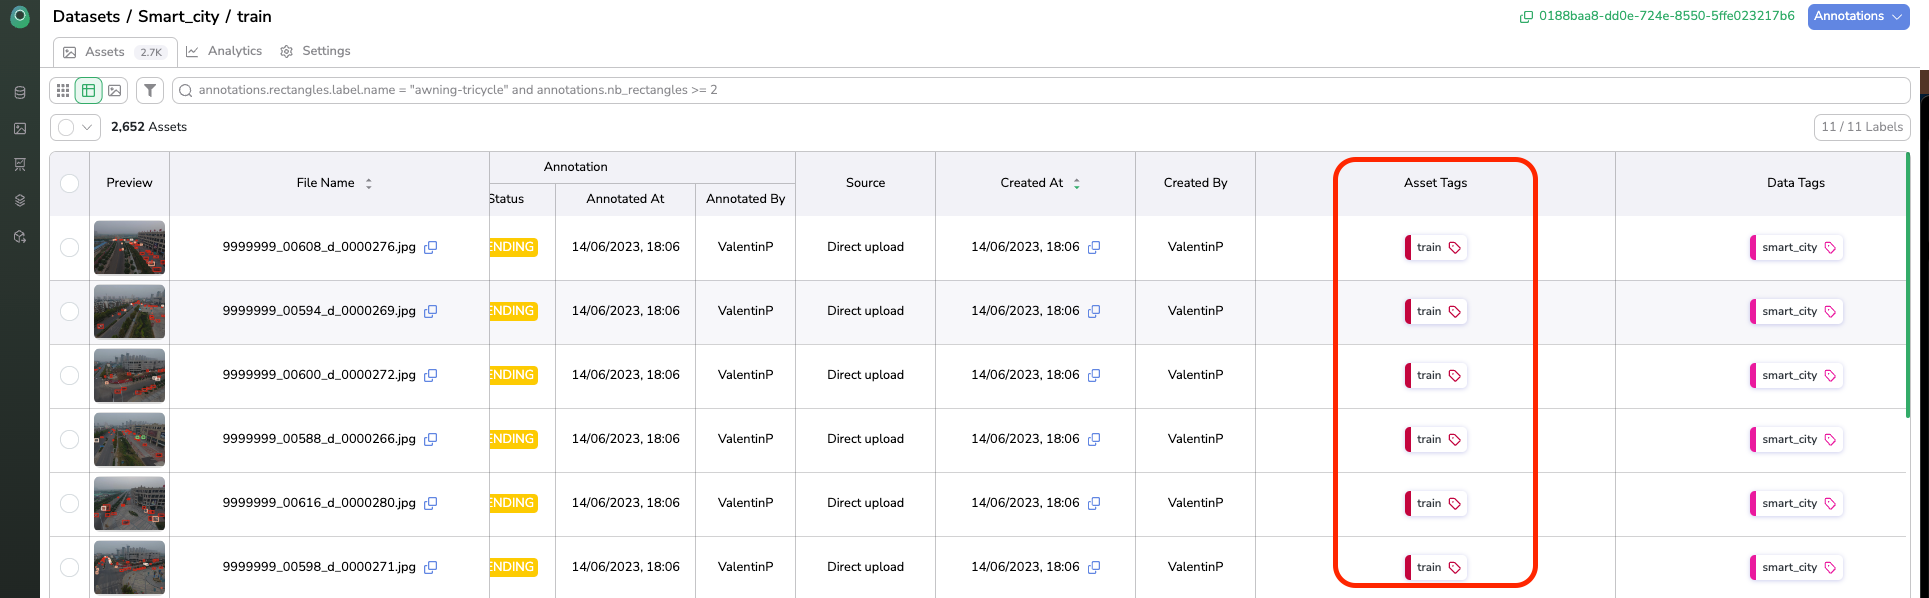
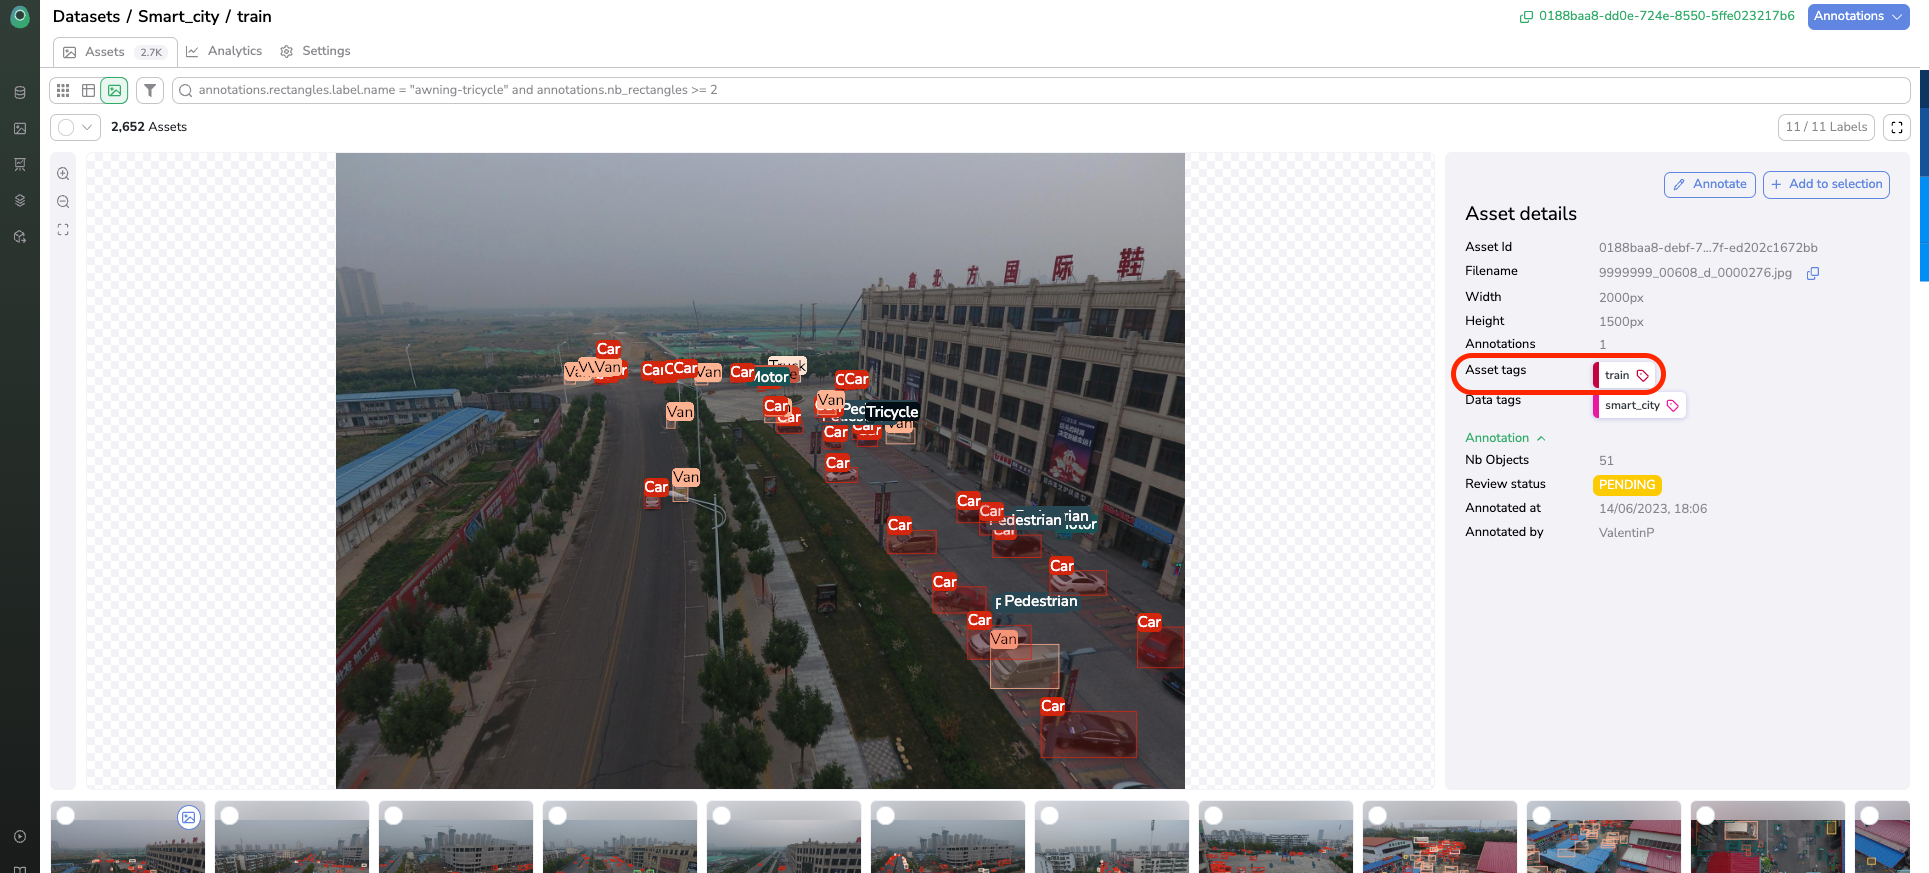
First of all, you can visualize the AssetTag attached to each Asset using the Table or Details view of your DatasetVersion.
Filter onDataTagFrom Assets overview you can also visualize the
DataTagattached to theDatalinked to displayedAsset.
This way, for each Asset you can see the related AssetTag.
By using the search bar you can also filter only the Asset with one or several given AssetTag attached.
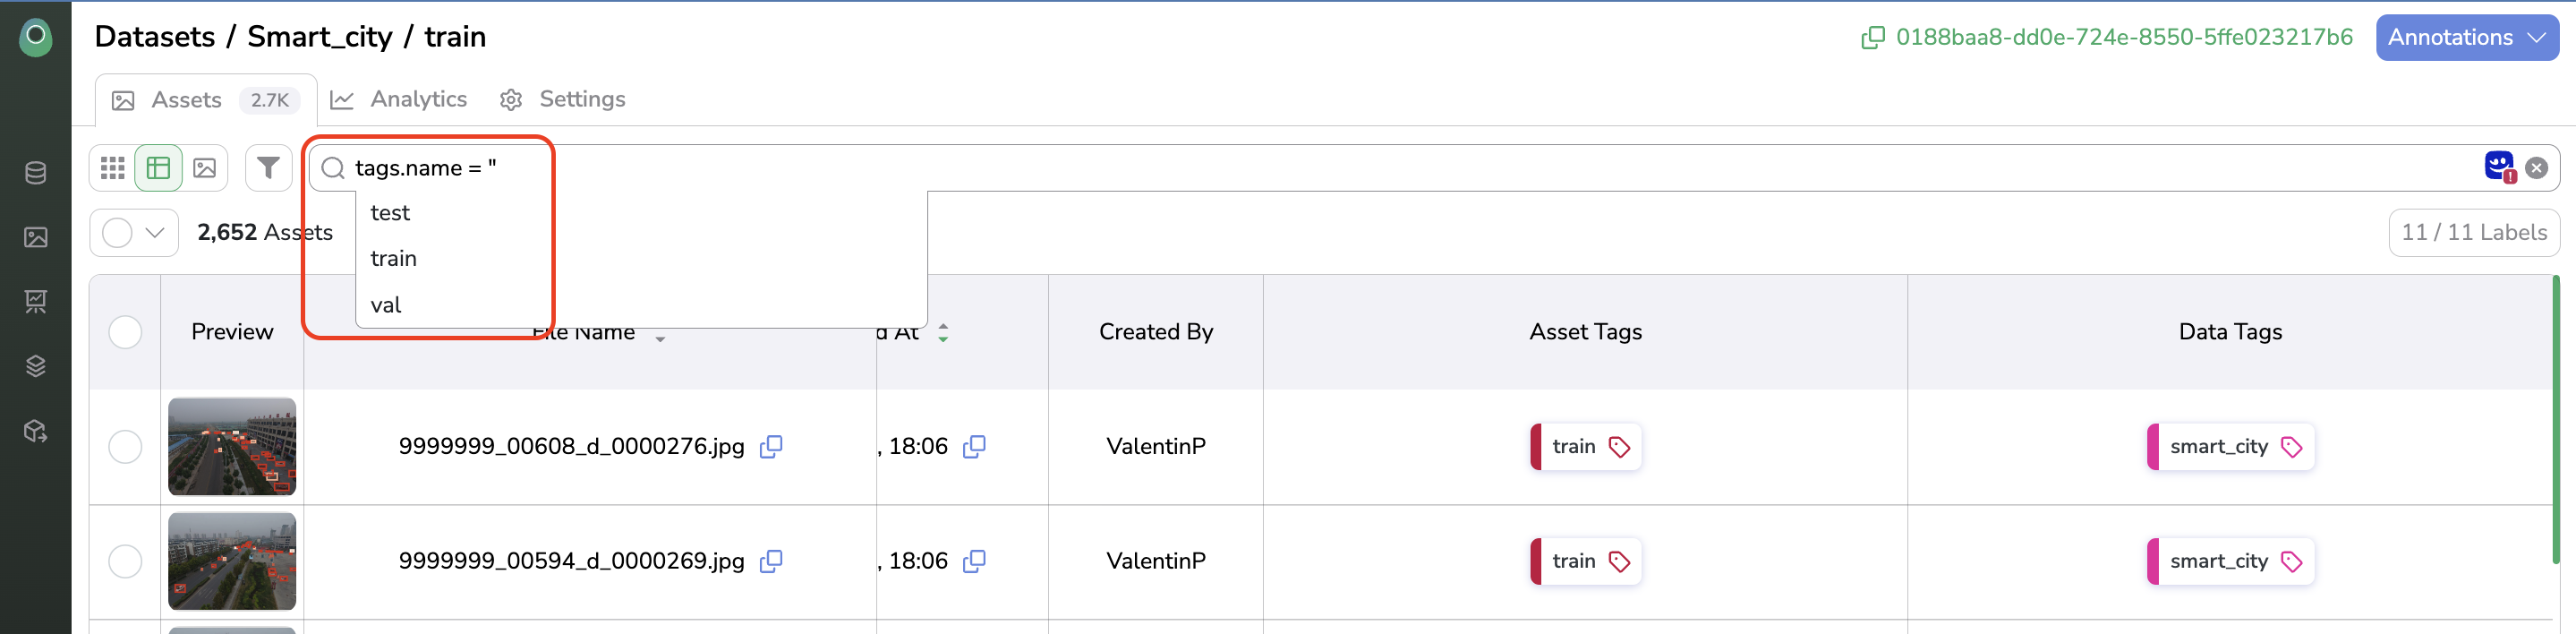
More detais about the Query Language. usage available here
5. Detach AssetTag
AssetTagIf for any reason you need to detach one or several AssetTag from a set of Asset from your DatasetVersion, you simply need to select the bench of Asset that AssetTag need to be detached from and click on Tag > Detach.
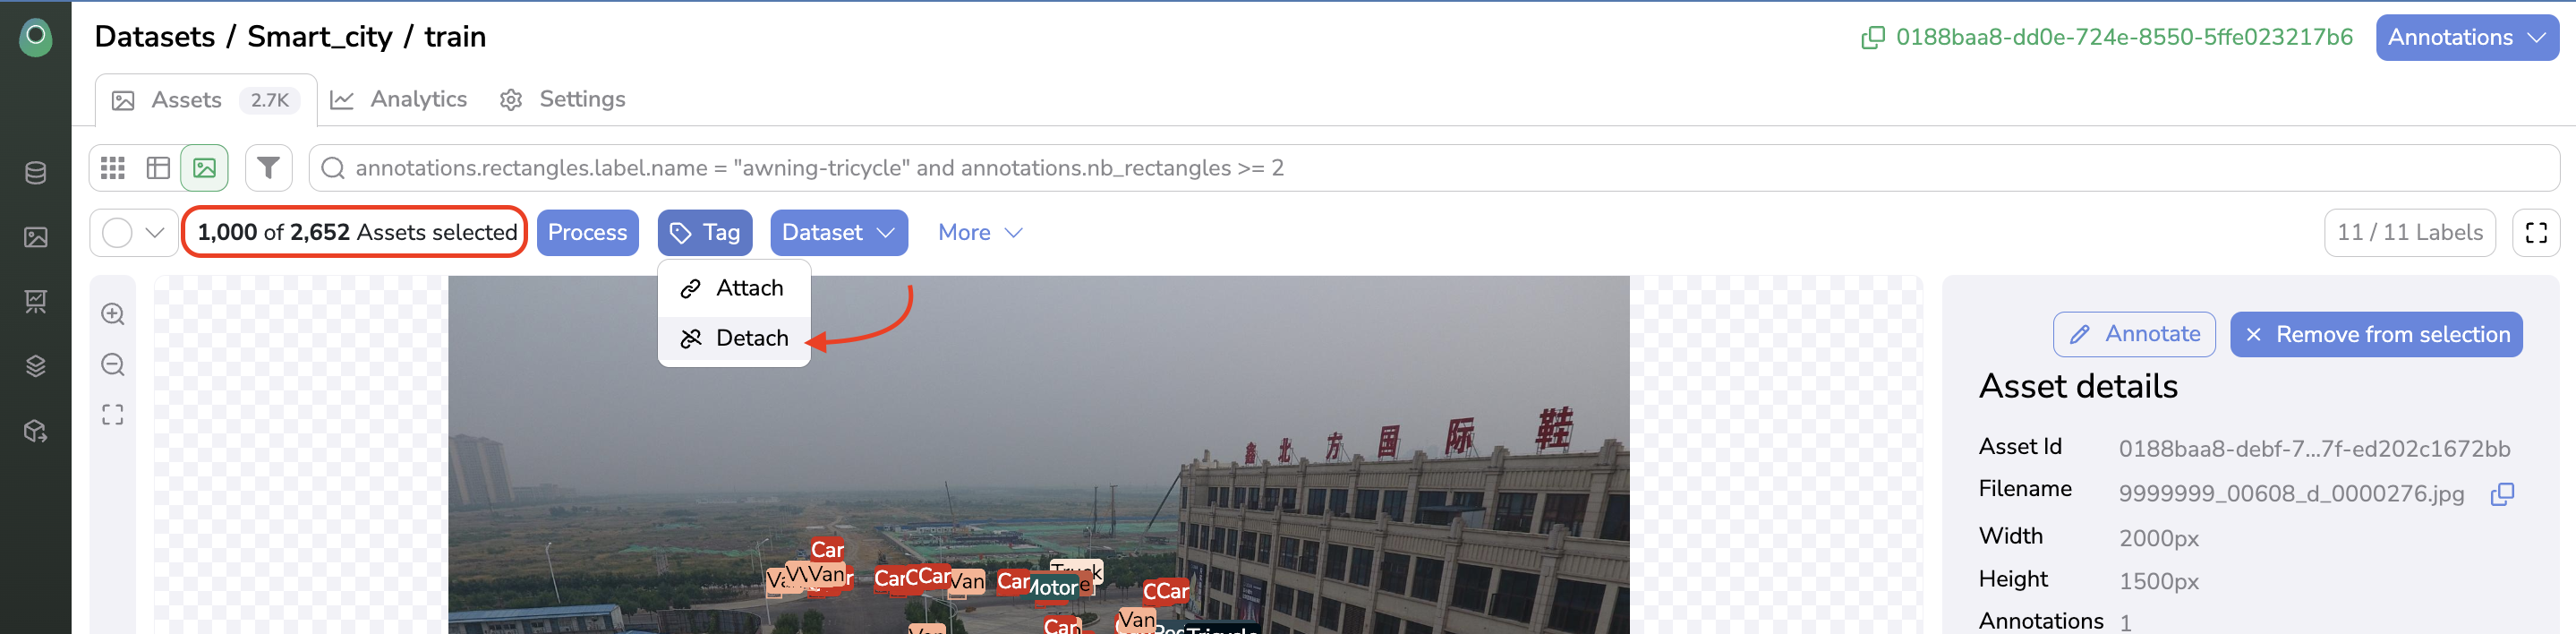
Select Assetfor detaching AssetTag
A modal will open listing all AssetTag attached to any of the selected Asset. You just need to click on the AssetTag you want to detach from the Asset selected and click on the button Detach.
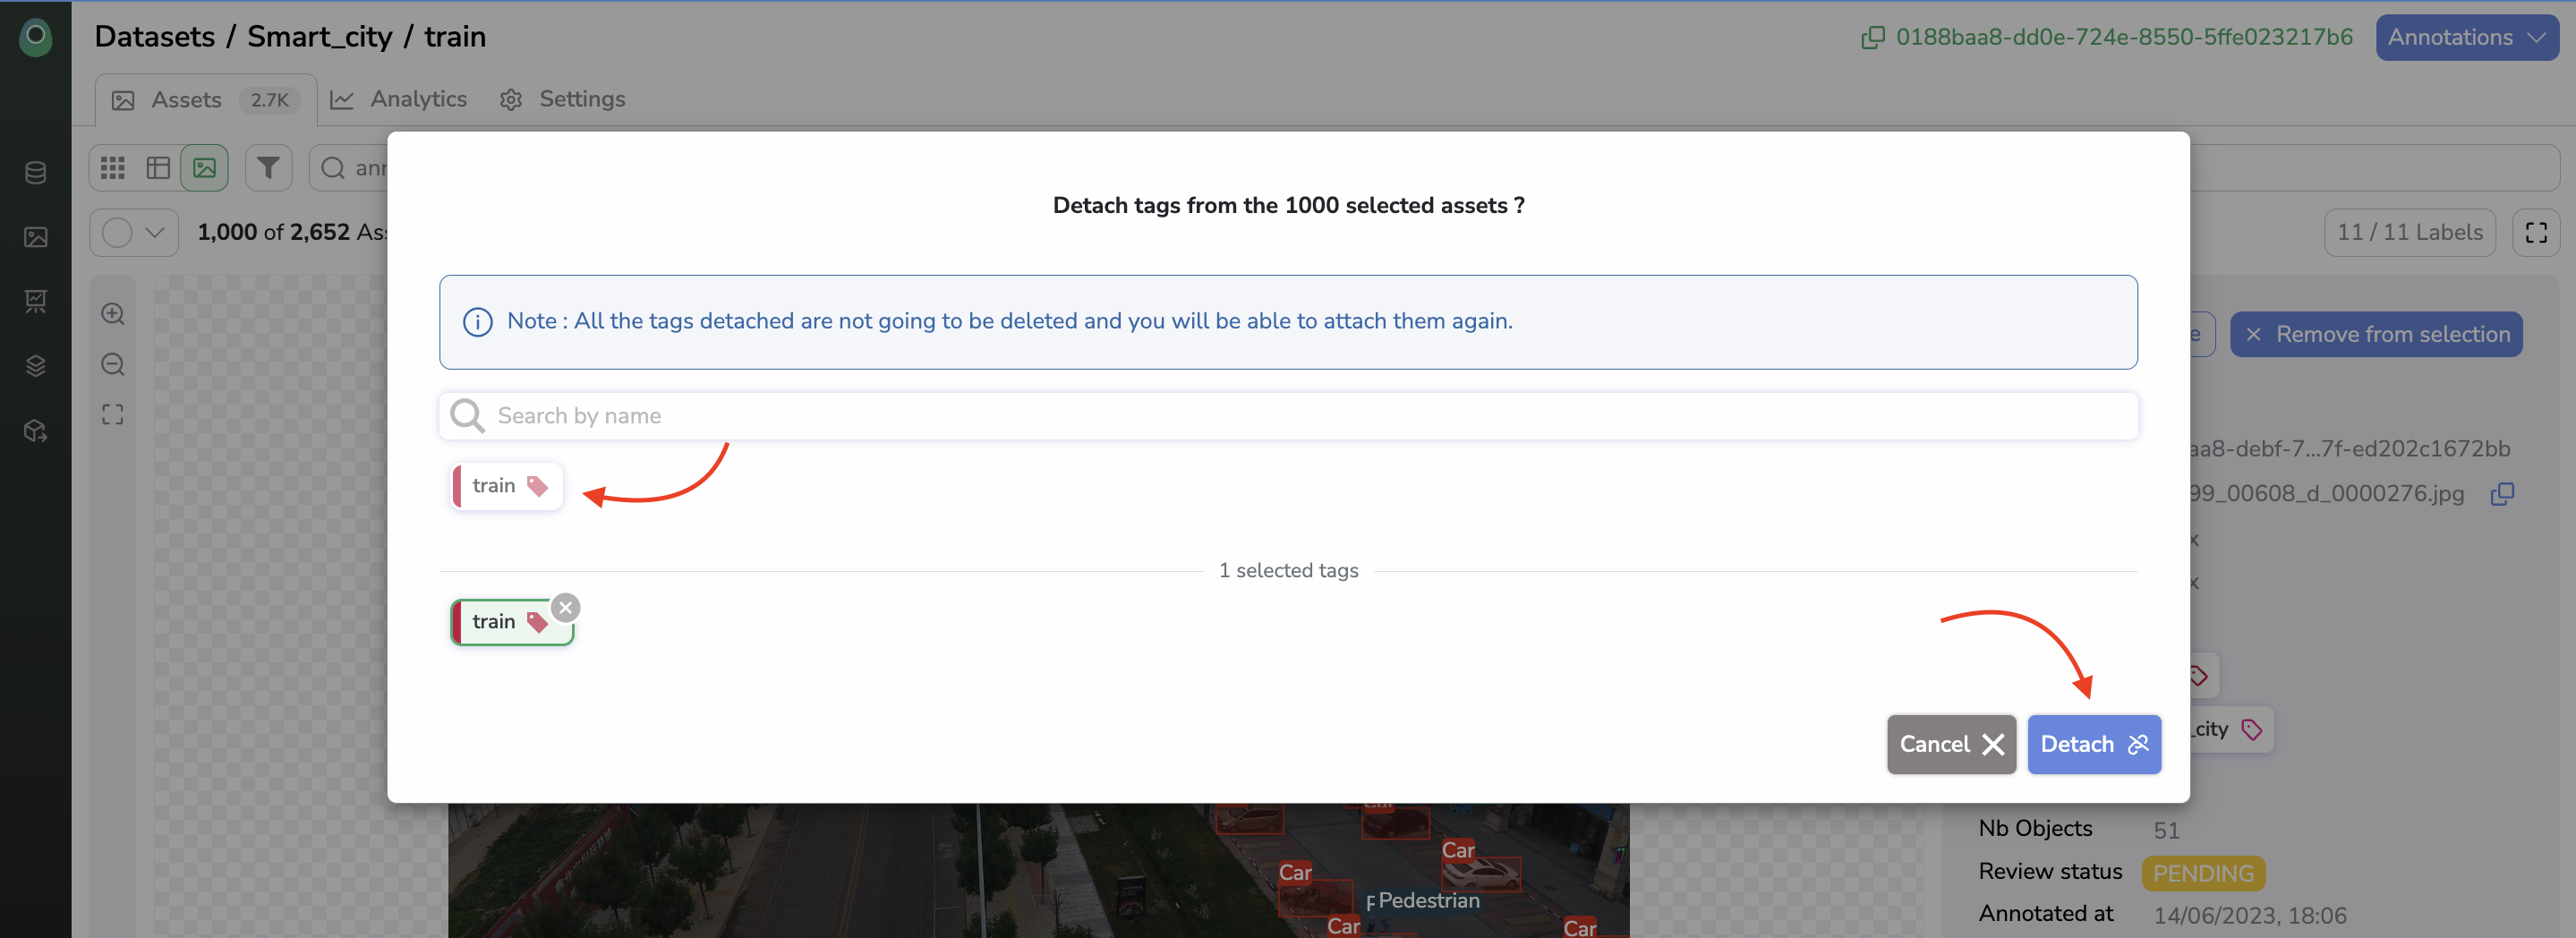
Detach AssetTag
Updated about 1 year ago