4. Make your ModelVersion Trainable
This page explains how to make a ModelVersion Trainable on Picsellia.
To achieve this, you need to attach the following to your Picsellia ModelVersion:
- All relevant Model files required to train the
ModelVersionsuch as checkpoints, config, etc. - The training parameters necessary for your training script.
- Your training script.
1. Import your files
Here, you just need to import Model files like you did to make your ModelVersion Deployable:
from picsellia import Client
from picsellia.types.enums import InferenceType

client = Client(api_token=api_token, organization_name=organization_name)

model_name = "pytorch-model"

my_model = client.get_model(
  name=model_name,
)

my_model_version = my_model.get_version(
  name='v1',
)

my_model_version.store("pth-model", "path/to/model.pth")
my_model_version.store("config", "path/to/config.conf")
Is it the same code for Tensorflow/ONNX/PyTorch?The files required to import to your Picsellia
ModelVersionobviously depend on the ones required by your training script to run properly.
2. Define the training parameters
If your training script takes certain parameters as input, such as epochs or image_size, you can define them at the ModelVersion level in Picsellia instead of hard-coding them manually in your script. This way, each time you retrain your ModelVersion through an Experiment, you can set values for those training parameters.
To set these parameters in your Picsellia ModelVersion and attach default values, follow these steps:
from picsellia import Client

client = Client(api_token=api_token, organization_name=organization_name)

model_name = "pytorch-model"

my_model = client.get_model(
  name=model_name,
)

my_model_version = my_model.get_version(
  name='v1',
)

## Define the model version parameters and associated default value
parameters= {
  'epochs': 50,
  'batch_size': 64,
  'image_size': 224
}

my_model_version.update(base_parameters=parameters)
The created parameters are now visible on the UI:
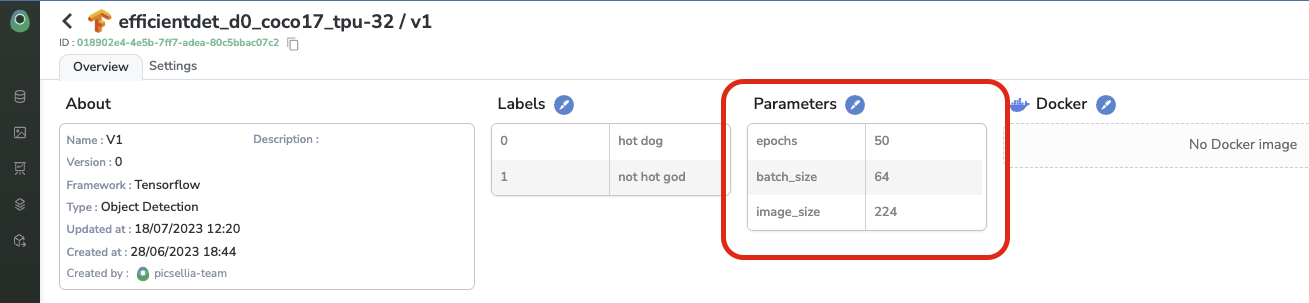
The parameters created for the ModelVersion
I want to use the UI!You can create or edit parameters directly through the UI on the
ModelVersionoverview by clicking on the pen icon.
3. Attach your own training script
The main idea is to modify your script to enable it to obtain the necessary Model files, parameters, and Data for training the ModelVersion. This will also enable you to log metrics, evaluations, and new Model files in a new ModelVersion.
To achieve this, two actions are required:
- Adjust the training script's content to integrate it with Picsellia.
- Dockerize this training scriptand attach the Docker Image to your Picsellia
ModelVersion, allowing you to launch the training remotely on any infrastructure (Picsellia Training Engine or your own training infrastructure).
A. Integrate your training script with Picsellia
By leveraging the Client provided by Picsellia, you can integrate Picsellia with your training script. This involves modifying some instructions in your current script to communicate with Picsellia instead of your local machine. From now on, all the resources needed to train your ModelVersion will be stored and organized on Picsellia.
As this part can be quite challenging, we created a dedicated guide to walk you through it.
B. Dockerize your training script
i. Setting up your custom image folder
To simplify the Dockerization of your training script and ensure that all technical requirements are listed for running the training according to Picsellia's requirements, we have created two Docker images that are ready to use in your custom Dockerfile. These images are available in our public Docker repository.
These images include real-time logging in the Picsellia Telemetry tab, as well as CUDA drivers, cuDNN, and other dependencies, so you don't need to worry about these aspects.
In the end, the file hierarchy of your custom Docker image should look like this:
.
└── your-custom-image/
    ├── picsellia/
    │   └── main.py <- insert your code here
    ├── Dockerfile
    └── requirements.txt
The script that will be used for training is called main.py. As a reminder, this script has been adapted to Picsellia in a previous section of this guide.
As usual, you must include all the necessary packages and materials needed to run your training script in the requirements.txt file.
ii. Setting up your Dockerfile
Now that you have a clear idea of our custom Docker image structure, let's build your Dockerfile.
As mentioned previously, to ease the dockerisation process, we've packaged 2 different images corresponding to 2 different versions of CUDA and cuDNN.
cuda:11.4.3-cudnn8-runtime-ubuntu20.04cuda:11.7.1-cudnn8-runtime-ubuntu20.04
Depending on your requirements you might want to use one of these two or build your own. But be aware, that if you're planning to use the Picsellia training engine, which is running on Tesla V100s GPUs, you must use a CUDA version compatible with this hardware.
The structure of your Dockerfile should like like this:
FROM picsellia/cuda:11.7.1-cudnn8-ubuntu20.04

COPY your-custom-image/requirements.txt .
RUN pip install -r requirements. txt

# You can also put the picsellia package inside your requirements
RUN pip install -r picsellia --upgrade

WORKDIR /picsellia

COPY your-custom-image/picsellia .

ENTRYPOINT ["run", "main.py"]
By following these steps, please make sure that:
- All technical requirements, packages, and drivers are installed correctly before launching the training.
- The training script is launched properly on the chosen infrastructure.
If everything is done correctly, the training logs will automatically be sent to Picsellia, allowing you to monitor your training from the Telemetry tab.
iii. Changing your training script.
We learned here how to integrate Picsellia into your training scripts in the last tutorial using a project name and experiment name. However in order to make it more robust and programmatically launch Docker GPU Jobs, we are going to switch a bit this code to make some needed information passed from Picsellia platform to the training script through env variables.
Let's take a look at what our code is looking like for now:
from tensorflow.keras.applications import EfficientNetB0
from tensorflow.keras.models import Sequential
from tensorflow.keras import layers
from tensorflow import keras
import tensorflow as tf
import tensorflow_datasets as tfds
from picsellia import Client, Experiment
from picsellia.types.enums import LogType
import os
import numpy as np

print("Initializing Picsellia Client 🥑")

client = Client(
  api_token="XXXXXXX",
  organization_name="my_organization",
  host="https://app.picsellia.com"
)
project = client.get_project("documentation_project")
experiment = project.get_experiment("exp-0-documentation")
datasets = experiment.list_attached_dataset_versions()


# The rest of your script
# ...
In the above script, the experiment name is for instance hard coded in our script. The idea is now to make this information passed from Picsellia to your docker job through ENV variables.
You can pass environment variables to your Docker container like this:
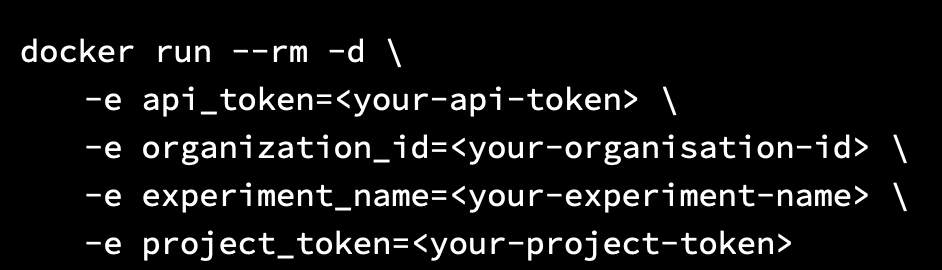
How to pass environment variables to your container
Please note that Picsellia will always pass as ENV variables:
API_TOKENorganization_idexperiment_nameproject_id(also calledproject_token)
So by defining a small function like this one, you'll be able to get back those ENV variables:
def get_experiment():
    if 'api_token' not in os.environ:
        raise Exception("You must set an api_token to run this image")
    api_token = os.environ["api_token"]

    if "host" not in os.environ:
        host = "https://app.picsellia.com"
    else:
        host = os.environ["host"]

    if "organization_id" not in os.environ:
        organization_id = None
    else:
        organization_id = os.environ["organization_id"]

    client = Client(
        api_token=api_token,
        host=host,
        organization_id=organization_id
    )

    if "experiment_name" in os.environ:
        experiment_name = os.environ["experiment_name"]
        if "project_token" in os.environ:
            project_token = os.environ["project_token"]
            project = client.get_project_by_id(project_token)
        elif "project_name" in os.environ:
            project_name = os.environ["project_name"]
            project = client.get_project(project_name)
        experiment = project.get_experiment(experiment_name)
    else:
        raise Exception("You must set the project_token or project_name and experiment_name")
    return experiment
You will then be able to retrieve your Experiment by passing environment variables to your container.
So, your main.py script should now look like this:
from tensorflow.keras.applications import EfficientNetB0
from tensorflow.keras.models import Sequential
from tensorflow.keras import layers
from tensorflow import keras
import tensorflow as tf
import tensorflow_datasets as tfds
from picsellia import Client, Experiment
from picsellia.types.enums import LogType
import os
import numpy as np
from utils import get_experiment

print("Initializing Picsellia Client 🥑")

experiment = get_experiment()

datasets = experiment.list_attached_dataset_versions()

# The rest of your script
# ...
Now our Docker image is fully ready, it's time to build, and push your image to your Docker hub.
docker build . -f your-custom-image/Dockerfile -t myregistry/my-image:1.0
docker push myregistry/my-image:1.0
Ensure access from training infrastructure to your Docker hubThe Docker image has been created and stored on Docker Hub. To ensure that the infrastructure used to train the model can access and pull the image from the Docker registry, authorization is necessary.
If you plan on using the Picsellia Training Engine, we can provide you with a private Docker Hub that our infrastructure can access and is authorized to use. Please do not hesitate to contact us to obtain it.
Now that this image is pushed to your docker registry, let's go back to our ModelVersion on Picsellia and attach this Docker image to it:
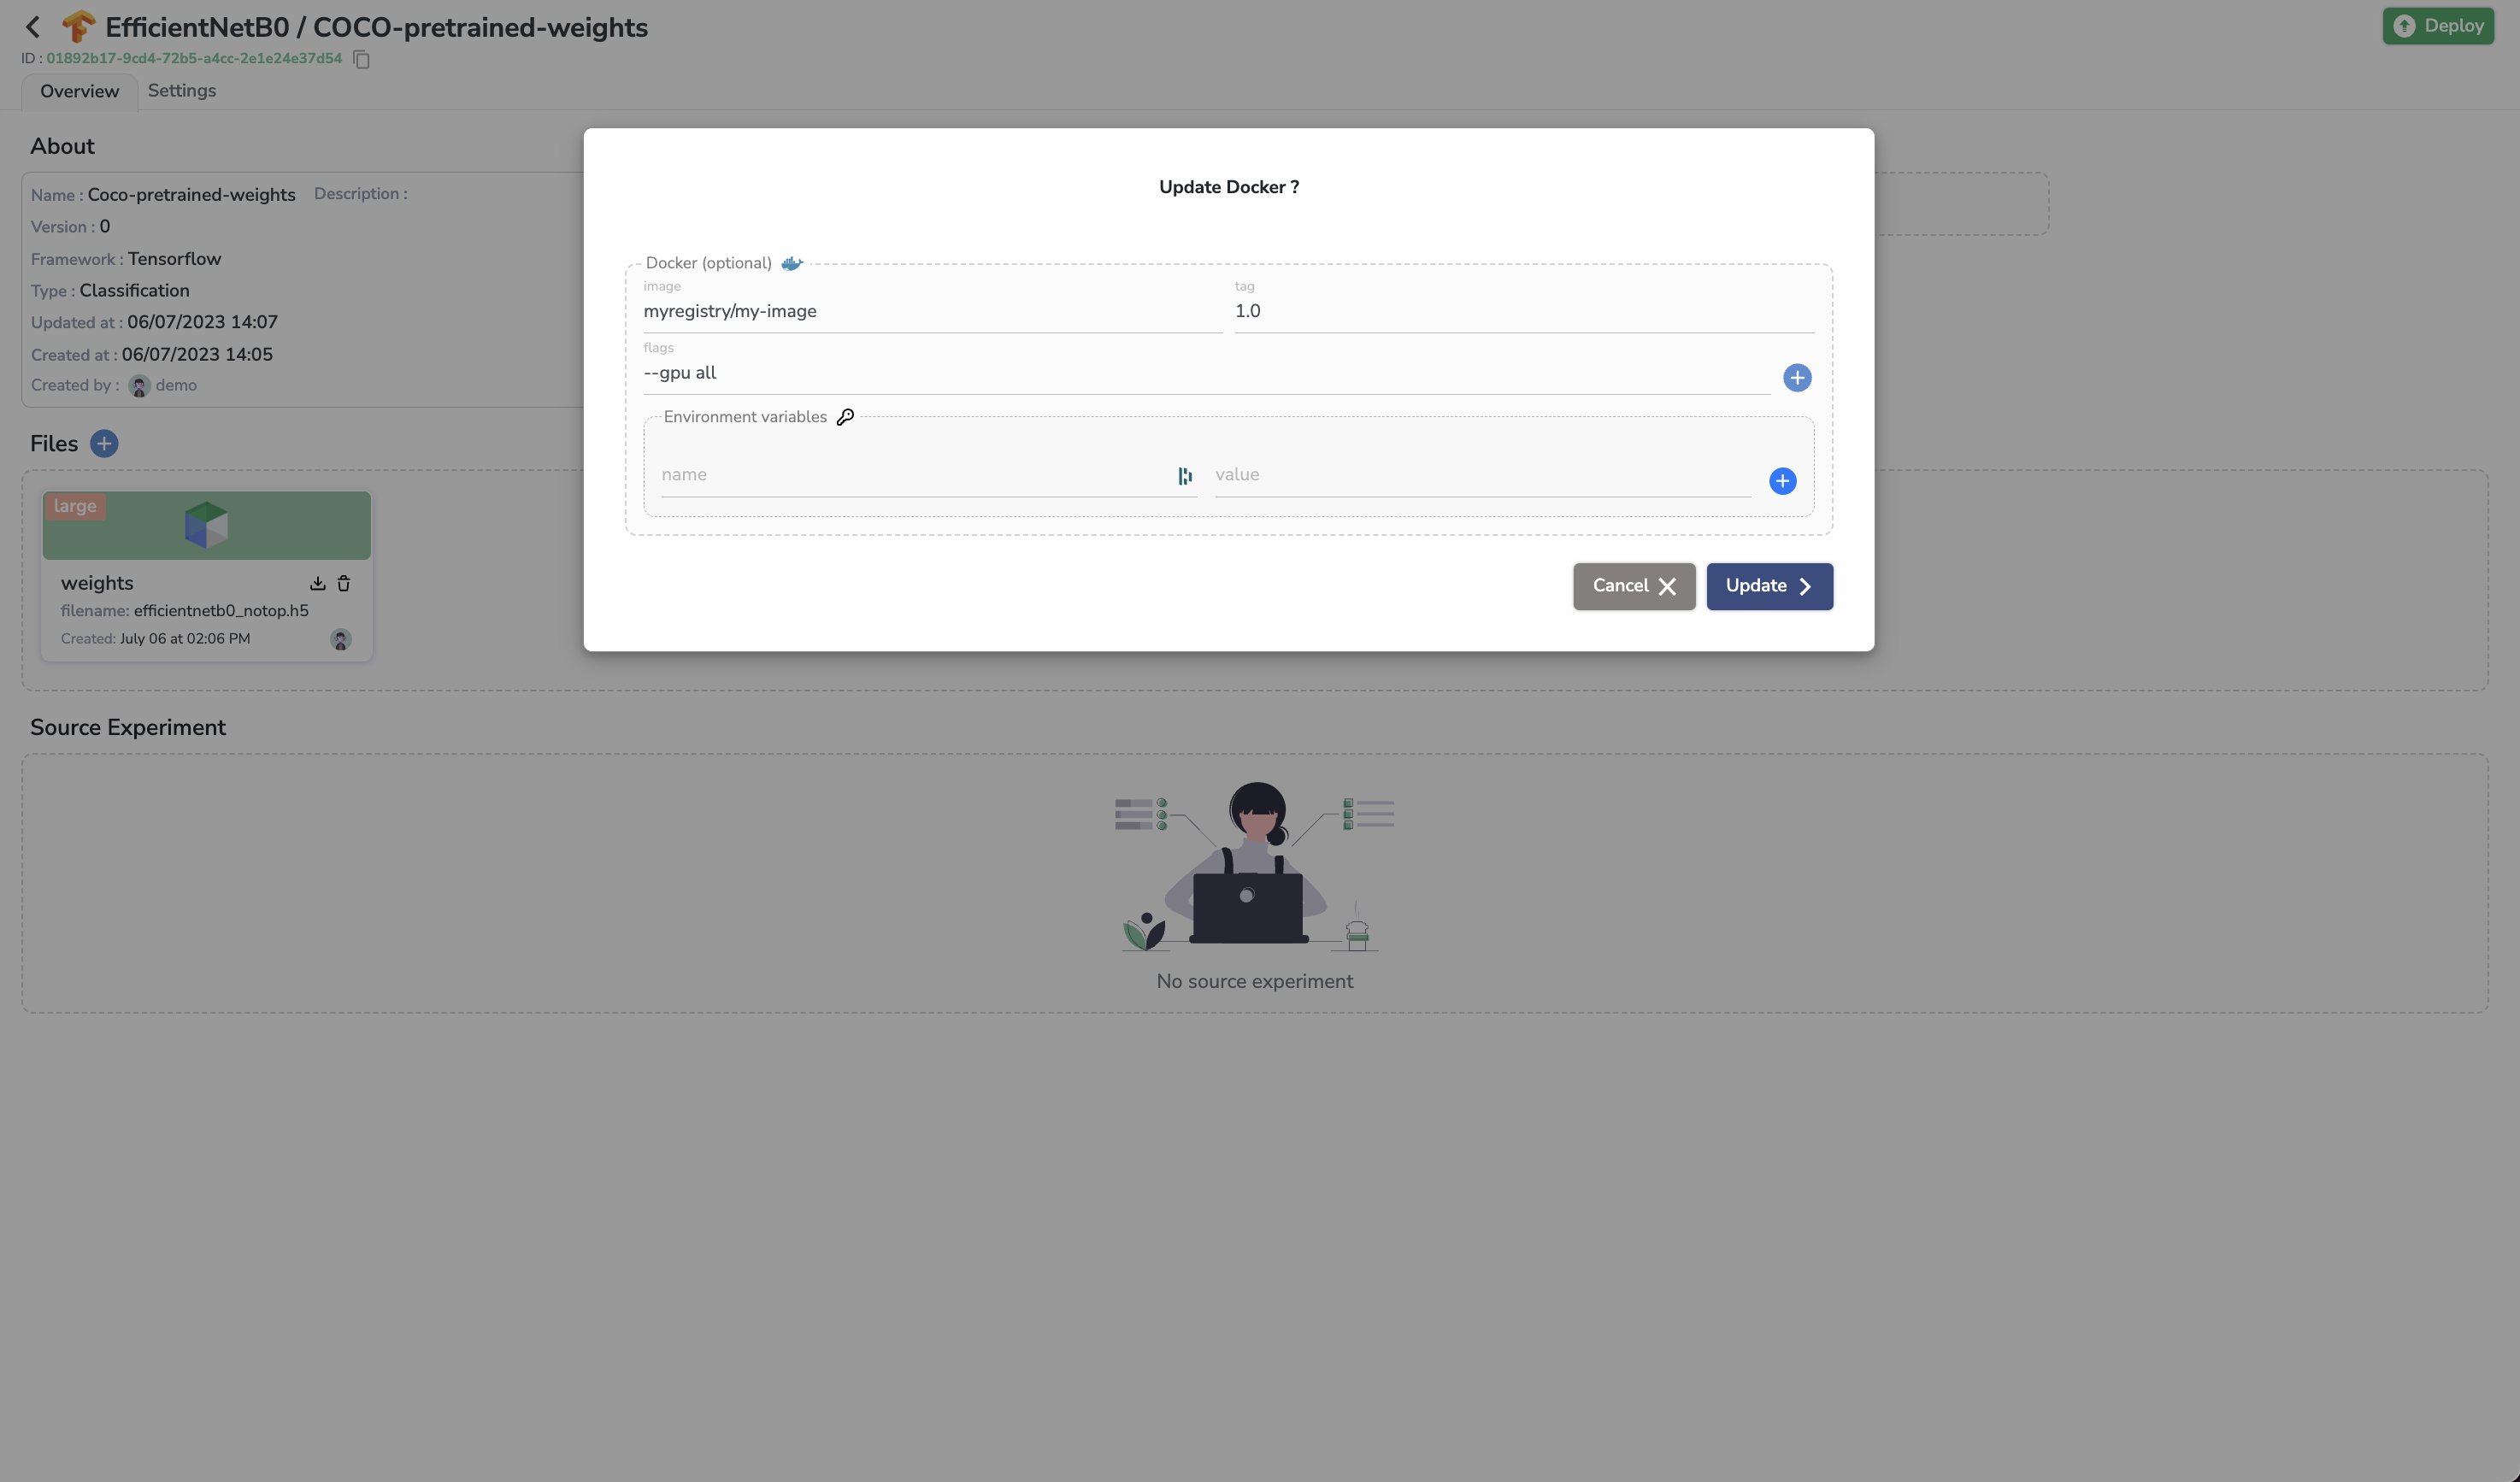
Here it is, our ModelVersion now has a Docker image attached. It means that this ModelVersion is now Trainable 🎉.
4. Launch the training
You are now ready to begin training. There are two ways to do this by clicking the Launch Experiment button: Docker and Picsellia Infra.
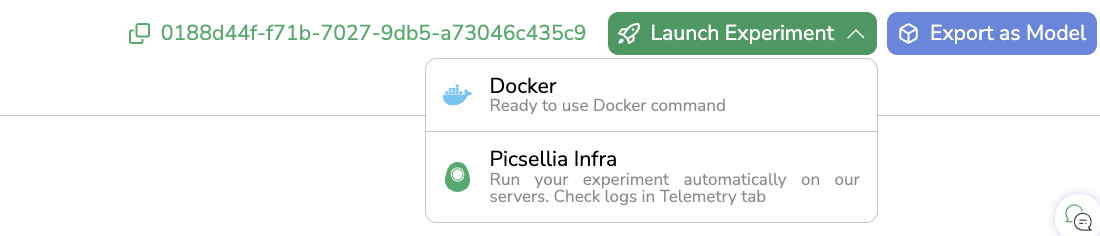
The two possible ways to start an Experiment
By selecting Picsellia Infra, you can launch training on the Picsellia Training engine (through its associated Docker image). On the other hand, by selecting Docker, you can generate a Docker command based on environment variables and flags. You can then copy and paste this command into your own training infrastructure to launch the Model training there.
As shown below, the command is adapted based on your Token and Experiment to ensure proper launching of the training for this particular Experiment.
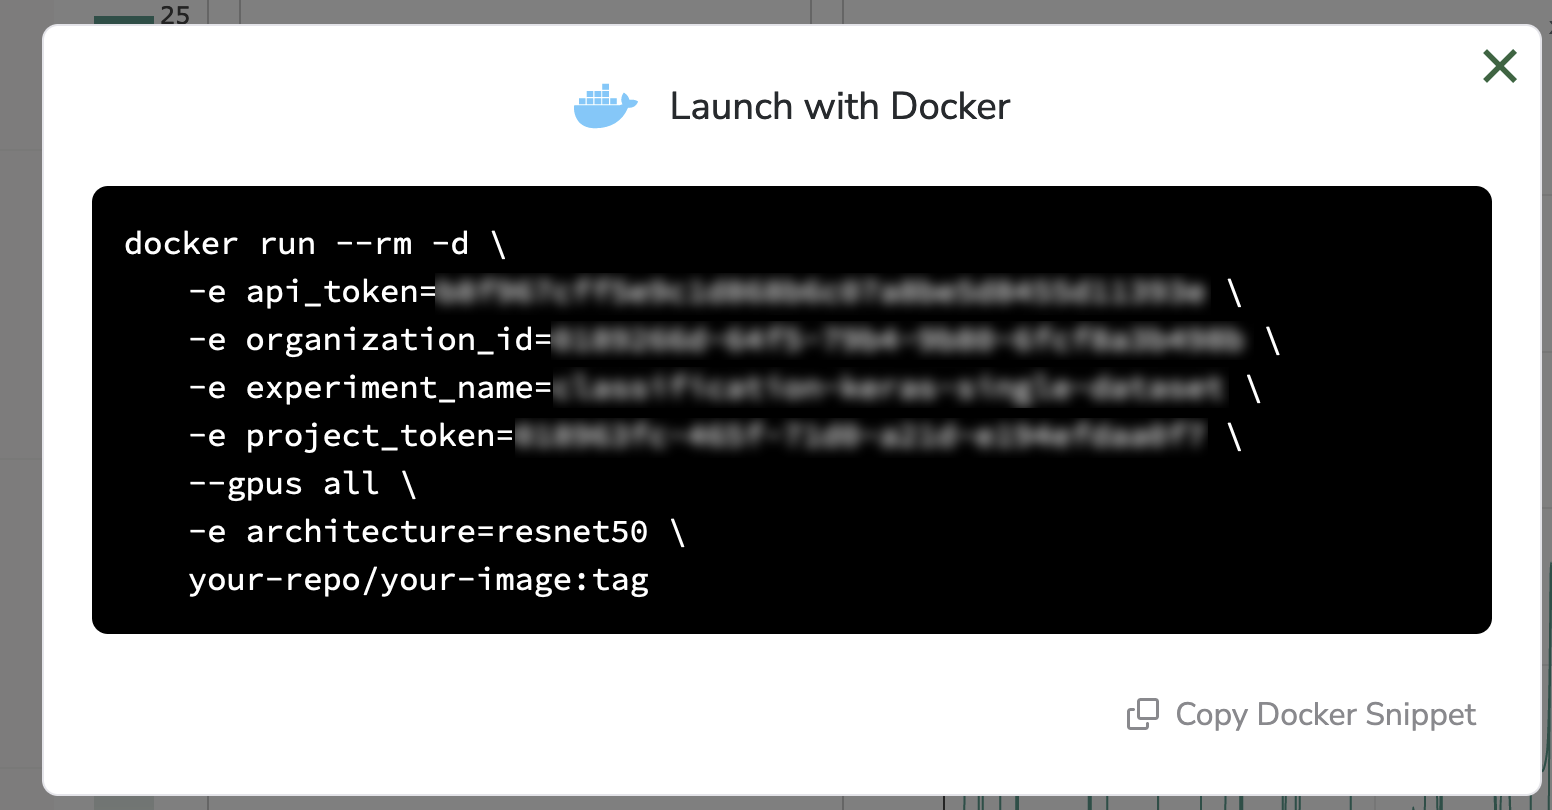
The Docker command to run on your environment
After launching either case, you can access the real-time training logs from the Telemetry tab of your Picsellia Experiment.
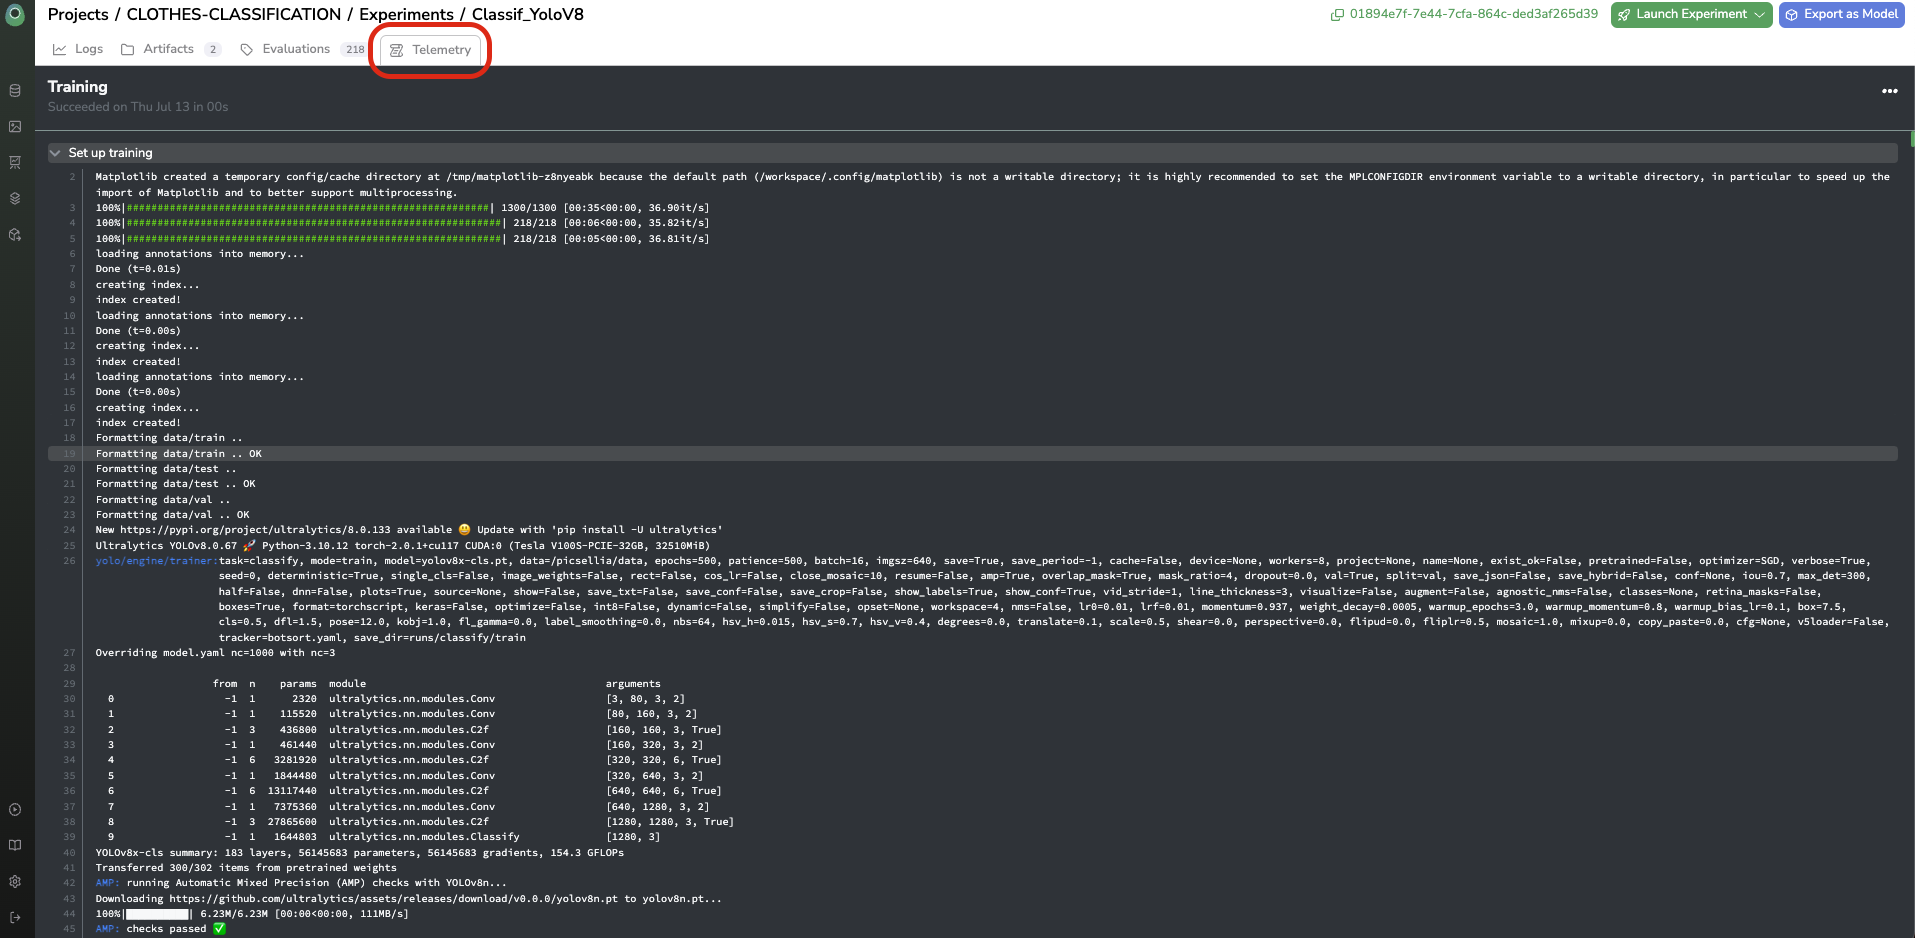
The Telemetry tab
Updated about 1 year ago