

Launch training
After having initialized an Experiment in the frame of a Project, it is time to launch the training of the ModelVersion you're aiming to create within this Experiment.
Depending on the way you integrated the Picsellia platform with your infrastructure, there are four different ways to launch the training of a ModelVersion through an Experiment:
- Launch the training script on the Picsellia training engine.
- Launch the training script on your own compute infrastructure through a Compute Connector.
- Launch the training script on your own training resources from the Picsellia platform.
- Launch the training script manually on your own training resources.
Each possibility has its own requirements that you need to fulfill to ensure the success of the training.
1. Launch the training on the Picsellia training engine
You can use the Picsellia training engine, natively integrated with the platform, to execute the training script directly from your Experiment.
The Picsellia training engine allows you to lauch your training on GPUs provided either by OVH or GCP on several GPU types, please note that all the training ressources used here are located in Europe. The training engine is operated by the Picsellia team.
ConsumptionExecuting your training script on the Picsellia training engine will consume your MPU quota. Before launching a training script on the Picsellia training engine, make sure you still have enough MPU quota to cover the training time. As a reminder, MPU represents the use of Picsellia computing resources (GPU) for training, serving, or preprocessing; MPU consumption can be tracked through the Plan and usage dashboard.
Please also note that depending on the GPU type selected the ratio MPU per hour of GPU will vary, typically one hour of V100 will consume 1 MPU where one hour of A100 will consume 2 MPUs.
You can launch the execution of the training script with your current Experiment by clicking on the Launch Experiment button, then selecting Picsellia Infra, as shown below:
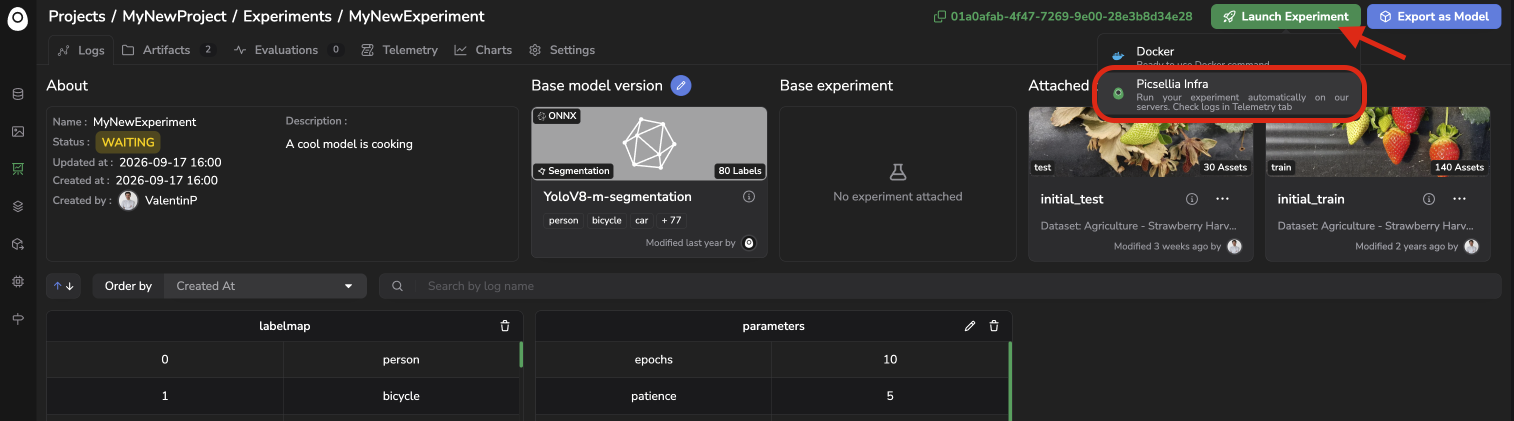
Launch Experiment training
A modal will then open allowing you the select the GPU type you want to use for the training among A100, L4, T4 or V100.
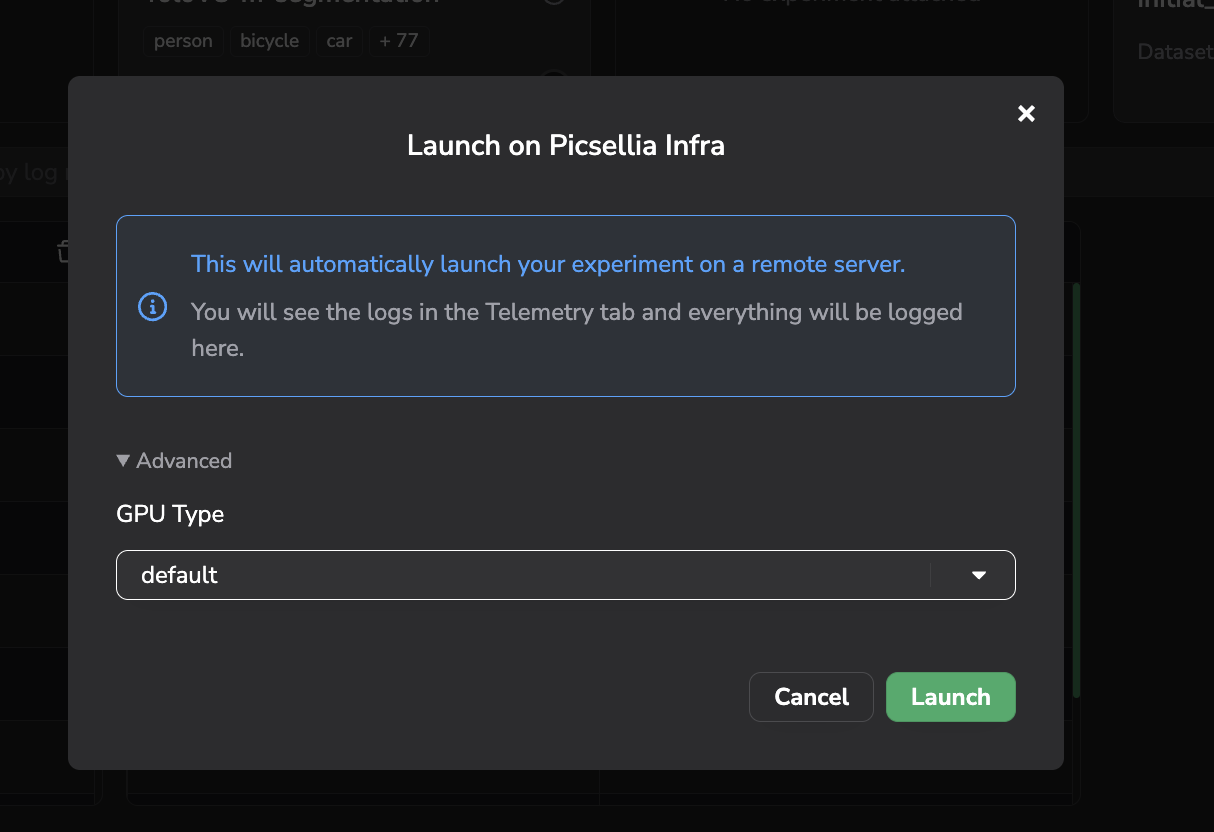
GPU Type selection and training launch
If you have the necessary permissions and everything has been properly set up, the execution of the training script on the Picsellia training engine will then start. An associated Job will be created to track and list all ongoing or past Training, Jobs page documentation is available here.
This execution can also be followed in real time through the Telemetry tab, as long as information is logged by the script on Picsellia.
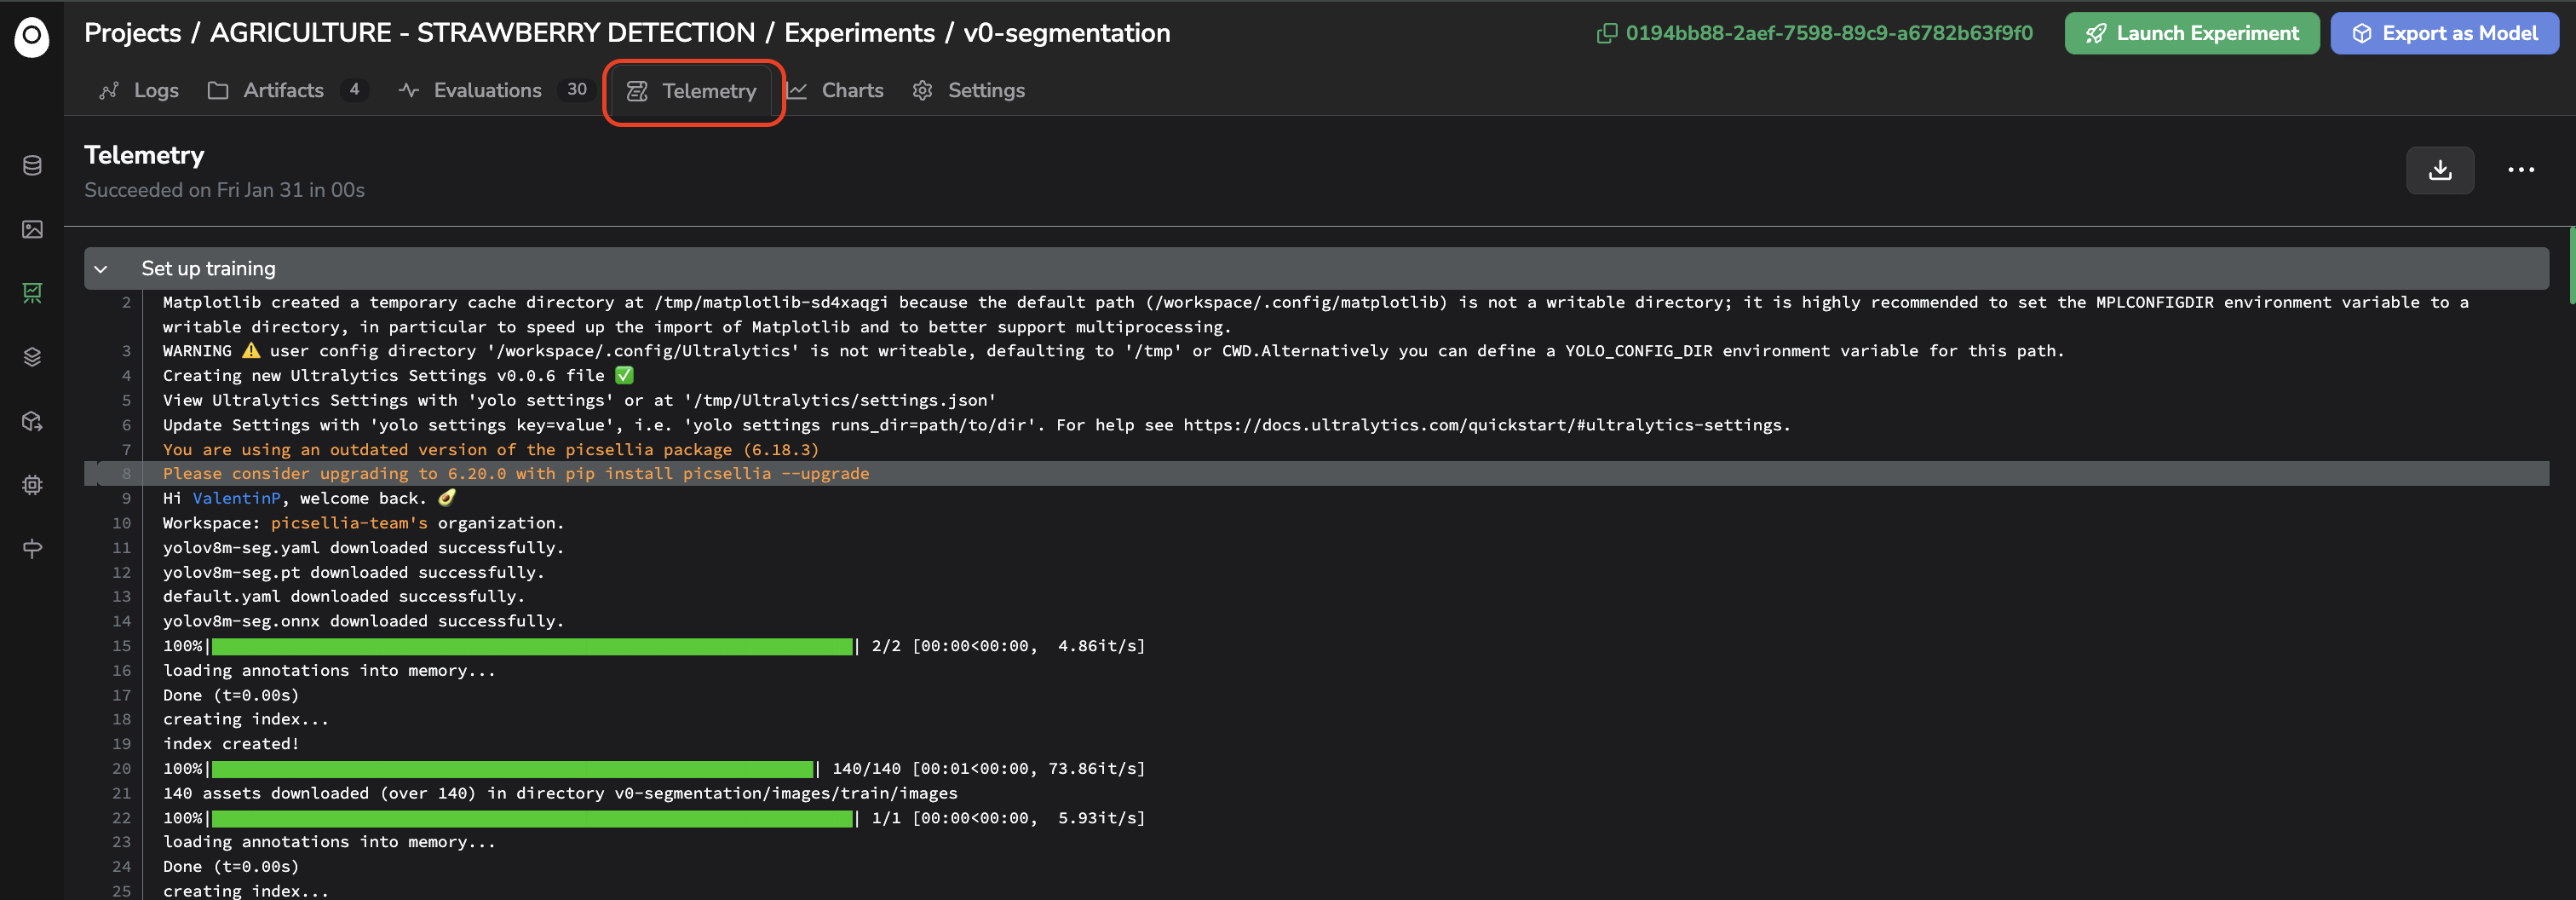
Telemetry tab
The training script that gets executed is the one contained in the Docker image of the Base architecture selected for the current Experiment. If the script has been written following the guidelines provided in this guide, it will retrieve the DatasetVersion and training parameters to initialize the training step of your model. During the training, in addition to visualizing real-time execution information in the Telemetry tab, the callback potentially defined in the training script will initialize and fill in the Metrics in the Logs tab. At the end of the training, Evaluation can also be logged and computed by the training script, and the outcome files stored as Artifacts on the Picsellia Experiment.
Once again, all those steps are defined in the training script, so they are under the responsibility of the script author. This is why, during your first use of the platform, using a ModelVersion from the Public Registry as Base architecture is recommended, as the training scripts contained in the attached Docker image have been properly written by the Picsellia team according to the guidelines defined in the guide.
Please note this method requires using, as Base architecture, a ModelVersion that has a Docker image containing the attached training script. This Docker image must also be stored either on a public registry, such as Docker Hub, or on a private container registry provided by the Picsellia team as this one would be accessible from the training engine infrastructure.
2. Launch the training script on your own compute infrastructure through a Compute Connector
If you'd rather run the training on your own compute infrastructure while keeping the same native, one-click experience as launching on the Picsellia training engine — no Docker command to copy, no script to launch yourself — you can integrate your infrastructure with Picsellia as a Compute Connector.
Two integration paths are available, detailed in Compute Connectors:
- If your infrastructure is a classic cloud compute resource, such as GCP Compute or AWS SageMaker-style instances, Picsellia can orchestrate it directly through SkyPilot. Setting up this integration requires reaching out to the Picsellia team.
- For any other kind of infrastructure, including on-premise machines, you can instead install the myoboku agent directly on it. Once running, myoboku regularly pings the Picsellia platform, waiting for a
TrainingorProcessingjob to launch; as soon as one is created, myoboku picks it up on its own and starts the execution, without Picsellia needing to reach your infrastructure from the outside. This gives you a native way to launch a training from Picsellia on virtually any kind of infrastructure.
Once one or several Compute Connectors are configured for your Organization, you'll be able to choose which one to use — and so which infrastructure runs the training — directly when clicking on Launch Experiment and selecting Picsellia Infra.
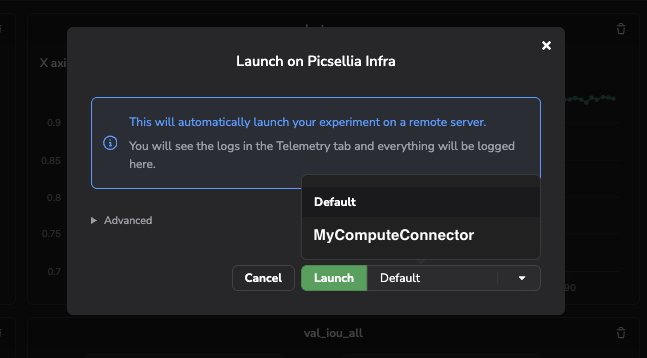
Choose the Compute Connector to use while launching the training on the current Experiment
Regardless of the integration path, this execution can be followed in real time through the Telemetry tab, as long as information is logged by the script on Picsellia, and an associated Job is created to track it, the same way it is for a training launched directly on the Picsellia training engine. Jobs page documentation is available here.
The training script that gets executed is the one contained in the Docker image of the Base architecture selected for the current Experiment. If the script has been written following the guidelines provided in this guide, it will retrieve the DatasetVersion and training parameters to initialize the training step of your ModelVersion. During the training, in addition to visualizing real-time execution information in the Telemetry tab, the callback potentially defined in the training script will initialize and fill in the Metrics in the Logs tab. At the end of the training, Evaluation can also be logged and computed by the training script, and the outcome files stored as Artifacts on the Picsellia Experiment.
Once again, all those steps are defined in the training script, so they are under the responsibility of the script author. This is why, during your first use of the platform, using a ModelVersion from the Public Registry as Base architecture is recommended, as the training scripts contained in the attached Docker image have been properly written by the Picsellia team according to the guidelines defined in the guide.
This method requires using, as Base architecture, a ModelVersion that has a Docker image containing the attached training script. This Docker image must also be stored either on a public registry, such as Docker Hub, or on a private container registry accessible from wherever the job actually runs — your own cloud account for the SkyPilot integration, or your own infrastructure for myoboku.
3. Launch the training script on your own training resources from the Picsellia platform
If you'd rather use your own computing resources to perform the training of your ModelVersion, you can use the Docker command generated for you and launch it on your training infrastructure. The data and training parameters will be pulled from your Picsellia Experiment, and the outcome of the training (Metrics, Artifacts, Evaluation...) will be logged to your Picsellia Experiment by your training script.
You can launch the execution of the training script on your infrastructure with your current Experiment by clicking on the Launch Experiment button, then selecting Docker , as shown below:
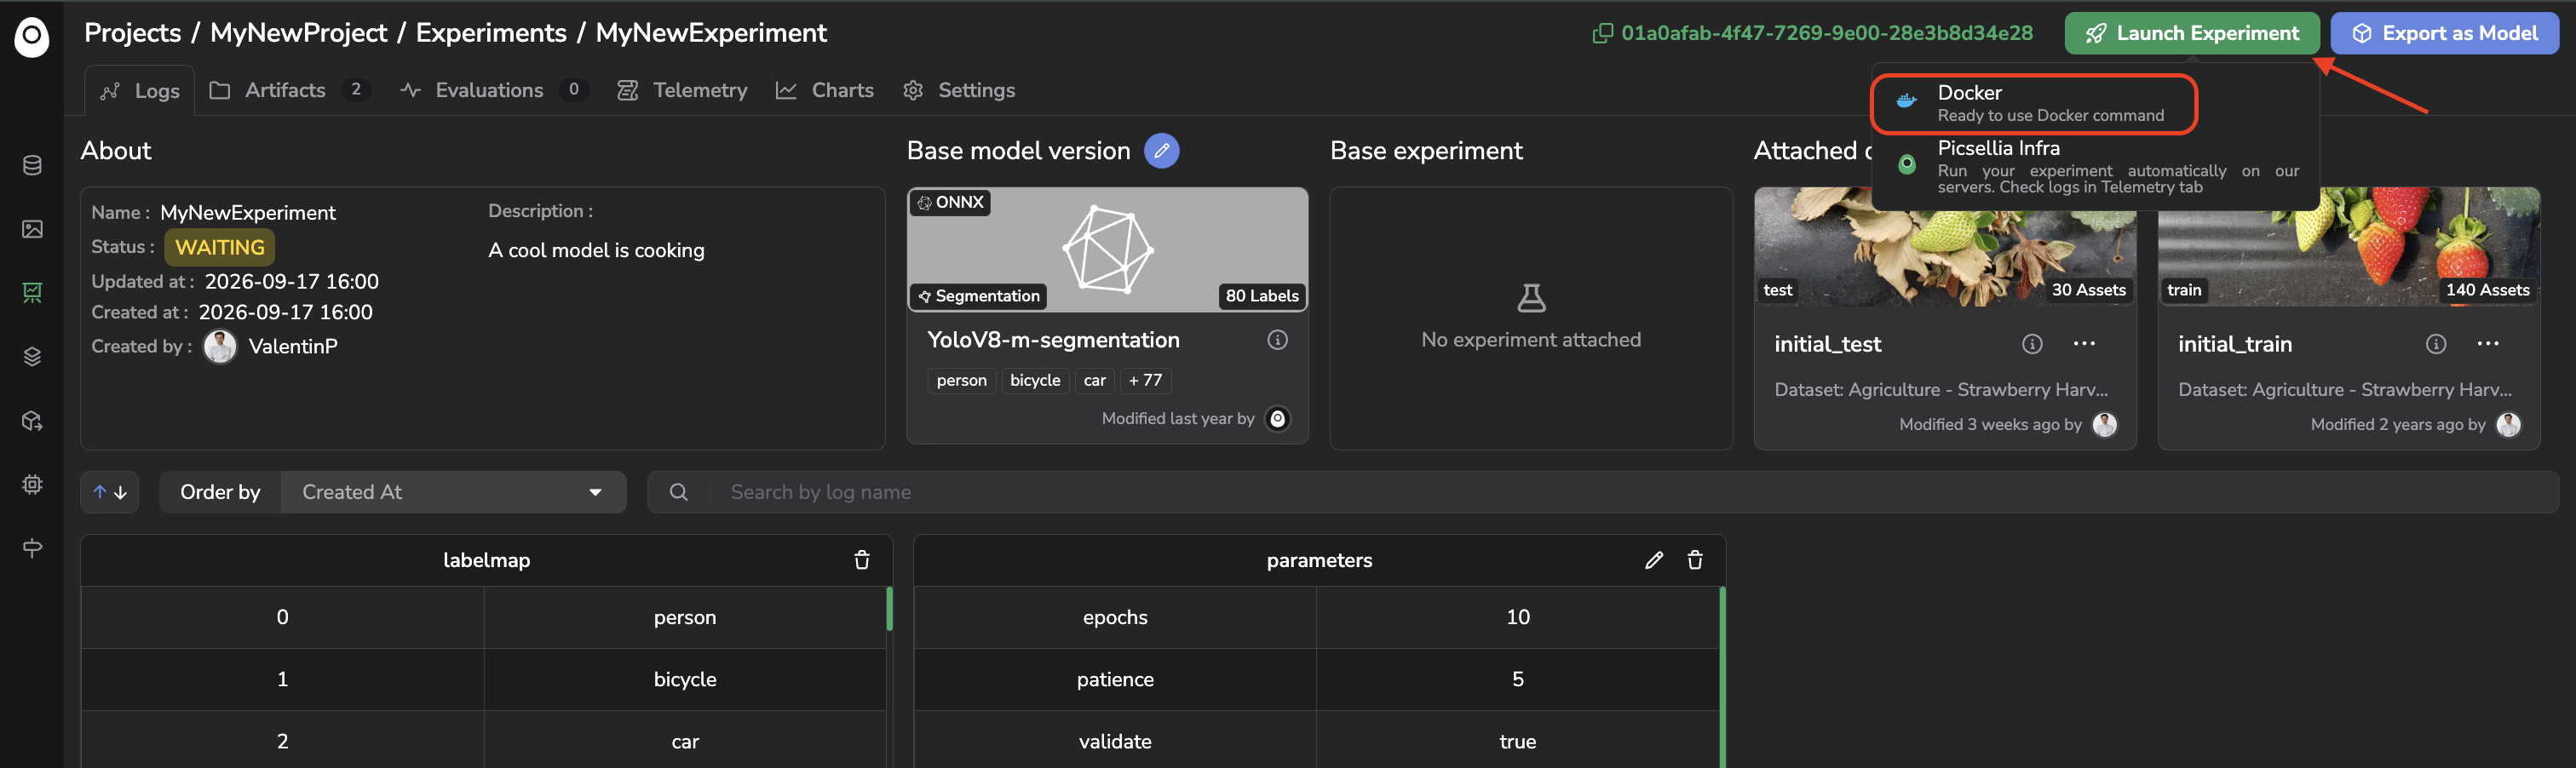
Launch Experiment with Docker
If you have the necessary permissions, a Launch with Docker modal will open, displaying the Docker command — copy this command and paste it into your training environment on your own infrastructure. If everything has been properly set up on your side, the execution of the training script on your infrastructure will then start.
The Docker command embeds your API tokenThe generated command embeds a Picsellia API token scoped to your
Experiment, allowing your infrastructure to authenticate and push results back. Treat it like any other credential: don't share it or commit it to a public repository.
This execution can be followed in real time through the Telemetry tab, as long as information is logged by the script on Picsellia. Please note that in that case, as the exectution is not triggered by the plateform, no associated Jobs will be created.
The training script that gets executed is the one contained in the Docker image of the Base architecture selected for the current Experiment. If the script has been written following the guidelines provided in this guide, it will retrieve the DatasetVersion and training parameters to initialize the training step of your ModelVersion. During the training, in addition to visualizing real-time execution information in the Telemetry tab, the callback potentially defined in the training script will initialize and fill in the Metrics in the Logs tab. At the end of the training, Evaluation can also be logged and computed by the training script, and the outcome files stored as Artifacts on the Picsellia Experiment.
Once again, all those steps are defined in the training script, so they are under the responsibility of the script author. This is why, during your first use of the platform, using a ModelVersion from the Public Registry as Base architecture is recommended, as the training scripts contained in the attached Docker image have been properly written by the Picsellia team according to the guidelines defined in the guide.
This way of launching the training of your ModelVersion lets you use your own computing resources while still leveraging the Picsellia platform to structure and orchestrate your Computer Vision projects.
However, this method requires using, as Base architecture, a ModelVersion that has a Docker image containing the attached training script. This Docker image must also be stored either on a public registry, such as Docker Hub, or on a private container registry accessible by the target training infrastructure. If you'd rather not Dockerize your code, you can launch the script manually on your own infrastructure, as explained below.
4. Launch the training script manually on your own training resources
If your code is not Dockerized, or if you don't want to publish your Docker image on a container hub, you can also take care of launching manually the training script on your infrastructure yourself.
In this case, you need to make sure your script has been adapted to Picsellia SDK (as detailed in this guide), so that the DatasetVersion and training parameters attached to the Experiment are properly pulled onto the computing resource executing the script. The results of the training (Metrics, Evaluation, and Artifacts) are then stored in your Picsellia Experiment, ensuring the traceability and structure of your Project directly within your Picsellia Organization.
Updated 13 days ago