8. Create your Project and launch Experiments
Objectives:
- Create your
Project(AI lab) - Create
Experiment& launch your first training - Track & compare the results of trainings
- Evaluate your
ModelVersionon a testDatasetVersion - Find the best
Experimentand convert it into a deployableModelVersion - Organize your
ModelVersionin your Model Registry
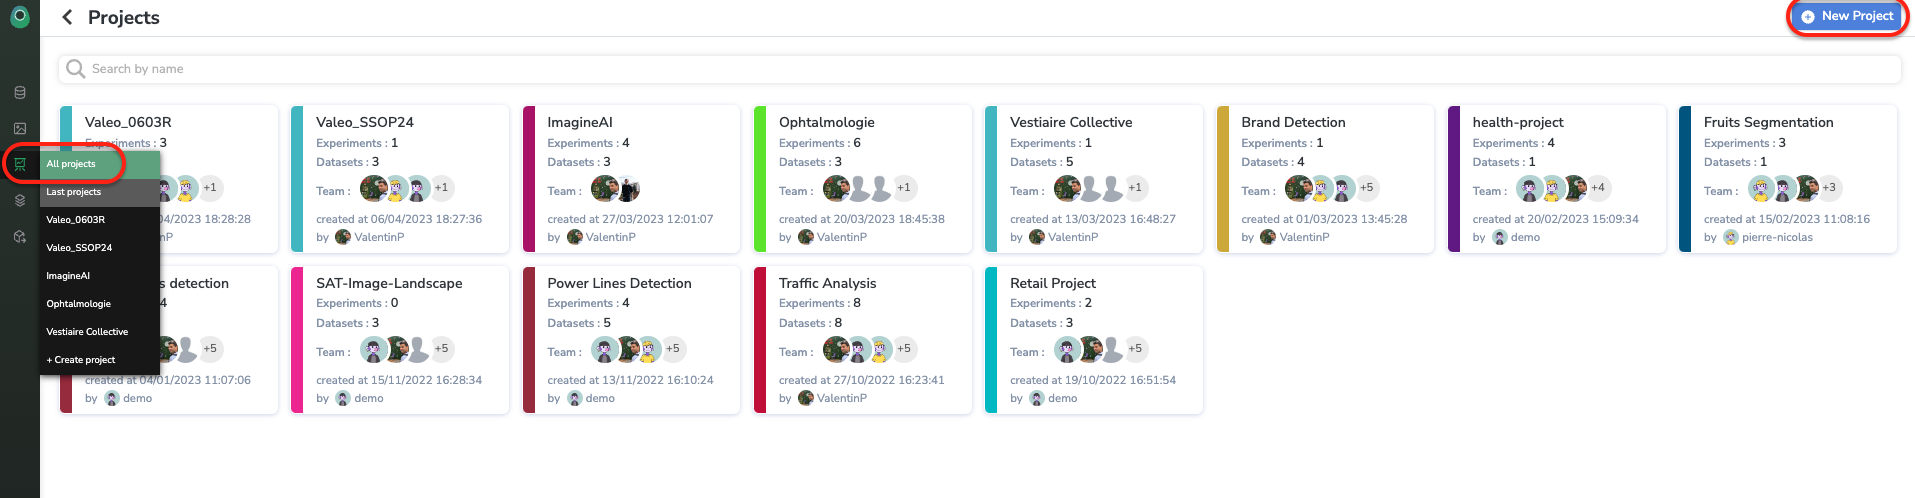
1. Create a Project
ProjectNow that we a ready-to-be-used DatasetVersion, it is time to train our ModelVersion. The first step is to create a Project, as described below:
You have to give a name to this Project, describe it, and add the member of your Organization who will work on it with you.
A Project is a space dedicated to a particular use case, it's a kind of AI lab, in this workspace you'll be able to launch severalExperiment playing on different variables (DatasetVersion, architectures, hyperparameters) and compare them in order to create the perfect `ModelVersion!
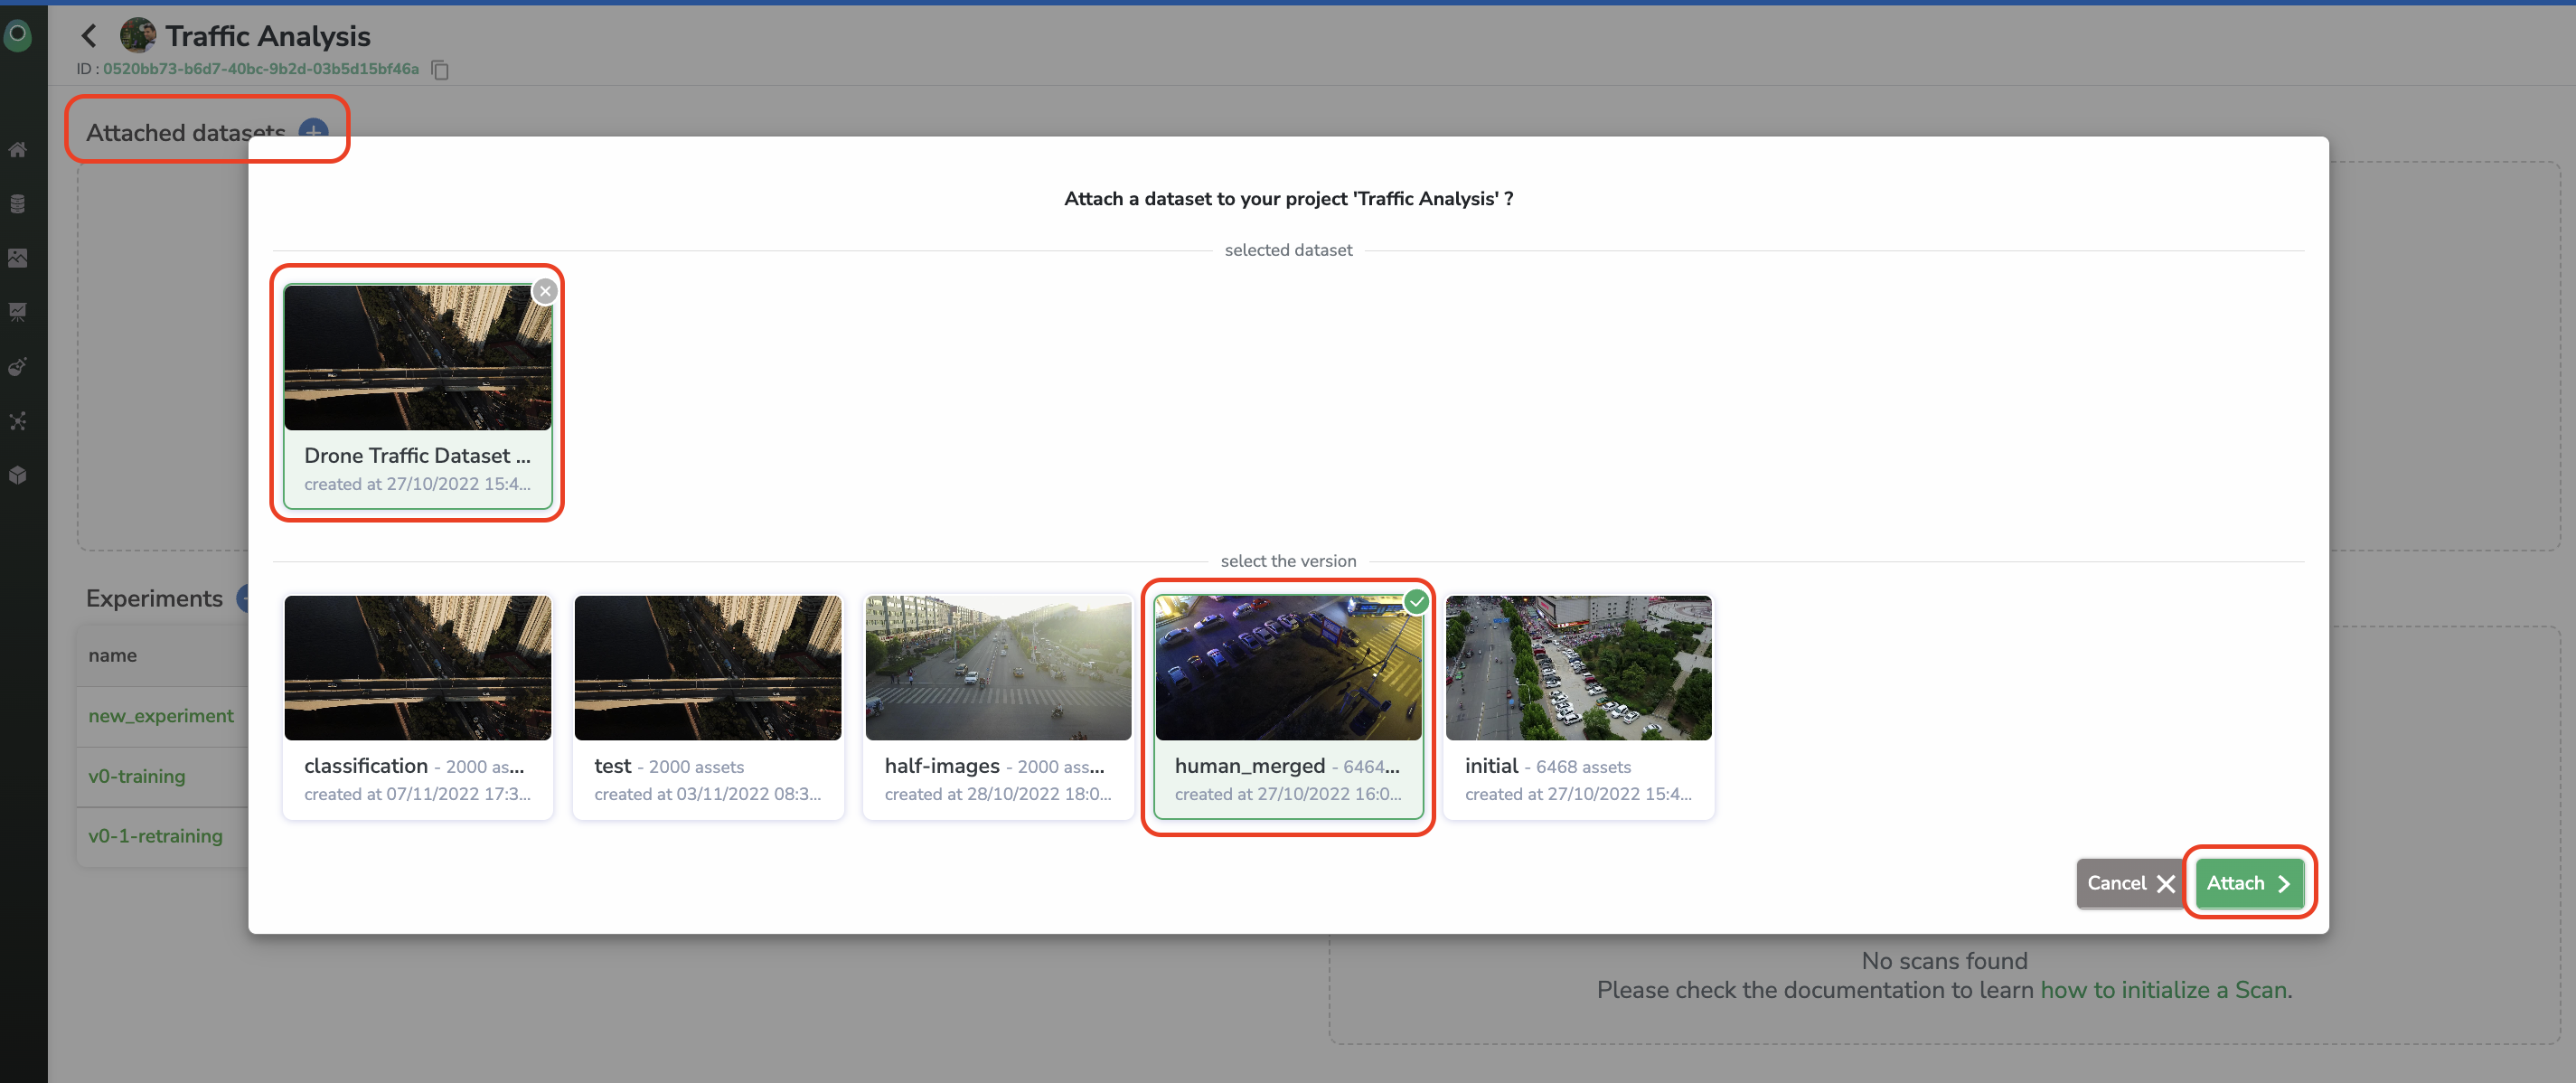
On the Project view, you will retrieve all the DatasetVersion related to and all the Experiment performed. The first step is to attach the DatasetVersion which will be used in the frame of this Project:
2. Create an Experiment
ExperimentIt is now time to create your first Experiment to train a first ModelVersion.
Click on the + button next to the Experiment.
The Experiment creation form should now be displayed:
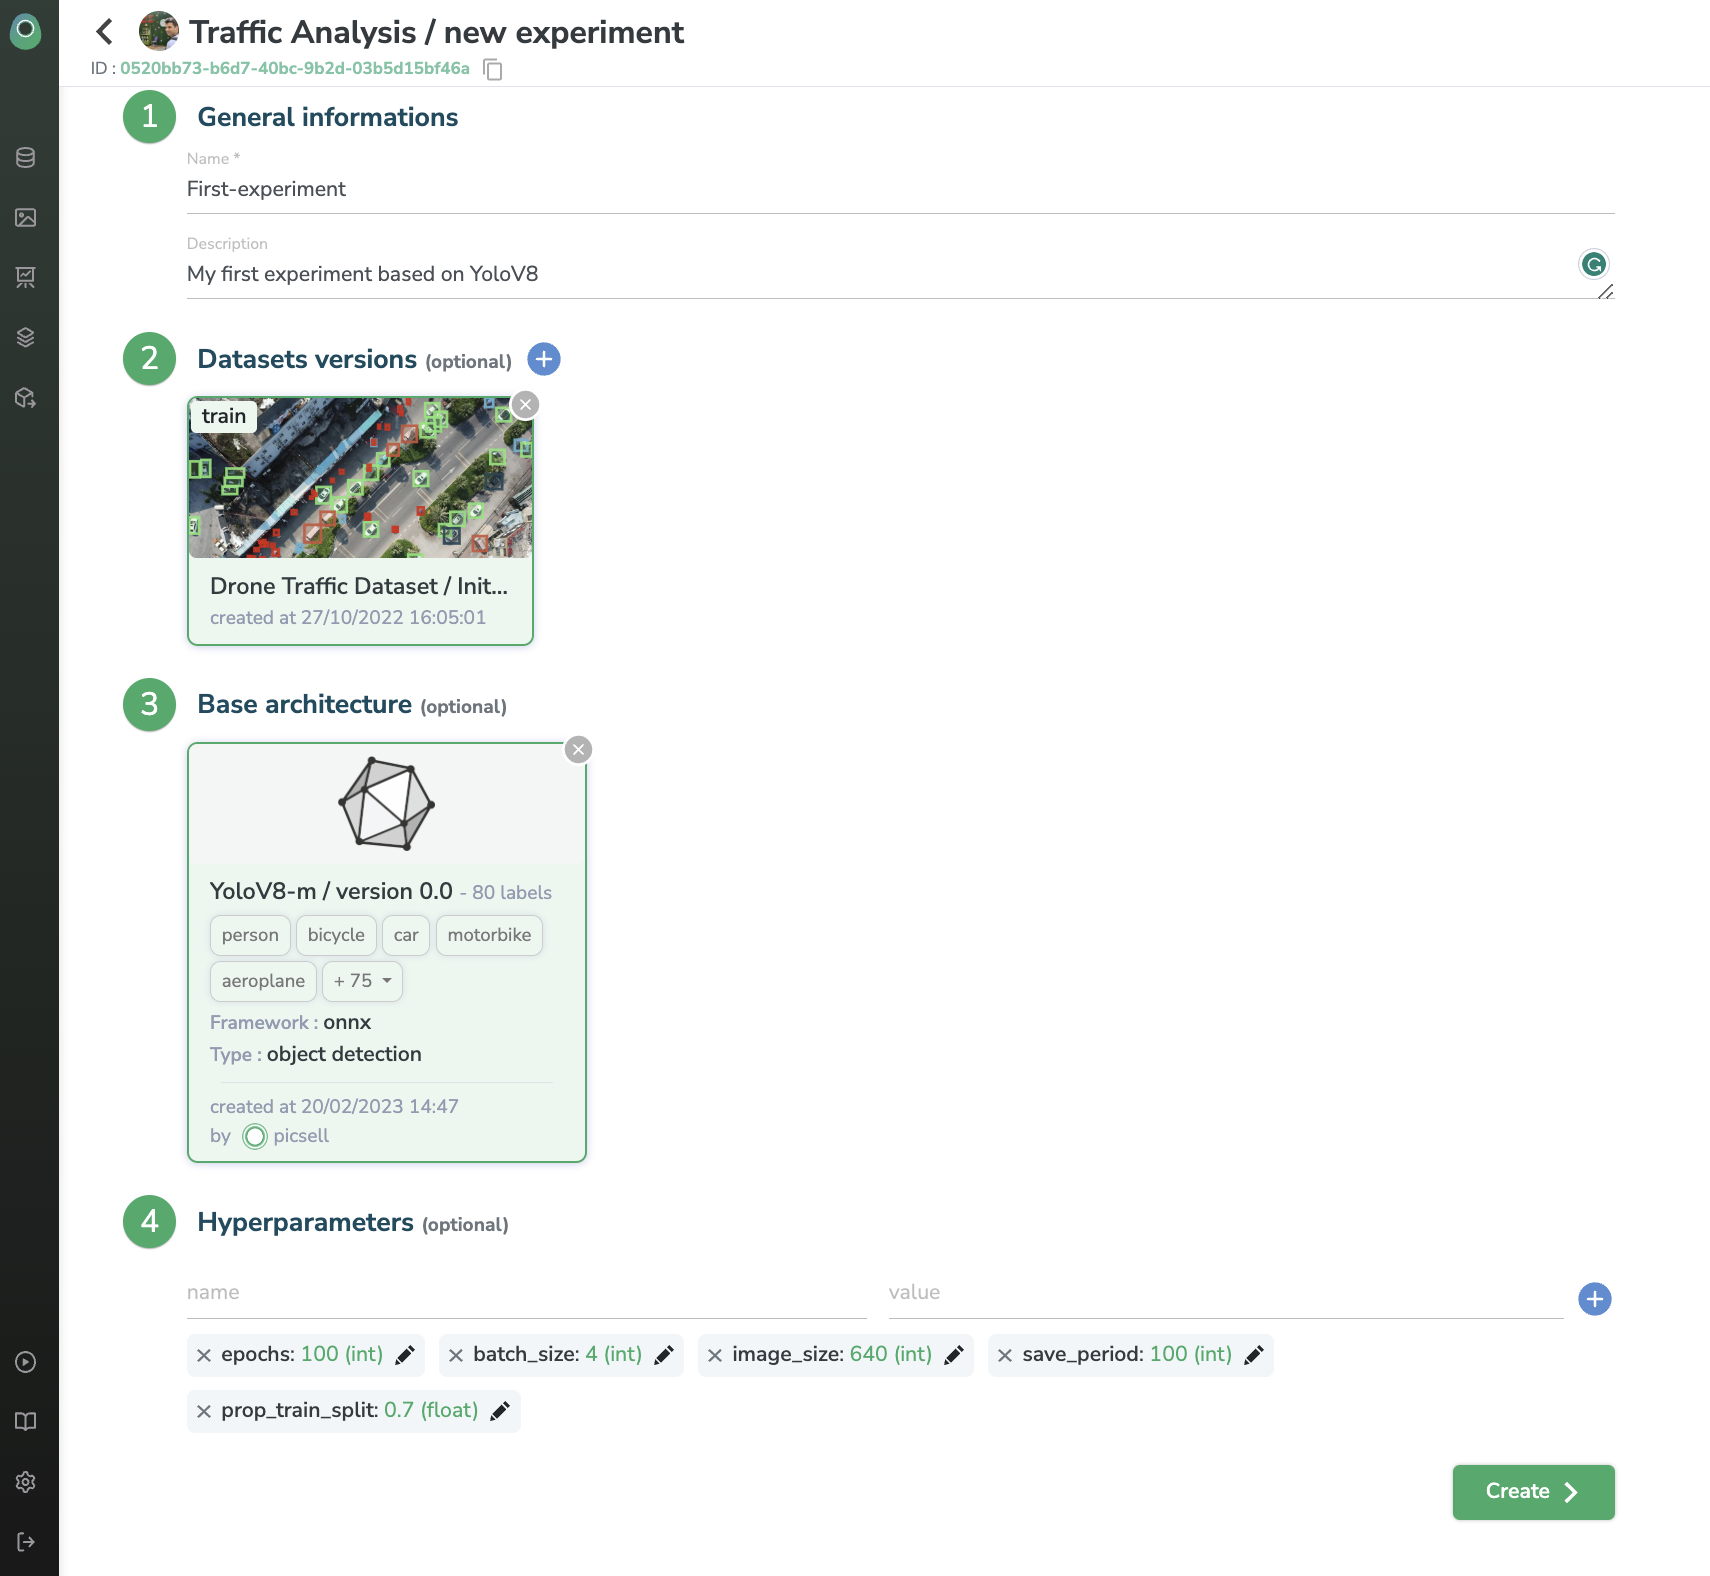
After giving a name and a description of your Experiment, you need to choose the DatasetVersion to be used for the training, depending on the type of ModelVersion you'll train, the number of DatasetVersion to attach can vary (a DatasetVersion alias is asked when attaching, this alias will be read by the training script to understand the purpose of the DatasetVersion, to differentiate train, test and validation DatasetVersion for instance).
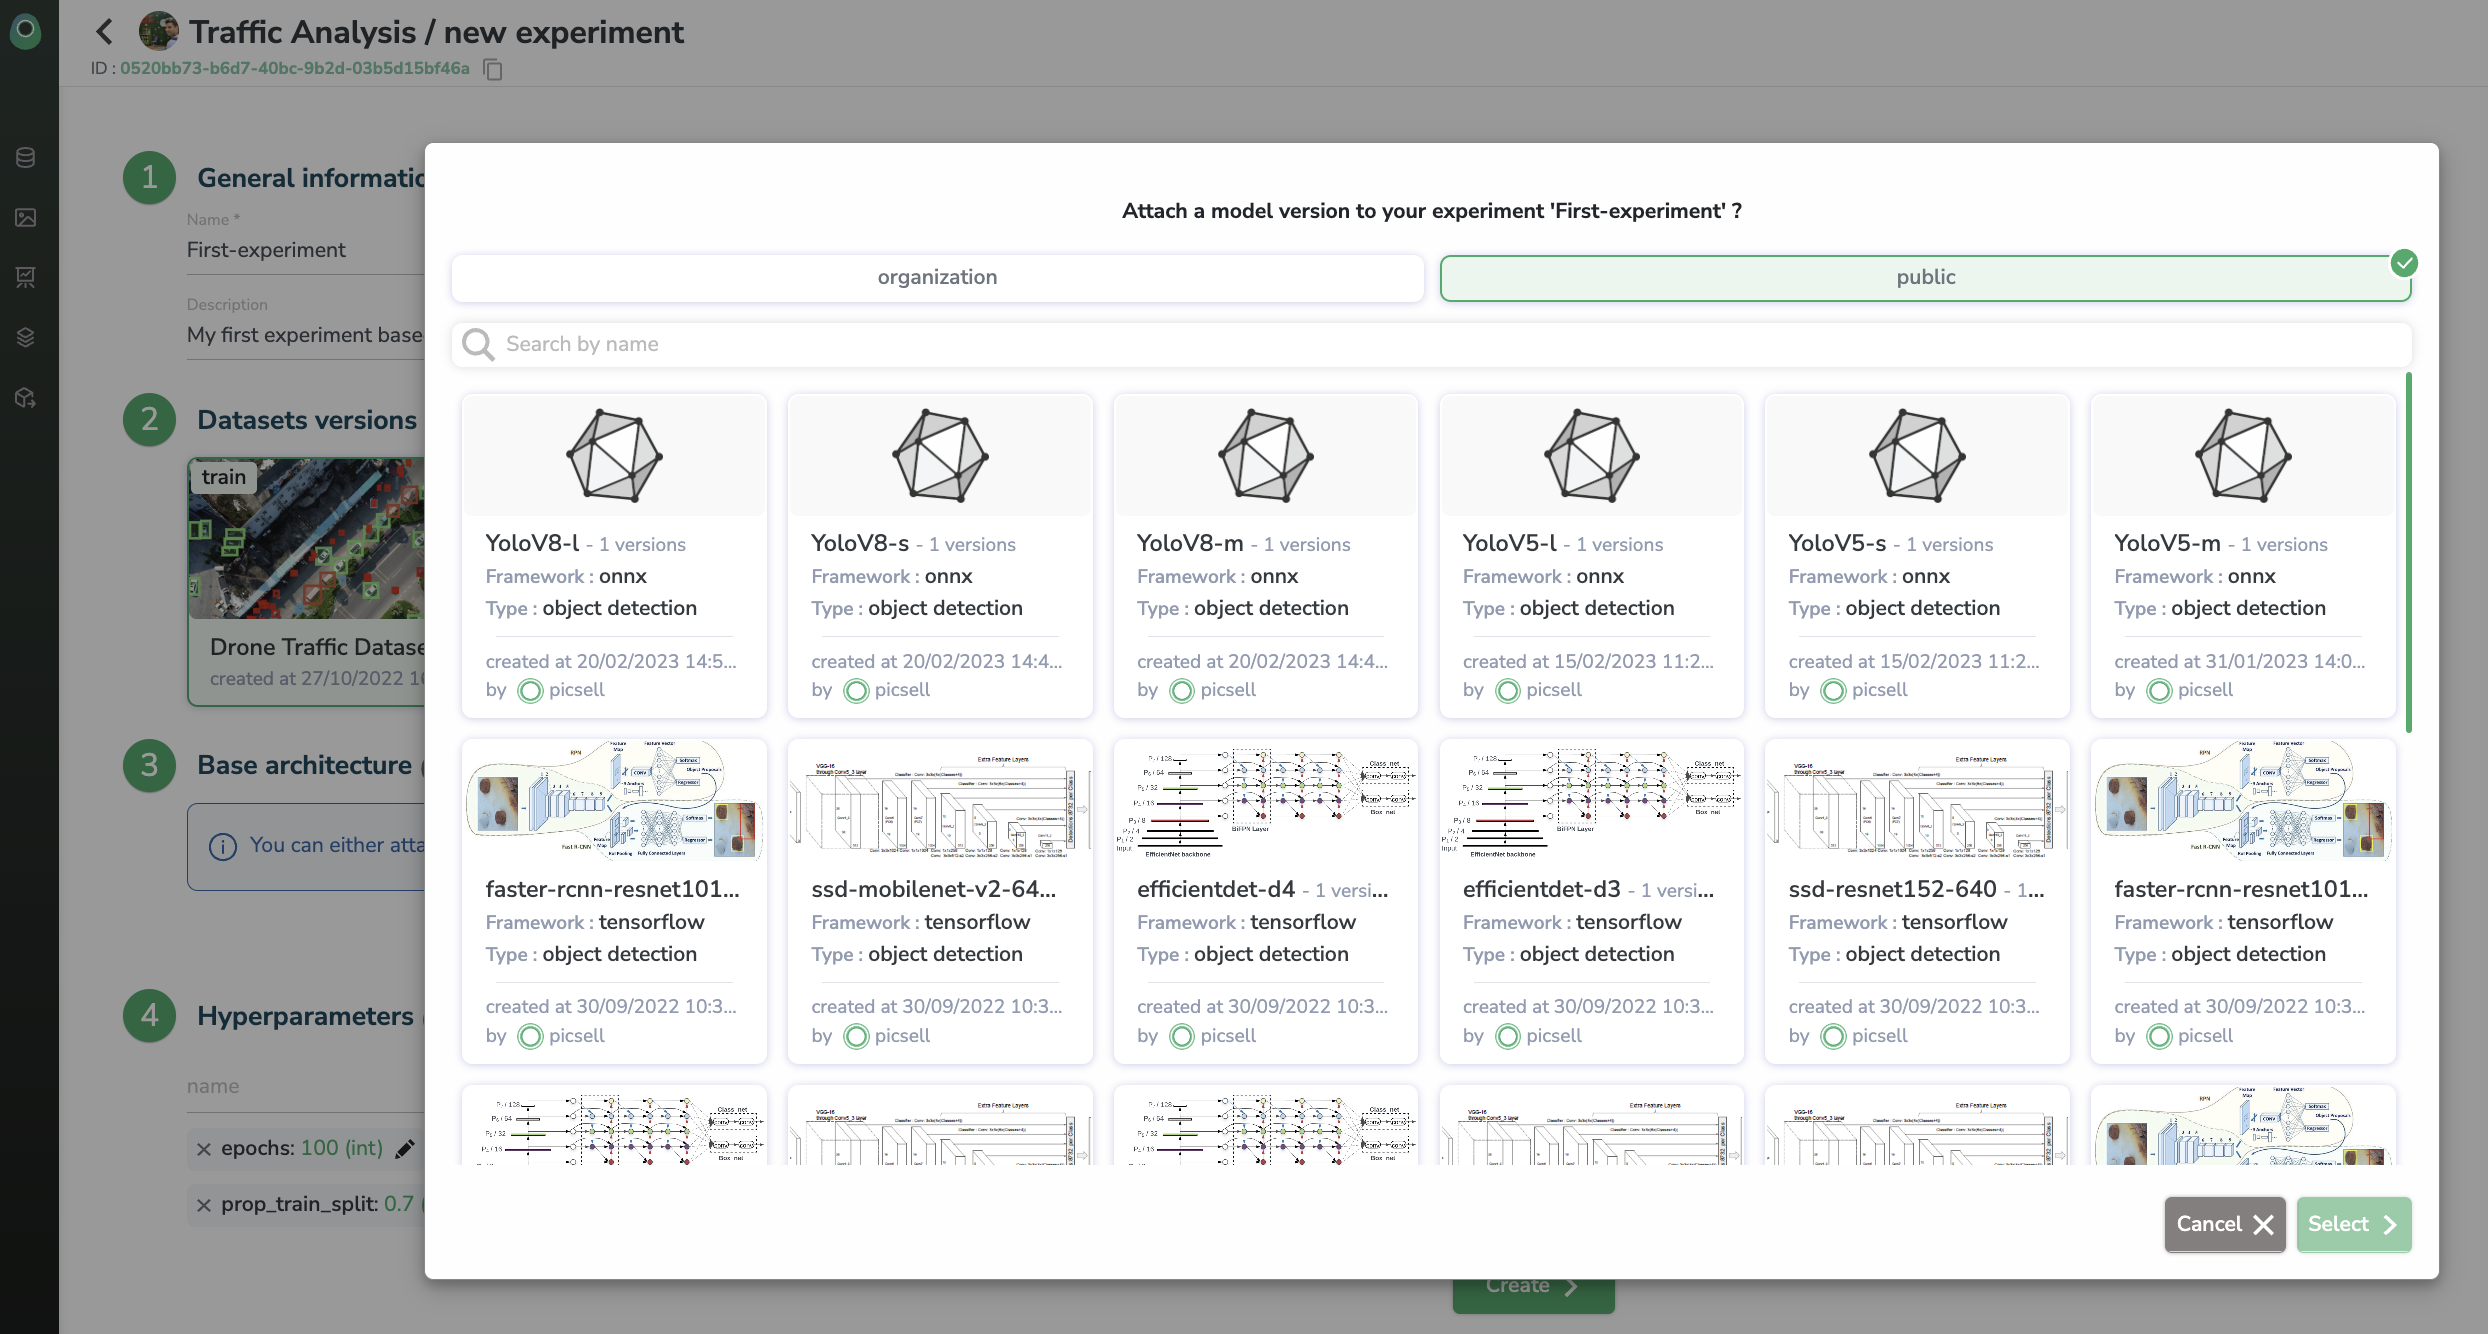
Then, you should choose the type of architecture to be trained in the frame of this Experiment. You can retrain an Experiment already performed in the current Project or you can leverage an existing ModelVersion. You can use aModelVersion already created inside Picsellia in the past in your Organization (Private Registry) or a ModelVersion available in the Public Registry.
You also import your ownModelVersionand training script into PicselliaIf you want to train a
ModelVersionyou already created out of Picsellia and use your own training script, you can pushModelVersionand training script to your Picsellia Private Registry and use them for future Picsellia training. Here the procedure to do it.
When the ModelVersion is selected you can modify the hyperparameters related to its associatedtraining script.
Please note that you need to attach theDatasetVersionto yourProjectbefore using it in anExperiment.
Now, all you have to do is click on Create.
3. Launch the training
When the Experiment is created, you land on the Logs view of this freshly created Experiment. Obviously, this logs dashboard is empty now and is waiting for the training to be launched to be filled in with Experiment tracking metrics.
Everything is now set to launch the training of your ModelVersion.
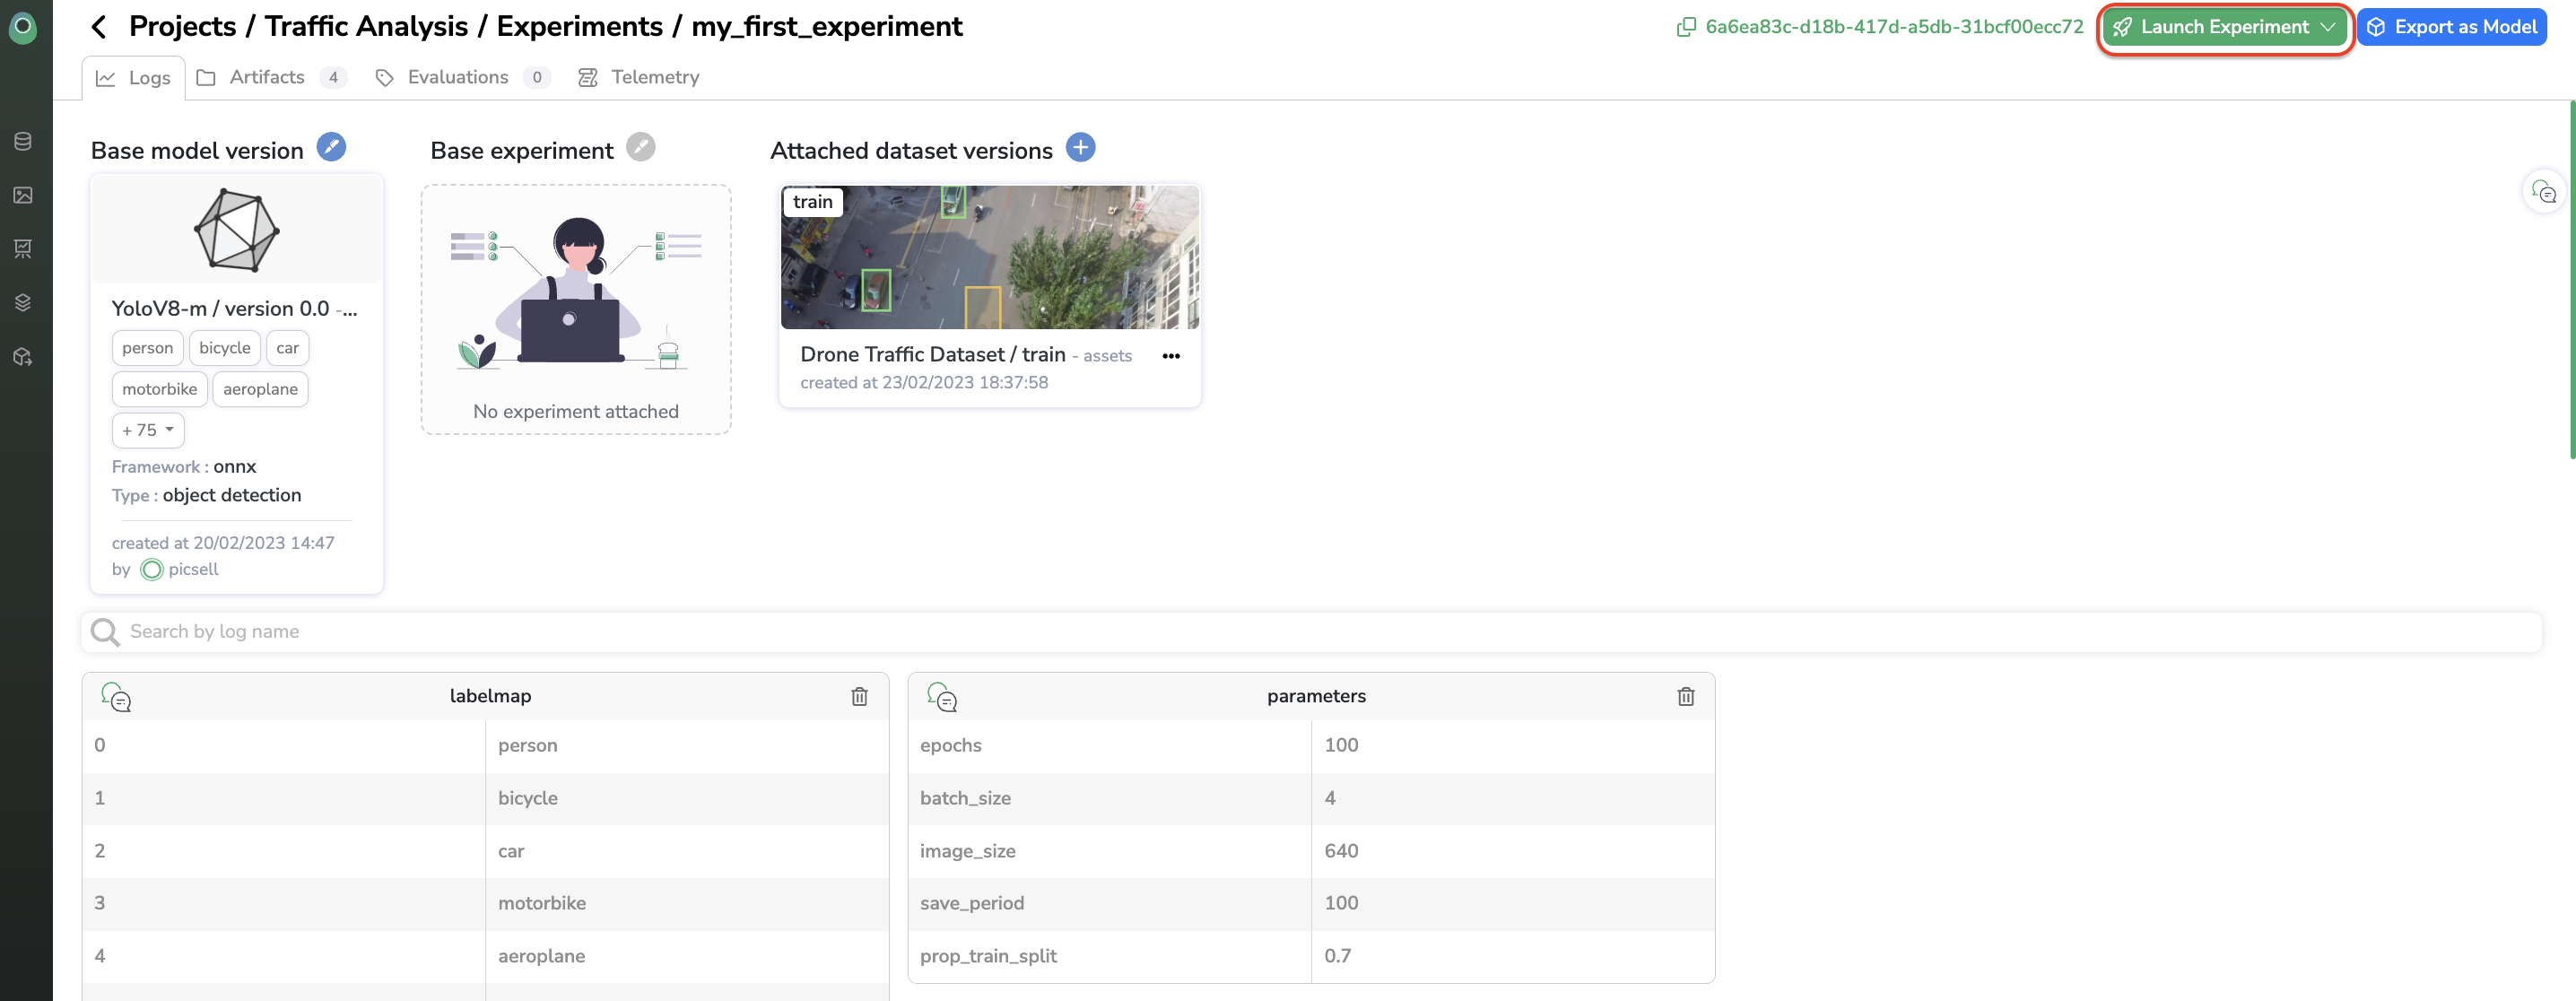
You must know that the label map displayed in theExperimentLogs view is updated with the labels of the relatedDatasetVersiononce the training is launched.
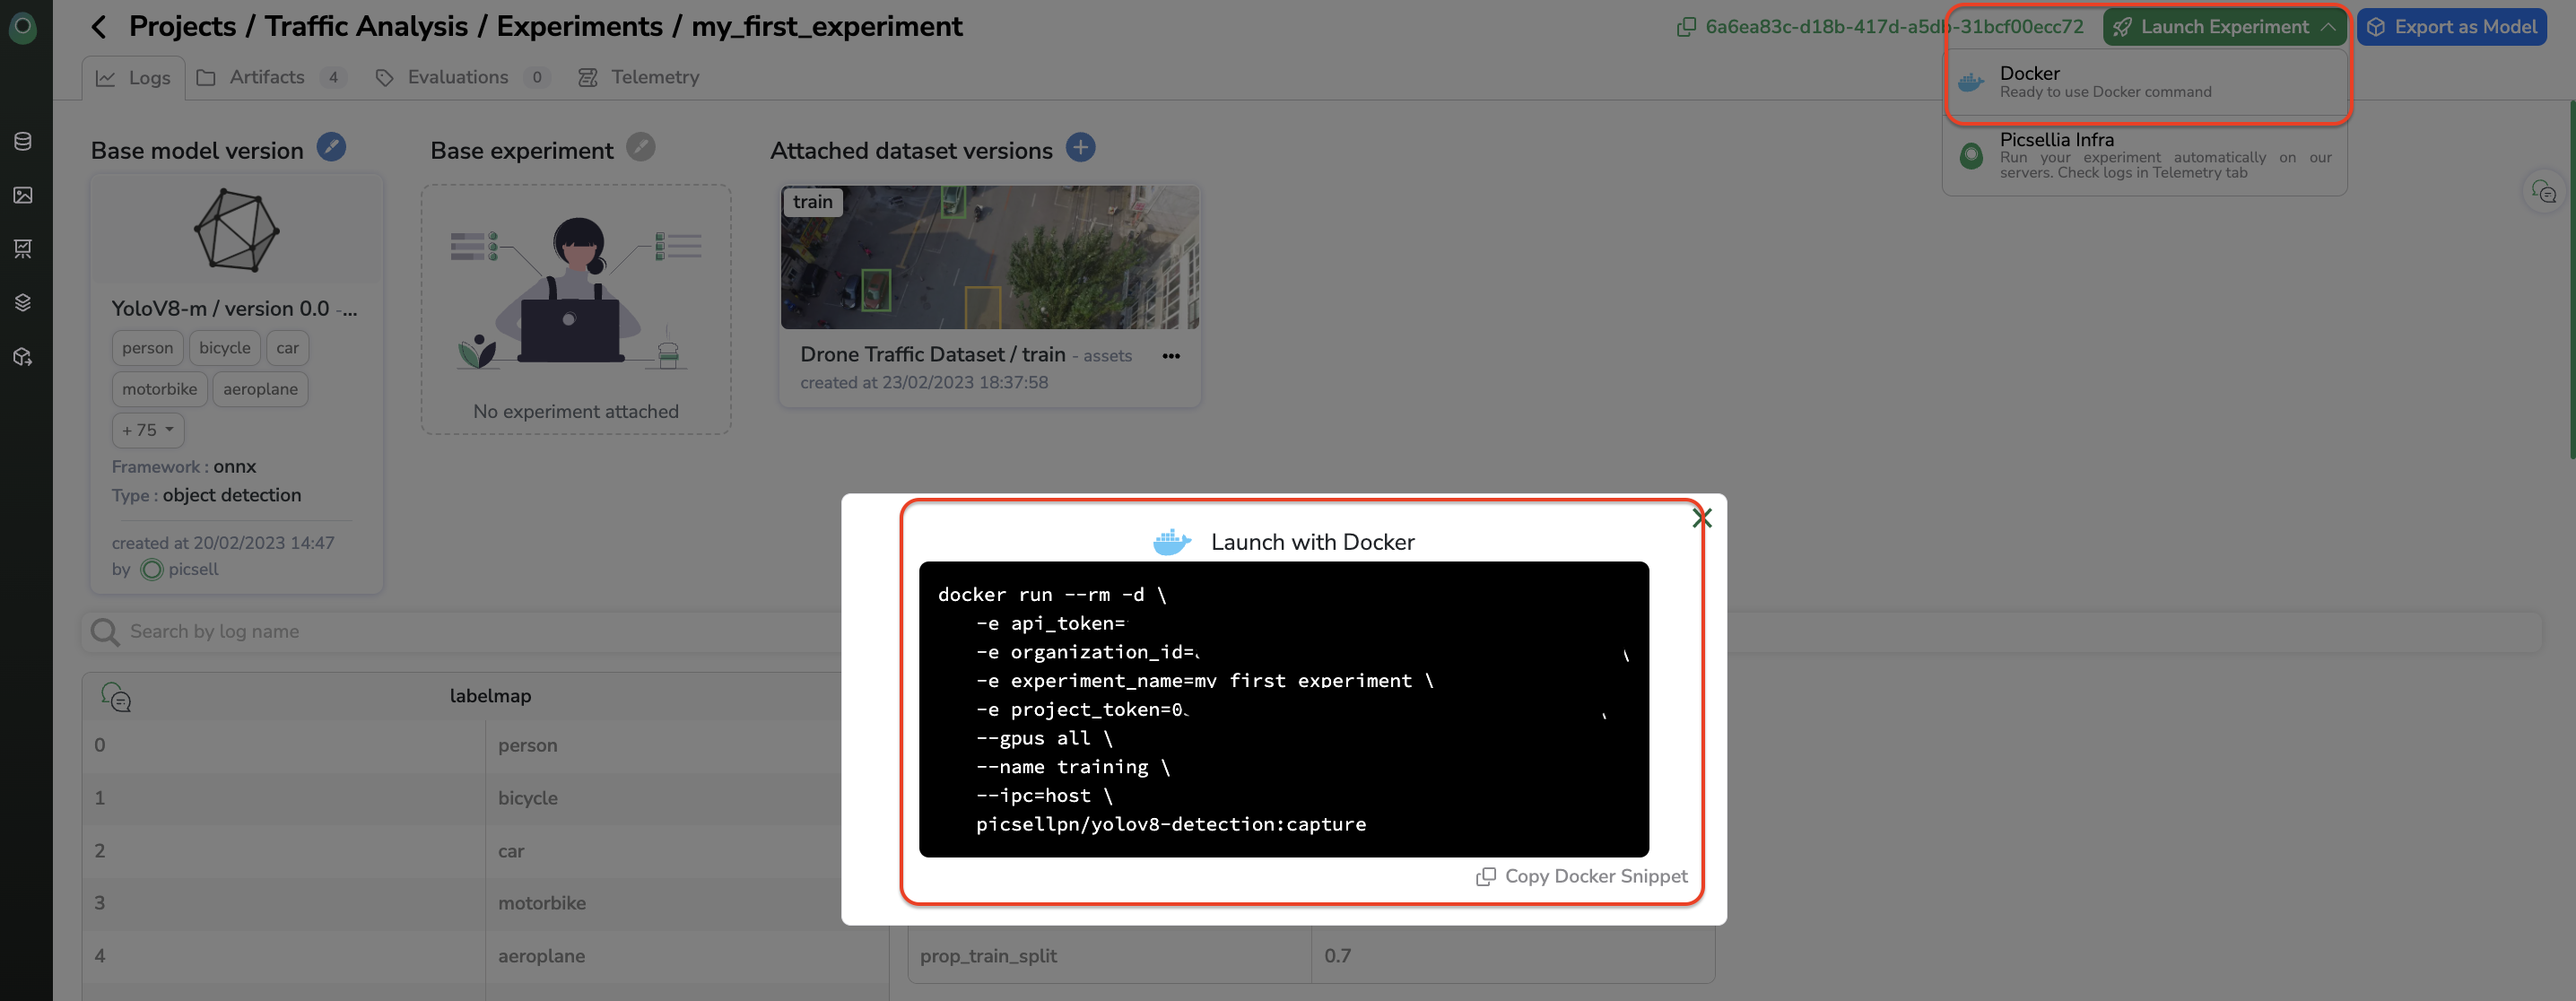
You can launch the training of your Experiment in several ways. You can run it with Google Collab, launch it on your own infrastructure by using the Docker Image generated, or launch it on the OVH infrastructure provided by Picsellia, during the trial period, we strongly recommend using the Google Collab or the OVH infrastructure if it has been agreed during the Trial kick-off meeting. We also recommend avoiding running training with a huge number of steps during the trial period, for instance, 5000 steps or less is largely sufficient.
Launch training anywhereYou can either launch the training of your
Experimenton Picsellia's GPUs or on any computing resource.
When clicking on Launch Experiment, you can choose to launch the training on Picsellia Infra or on your own computing resource by leveraging the Docker Image generated for you.
Training logs for Picsellia infra trainingIf you are using the OVH infrastructure, please be advised that as soon as the training is launched, you can go to the Telemetry tab to see the
Experimentlogs. However, for performance reasons, as long as the training is ongoing you will only be able to see the news logs generated after you landed on the Telemetry view. When the training is over you can go back to Telemetry and see the whole log of your training.
4. Experiment tracking
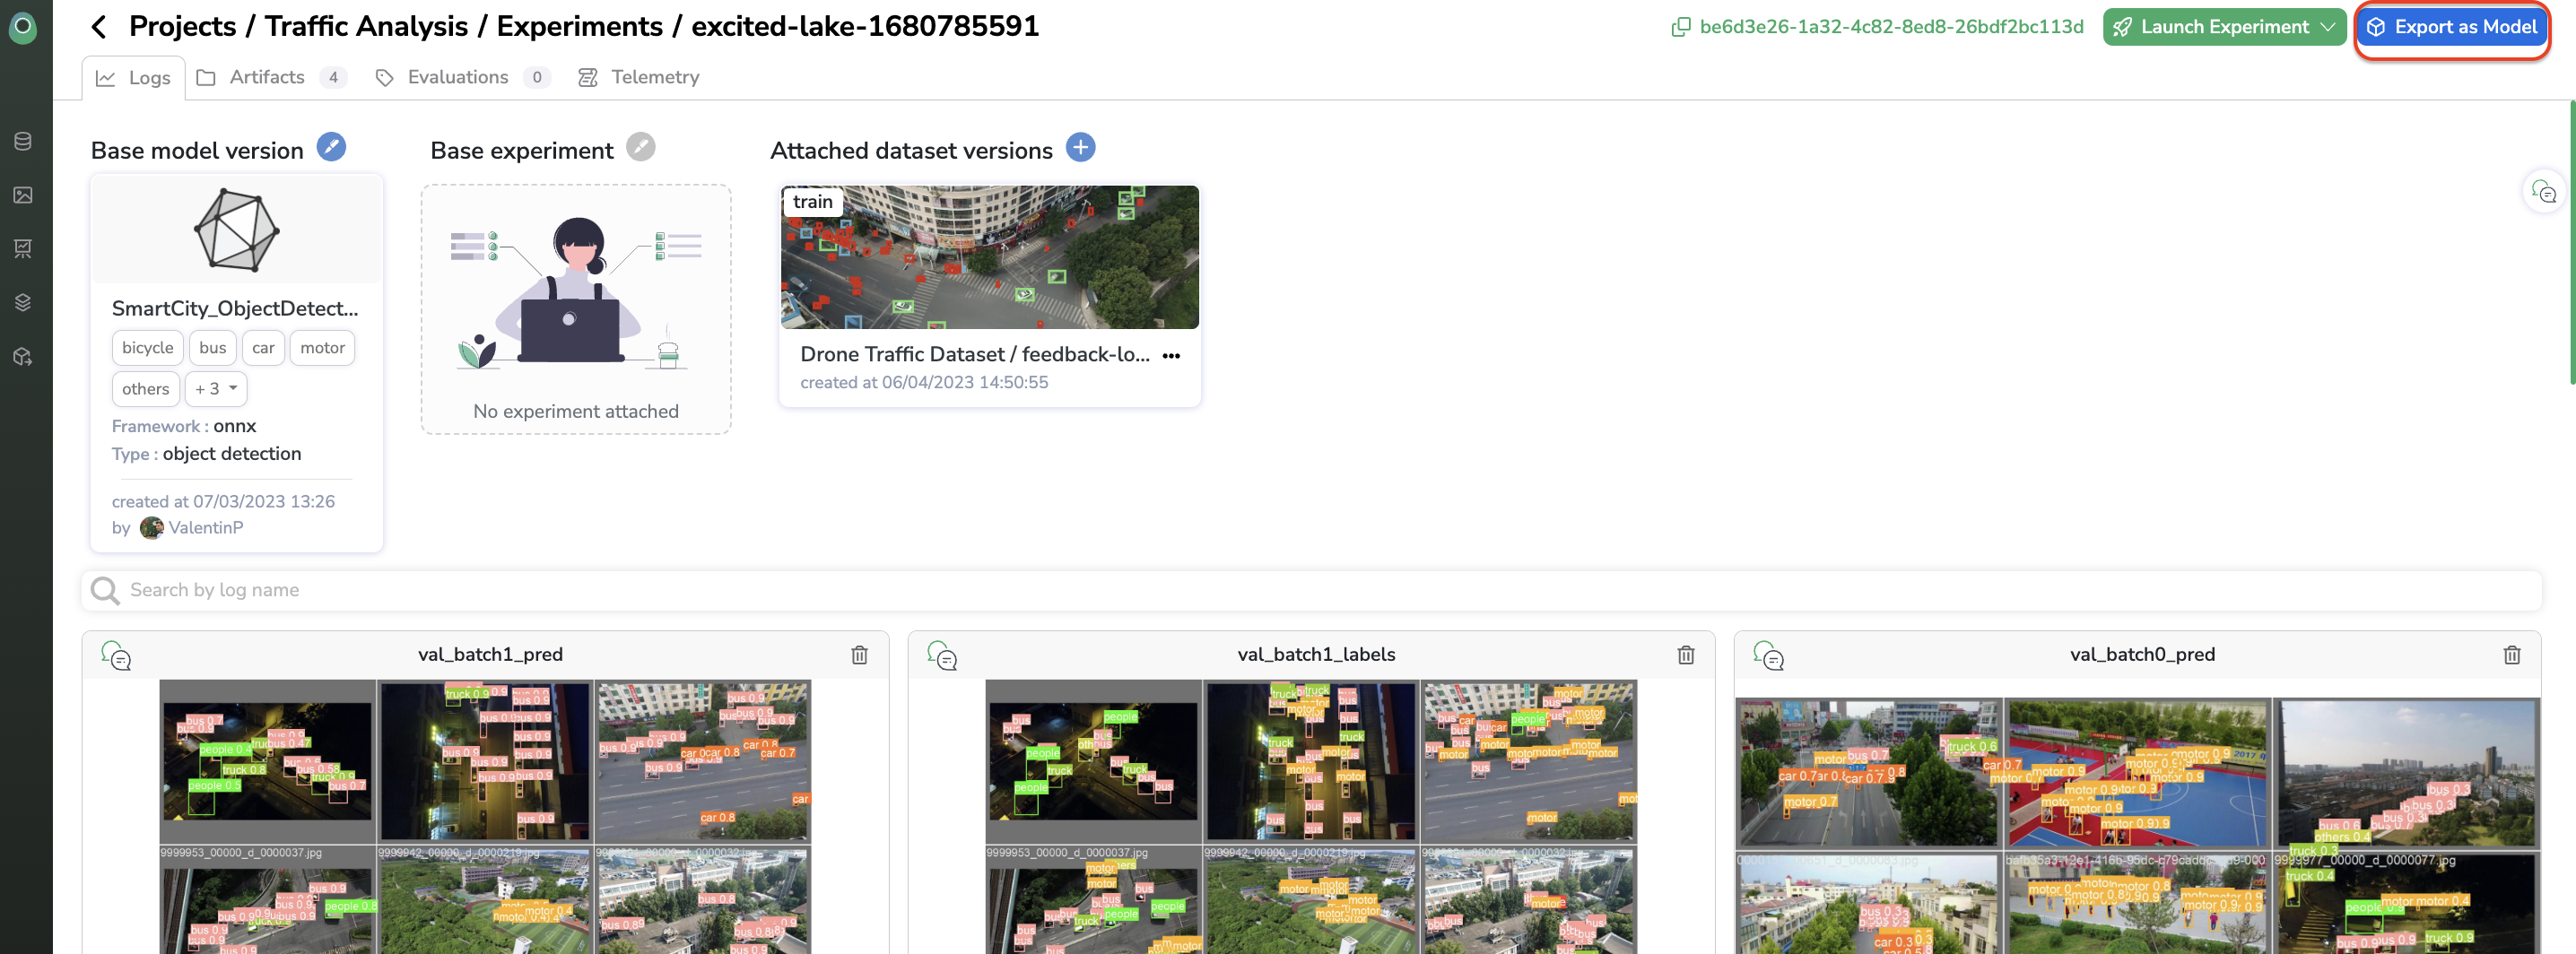
Experiment trackingAt the end of the training, you can go to the Logs tab to see all the Experiment tracking metrics related to the training, it will help you to assert if the Experiment is successful or not.
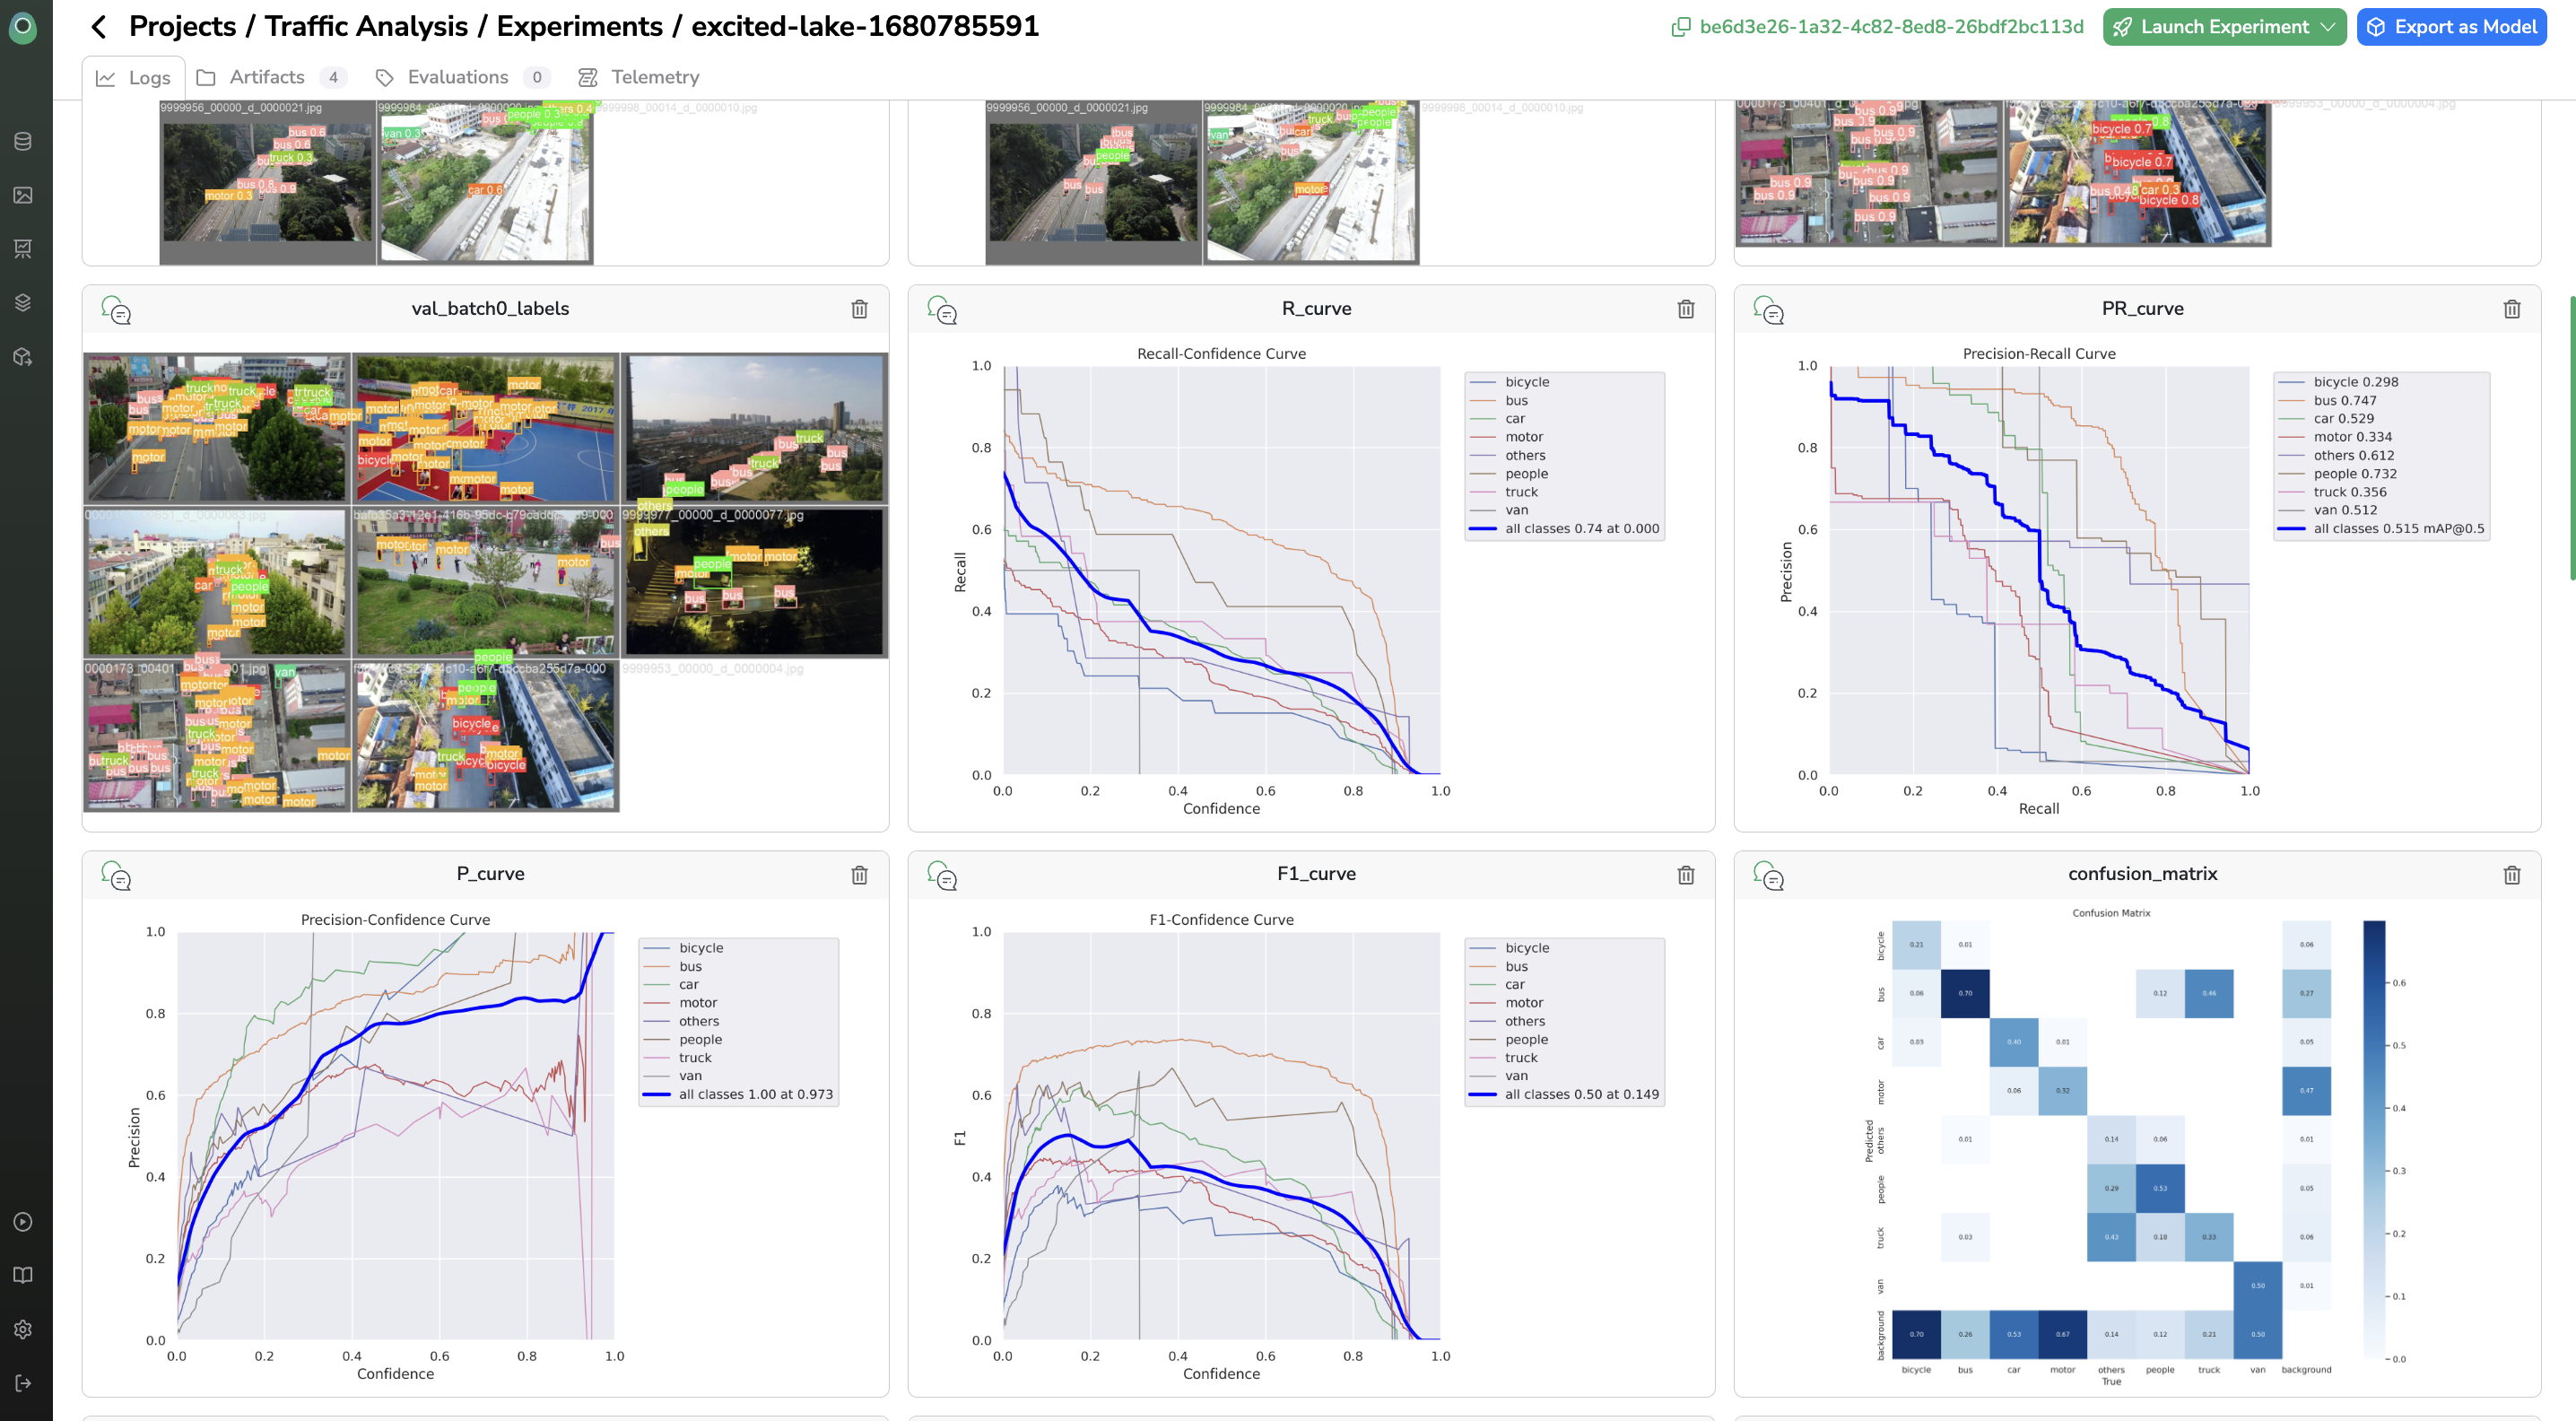
Experiment tracking metrics are customizableEach training script is logging metrics inside the Experiment tracking dashboard, it means that if you push your own
ModelVersionand training script on Picsellia you can choose the metrics to be computed & displayed at the end of the training (graphs, images, matrix, figures...)For Public
ModelVersion, the Picsellia's data-scientist scientists wrote training with some well known and regular metrics. But to power-use the platform, you can import your own scripts and personalize also yourExperiment tracking dashboard. Here is the procedure to do it.
You can launch several Experiment in your Project with different DatasetVersion, architecture, or hyperparameters. From the Experiment list accessible on the Project you can compare Experiment to assess which one is the best one.
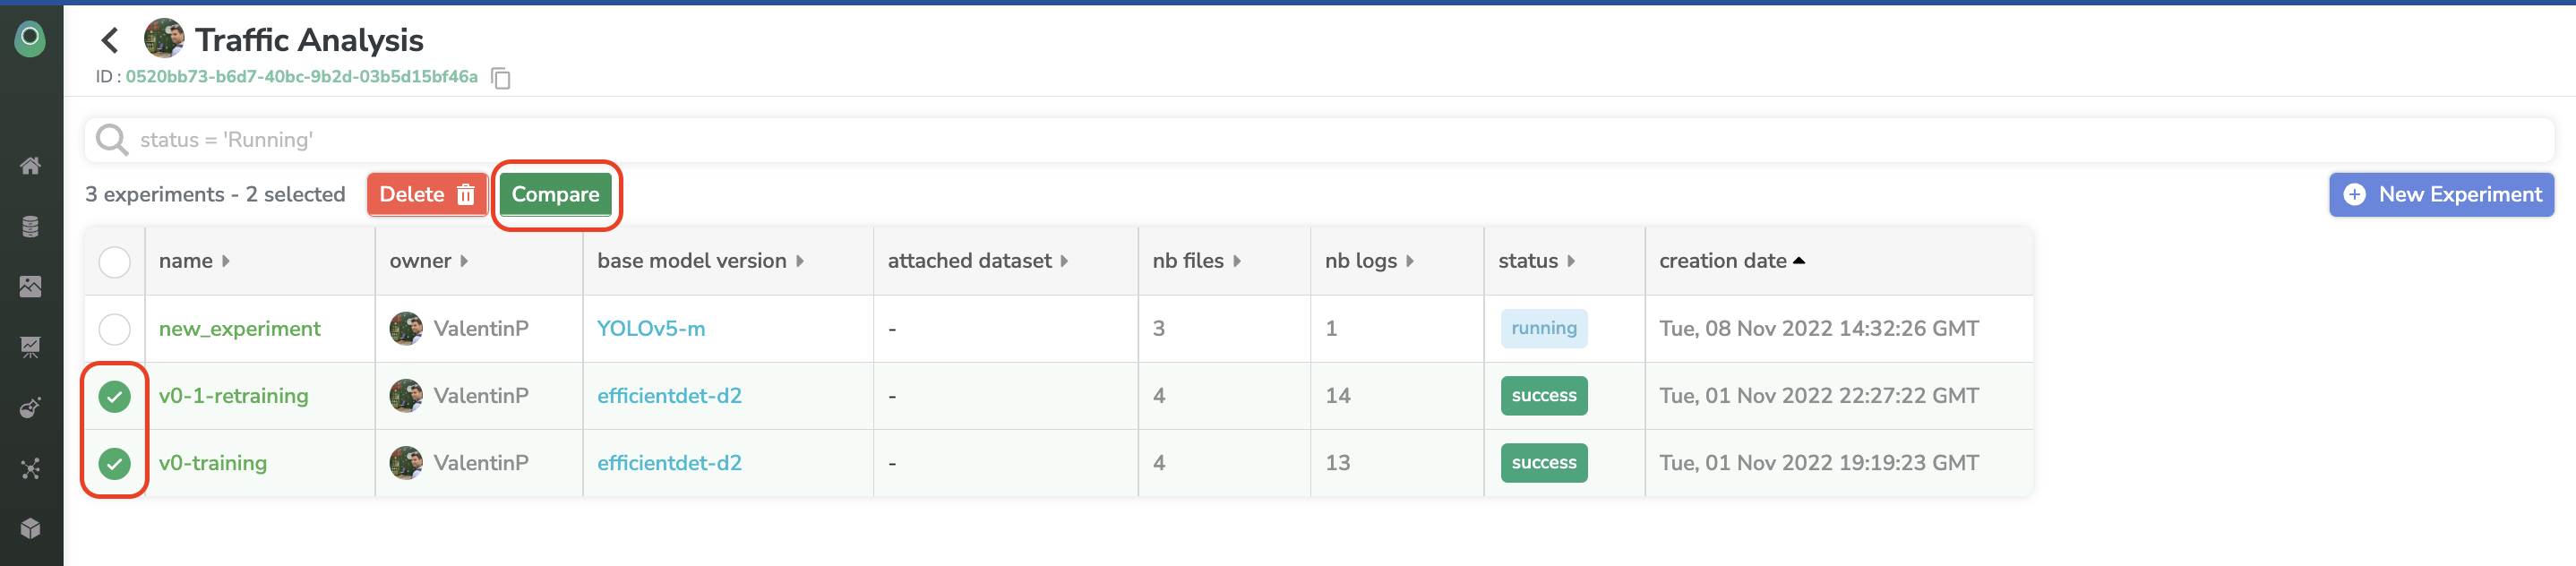
Once you have determined the best Experiment, you can select it and export it as a ModelVersion.
DownloadModelVersionfilesYou can download you
ModelVersionfiles at any moment from the Artifacts tab.
5. Model Registry
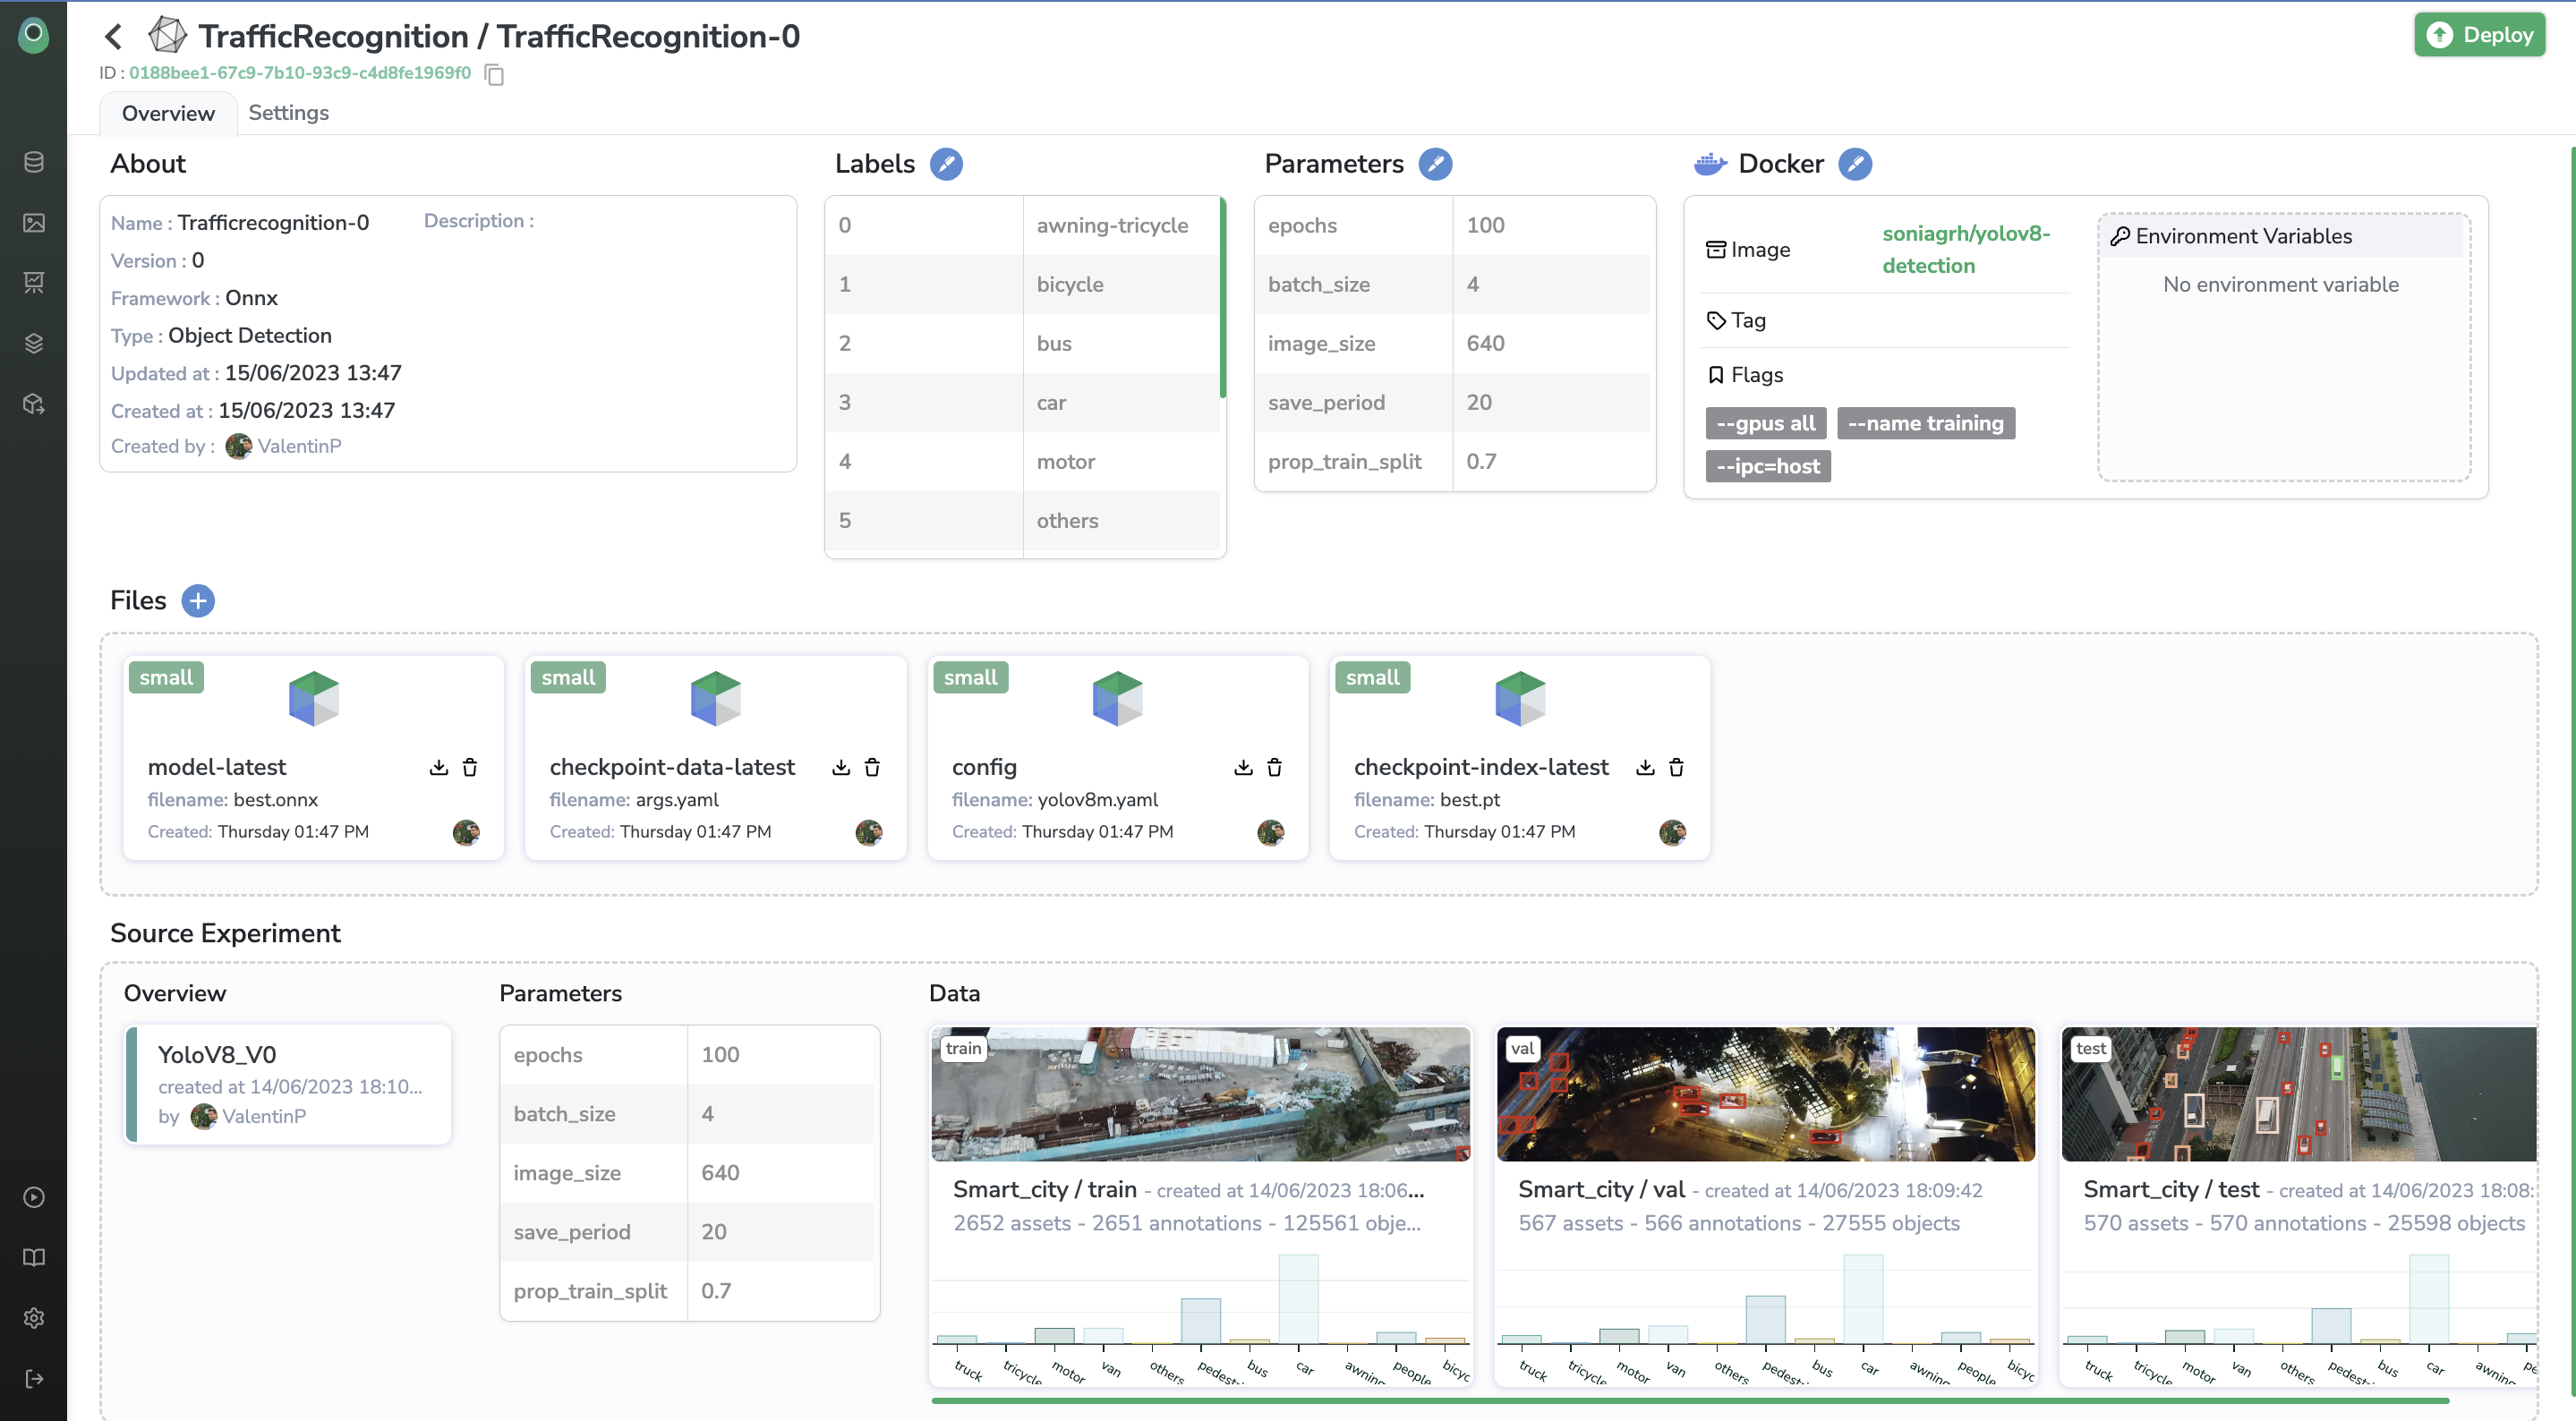
This ModelVersion generated from an Experiment is stored in the Model Registry. The Private Registry is the library of ModelVersion related to you and your Organization whereas the Public Registry gathers all the ModelVersion packaged by the Picsellia team and ready to be used by any Picsellia user.

Any ModelVersion trained through Picsellia can be retrieved in the Private Registry but, you can also push in your Private Registry any ModelVersion that you could have on your side even if developed outside Picsellia, to upload a ModelVersion in your Picsellia Private Registry for further deployment, you can rely on this page.
Model Versioning SystemThe Model Registry allows you to version your
Modelto keep history and trackModelVersionimprovements.
By clicking on any Model you'll display all the versions available. A Model can have several versions, for each version you can display and access all the details of this ModelVersion, including contextual information and ModelVersion parameters. For traceability purposes, you can also access any time the Experiment related to the ModelVersion and the DatasetVersion used for training.
To do it with the SDK:
Updated about 1 year ago