Datalake - Import Data from your Cloud-based Object Storage
1. Accessing the Datalake integrated with your bucket
Datalake integrated with your bucketTo access the proper Datalake, first, ensure that you're within the right Organization. Each Organization can have one or several independent Datalake.
After accessing the proper Organization, you can see the list of available Datalake through the Navigation Bar as illustrated below:
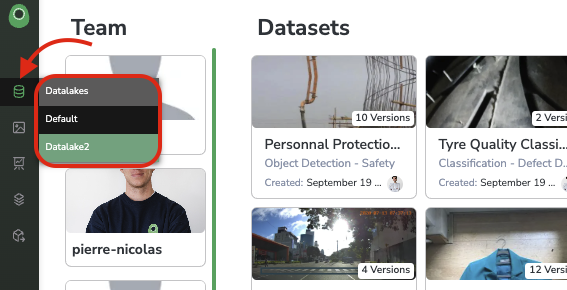
List of Datalake
You're now visualizing the Datalake list available for your Organization.
In our case, you want to visualize and explore the images that are stored on your own Cloud Storage, tho you can click on the Datalake that has been previously connected to your bucket.
If the integration between your bucket and a Picsellia Datalake inside your Organization has not been done yet, you can do it following this tutorial.
2. Importing your Data
DataEvery machine learning project begins with data, and in our case of Computer Vision, it starts with images.
There are two ways to create Data into a Picsellia Datalake:
- Upload
Datafrom a local drive. In this case, the uploadedDatawill be physically stored by Picsellia on the bucket linked to theDatalakethrough a Storage Connector. - Import
Dataalready stored on a bucket hosted by a Cloud provider. In this case, you will be able to visualize and exploreDataalready physically stored through your PicselliaDatalake.
This page focuses on the second approach: the visualization and manipulation of Data stored on your Cloud-based Object Storage.
In our case, the Data is already physically stored on a cloud-based bucket. Moreover, the current Datalake is already connected to this bucket. So, the only remaining action to be done is to select from Picsellia the images stored on your bucket that have to be visualized as Data in your integrated Datalake.
To proceed, click on the Import bucket objects button.

Import bucket objects
A modal will appear. From here, a modal will open displaying the file structure of the connected bucket and allowing you to choose the images you wish to import into your Picsellia Datalake.
You can then select the files or folder to import from your bucket to your Datalake as shown below:
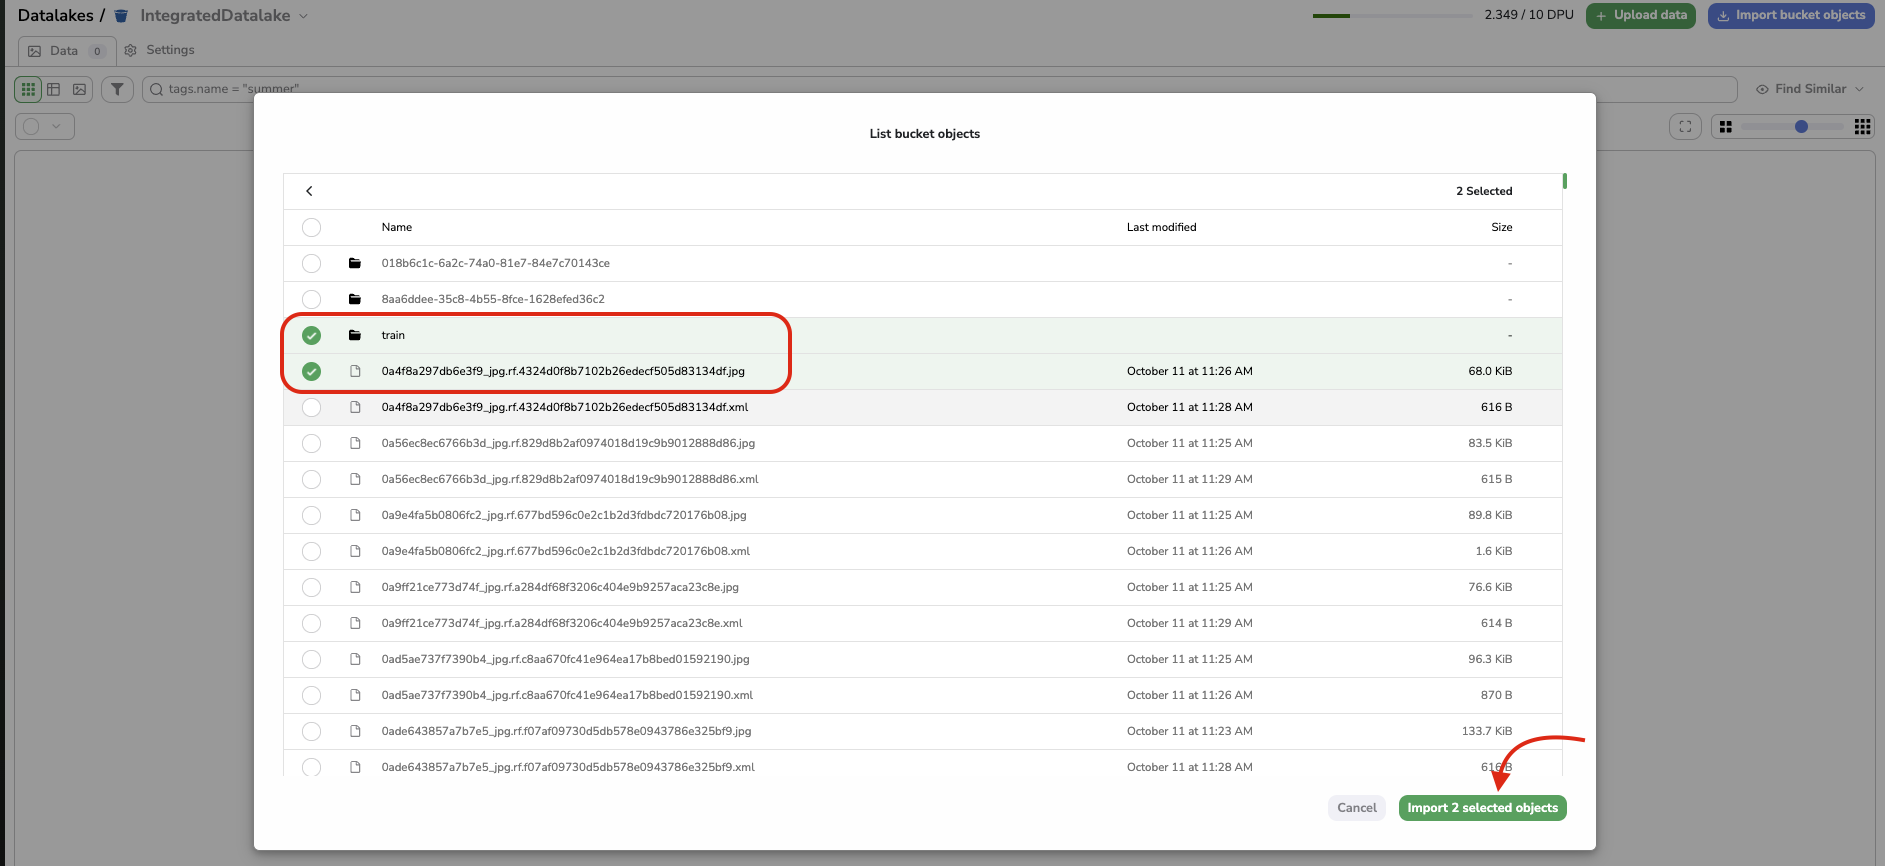
Import of images from an integrated bucket
Once the import is launched, you can track its completion from the Jobs panel.

Import bucket object Job
Depending on the amount of Data being imported, you may need to be patient,.
Supported Image FormatsCurrently, we support the primary image formats:
- .png
- .jpg
- .jpeg
If you require support for additional formats, please don't hesitate to contact Picsellia team.
Once the import is complete, you can see the total number of Data in your Datalake and sort it based on various criteria (updated date, filename, or random), as depicted below:

Visualize and sort imported Data
What about Annotations?It's important to note that labeling occurs at the
DatasetVersionlevel, not at theDatalakelevel.
As soon as all the images from your bucket have been imported as Data on your Datalake, you can start structuring them by using Tag or Metadata.
Updated about 1 year ago