4. Create your own Processing (Part 1)
Now it's time to create your own Processing ! To show you the process, we are going to start from scratch and create a Processing that performs simple data-augmentation and put the augmented data in a new Dataset.
Let's go to our Processings page and create a new one.
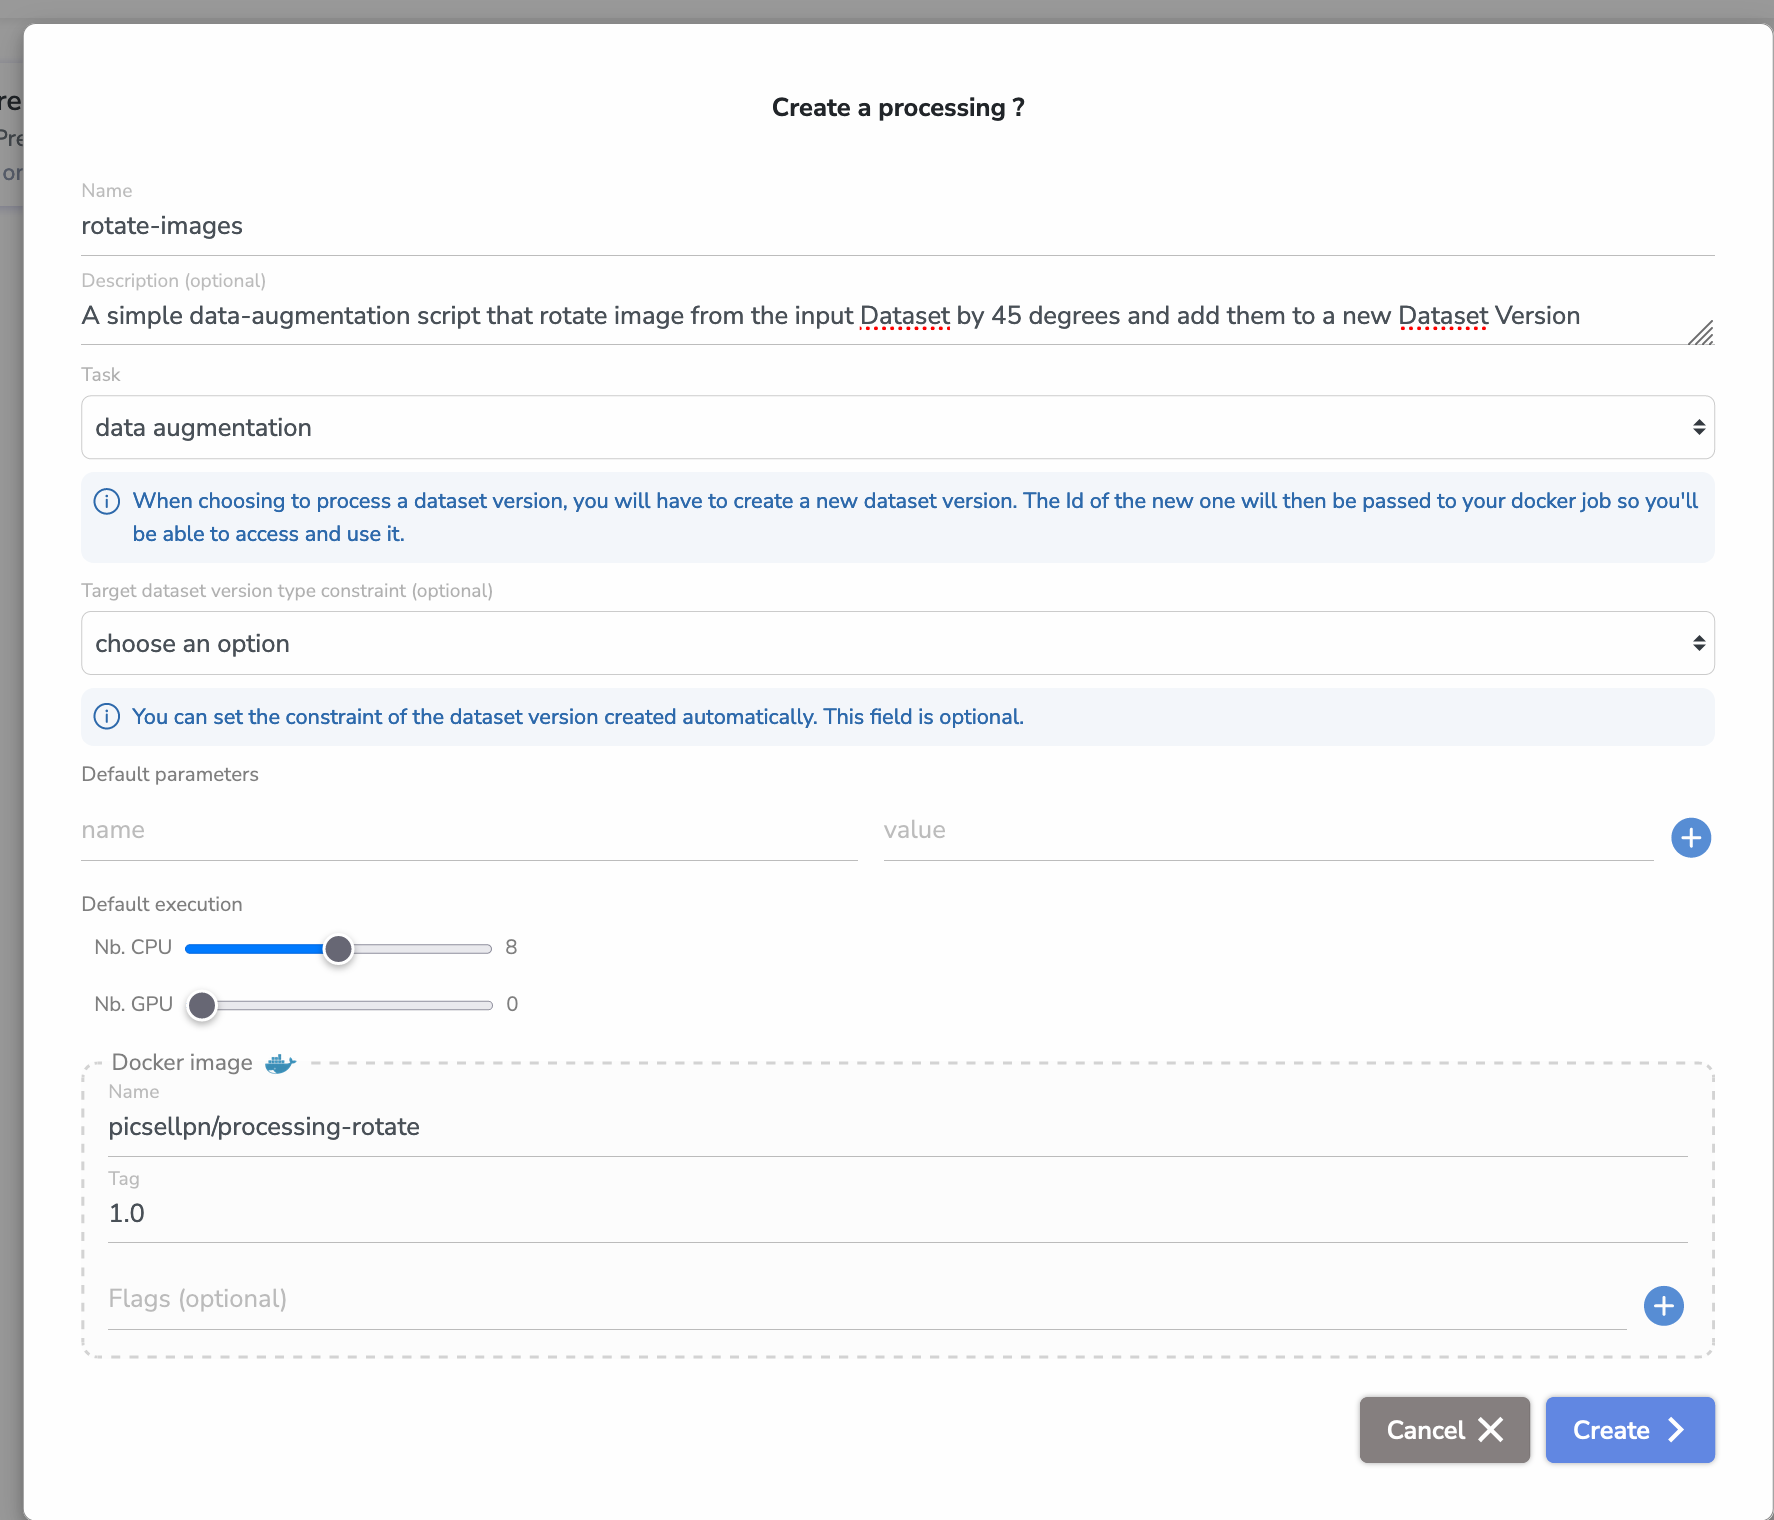
Let's describe the different fields:
- As our Processing is going to simply rotate images, we give it a simple yet clear name
rotate-image - We give it a little description explaining the action performed by our script
- We set the task to
data augmentationas our script enters in this category - As our processing is of type
data augmentation, it will automatically create a new Dataset Version to host the augmented image. When you will launch it, you will be prompted to enter a name for this new version. - We could set a
Dataset Version Type Constraint, which means that the type of the Dataset Version created automatically will already be set to the chosen type. Here we choose to leave it not configured. - We don't have any parameters for our script so we leave the
default parametersempty. - As this script will not require much processing power, you can leave the
default executionrequirements to 8 CPUs and 0 GPUs. (Change this value based on the needs of your code) - And finally, as the Processing will be packaged in a Docker image (see the next part of the tutorial), we have to enter its future details.
- As I'm pushing in the public Docker Hub, my Image name is my Docker username followed by the chosen name for our processing. Here
processing-rotate - I will set the Image tag to
1.0, you could have many tags for the same image, just enter the correct one. - We could add some flags to the Docker Run command but here we don't need anything so we leave this empty.
- As I'm pushing in the public Docker Hub, my Image name is my Docker username followed by the chosen name for our processing. Here
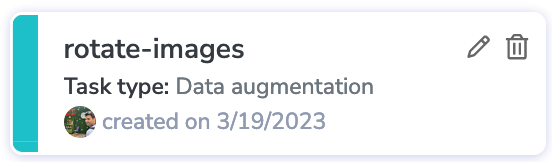
And that's it! Now you can just click Create and see our brand new Processing is available on Picsellia 🎉
Now, move on to the next part of the tutorial to see how to Build and Package your own Processing and push it to a Docker Registry.
Updated 11 months ago
Continue Reading