Registry - Create a ModelVersion manually
There are two ways to create a new ModelVersion on Picsellia:
- Automatically by exporting an
Experimentas explained here - Manually in the Private Model Registry
This page will focus on the manual creation of a ModelVersion directly from the Private Model Registry of your Organization.
1. Access a Model
ModelFirst of all, you need to access the Model under which you want to create a ModelVersion.
From your Private Model Registry, you simply need to click on this Model.
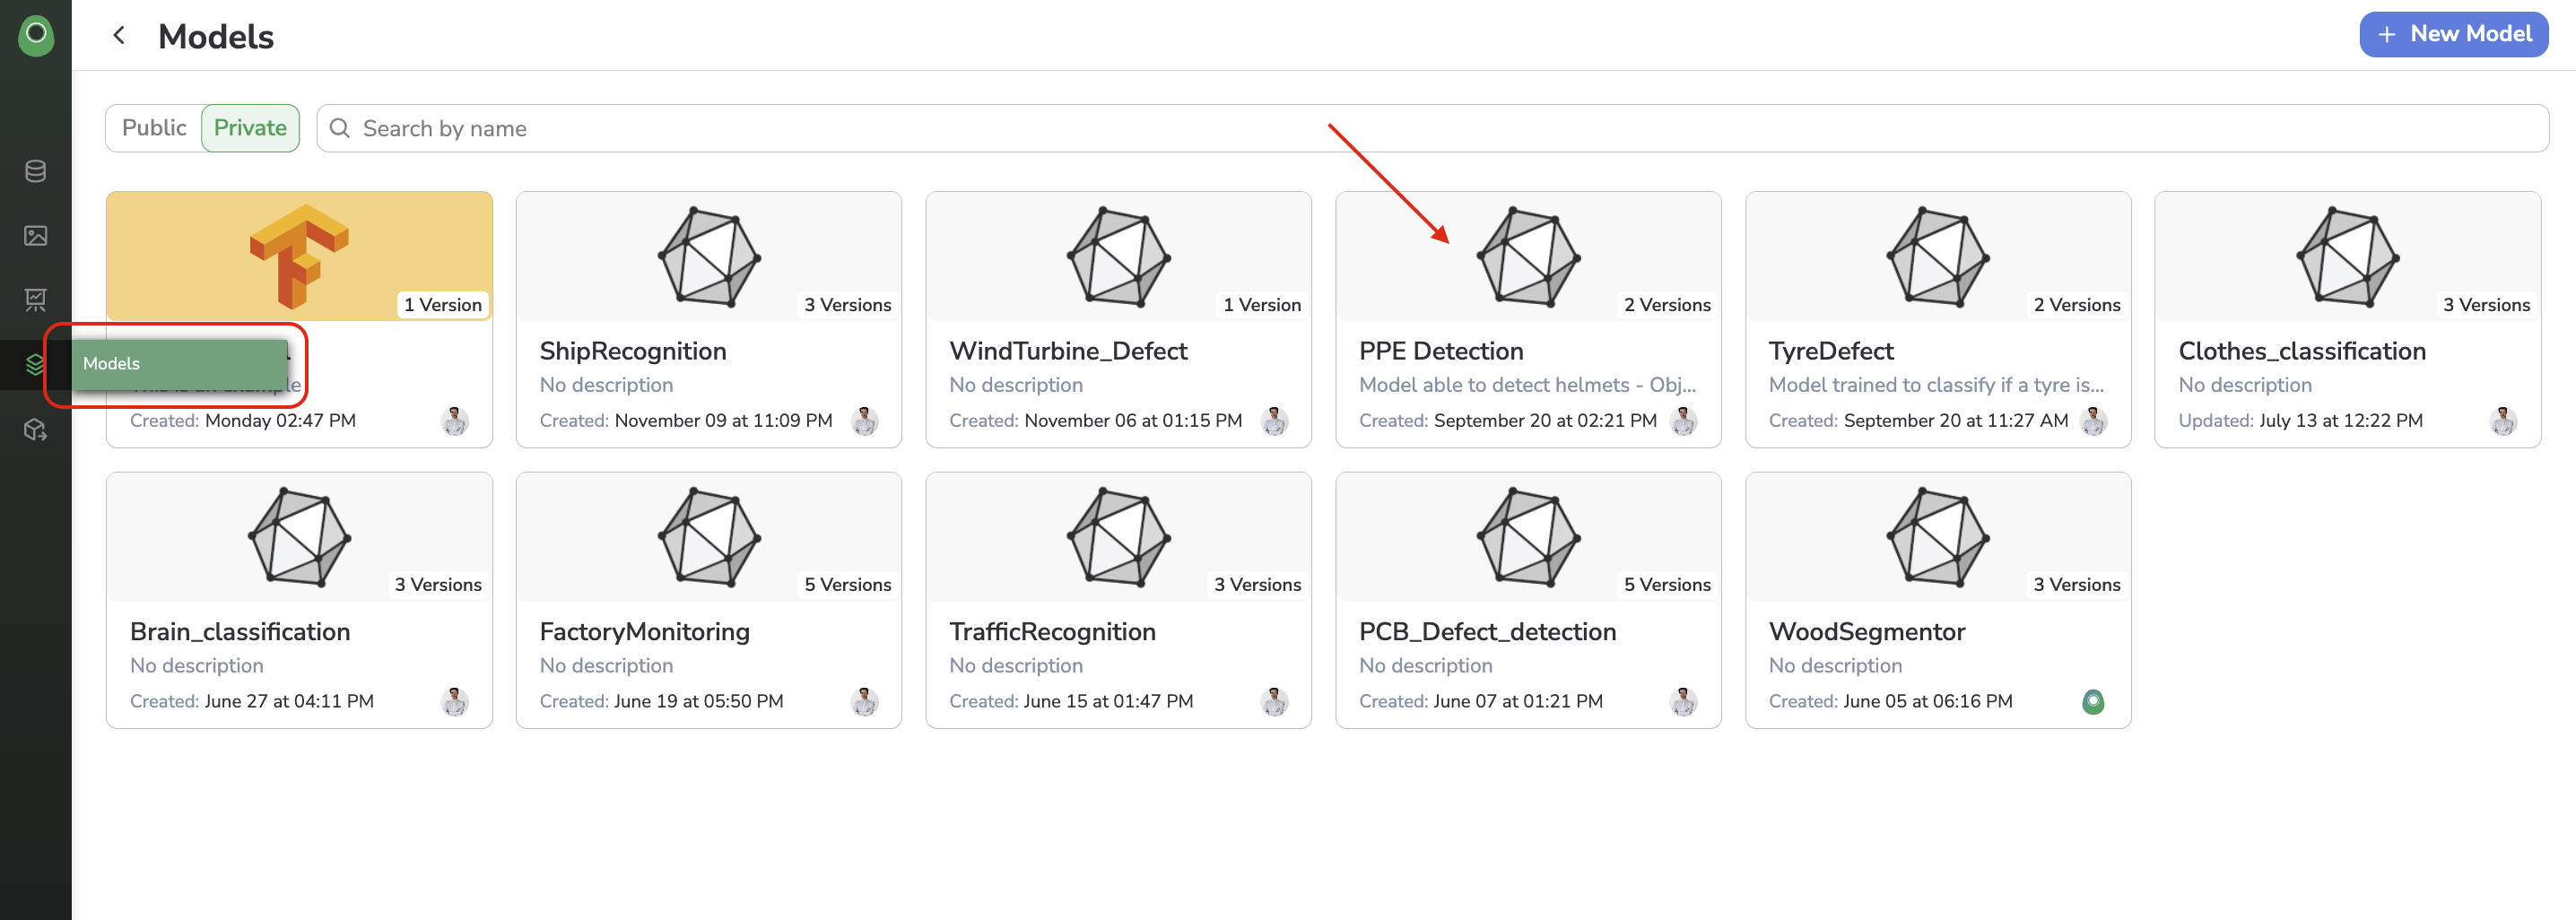
Private Model Registry
The list of existing ModelVersion will then be displayed. From this ModelVersion list, the creation of a new ModelVersion can be initialized by clicking on + New Version.
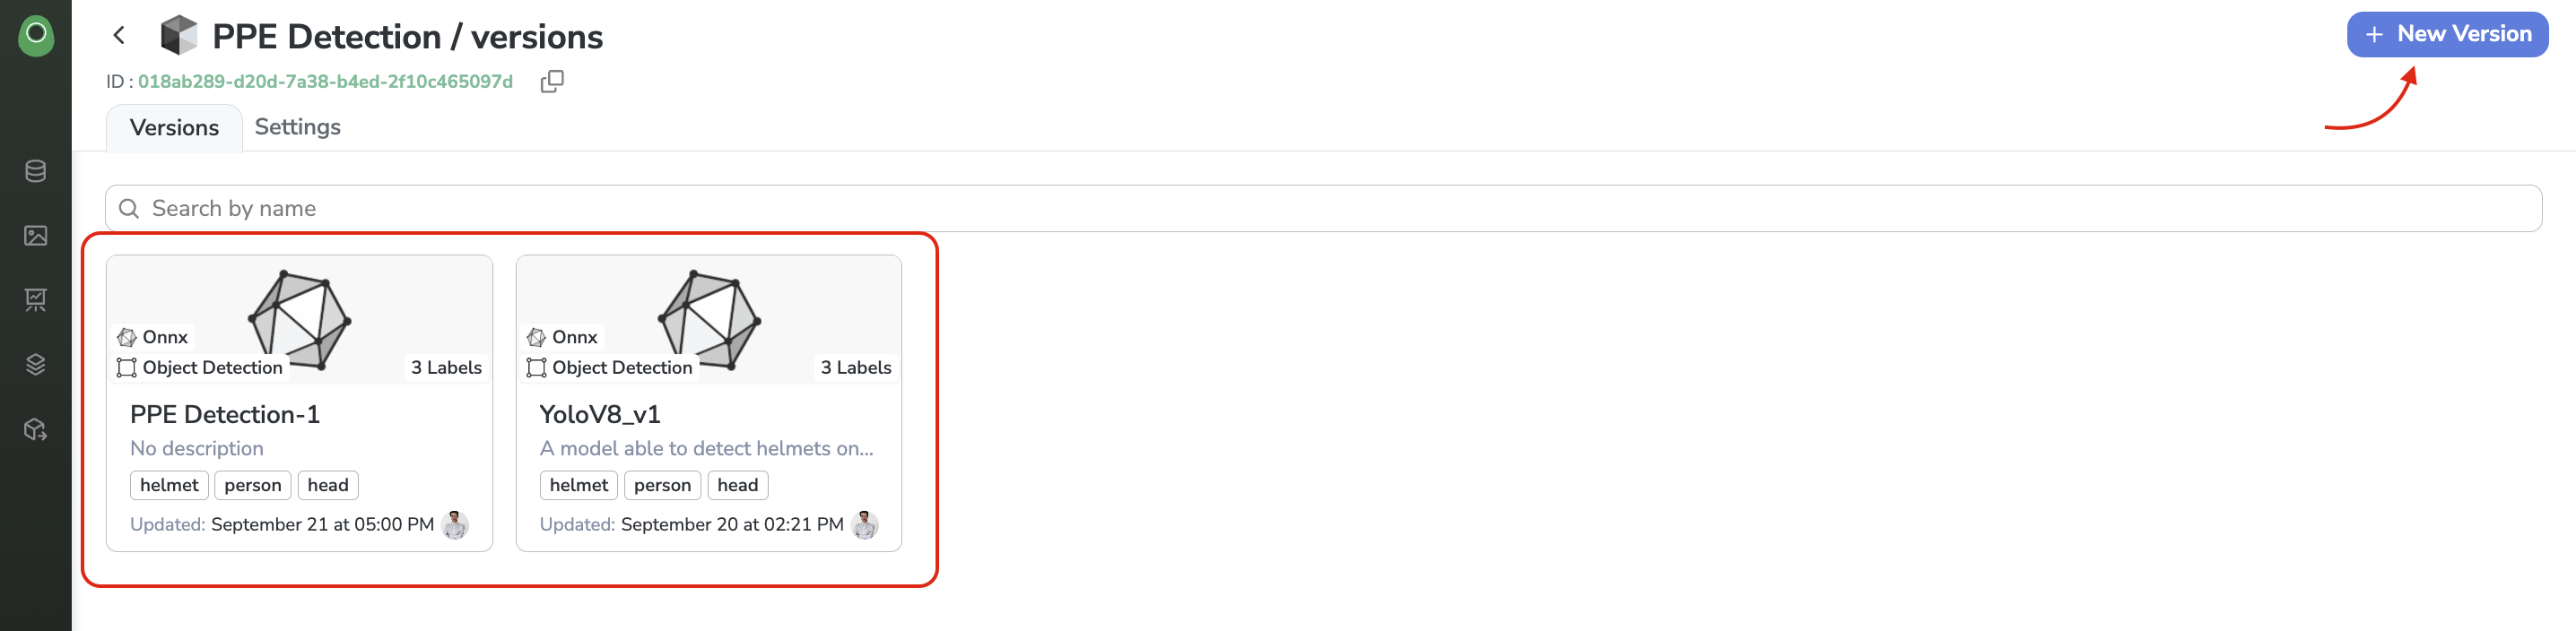
ModelVersion list
2. ModelVersion creation form
The ModelVersion creation form will then open. This form allows you to define the main characteristics of your ModelVersion.
You will be requested to fill in the following fields:
- Name
- Description (optional)
- Picture (optional)
- Detection Type
- Framework (optional)
LabelMap(optional)- Parameters (optional)
- Docker information: Image, Tag, Flads, and Environment variables (optional)
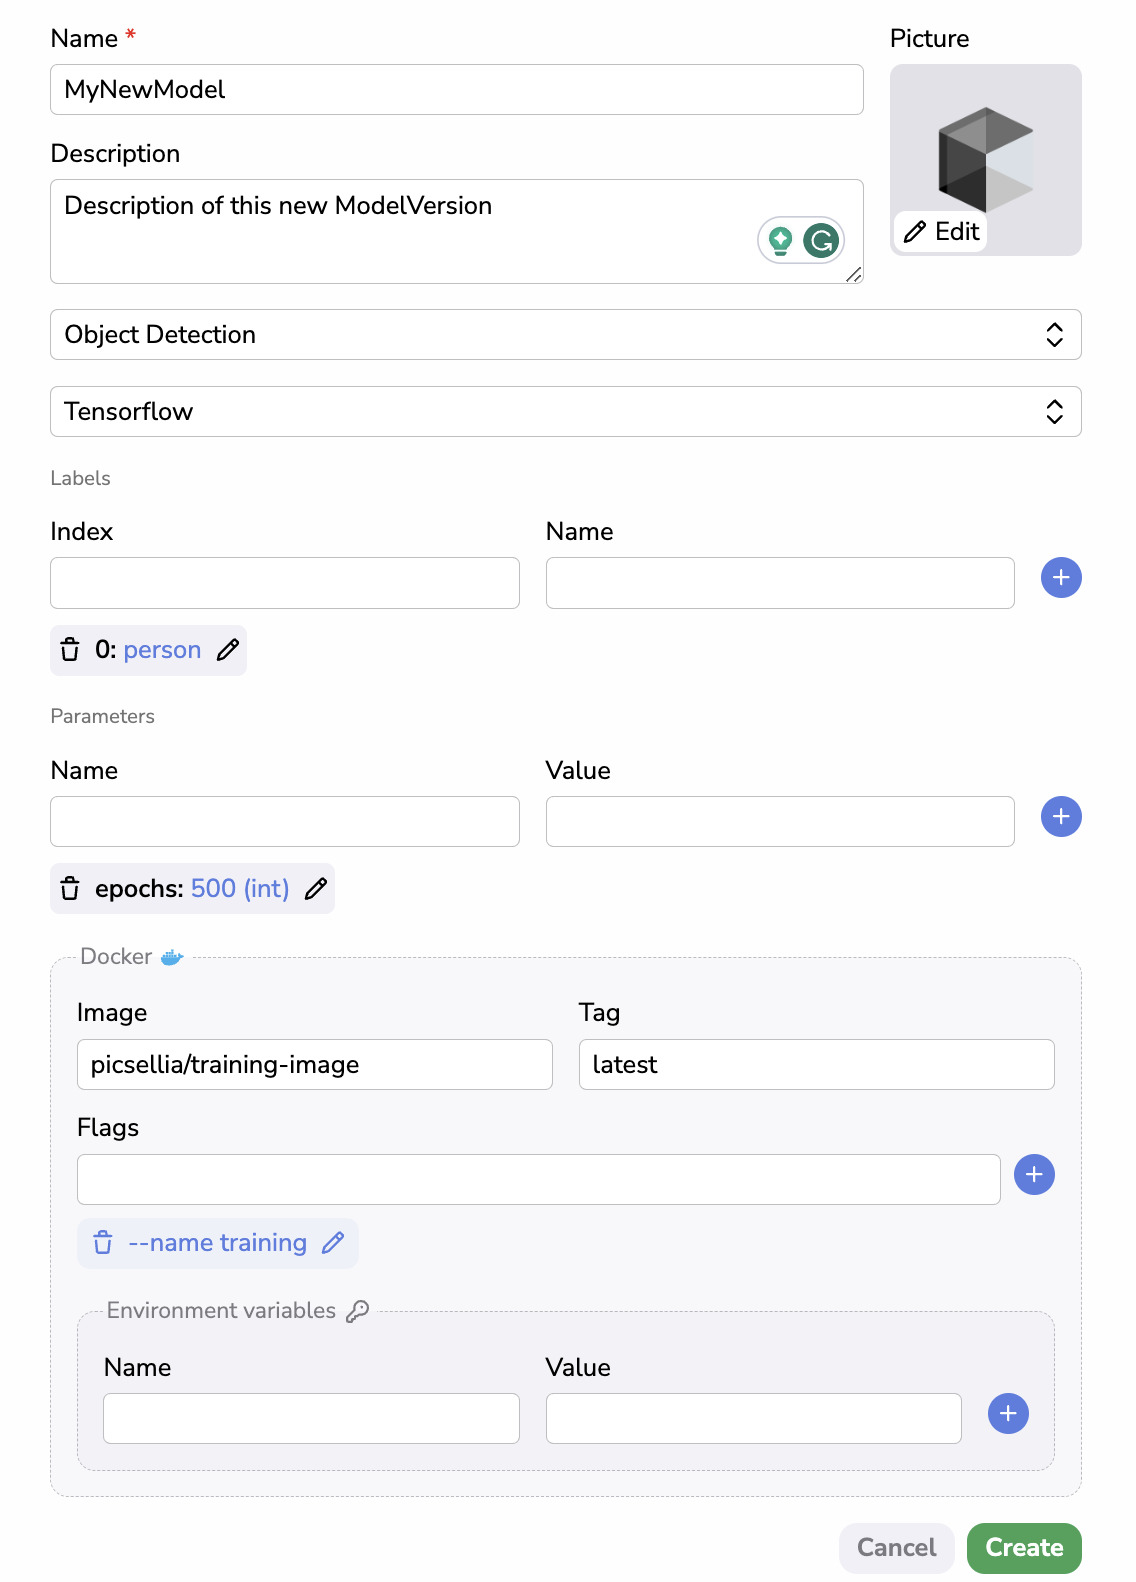
The blue + buttonPlease note that while filling out this form, when adding a new
Label, Parameter, Flag or Environment variable, you need to click on the blue + button after having typed the value in the related text holder, to ensure this new value is well taken into account
Once the form is filled, you just need to click on Create and you will land on the ModelVersion overview of the freshly created ModelVersion.
No Source ExperimentAs the
ModelVersionhas been created manually from scratch in your Private Model Registry, the Source Experiment section will remain empty. Indeed, this placeholder aims at visualising theExperimentthe currentModelVersionhas been exported from, but in our case theModelVersionhas not been exported from a PicselliaExperiment.
More details about the elements that composed a ModelVersion are detailed in this page.
3. Add Model files
Attaching Model files such as weight, configuration file, or checkpoint file to your ModelVersion can be done once the ModelVersion has been initialized as explained just before.
To do so, you just need to click on the + button located in the Files section.
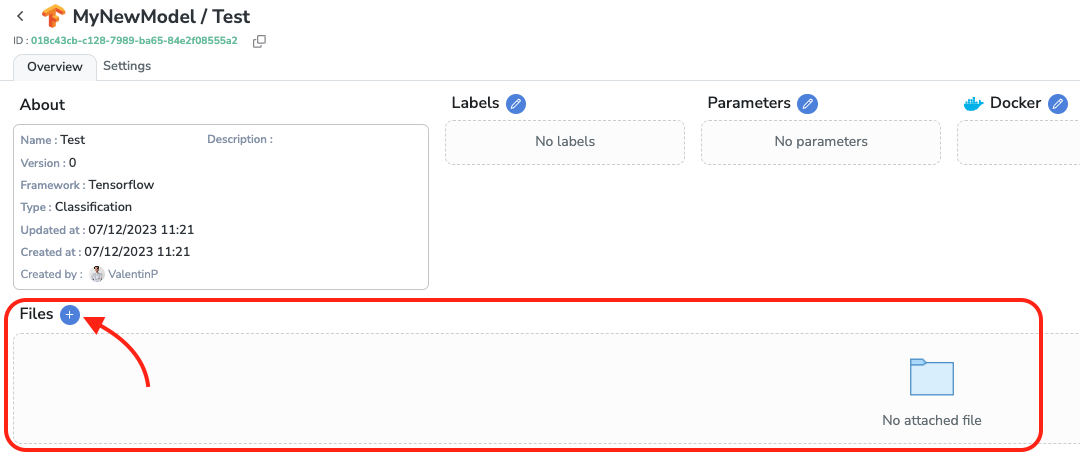
Add a Model File
A modal will then open allowing you to select the Model file and give it a Name.
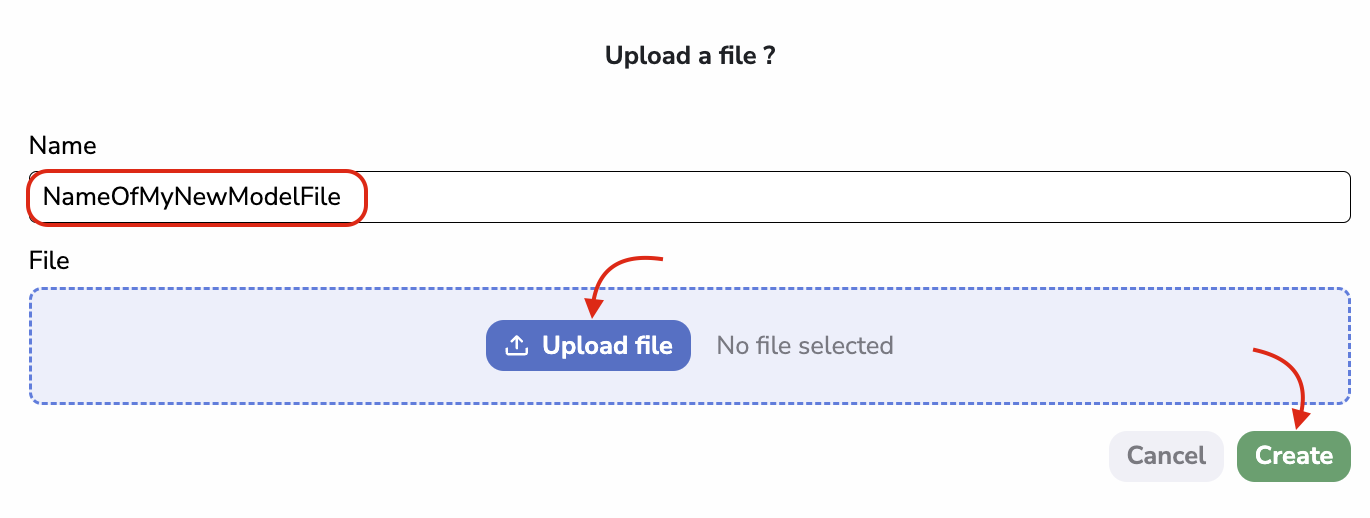
Model File upload
Once uploaded, the Model file will be related to the ModelVersion and physically stored through the Storage Connector defined as default for the current Organization.
Further details on Model Files are available here.
4. Modify a ModelVersion
ModelVersionOnce created you can still modify some elements of a ModelVersion.
- The Name and the Description can be modified in the Settings tab.
- The
LabelMap, Parameters, Docker Image and Model files can be modified directly from the ModelVersion overview using the blue + button next to each section. - The Framework and Detection Type can be modified using the SDK
Other elements can not be modified as they are automatically generated by Picsellia, so modifying them could endanger the consistency of theModelVersion.
However more globally, if the ModelVersion is already used in a Deployment or somewhere else, modifying it could put at risk the consistency of your workspace or create issues later in your project. This is why you should be really careful when performing such modifications.
A good practice that would avoid such risks would be to create a newModelVersion that will carry those modifications. This way, you keep track of your work and you avoid endangering the consistency of your workspace.
Updated about 1 year ago