Datalake - Tagging system
Organizing your Data with Picsellia's DataTag.
In your Organization's Datalake, where all your Data is stored, things can become disorganized after weeks of work – often referred to as "data chaos."
The primary goal of the tools within the Datalake is to assist you in structuring and organizing your Data as needed.
1. Introducing DataTag by Picsellia
DataTag by PicselliaThink of a tag as a marker that you can name and connect with different elements in Picsellia. Its primary purpose is to make organizing and locating these elements easier. Since almost everything in Picsellia can have a tag – whether it's a Datalake, a Dataset, and more – the ones linked to the Datalake are called DataTag.
For this page, we're only focusing on the DataTag.
Remember, each piece of Data can have multiple DataTag.
This additional layer of Organization empowers you to create a unique hierarchy for your Data within the Datalake. Even though all your Data is stored in one place, you can still find and navigate through them based on specificDataTag.
ADataTagis not a label or an annotationIt's only a tool to help you Organizing your
Datain Picsellia.
Of course, you can use DataTag in any way that suits your needs, allowing you to build your Datalake structure according to your preferences.
For instance, you might use DataTag to differentiate Data based on their use, source, or purpose (like training or testing).
DataTagare powerfulYou can use the 🛟 Datalake - Query Language to retrieve or filter your
DatausingDataTag.
2. Creating, Editing, and Deleting DataTag
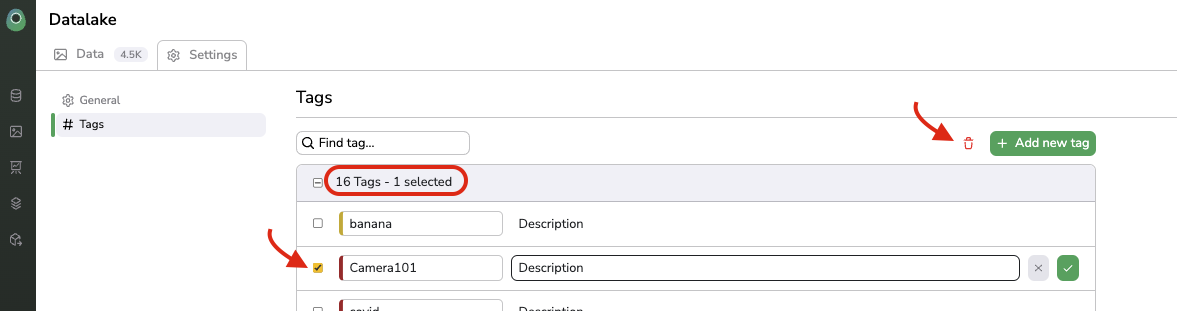
DataTagFor creating, modifying, or removing a DataTag, you can access the Settings page of your Datalake and go to the Tags tab.
To create a new DataTag, simply click on Add new tag. This adds a new entry to the DataTag list, where you can provide a name and description for the new DataTag.
The DataTag is established when you click the + icon.

Creating a DataTag from Settings
You can also change the name and description of an existing DataTag, or delete it using the trash icon after selecting it.
Deleting a DataTagfrom Settings
3. Attach DataTag to your Data
DataTag to your DataOnce created, there are two ways to attach DataTag to your Data within the Datalake:
- Attaching
DataTagwhen ⬆️ Importing Data from Your Local Drive. - Attaching
DataTagto existingDatain yourDatalake.
DataTagBest PracticeIt's highly recommended to always attach
DataTagwhen adding newDatato yourDatalake.
A. During Data Import into the Datalake
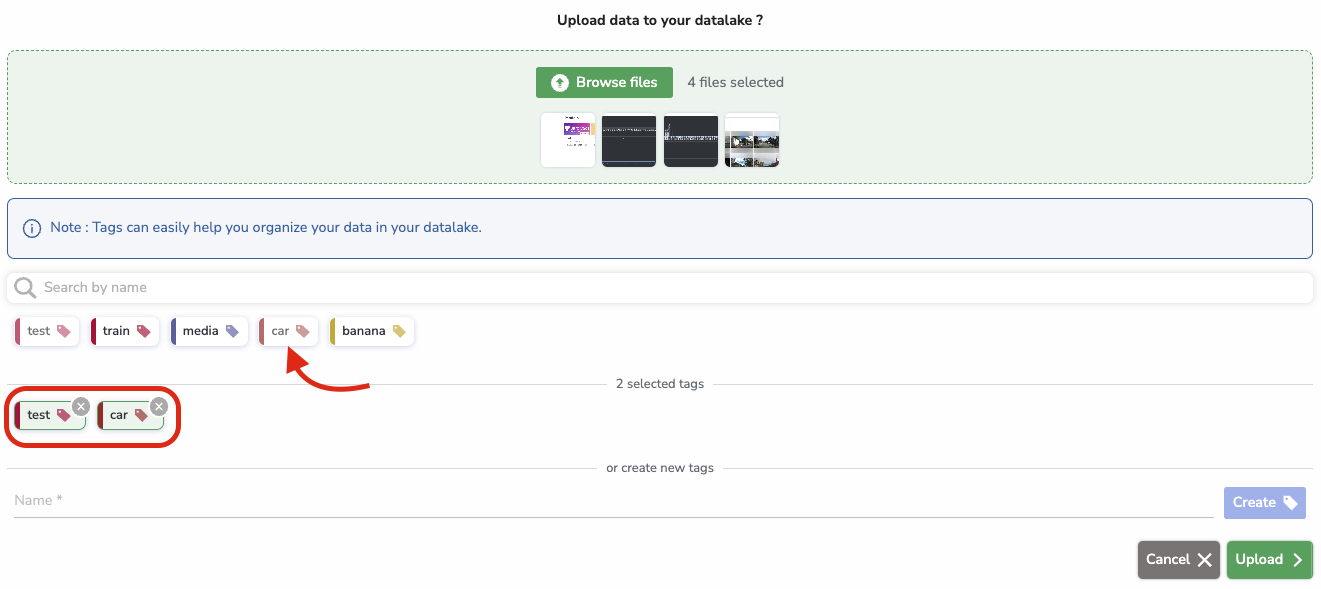
Data Import into the DatalakeWhen you're importing Data into your Datalake (whether through direct upload or cloud storage scanning), you have the option to connect one or more DataTag to the incoming Data.
Attaching DataTag during Data import
In this process, after selecting the files to upload, you can select the DataTag you want from the list.
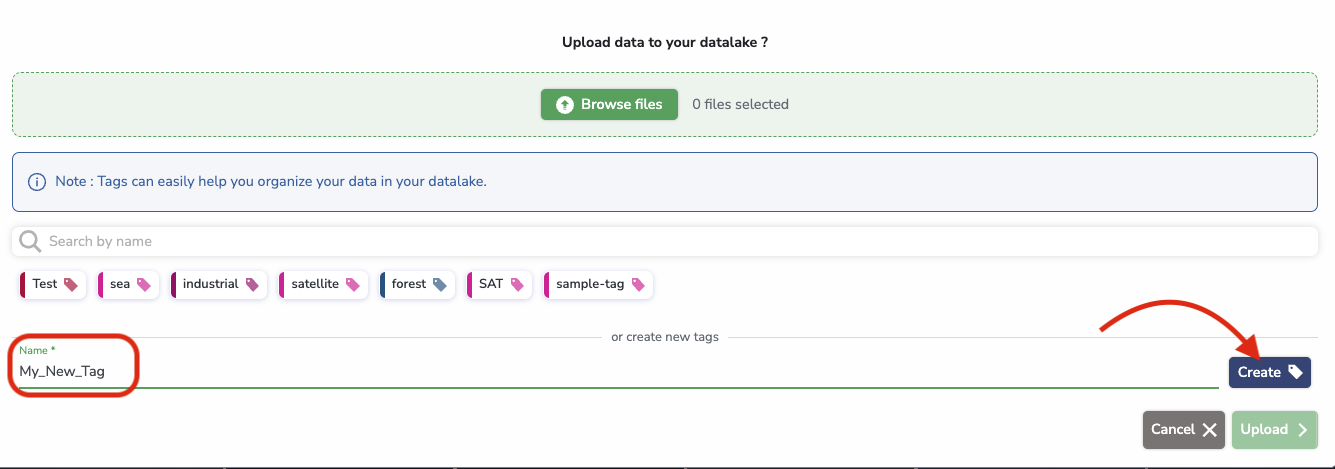
You can also create new DataTag here, like this:
Creating a DataTag during Data import
Once you click Create, the new DataTag gets added to the list and will be connected to the Data you're uploading when you click Upload.
B. Directly Within the Datalake
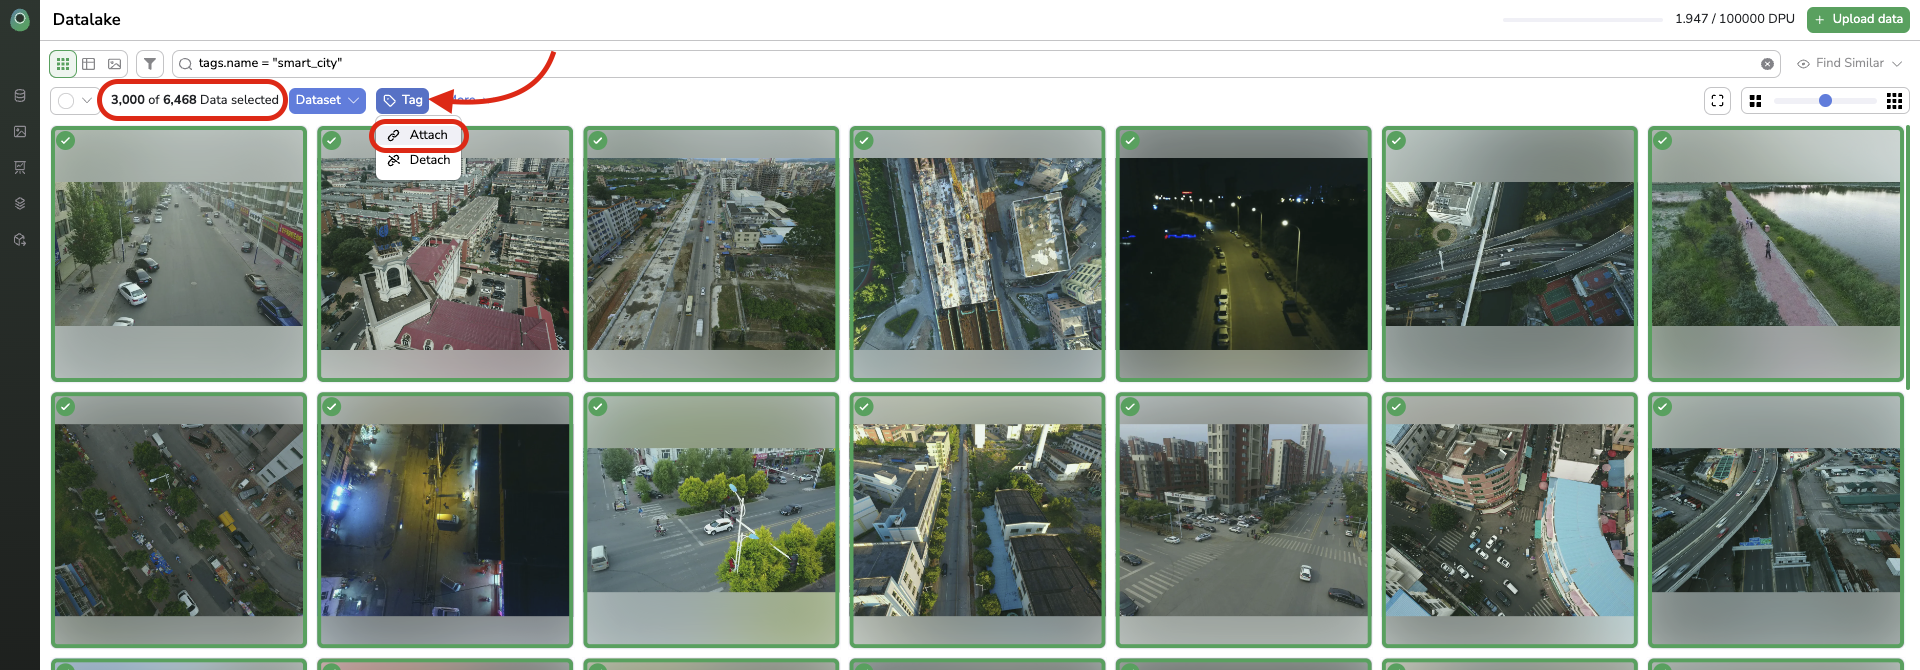
DatalakeIf you want to attach DataTag to Data that's already in your Datalake, simply select the images you want to tag, and then choose Tag > Attach.
Attaching DataTag to Data
After that, you can link the selected Data to the DataTag you want from the list, and confirm by clicking Attach, like this:
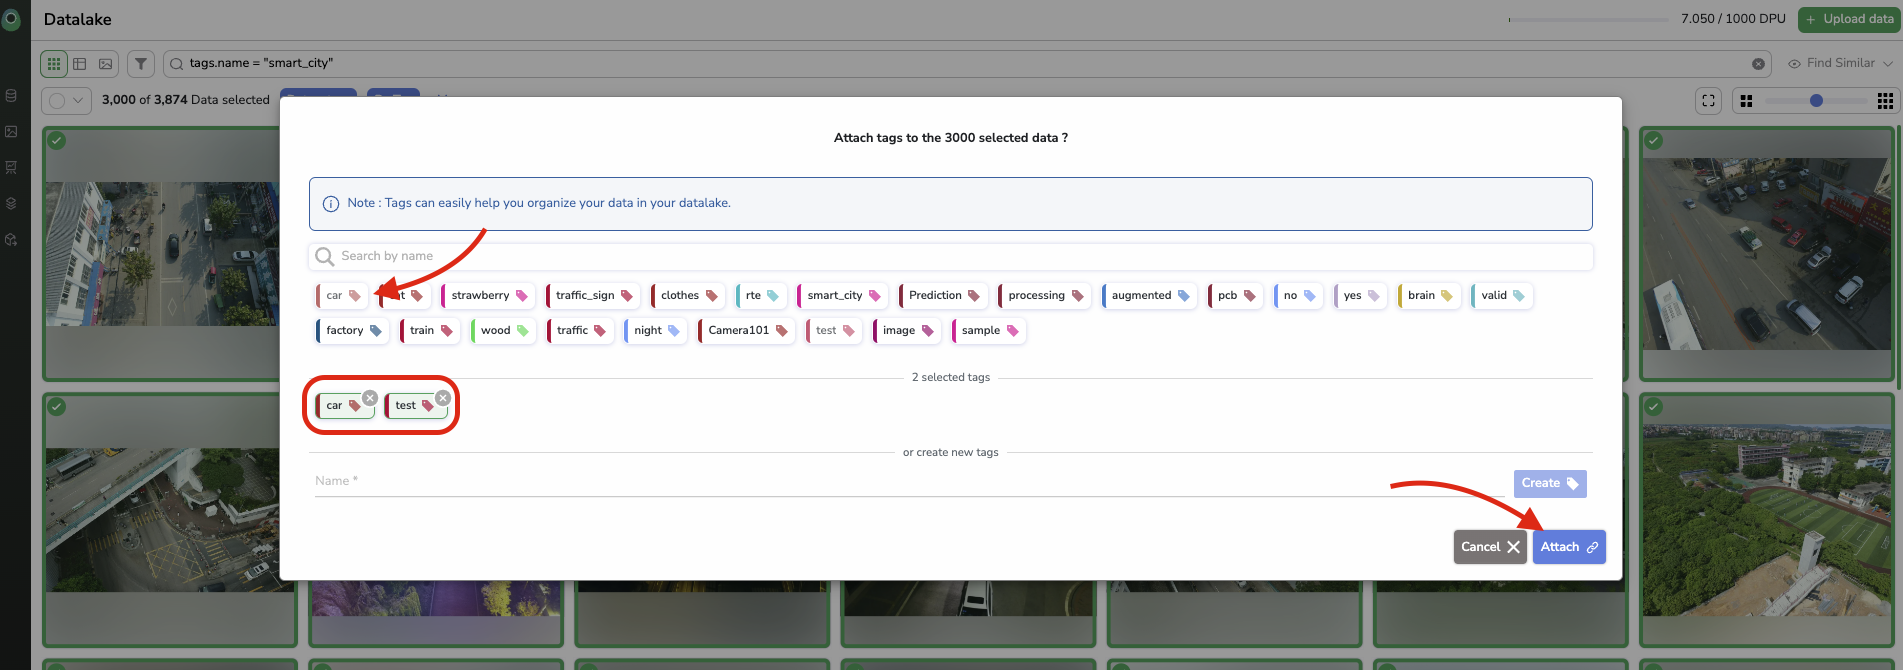
DataTag attachment modal
And once again, remember that you can also create new DataTag from this attachment modal:
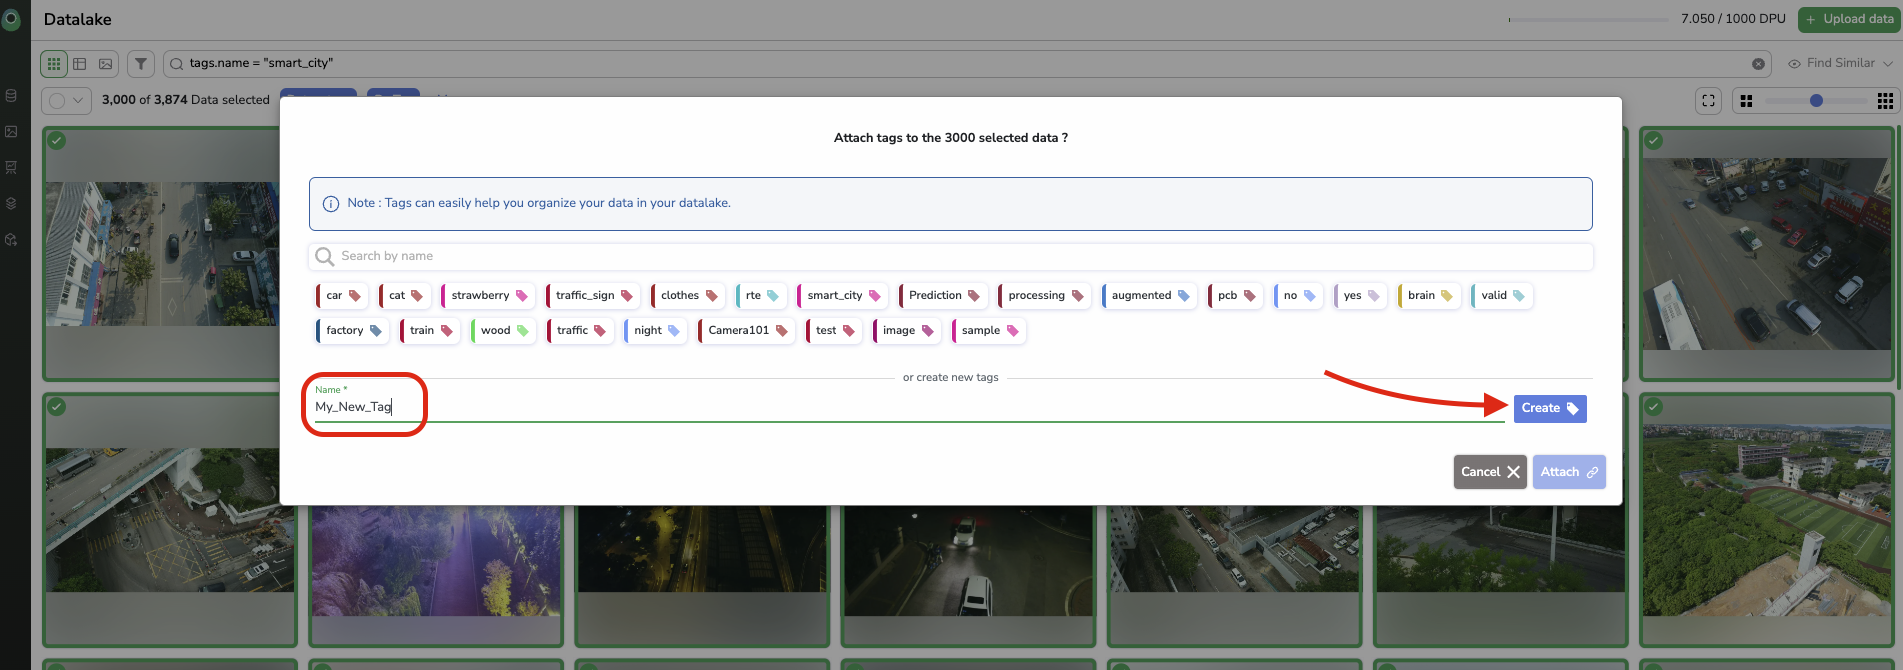
Creating a DataTag within the attachment modal
4. Visualizing DataTag on your Data
DataTag on your DataNow that you know how to create and attach DataTag to enhance your Datalake Organization, let's explore how to effectively use these tags to easily locate the specific Data you need within your Datalake.
You can begin by identifying the DataTag associated with each Data entry using the Table or Details views in your Datalake.
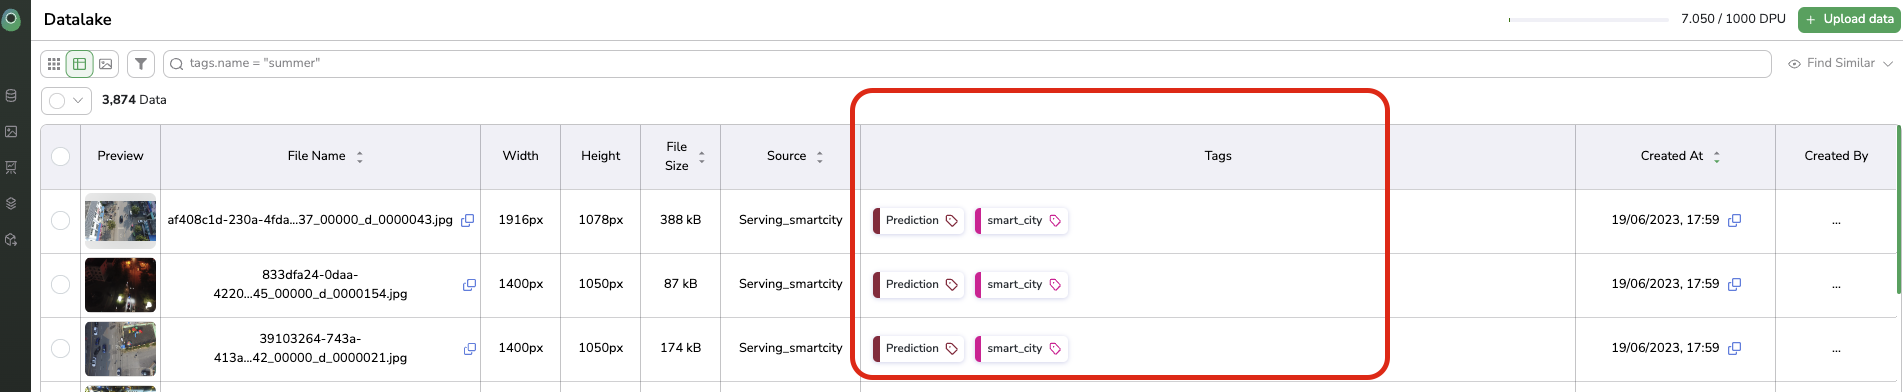
Visualize DataTag in Details view
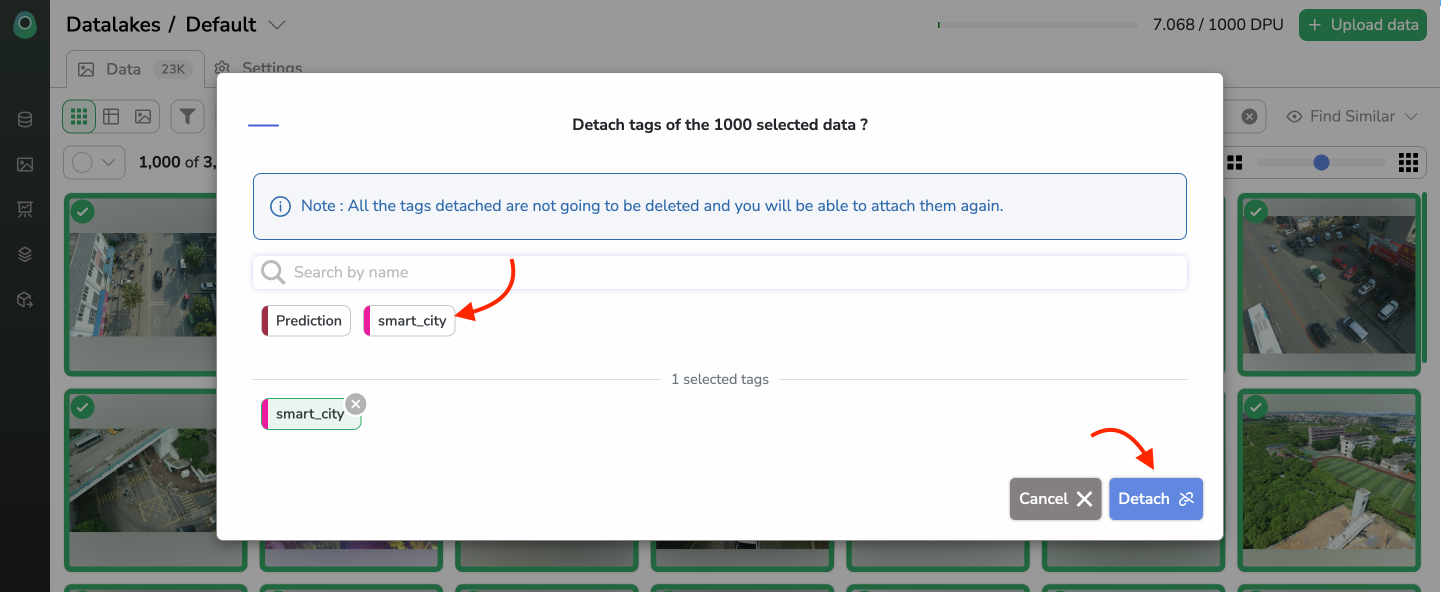
5. Detach DataTag
DataTagIf for any reason you need to detach one or several DataTag from a set of Data from your Datalake, you simply need to select the bench of Data that DataTag need to be detached from and click on Tag > Detach.
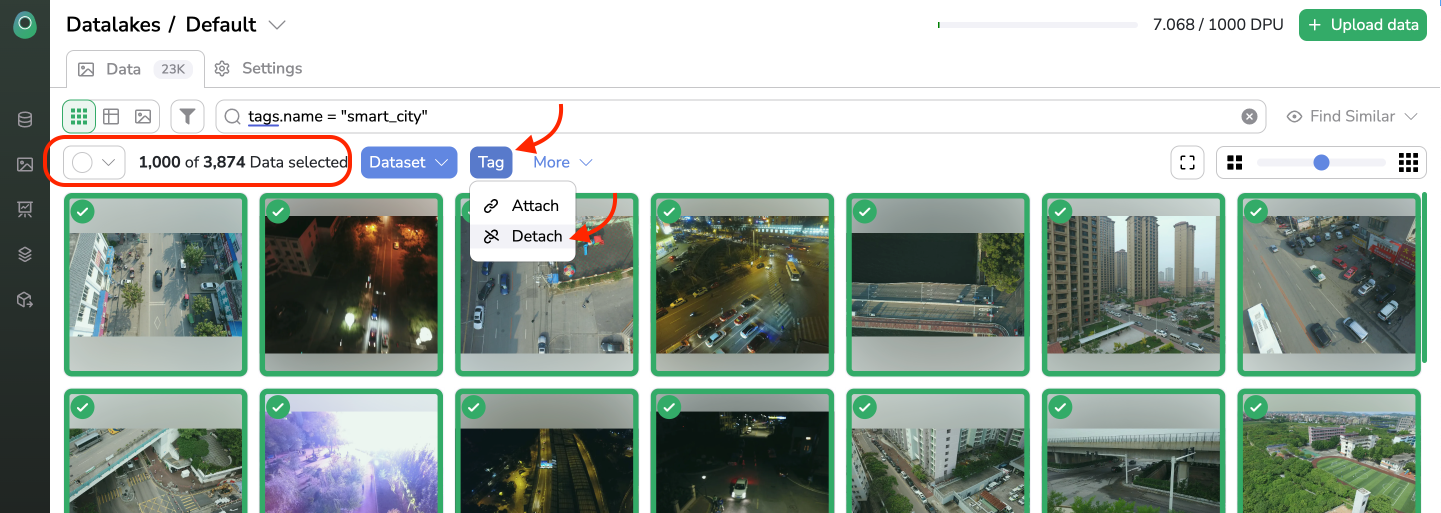
Select Datafor detaching DataTag
A modal will open listing all DataTag attached to any of the selected Data. You just need to click on the DataTag you want to detach from the Data selected and click on the button Detach.
Detach DataTag
Updated about 1 year ago