

Custom Shapes import from another version
We have seen that you can annotate a DatasetVersion by importing an Annotation file or using the integrated Annotation tool.
Picsellia also offers the possibility to transfer Shape from one DatasetVersion to another, as long as they are versions of the same Dataset.
For Computer Vision teams, this is what makes it possible to build a new DatasetVersion type (for instance a Rectangle-only version dedicated to a specific model) directly from the Annotation already produced in another version of the same Dataset, instead of re-annotating everything from scratch.
Only the Shape of Asset present in both DatasetVersion — meaning they are linked to the same Data in the Datalake — can be transferred.
Shape import also works if the DatasetVersion receiving the Shape is already annotated, so be careful not to create duplicate Shape. For each impacted Asset, the imported Shape are added to the Annotation related to your user if it already exists, otherwise a new Annotation containing the imported Shape is created for your user.
1. Import Shape
ShapeFirst, reach the DatasetVersion that will receive the Shape (the Target DatasetVersion) from the already annotated DatasetVersion (the Source DatasetVersion).
Then, go to Settings > Import Shapes.
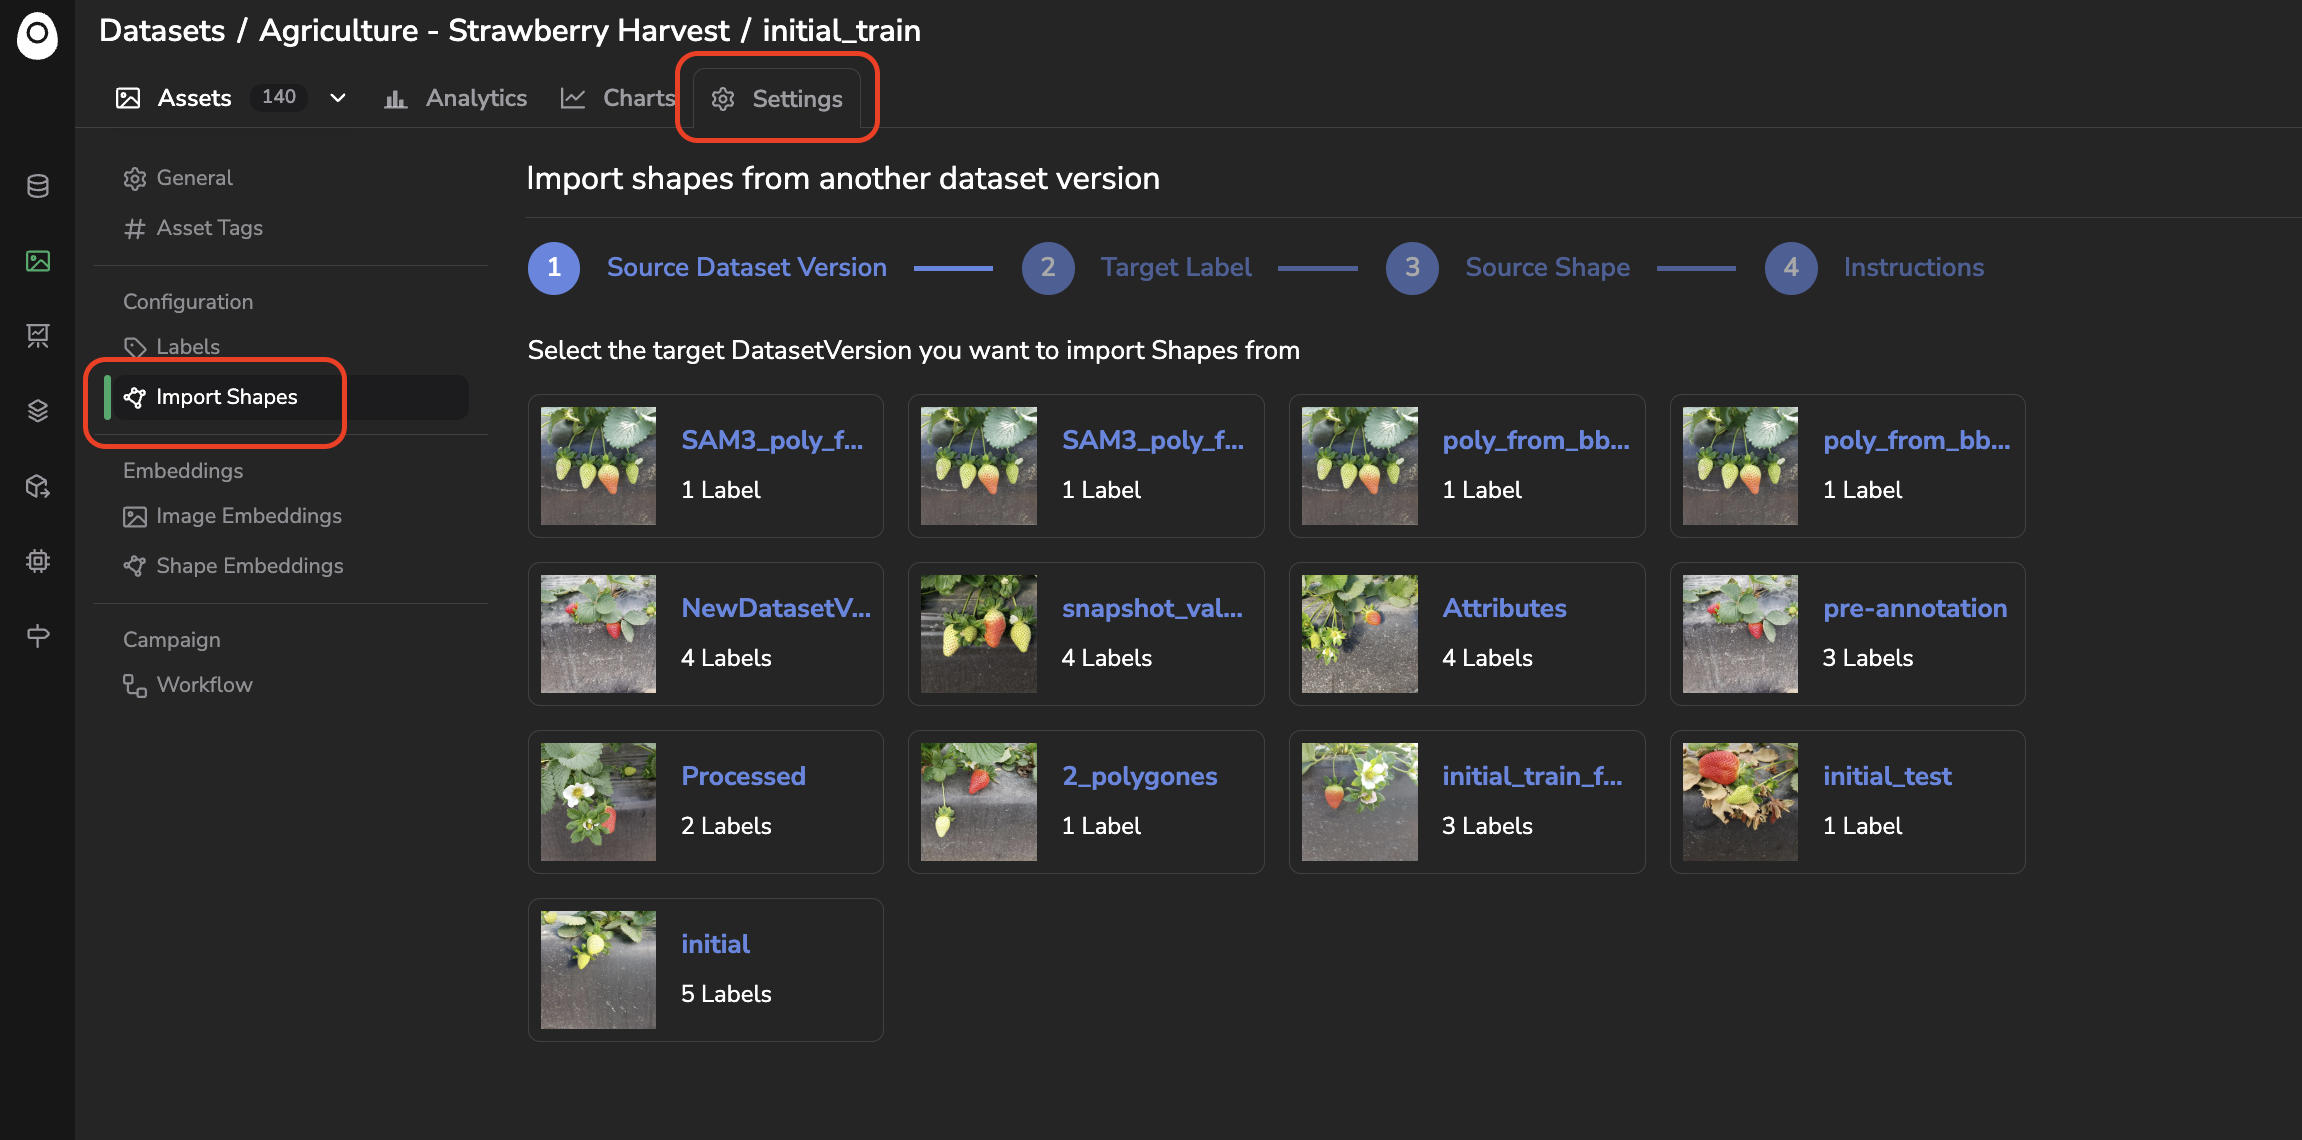
Access the Import Shapes feature
The Target
DatasetVersionmust already be set up with a Version Type andLabelmap, detailed here.
This is a 4-step wizard:
- 1. Source Dataset Version: select which other
DatasetVersionof theDatasetto importShapefrom. - 2. Target Label: select the
Labelof the current (Target)DatasetVersionunder which the importedShapewill land. - 3. Source Shape: select the
Labelof the SourceDatasetVersionwhoseShapeshould be imported as the TargetLabelchosen above. - 4. Instructions: review the resulting instruction lines before running the import.
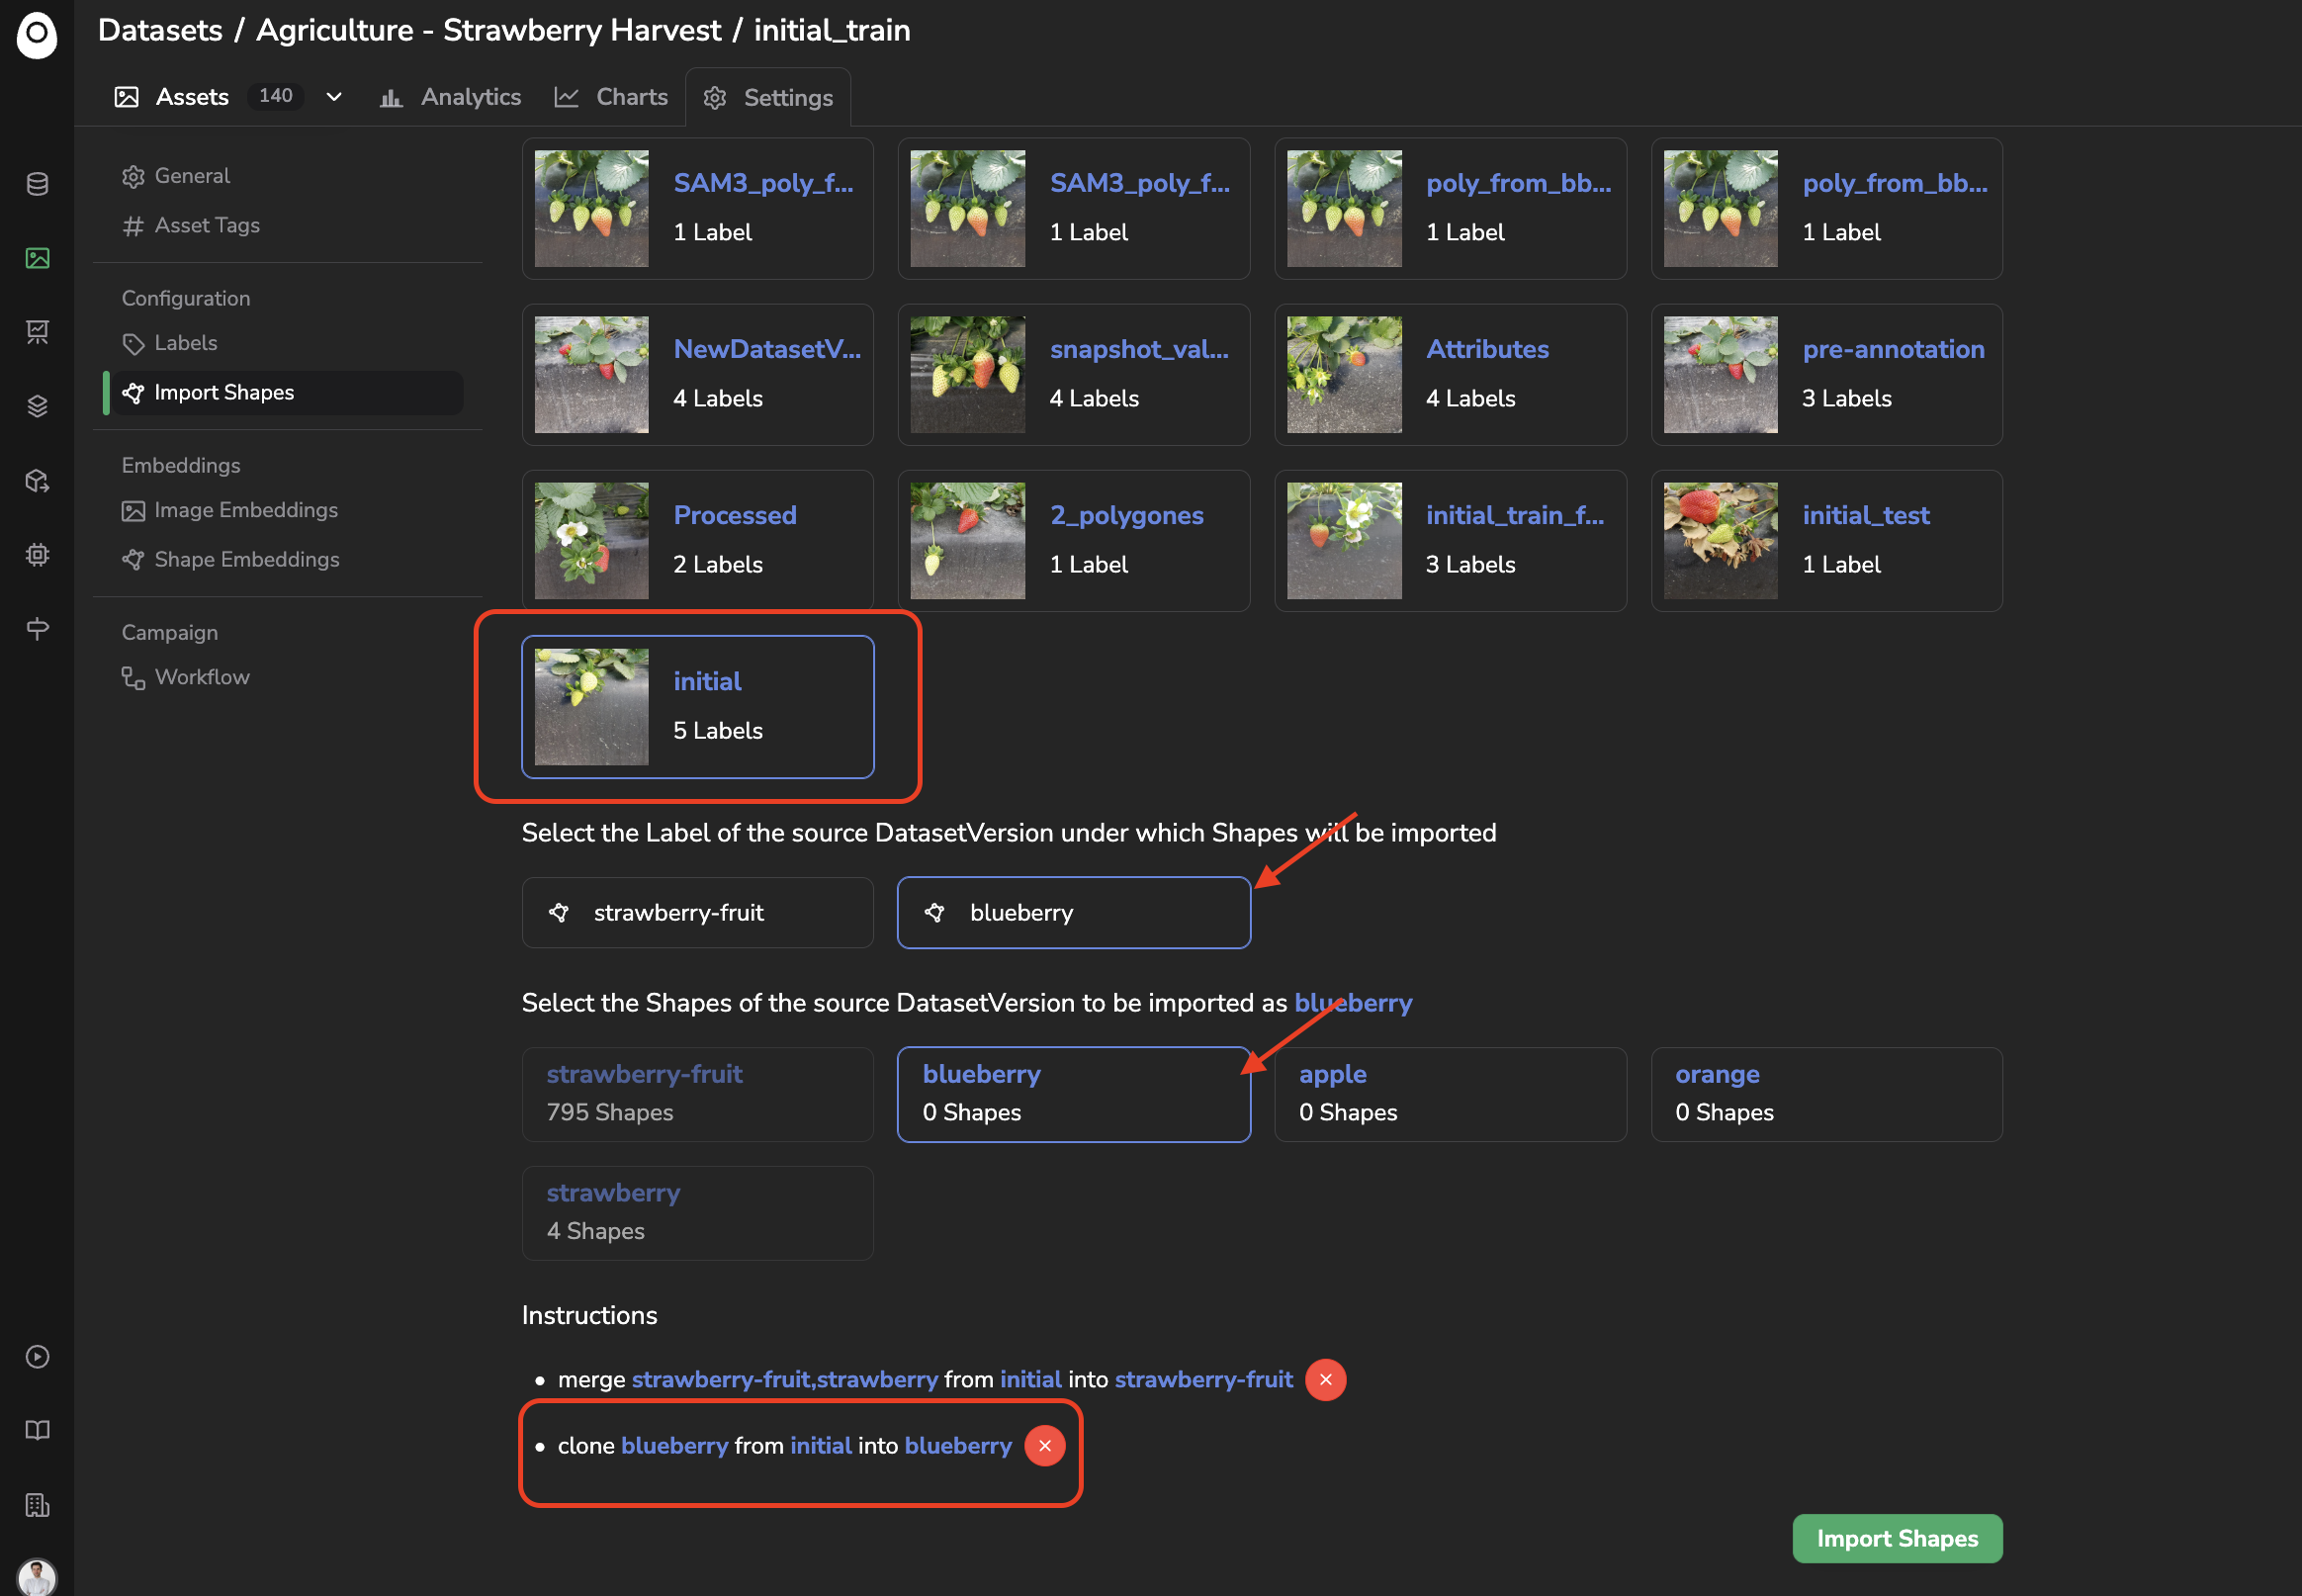
Customized Shapes import
This system is highly customizable: you can transfer the Shape of a given Label from the Source under a differently-named Label in the Target, and repeat steps 2-3 to merge Shape from two or more different Label of the Source under a unique Label in the Target.
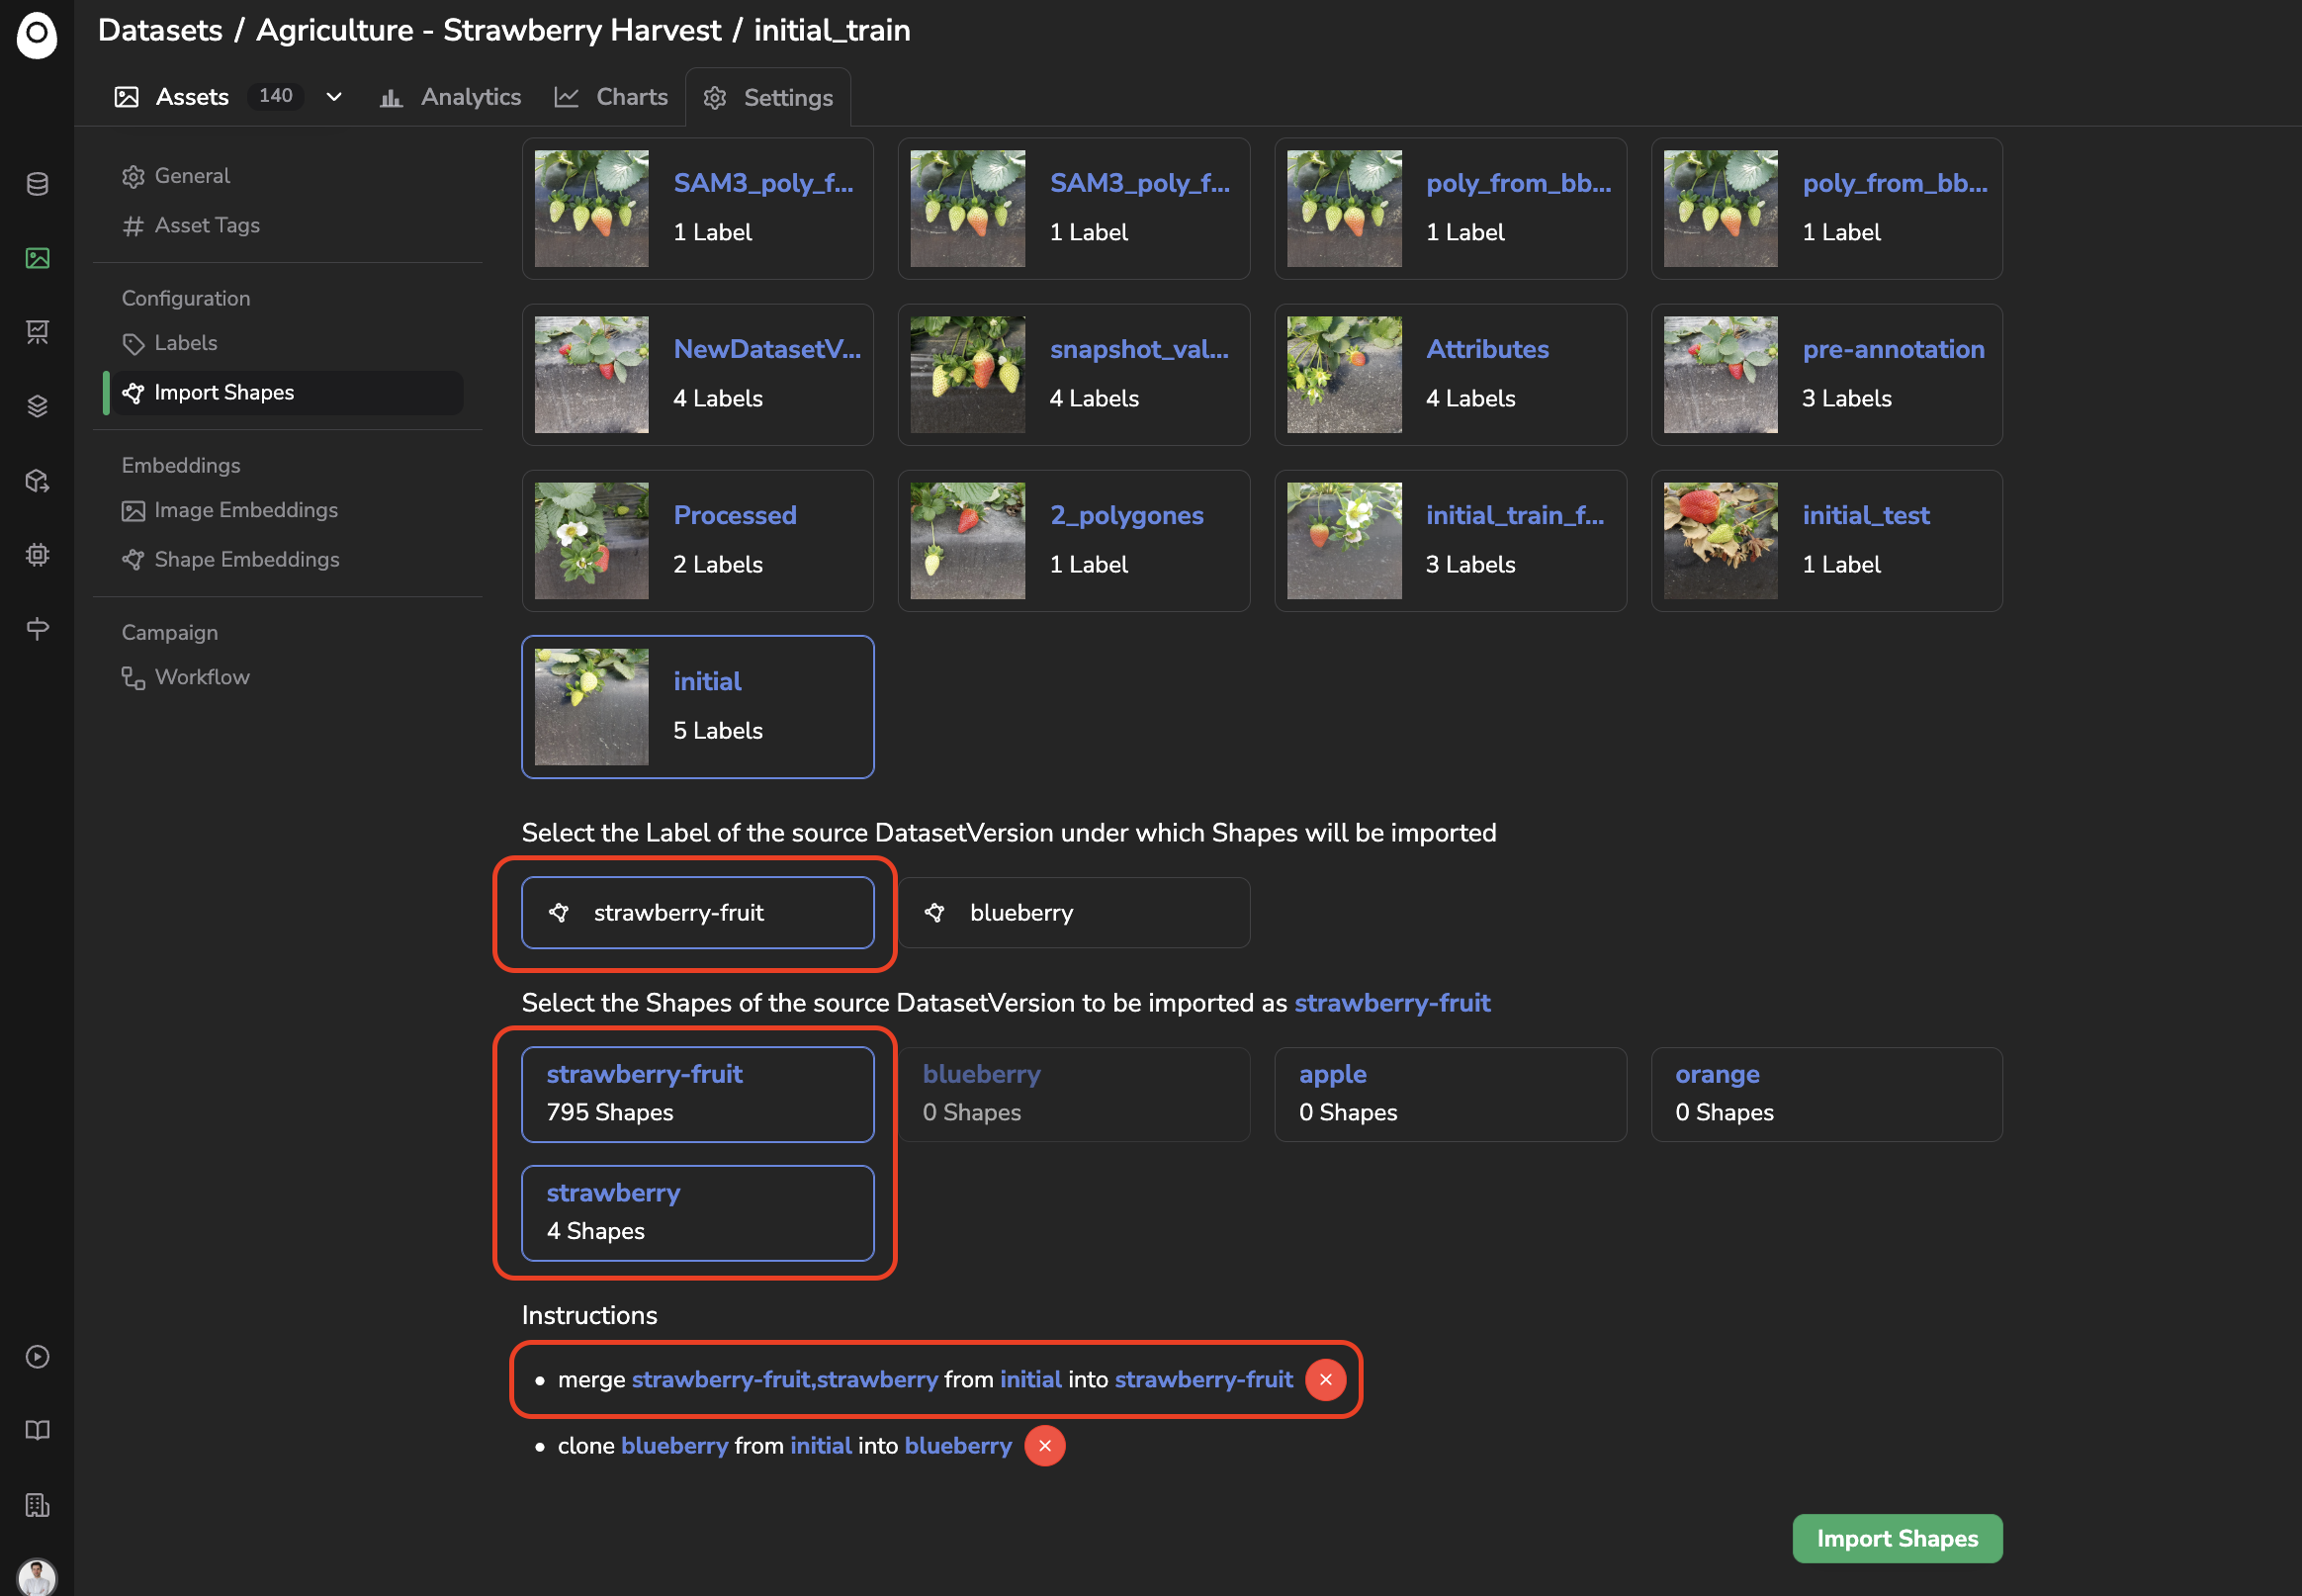
Each transfer generates an instruction line, letting you review and remove any of them (with the x icon) before confirming.
When the instructions suit your needs, click on Import Shapes.
The import completion can be tracked from the Jobs panel.
Updated about 2 months ago