1.3. Azure - Register a client application
1.Prerequisites
Before you begin, ensure you have the following set up in your Azure Active Directory:
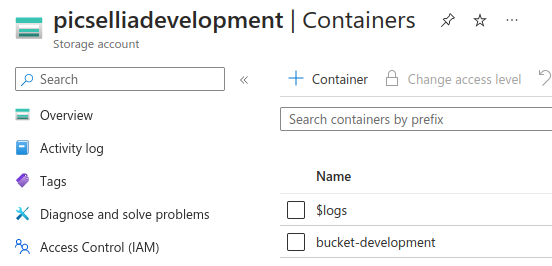
- A Storage account.
- A Container within that storage account.
For the purpose of this guide:
- The storage account name will be referred to as
ACCOUNT_STORAGE_NAMEand for this example, it'spicselliadevelopment. - The container name will be referred to as
CONTAINER_NAMEand in this example, it'sbucket-development.
2. Set up CORS for Your Storage Account
- Update the Cross-Origin Resource Sharing (CORS) policy of your storage account.
- Follow this guide for more details: Azure CORS Configuration.

3. Register an App in Azure
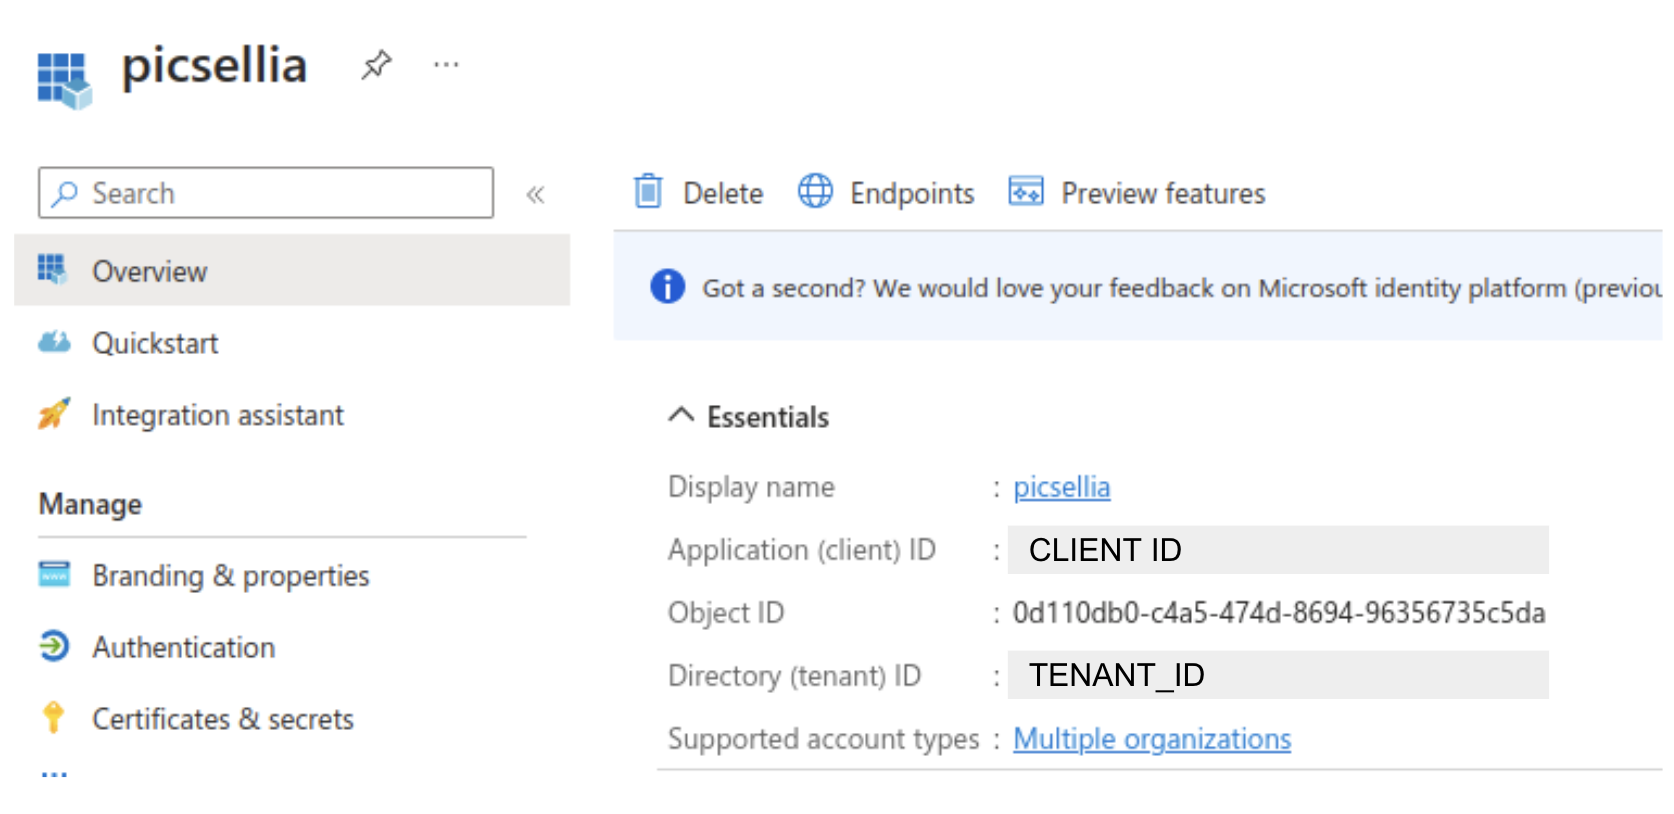
- Create an App Registration in Azure named
picsellia. - Guide for app registration: Azure App Registration.
- Navigate to App Registrations and initiate a New Registration.
- For Supported account types, select "multiple organizations".
- Note down the
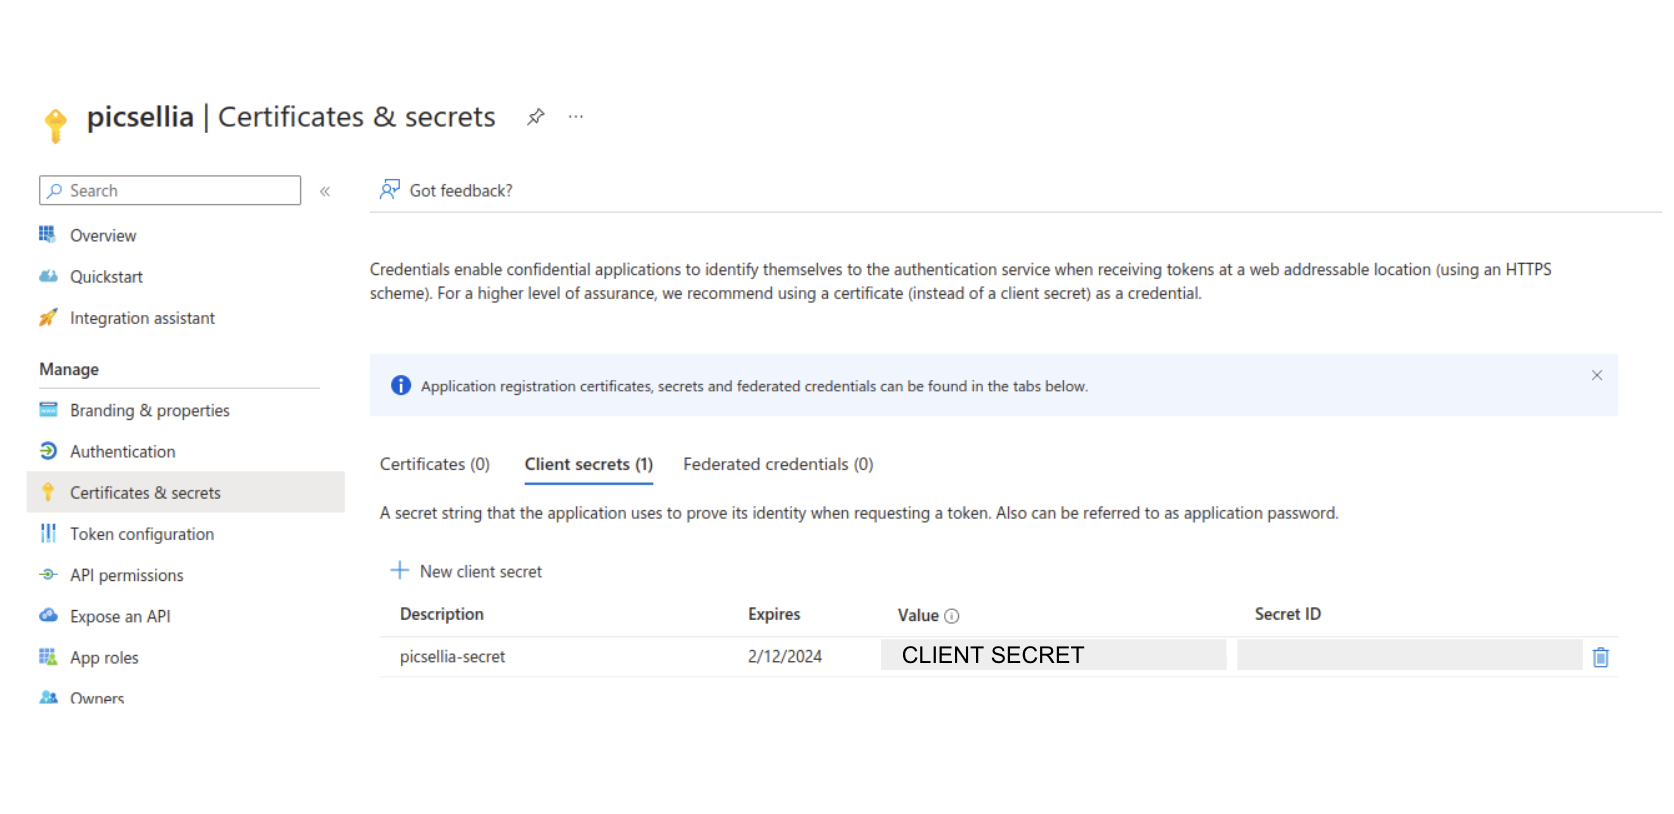
APPLICATION_IDandTENANT_IDfor future reference. - Generate and save the secret key ("Value"). This is your
CLIENT_SECRET. Ensure you save this key immediately as you won't be able to view it again.
4. Grant Access to Picsellia App
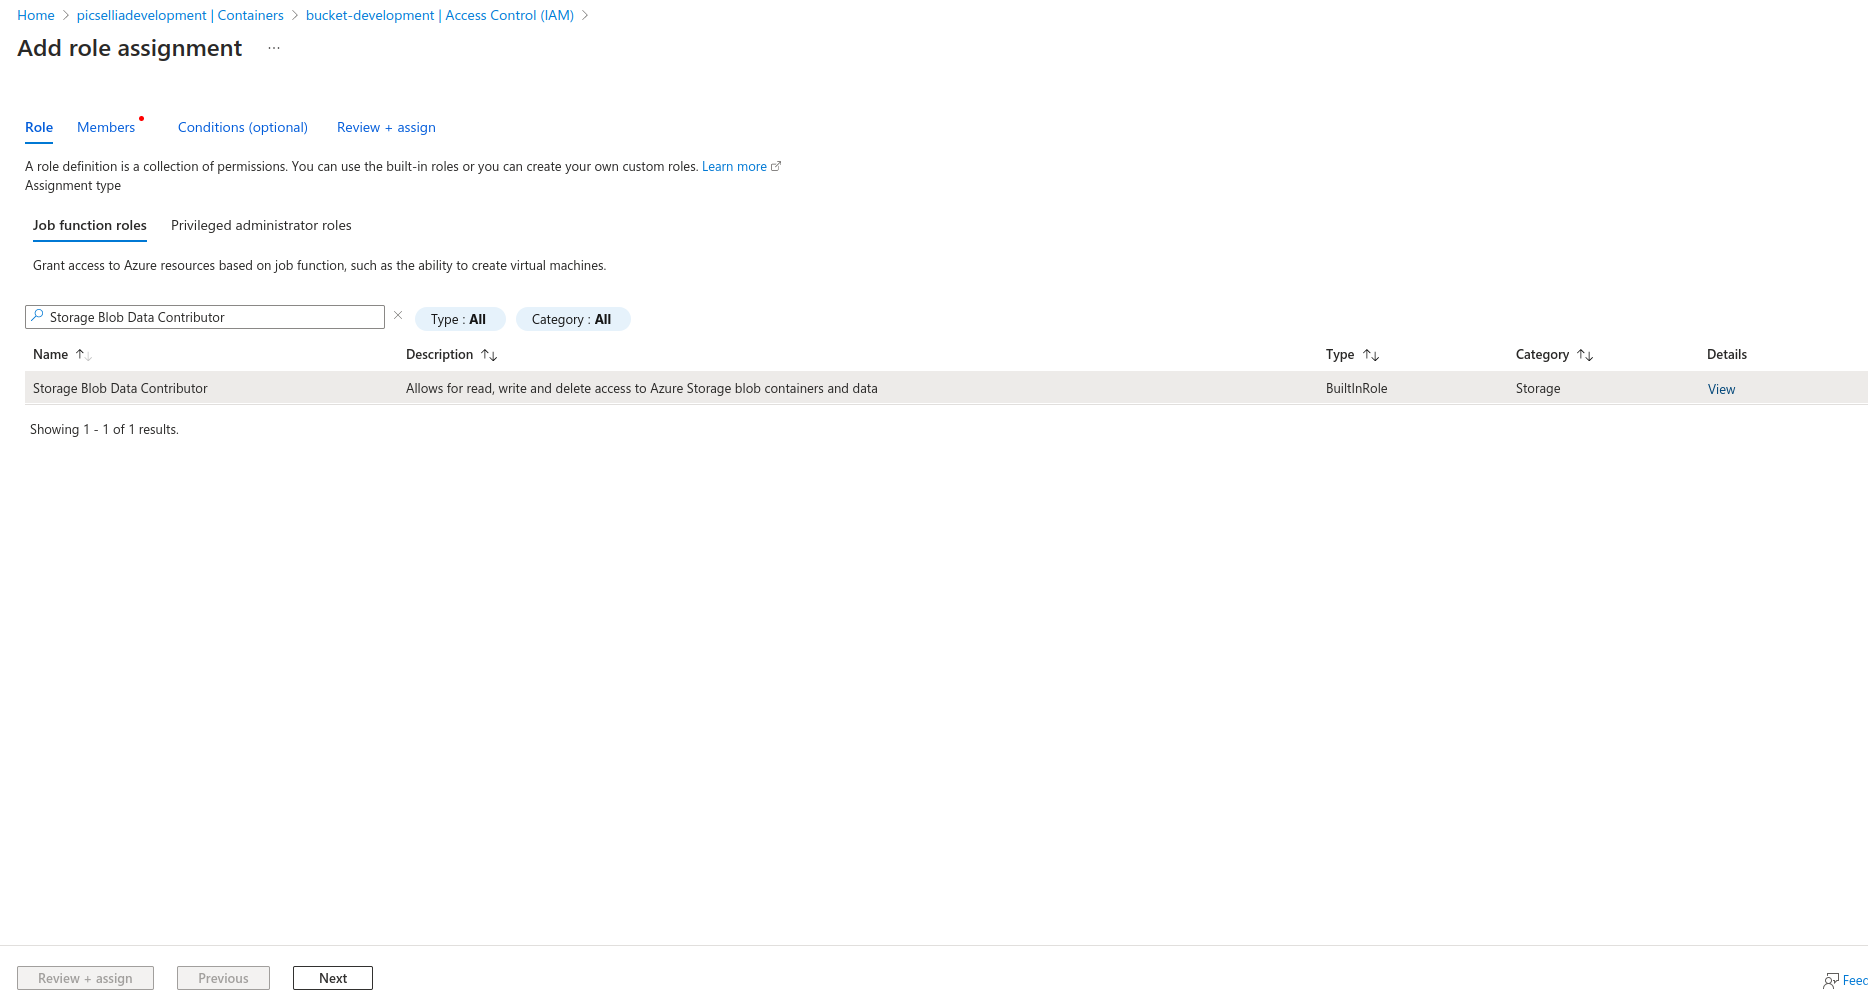
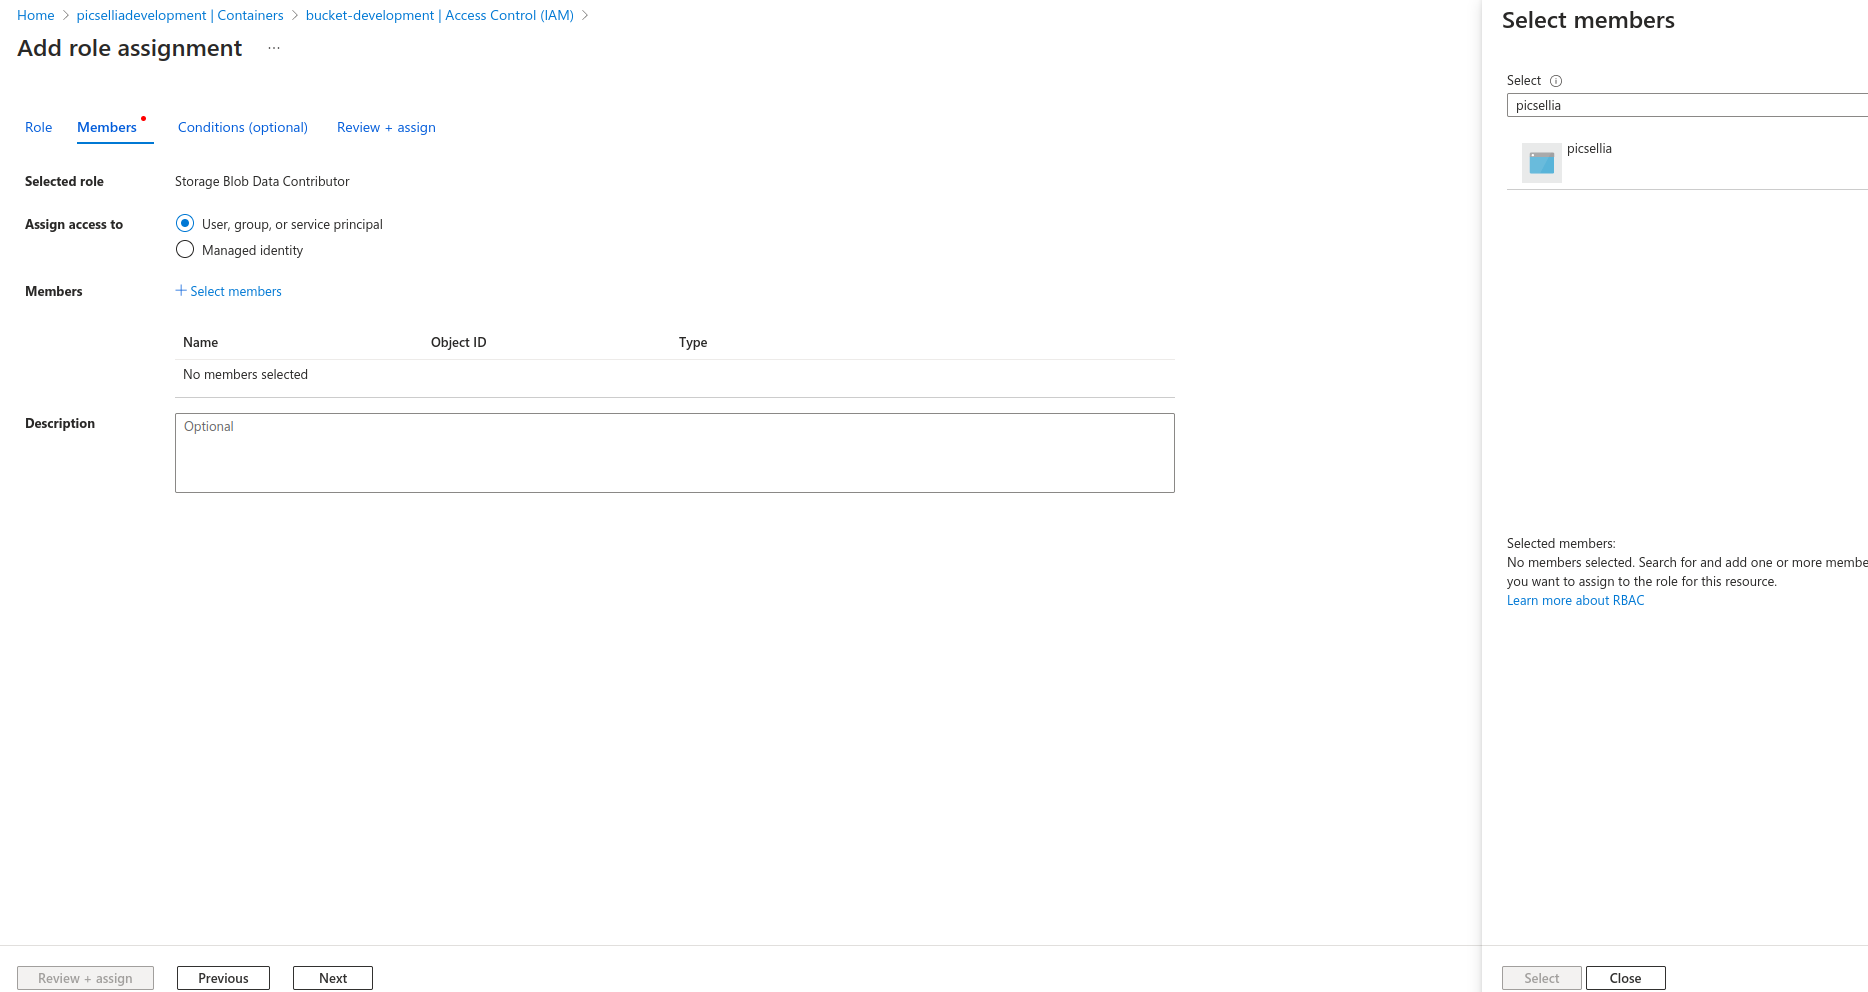
- Assign a role to your Container.
- Choose the role
Storage Blob Data Contributor. This permits the Picsellia app to read and upload data to your container. - To do this, click on "Add role assignment", and then select the role
Storage Blob Data Contributor. - Assign this role to the recently created App Registration named "picsellia". To find it, type "picsellia" in the 'select members' search.
5. Authorize App Access on Storage Account
- Grant your Account Storage access to the App.
- Assign the role
Storage Blob Data Delegatorwhich allows the Picsellia app to generate a user delegation key. - Here's an example of how your IAM configuration should look:

6. Finalize Integration
Conclude by creating a connector in the Picsellia integrations, for this step you need to get in touch with Picsellia's Team.
Updated 8 months ago