

Creation & management
A Project is an AI Lab where data scientists can perform as many Experiment as they want in order to create the best ModelVersion possible.
1. Projects list
You can access the Projects feature from the Navigation Bar:
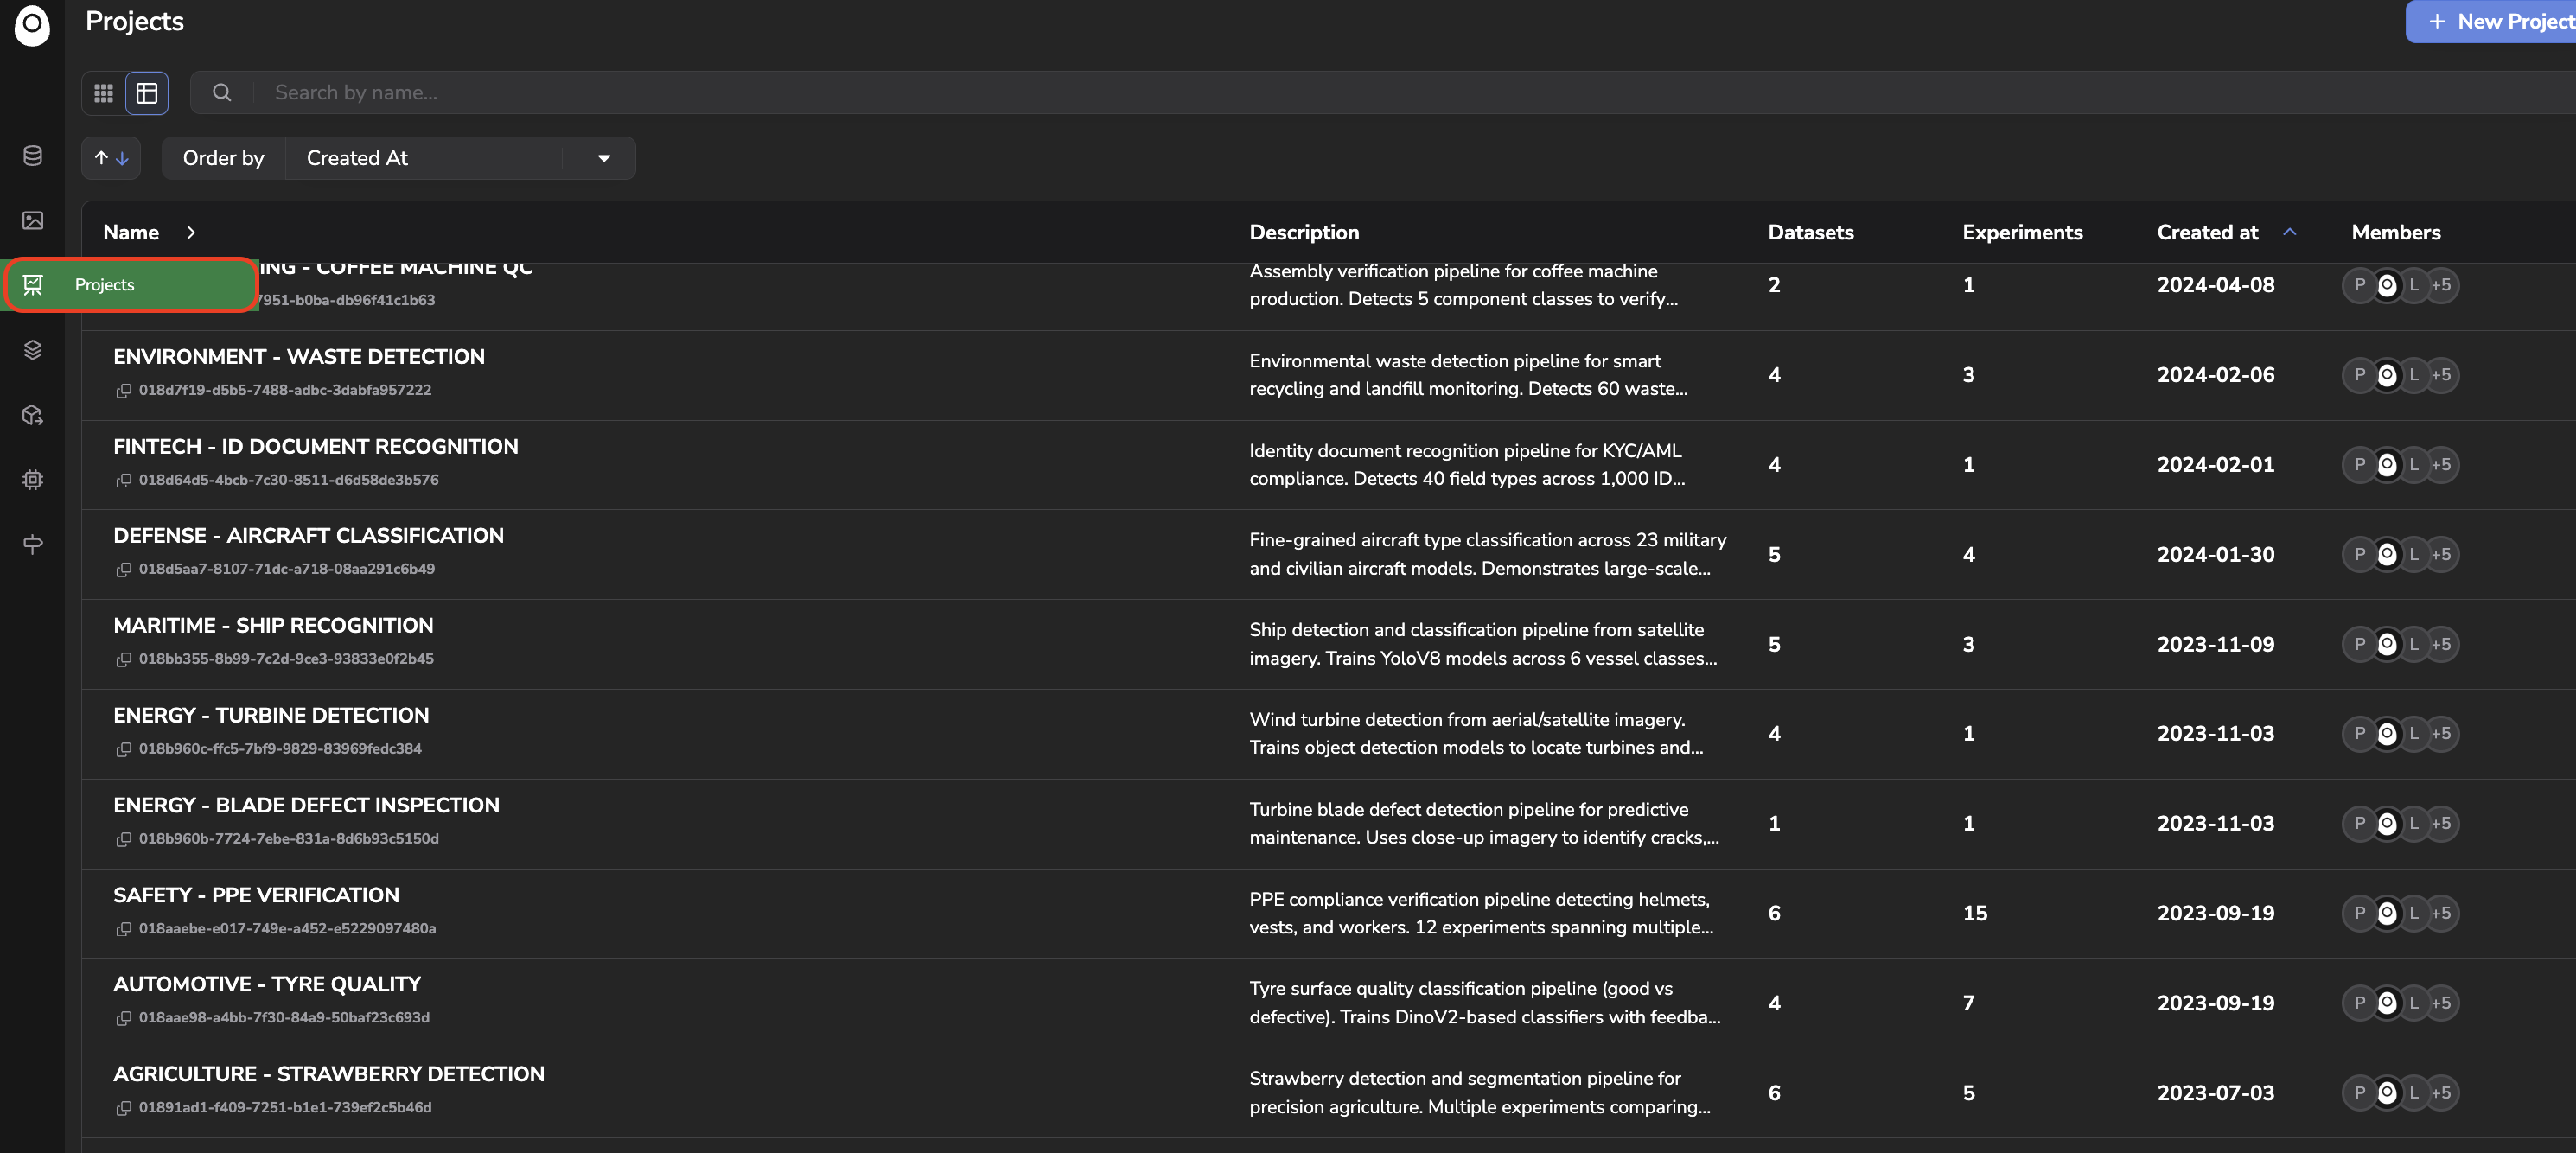
Access Project list
From this Projects list, you can visualize every Project you can access in the current Organization. For each Project, you can see the number of attached Dataset, the number of Experiment, its creation date, and an overview of the Members with access to it.
This view also allows you to create a brand-new Project.
It is recommended to create a new Project in your Organization each time you work on a new use case. Basically, you should have one Project per ModelVersion you are planning to train.
2. Create a new Project
ProjectFrom the Projects list, you can click on + New Project.
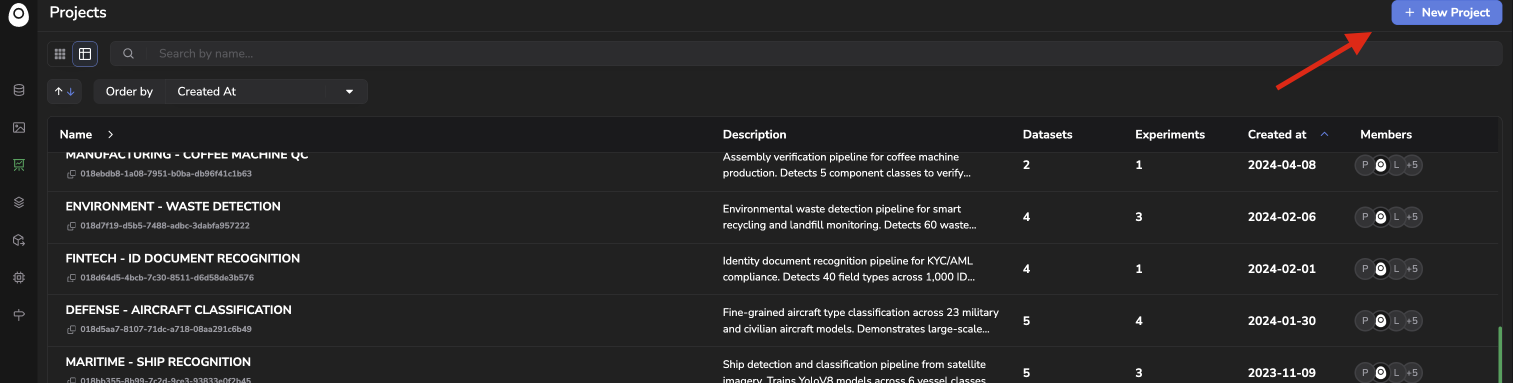
Create a new Project
The Project creation form will then open. Through this form, you will be able to give, for traceability purposes, a name and a description to your new Project.
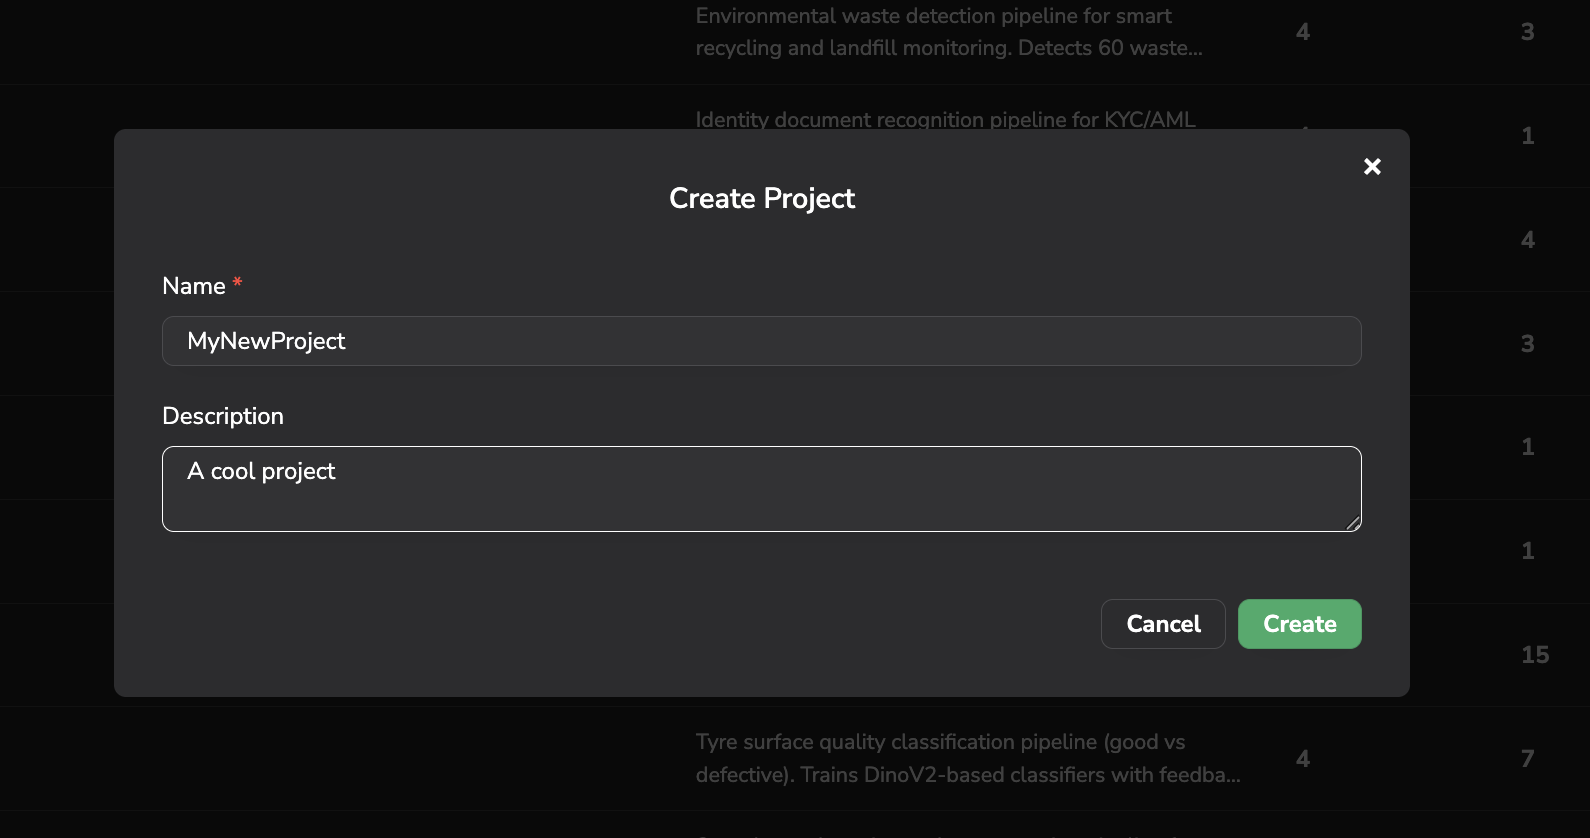
Project creation form
To finalize the Project creation, click on Create.
3. A collaborative lab
A Project is a space dedicated to the training of a ModelVersion for a dedicated purpose.
As the process of ModelVersion creation is a long one that needs several tries, experiments, and adjustments, a Project allows you to perform all your ModelVersion training attempts in a structured and trackable space.
To do so, in a Project, you'll be able to store and gather all the DatasetVersion needed for the current Project and retrieve all the Experiment performed until now in a single view.
4. Project overview
Once created, a Project offers four different tabs: Overview, Experiments, Scans, and Settings.
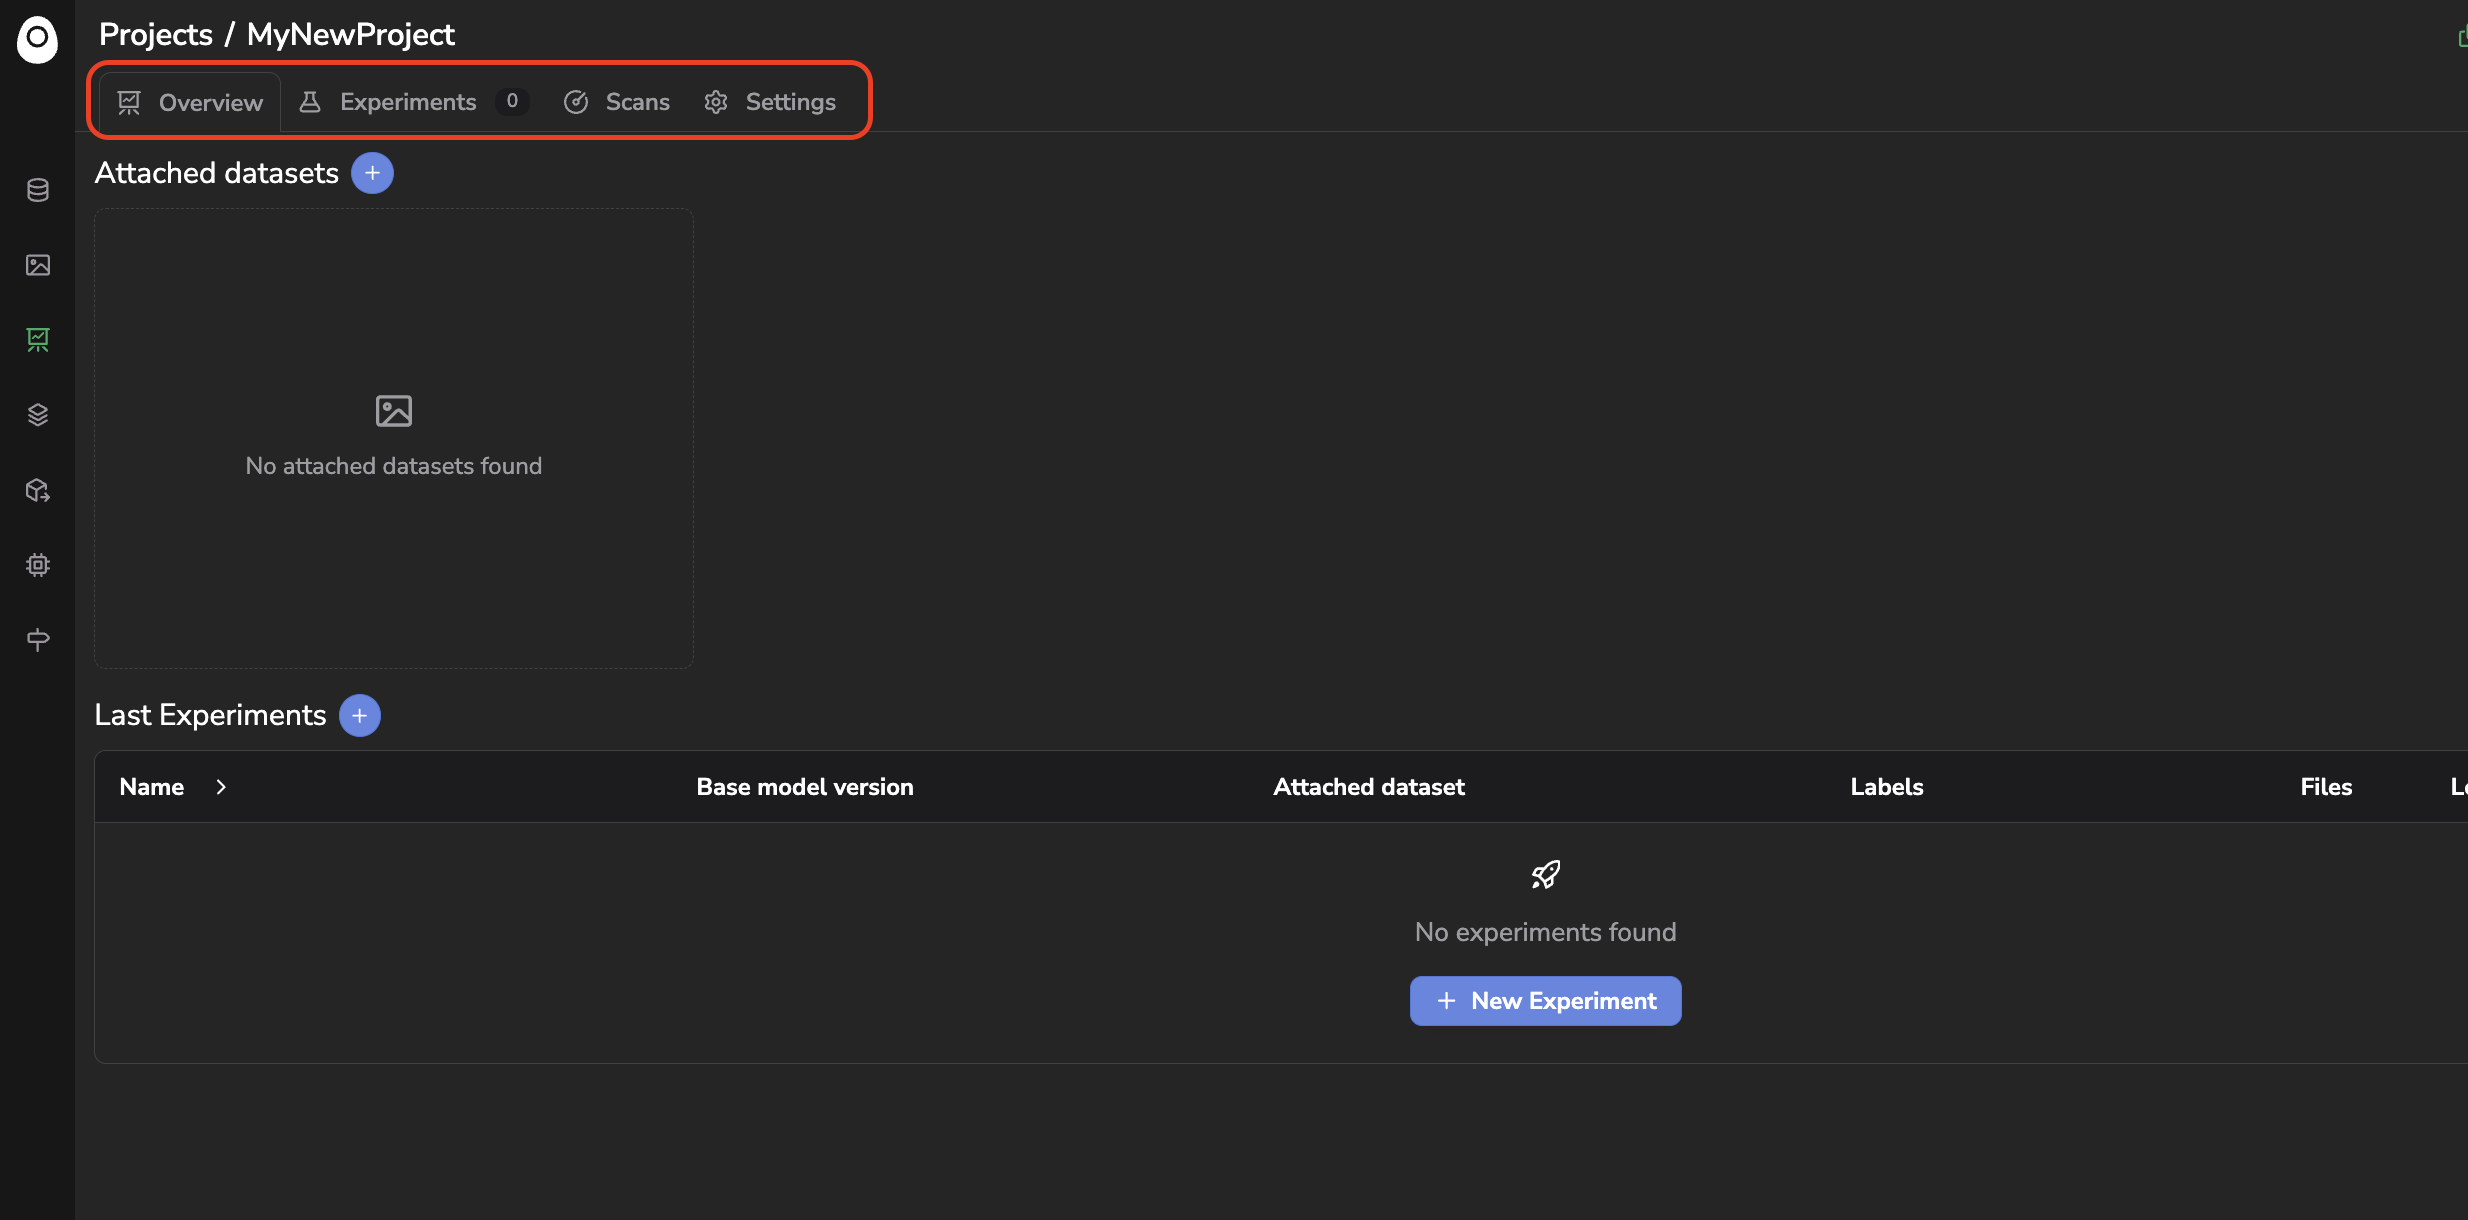
Project overview
A. Overview
a. Attach DatasetVersion
DatasetVersionThe Project overview is divided into two sections: Attached datasets and Last Experiments.
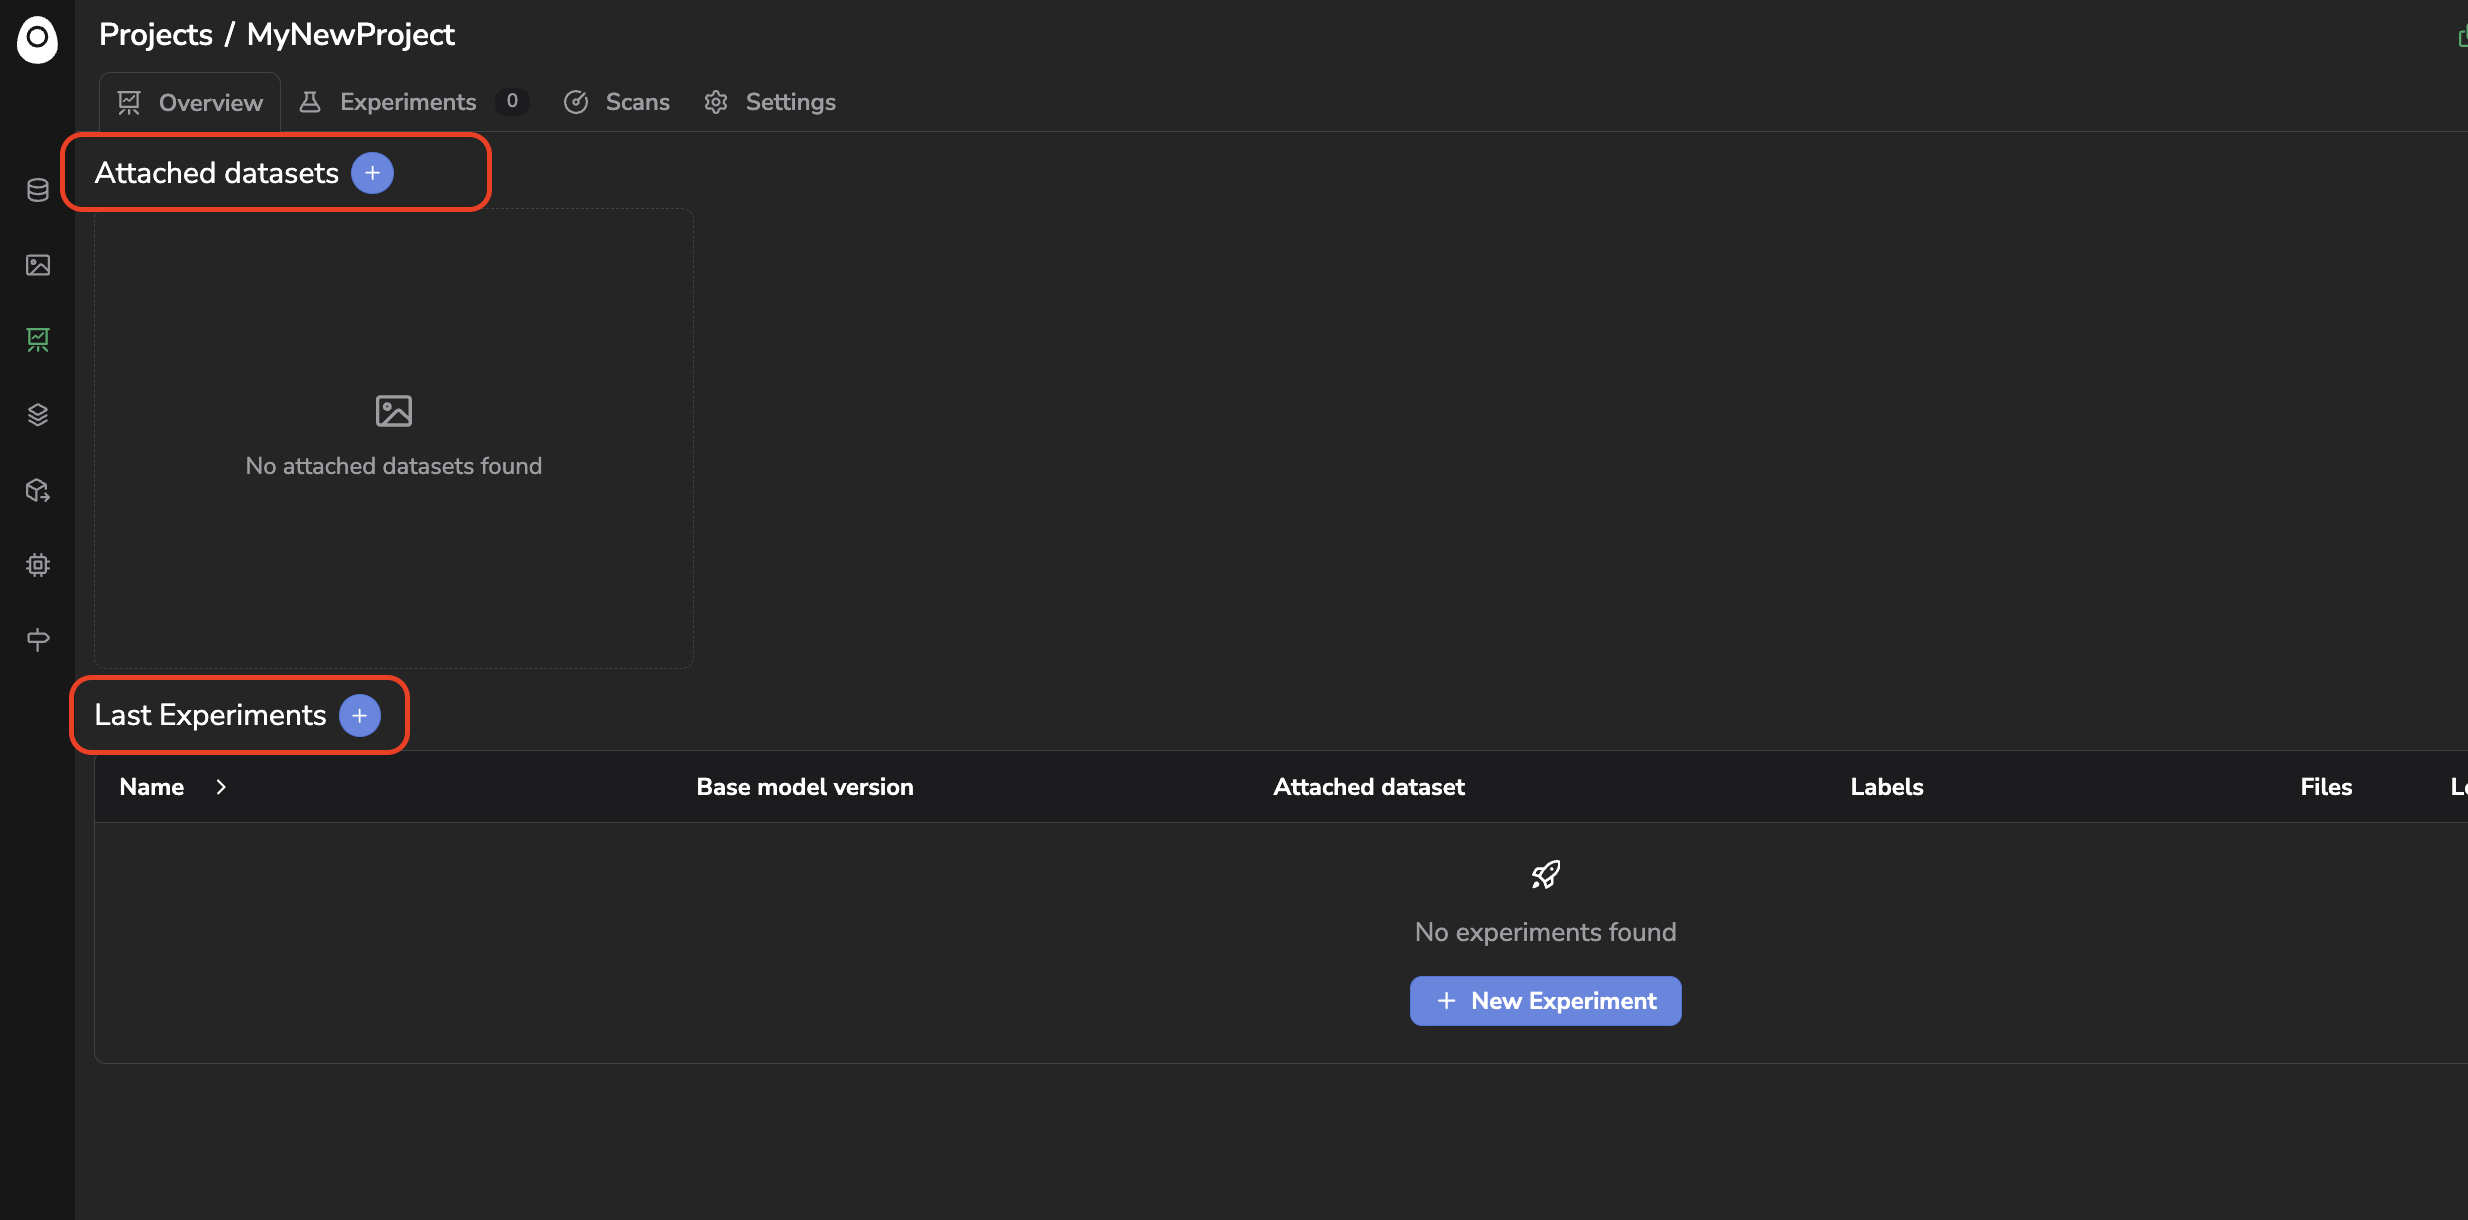
Overview tab of an empty project
Obviously, right after initialization, those two sections are empty.
So the very first step will be to attach to your Project the DatasetVersion you plan to work with for the ModelVersion creation. This can be done by clicking on the + button next to Attached datasets. A modal will open in which you'll be able to browse first among your Dataset and then among the related DatasetVersion to select the ones to be attached to the Project.
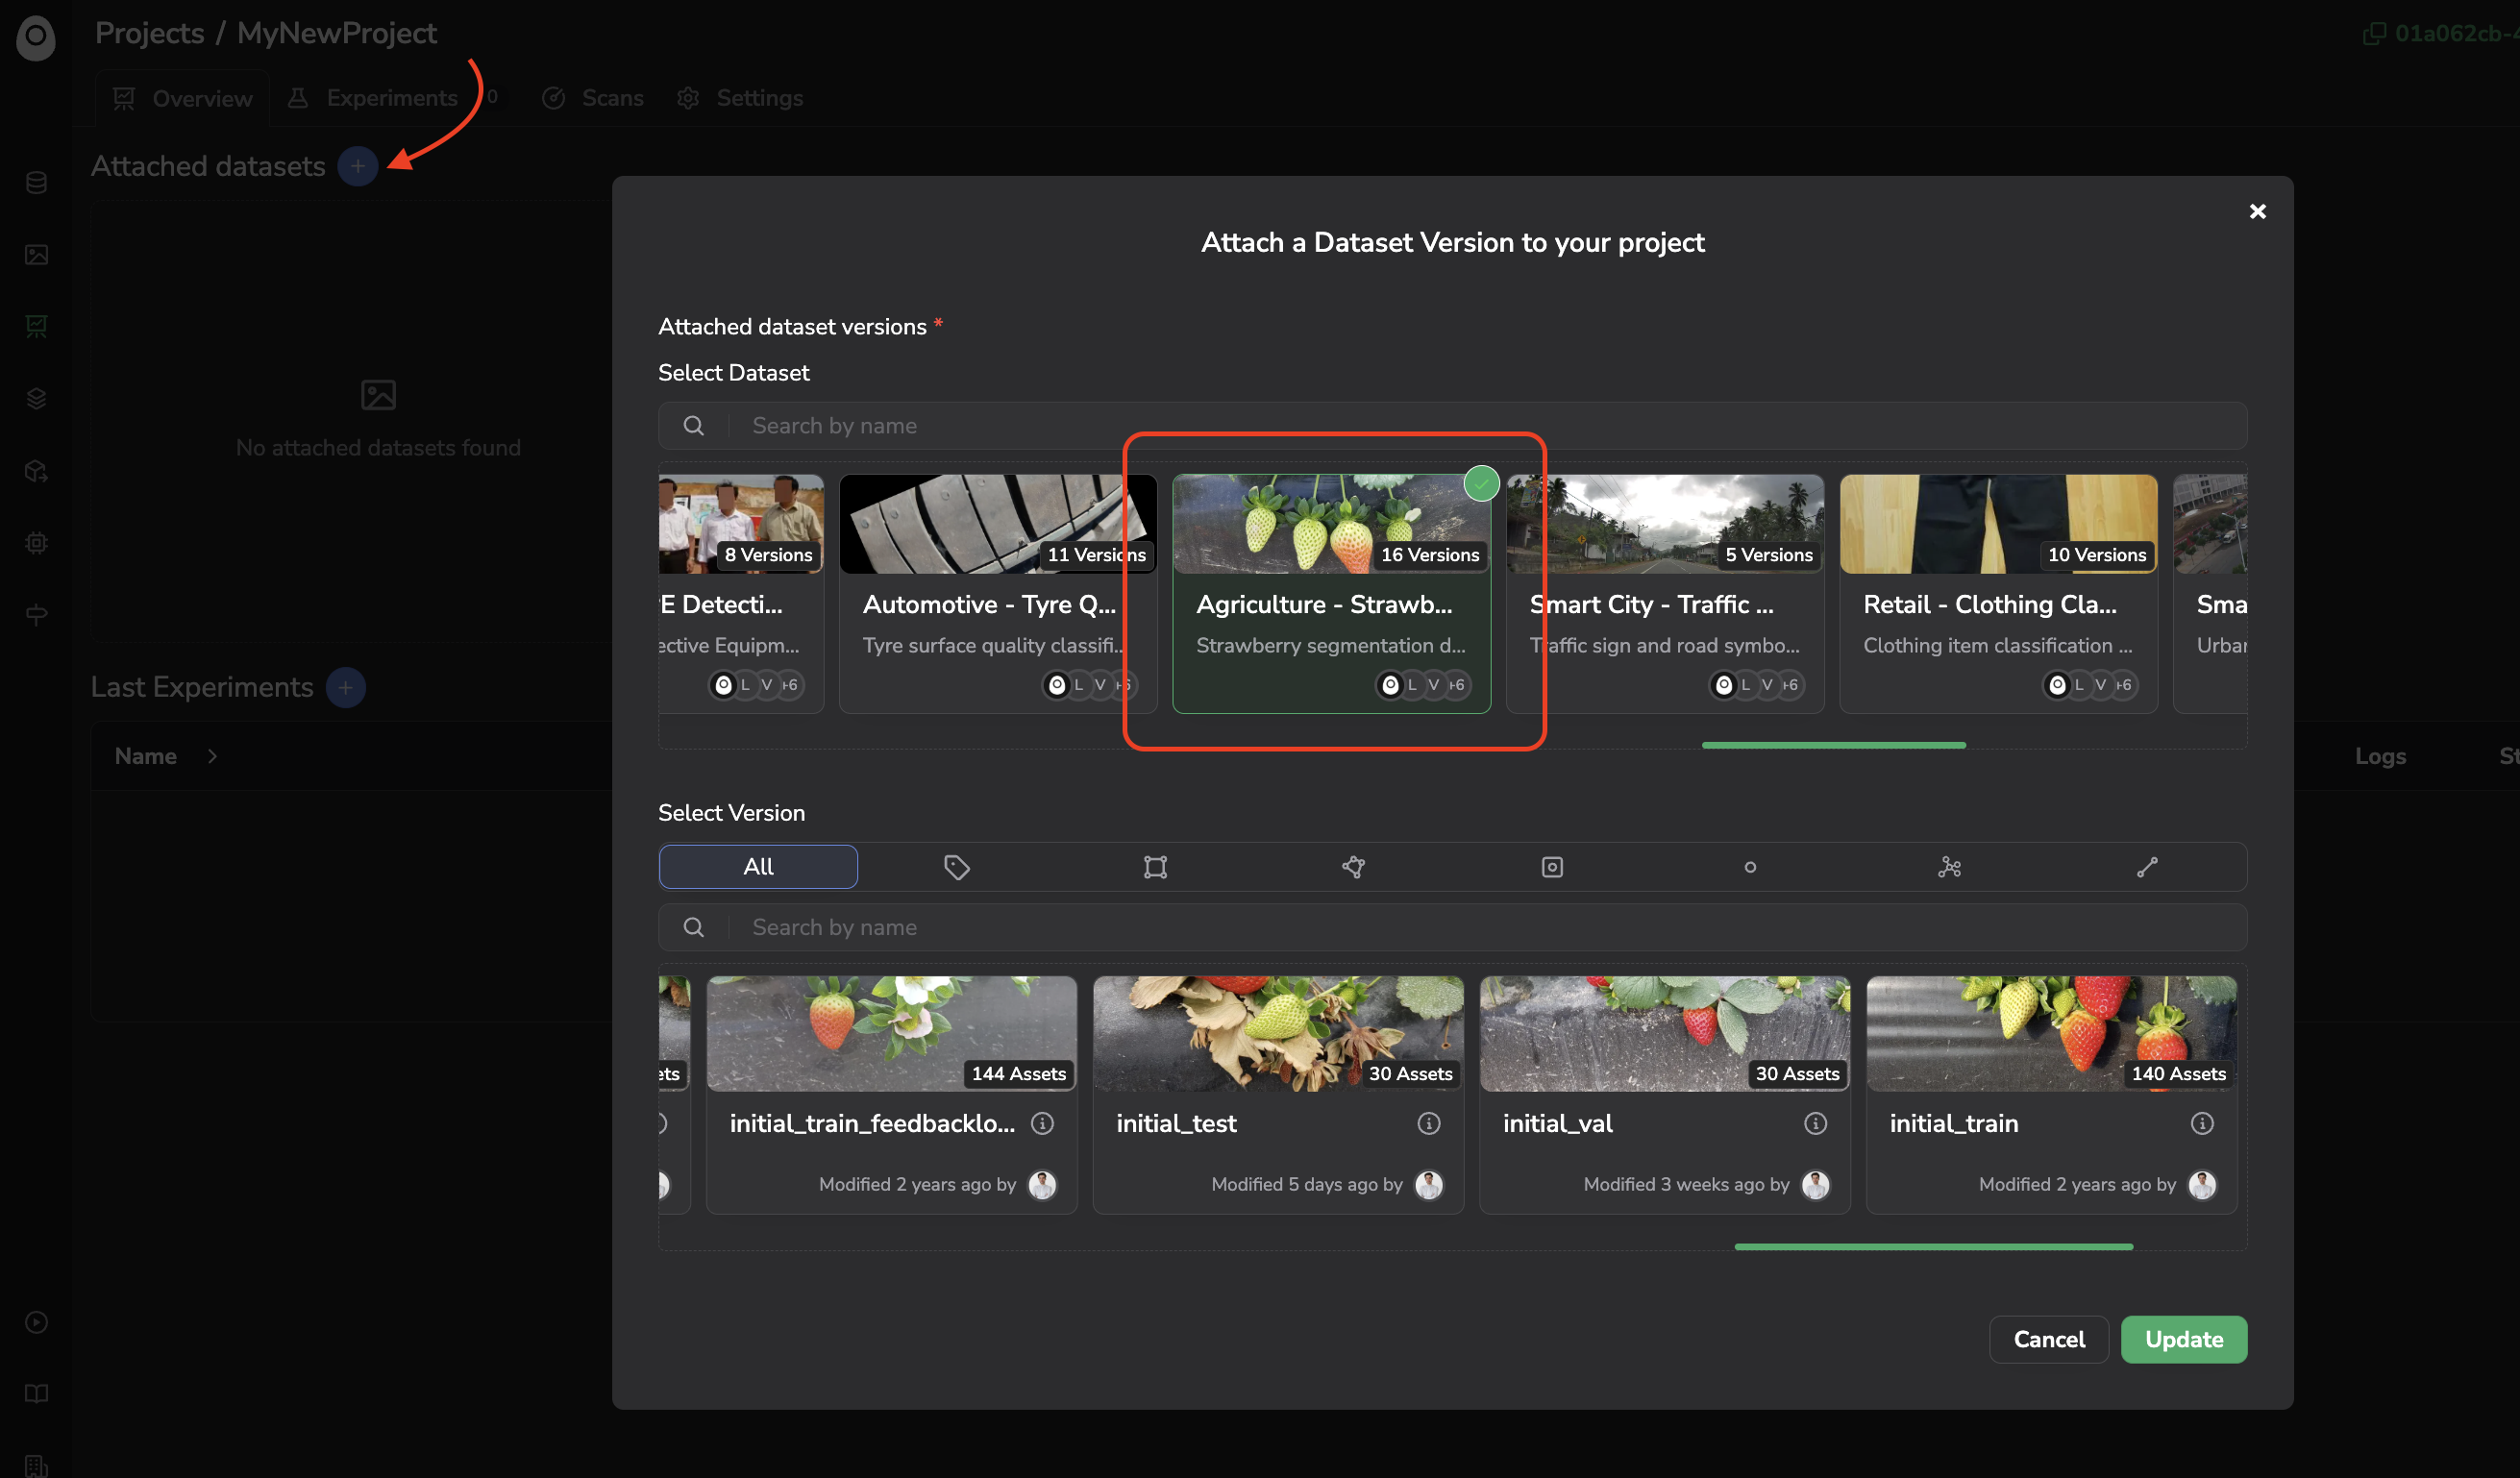
Select the Dataset
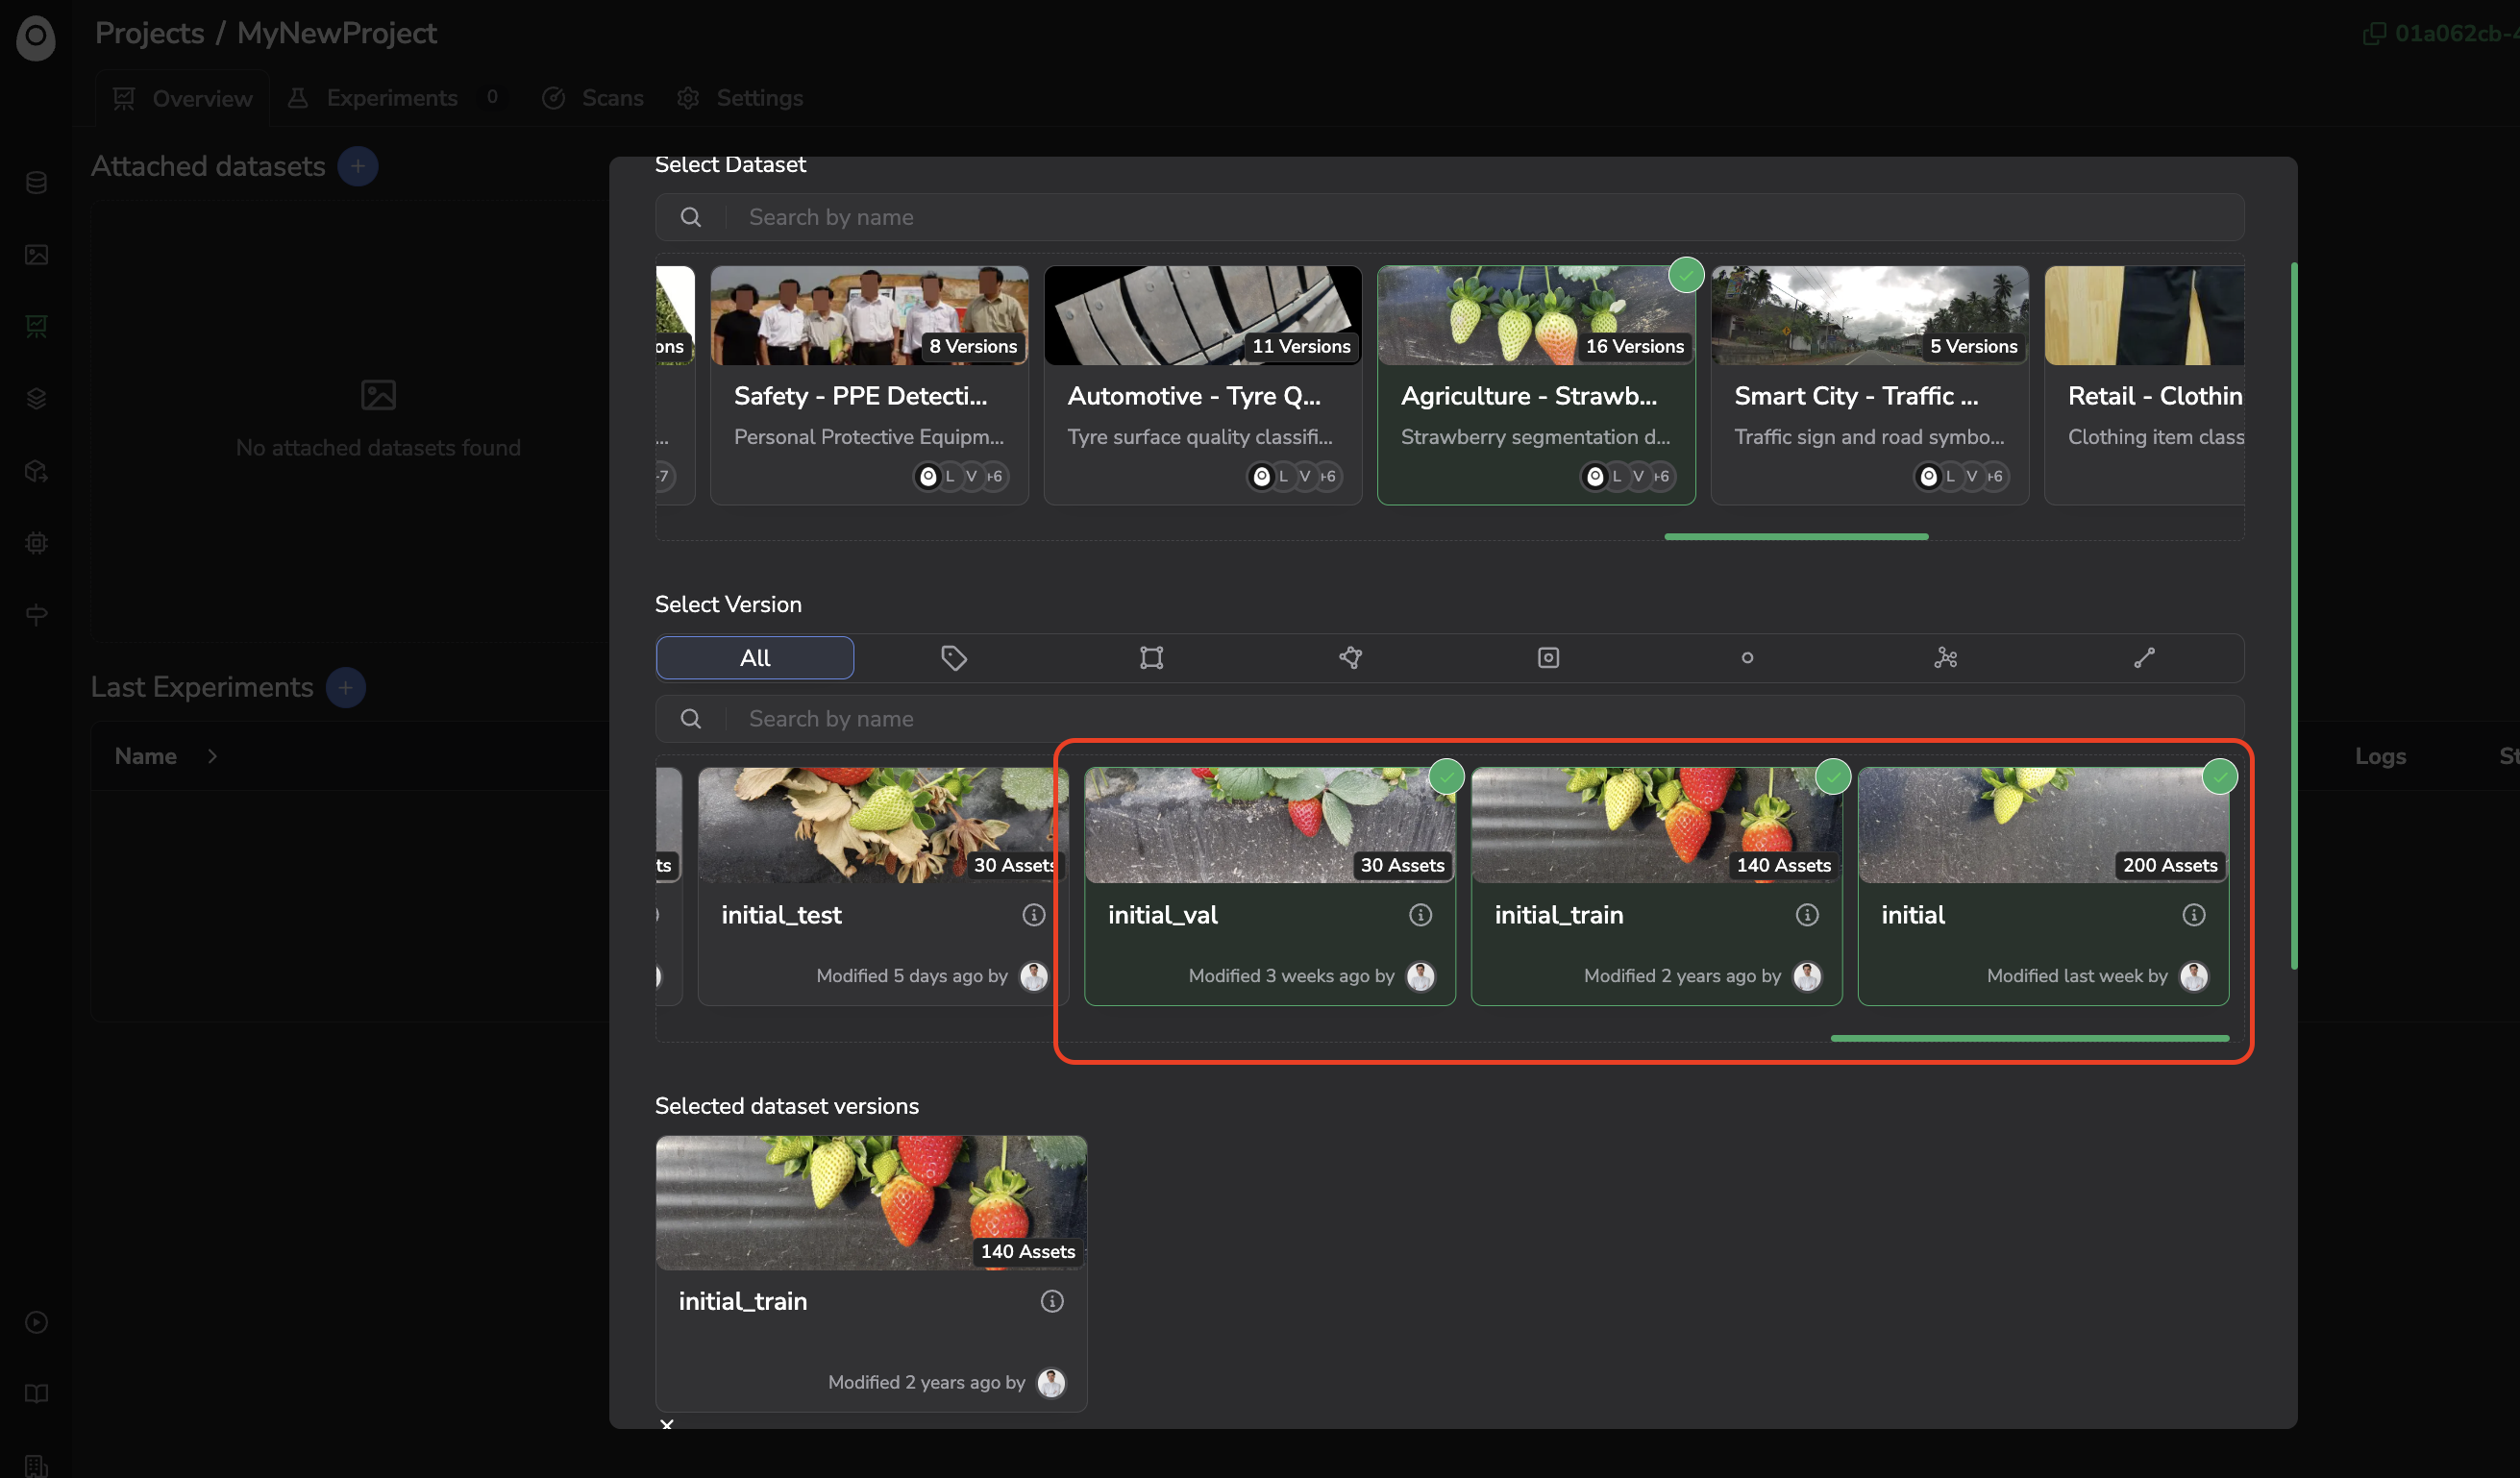
Select the DatasetVersion to be attached to Project
Once selected, click on Create. Your Project is now ready to get its first Experiment.
b. Last Experiments
The Last Experiments list is quite self-explanatory: it allows you to quickly visualize the main properties of the last Experiment created in the frame of the Project and create a new Experiment as detailed here.
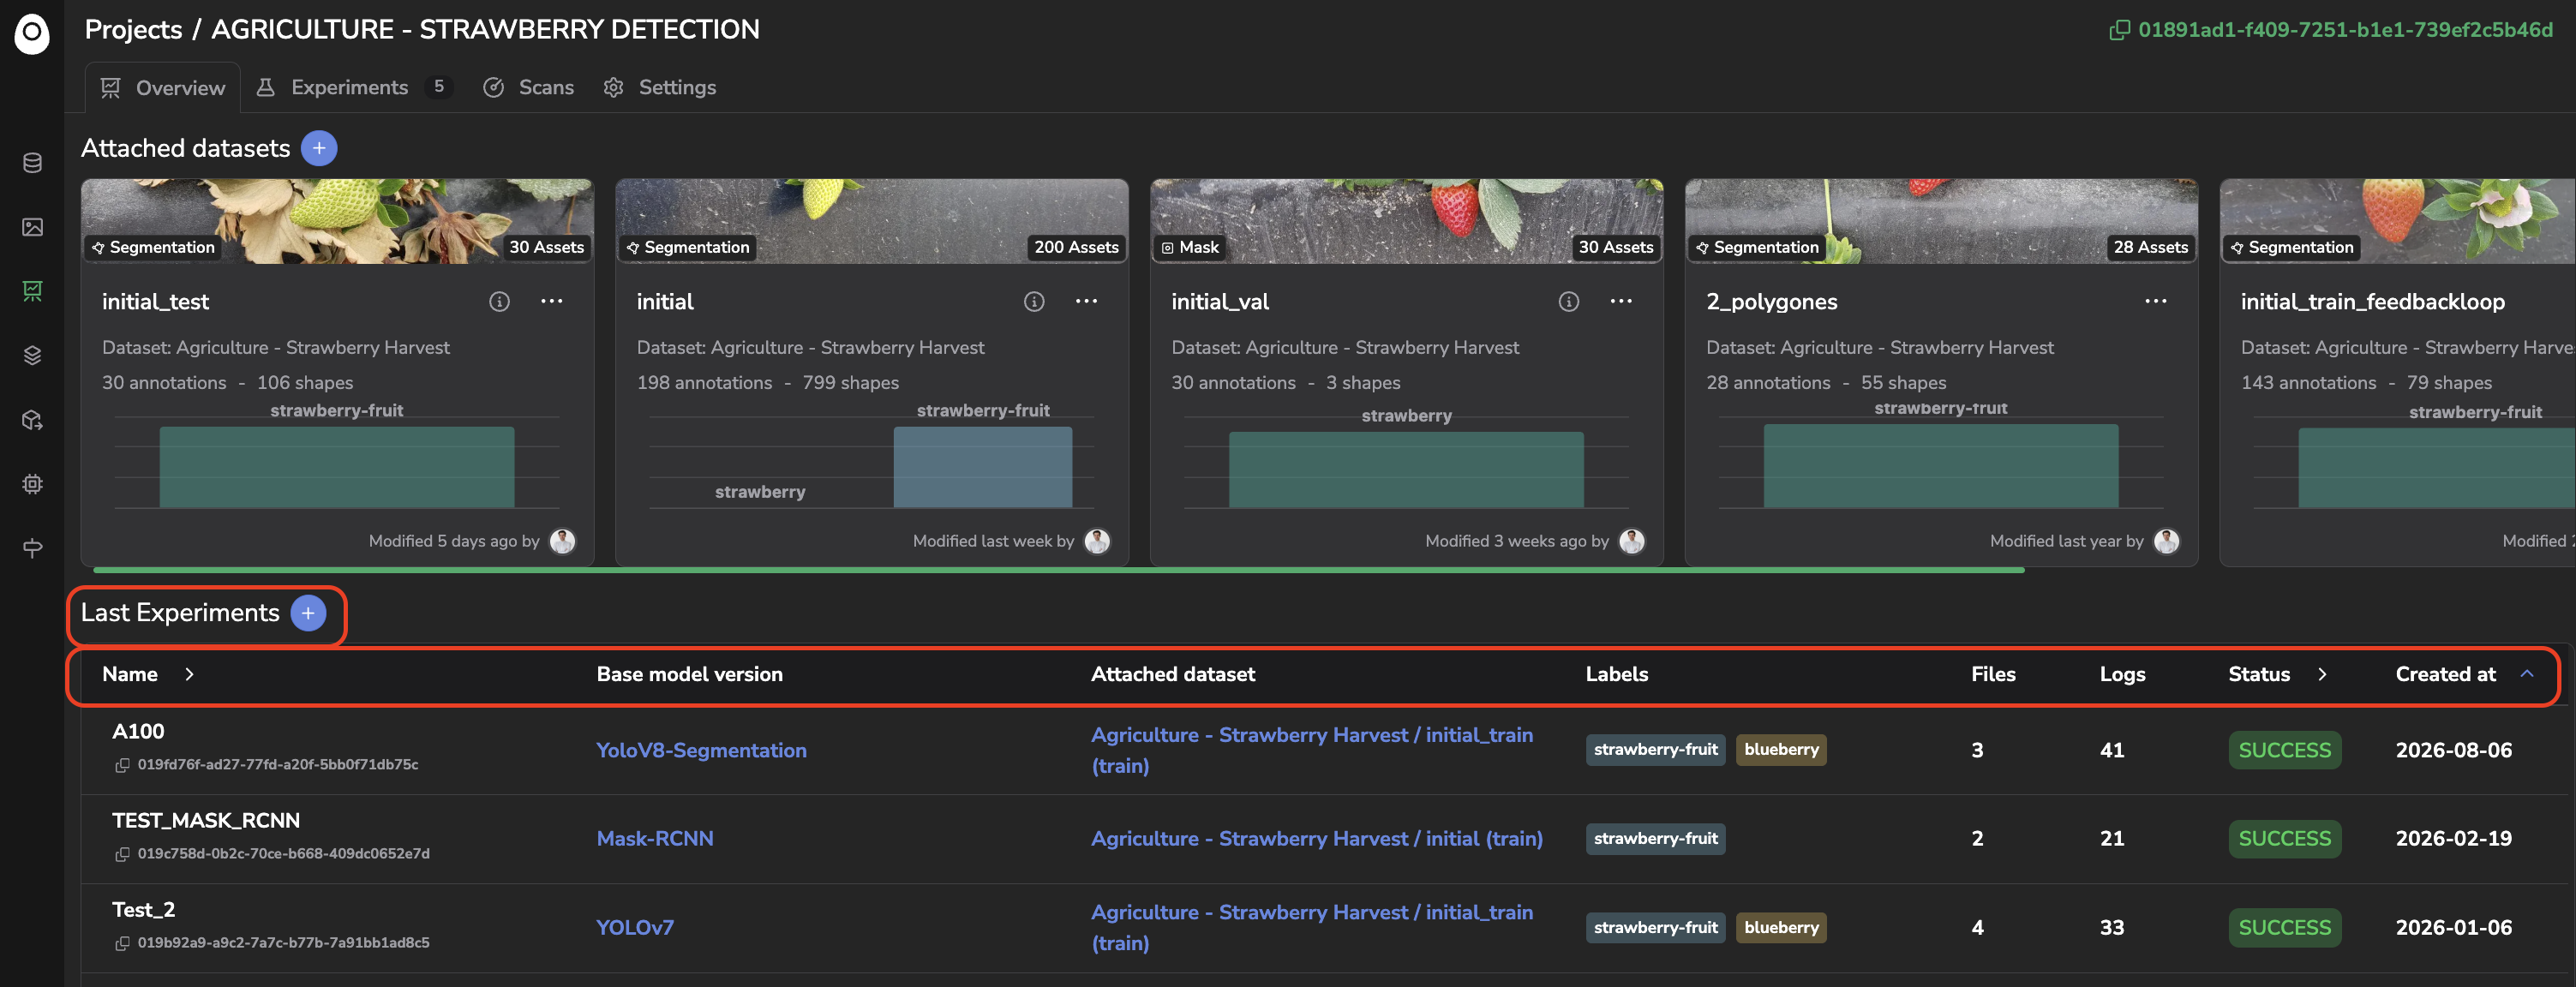
Last experiments
Clicking on any Experiment name will lead you to its Experiment overview page.
5. Experiments
By accessing the Experiments tab, you access the exhaustive list of Experiment created in the current Project and can visualize the main properties of each Experiment.
You also have the possibility to create a new Experiment by clicking on the + New Experiment button; more details about Experiment creation are available here.
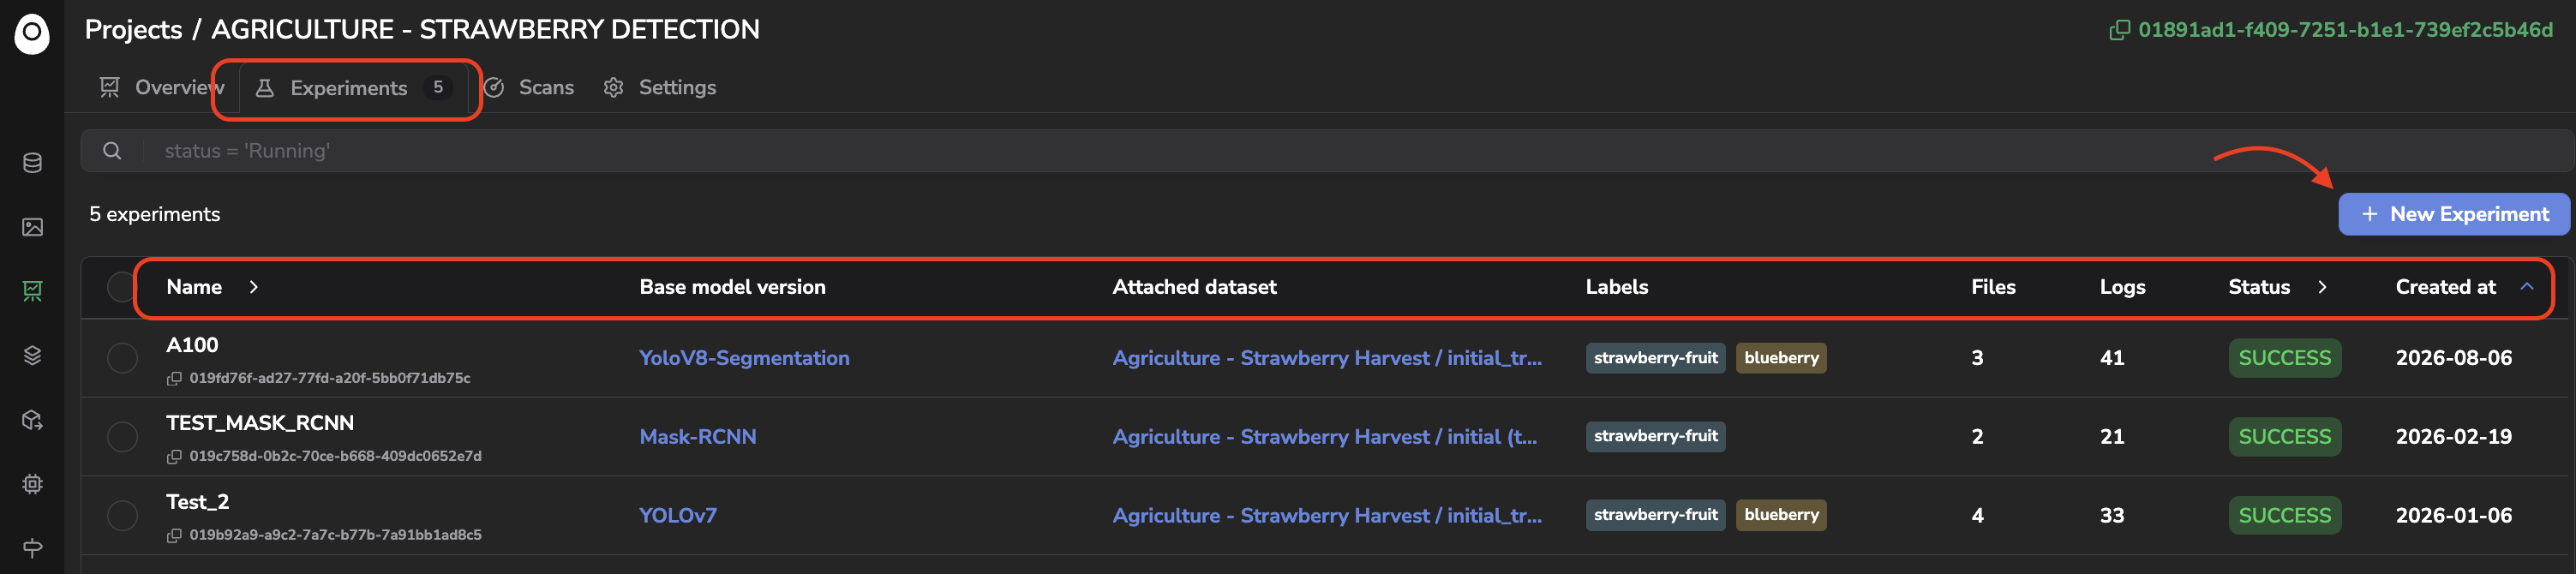
In case you have many Experiment in your Project, you can leverage the Search bar to search for a particular Experiment. The Search bar embeds an auto-completion engine that lets you search Experiment on properties such as Name, Status, and Creation date.
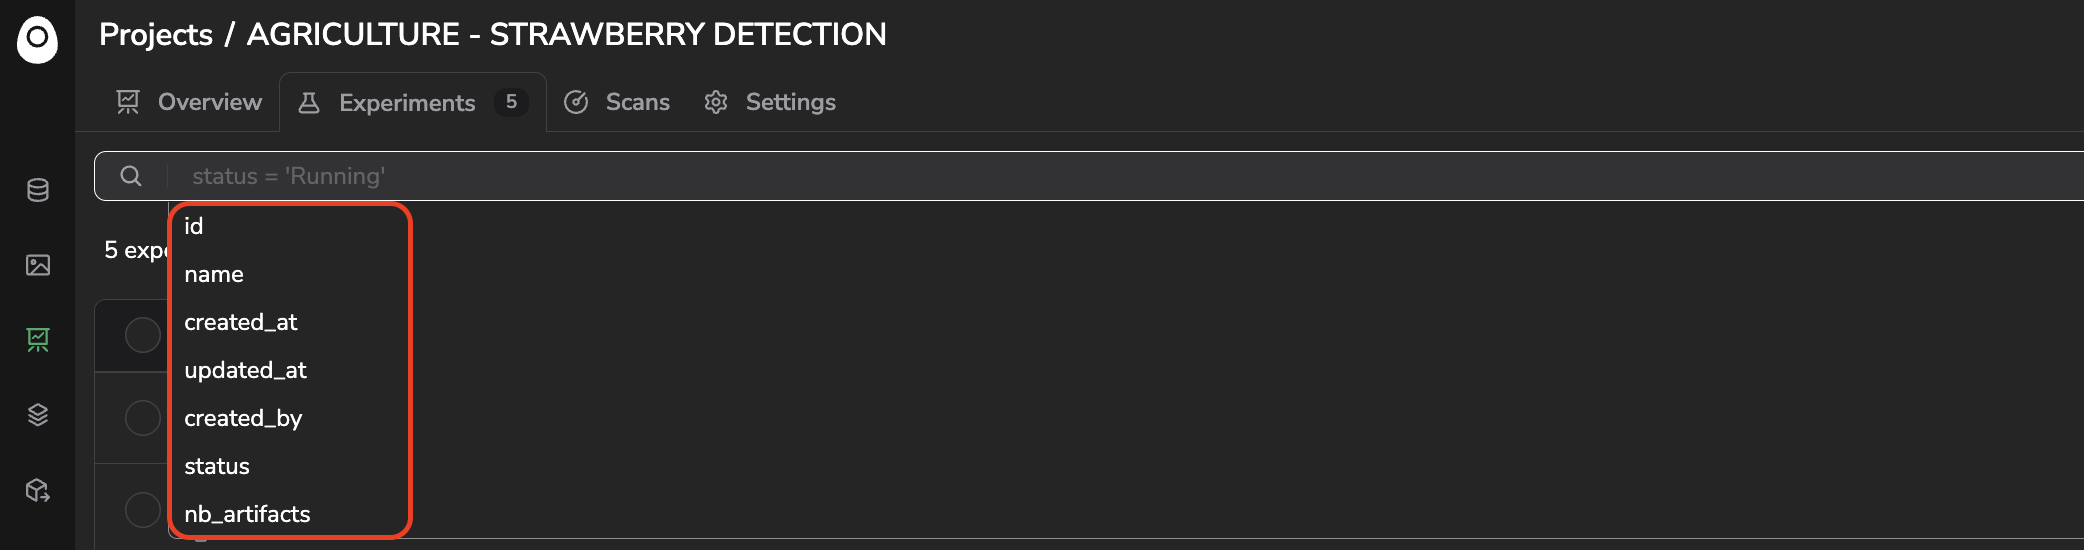
Search bar for Experiments
6. Scans
Besides creating Experiment one by one, the Scans tab lets you launch a hyperparameter search across several runs at once, using either a Grid search (every combination of the values you define) or an Optuna Bayesian-optimized search.
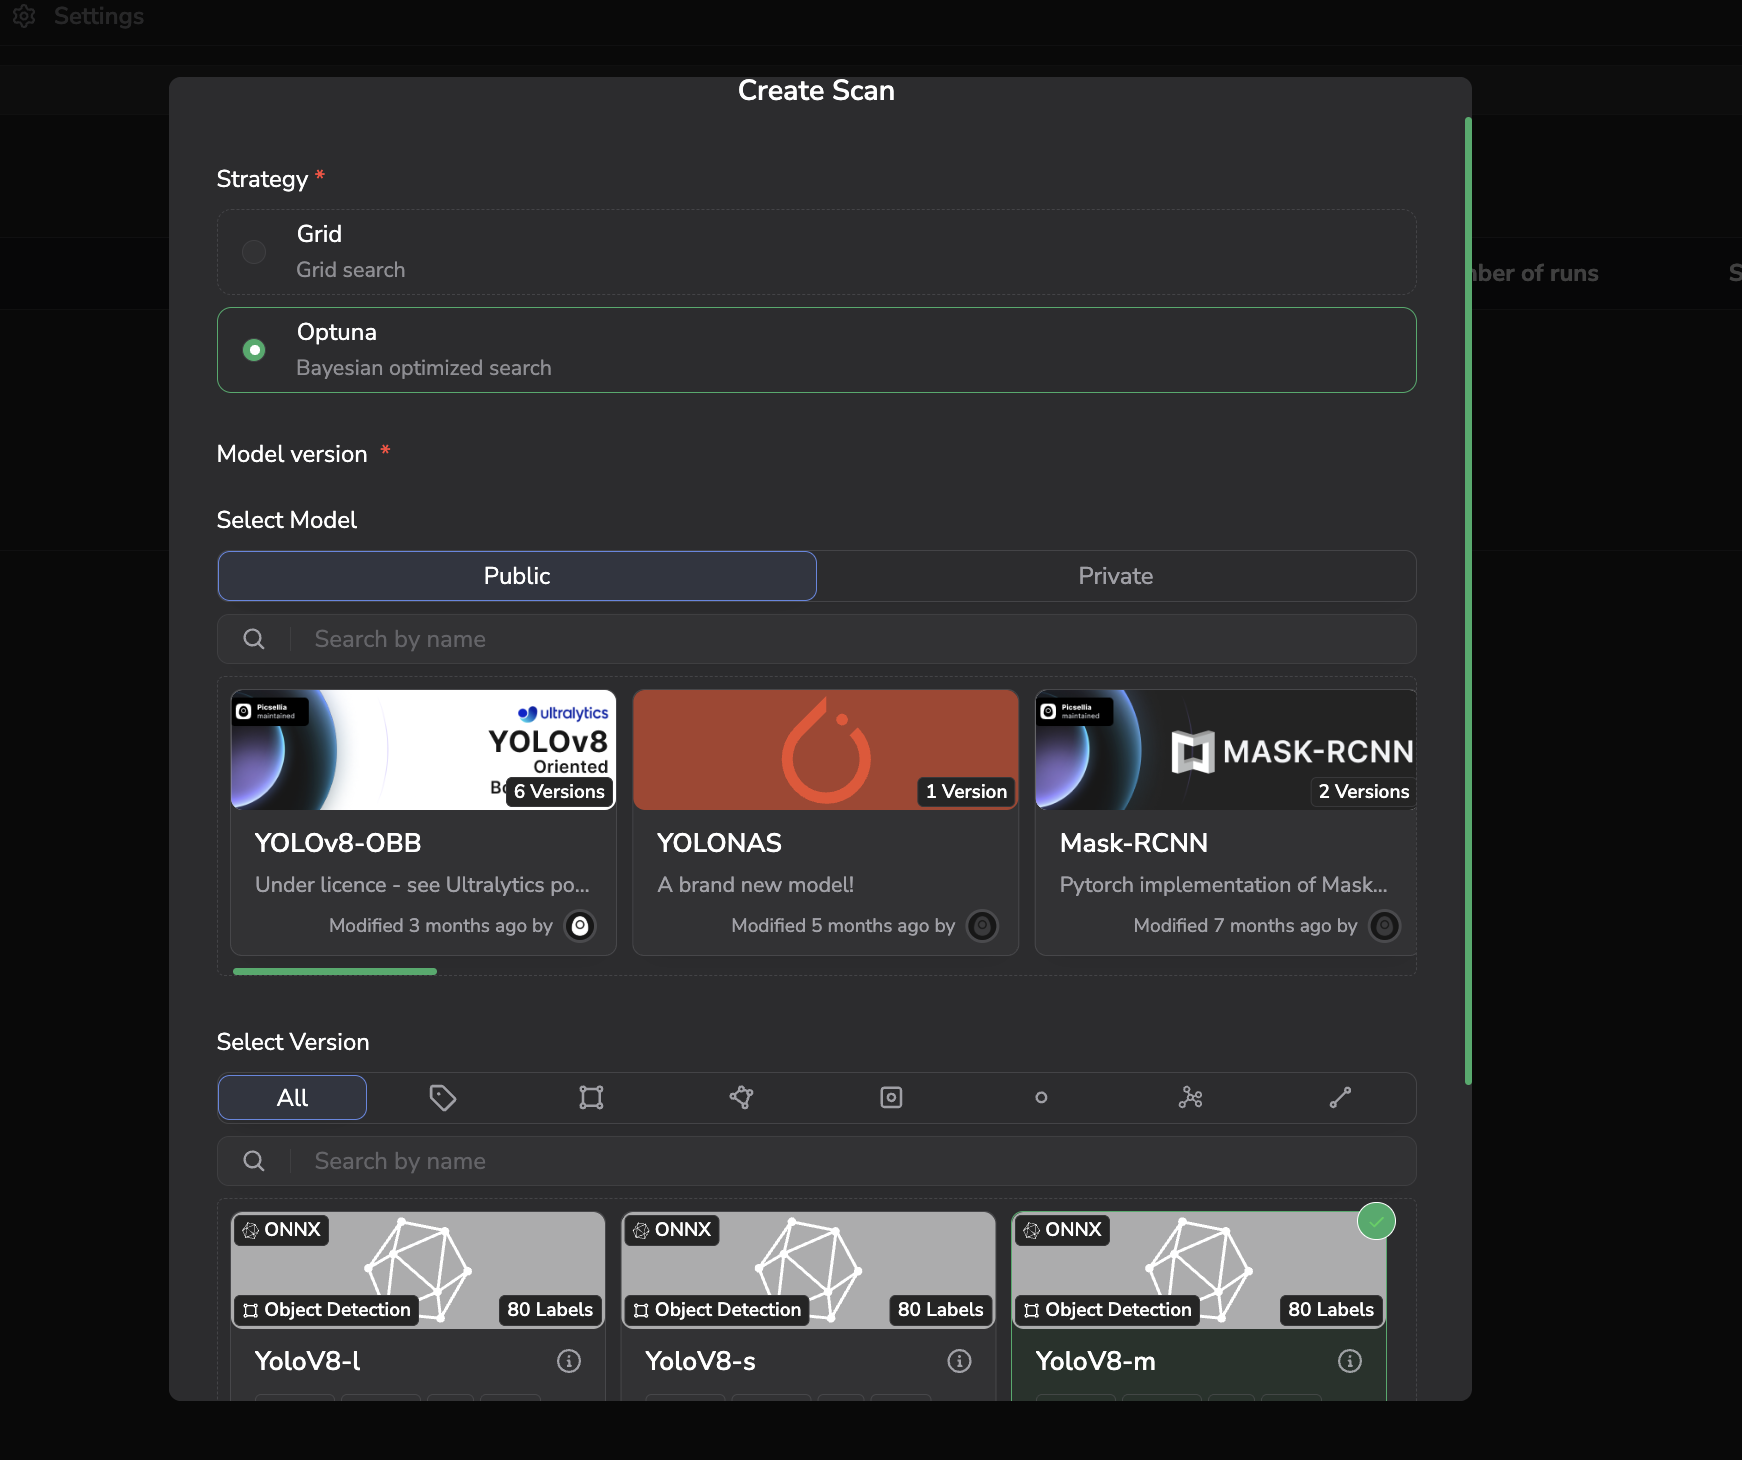
Scan creation
7. Settings and Access Management
The Settings tab lets authorized users modify the name and description of the Project and delete it, through the General tab.
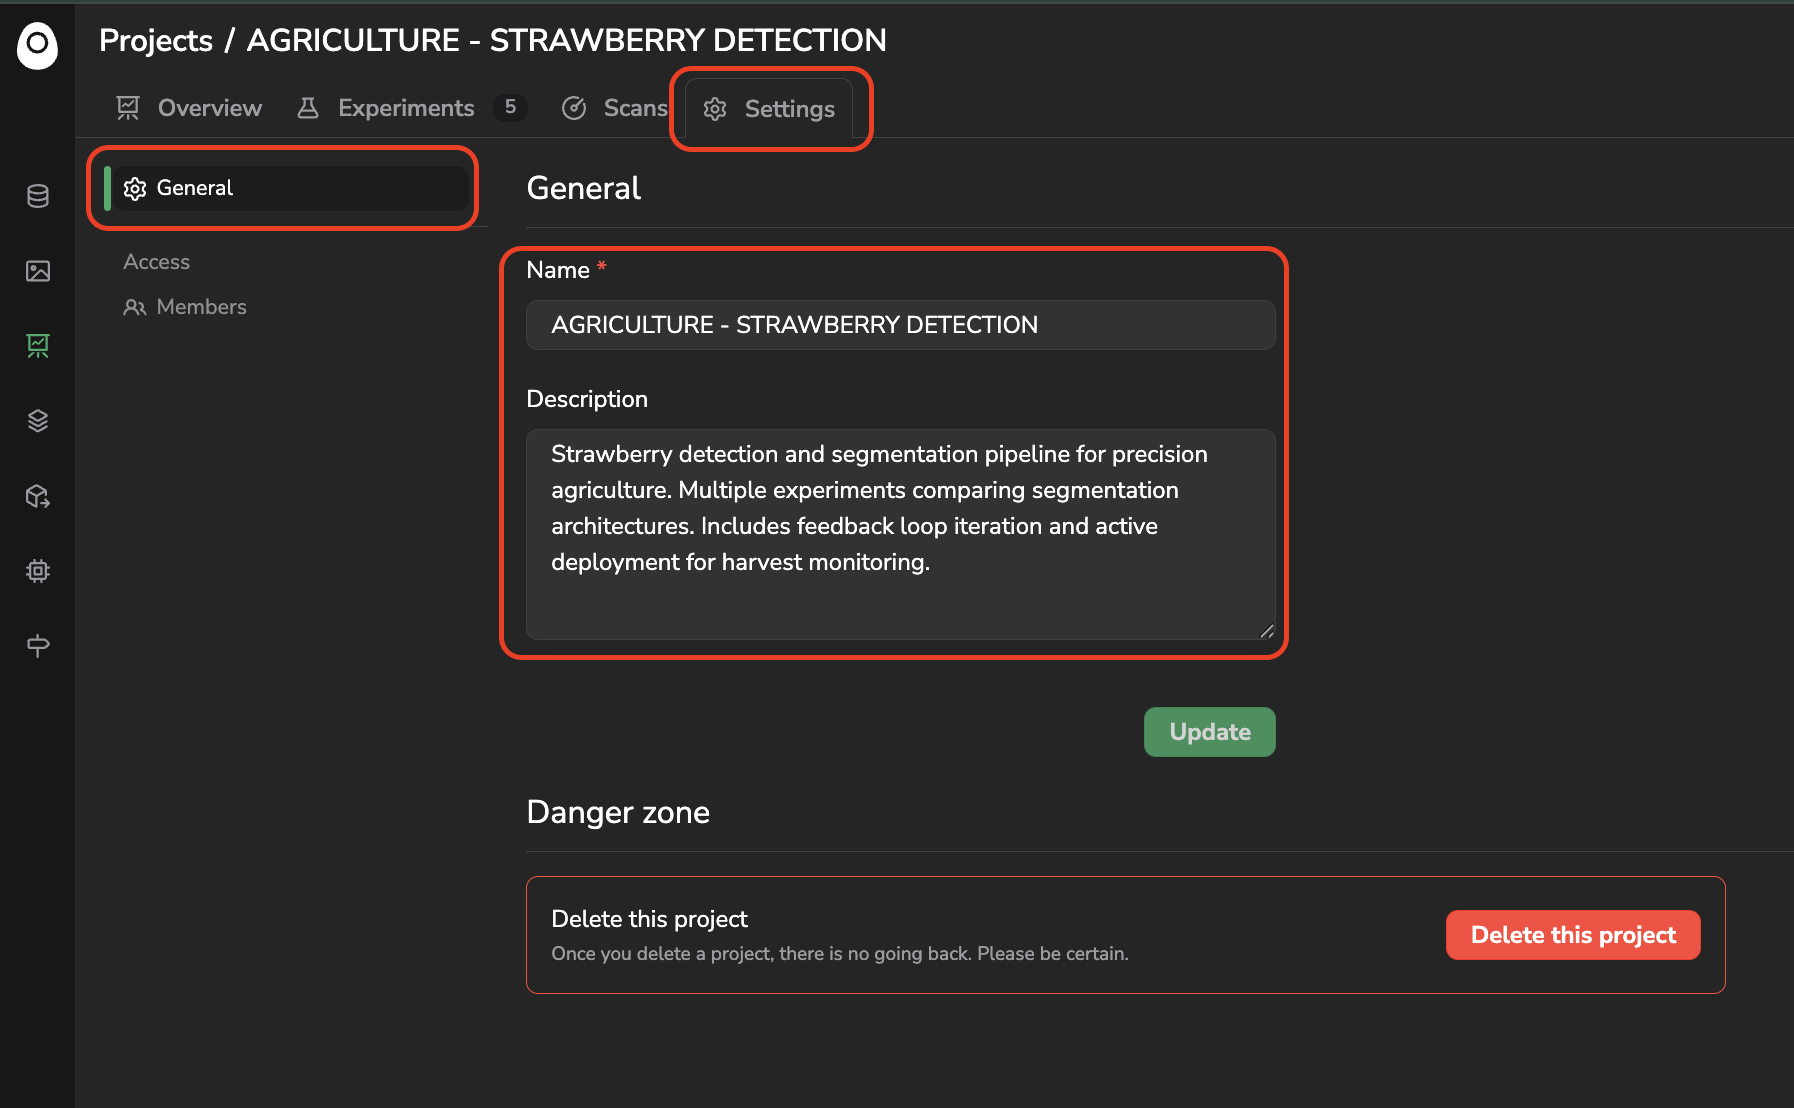
General tab in Project Settings
The Members tab lets you manage who can access the current Project, on top of the access already granted through each Member's Organization Access on the Project resource type.
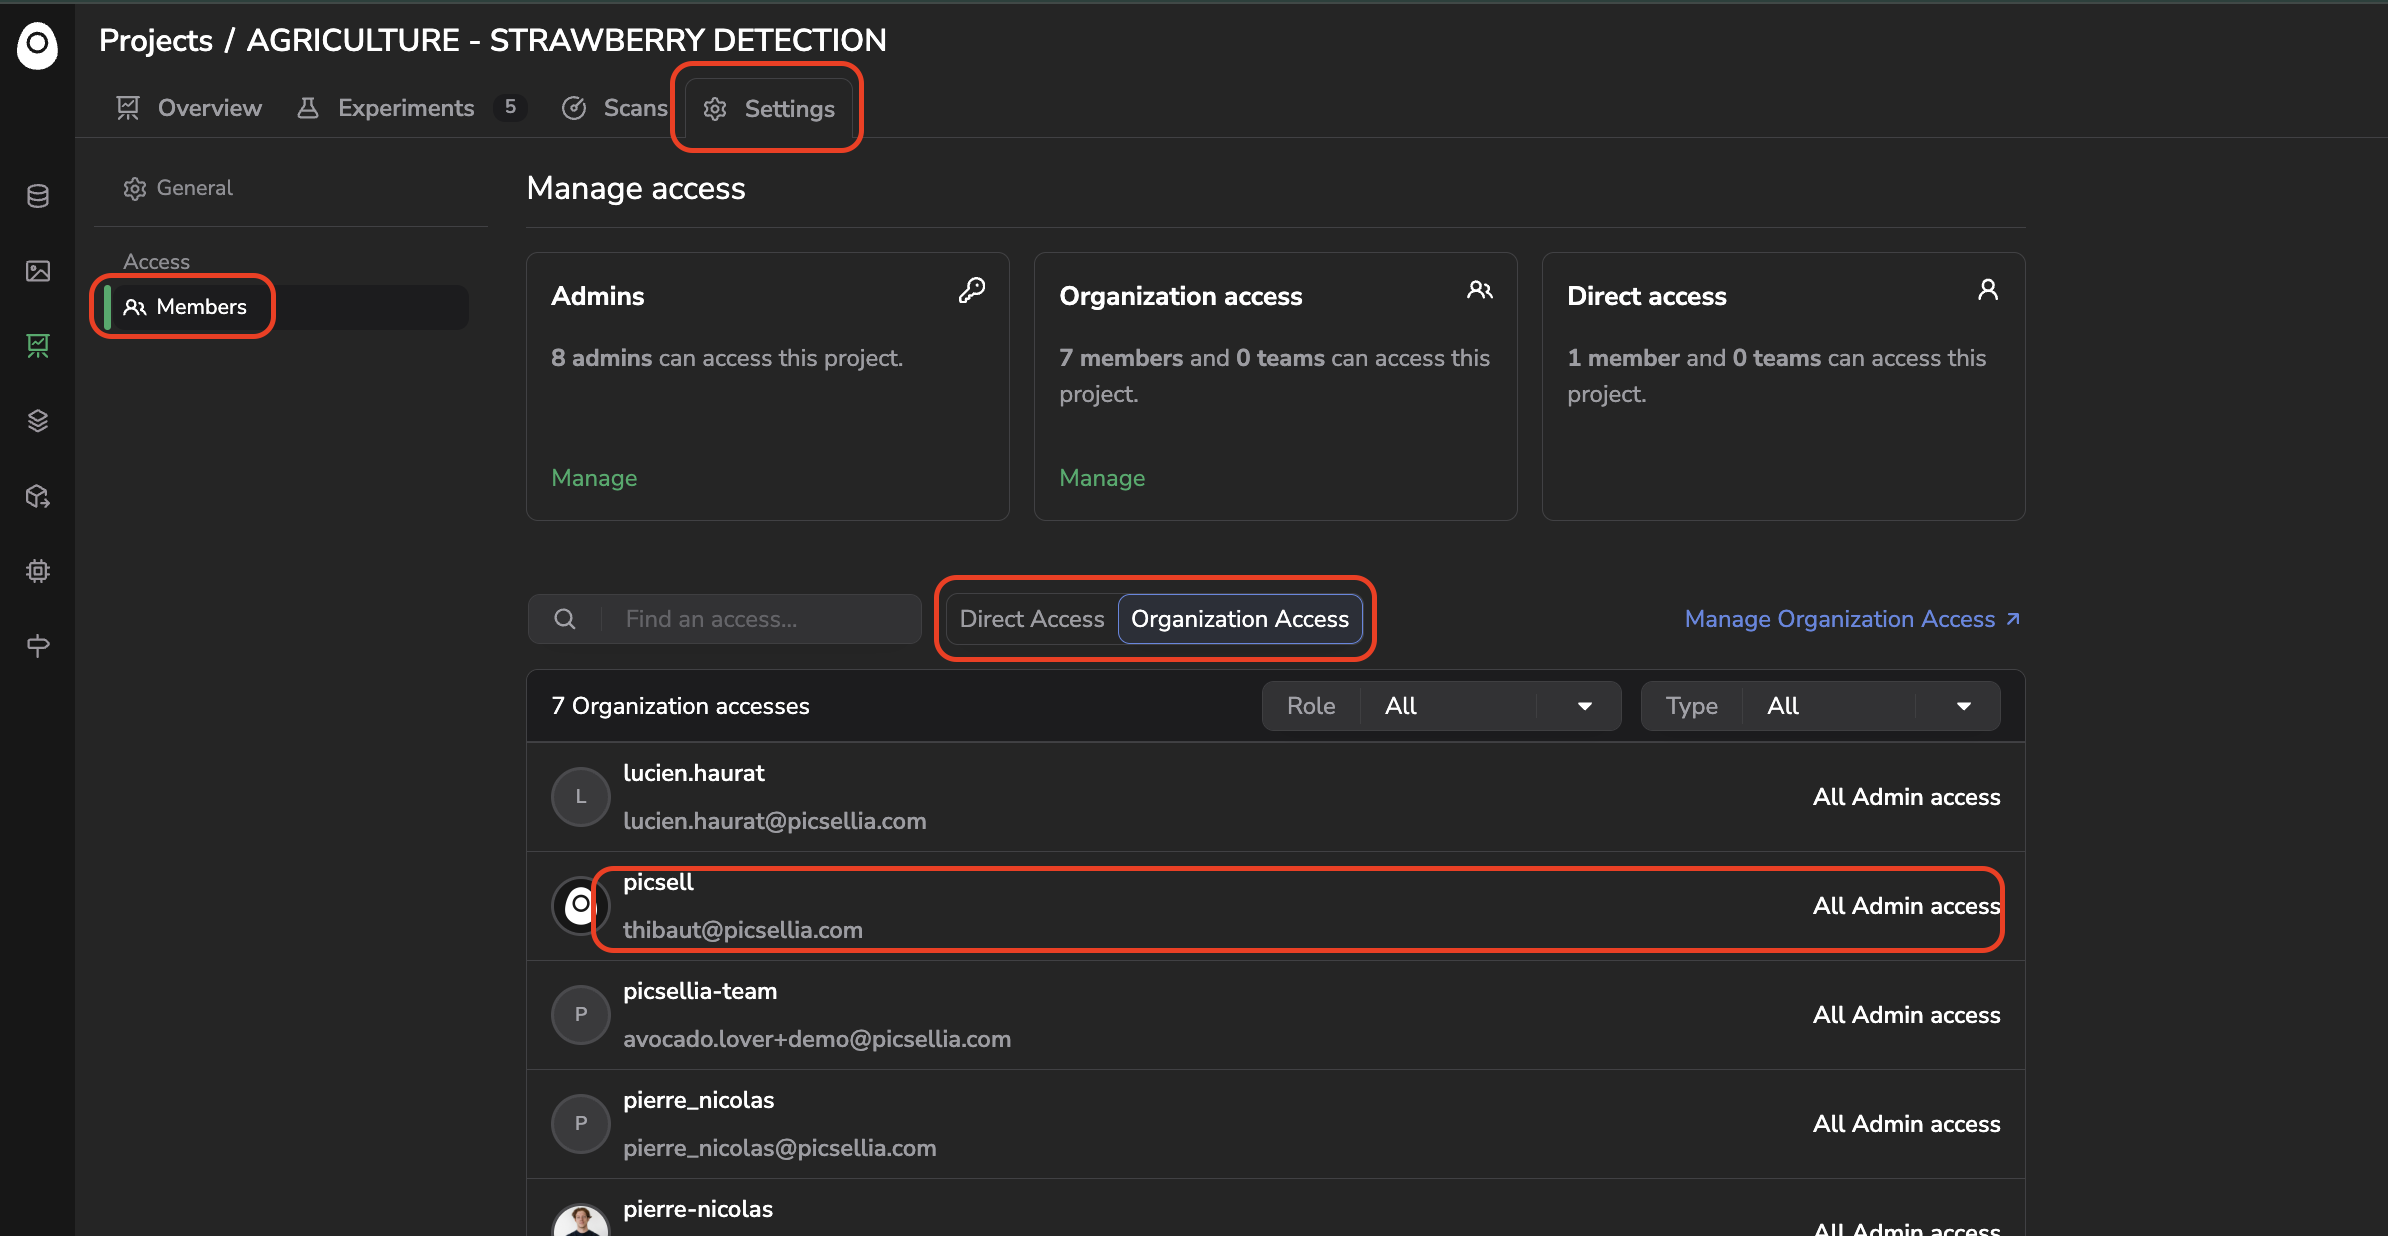
Members tab of Project Settings
This view, only accessible if you have an Admin Organization Right or an Admin Organization Access on the Project resource type, first summarizes how many Members can already access the Project as Admins or through their Organization Access, and how many have been granted a Direct Access to this specific Project.
Click on + Add Member (or + Add Team) to grant a Member or a Team a Direct Access to the current Project, with a Reader, User, or Admin role — a Direct Access lets you raise a Member's privileges on this particular Project above what their Organization Access would otherwise grant them.
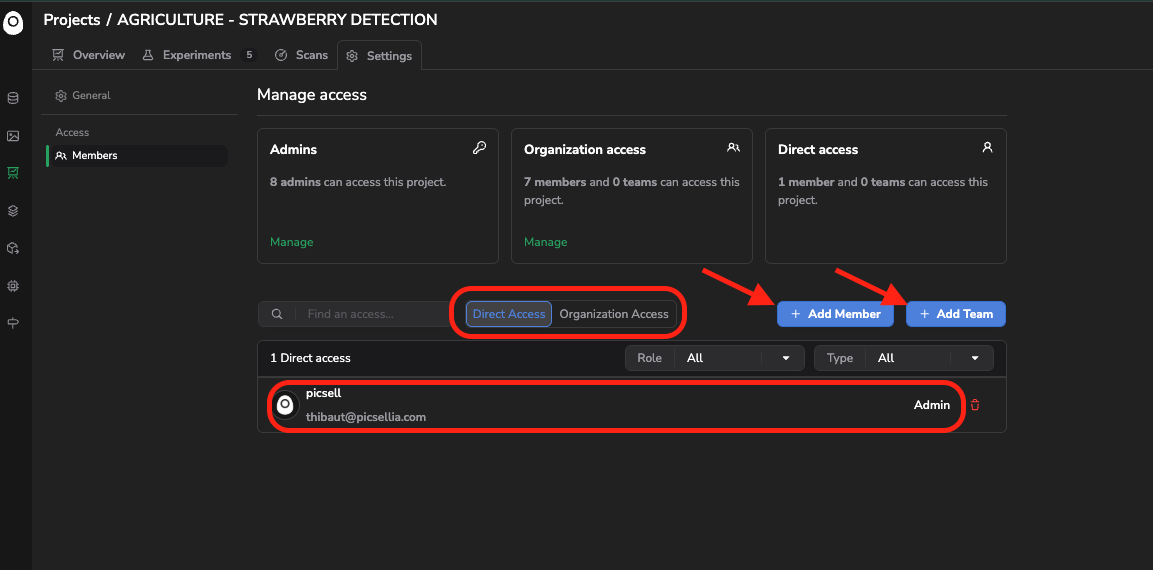
Grant a Direct Access on the current Project
More on Members and rightsThe
Projectresource follows the same Organization Rights, Organization Access, and Direct Access mechanisms detailed in Users Management System.
Updated 13 days ago