

Picsellia Organizations
On Picsellia, you can work on multiple workspaces, which are referred to as Organizations on the platform.
1. Organization types
Each Organization can be either with a free plan or a premium plan.
A. Picsellia Community Edition
When creating an account on Picsellia, a free Organization will be created and linked to your account. This Organization is a free plan call Community Edition meaning that you will be able to access to a limited set of Picsellia features (Datalake and Dataset) with a limited quota of images and videos.
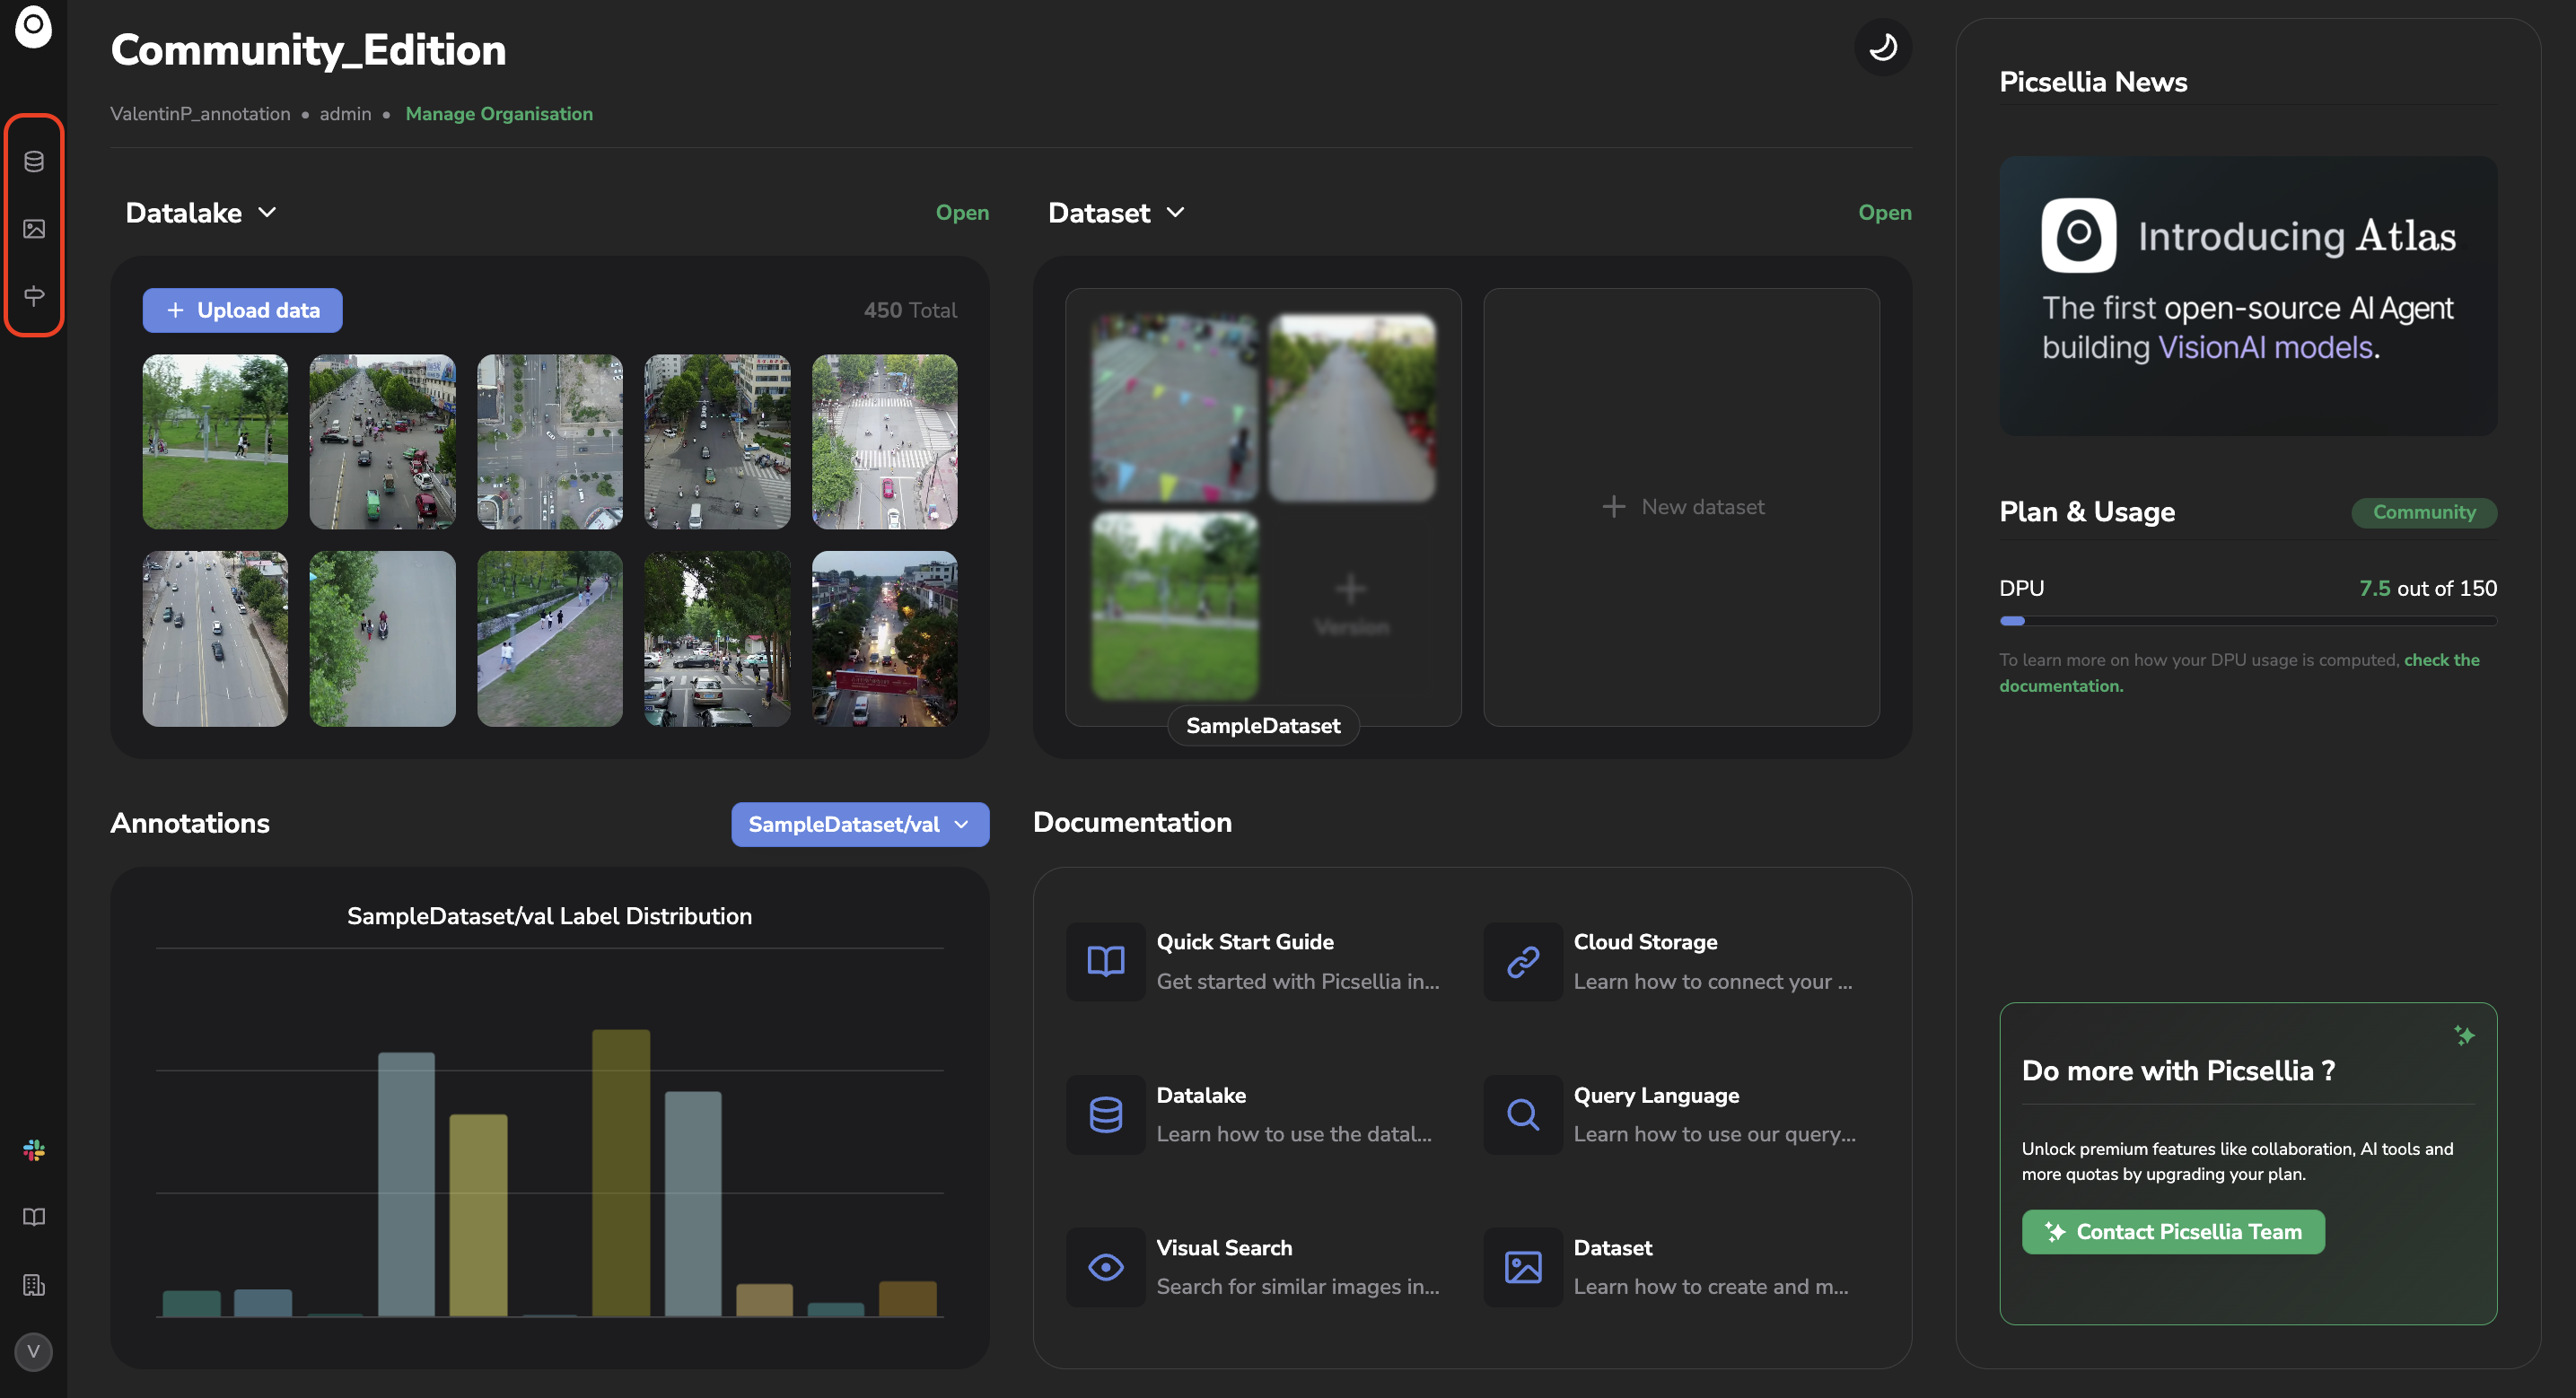
Picsellia Community Edition homepage
B. Picsellia Premium plan
However, if you subscribe to a Picsellia license, your Organization will be upgraded to a Premium plan, allowing you to, depending on your licence details, access all or some of the platform features with a higher quota and seats for your colleagues.
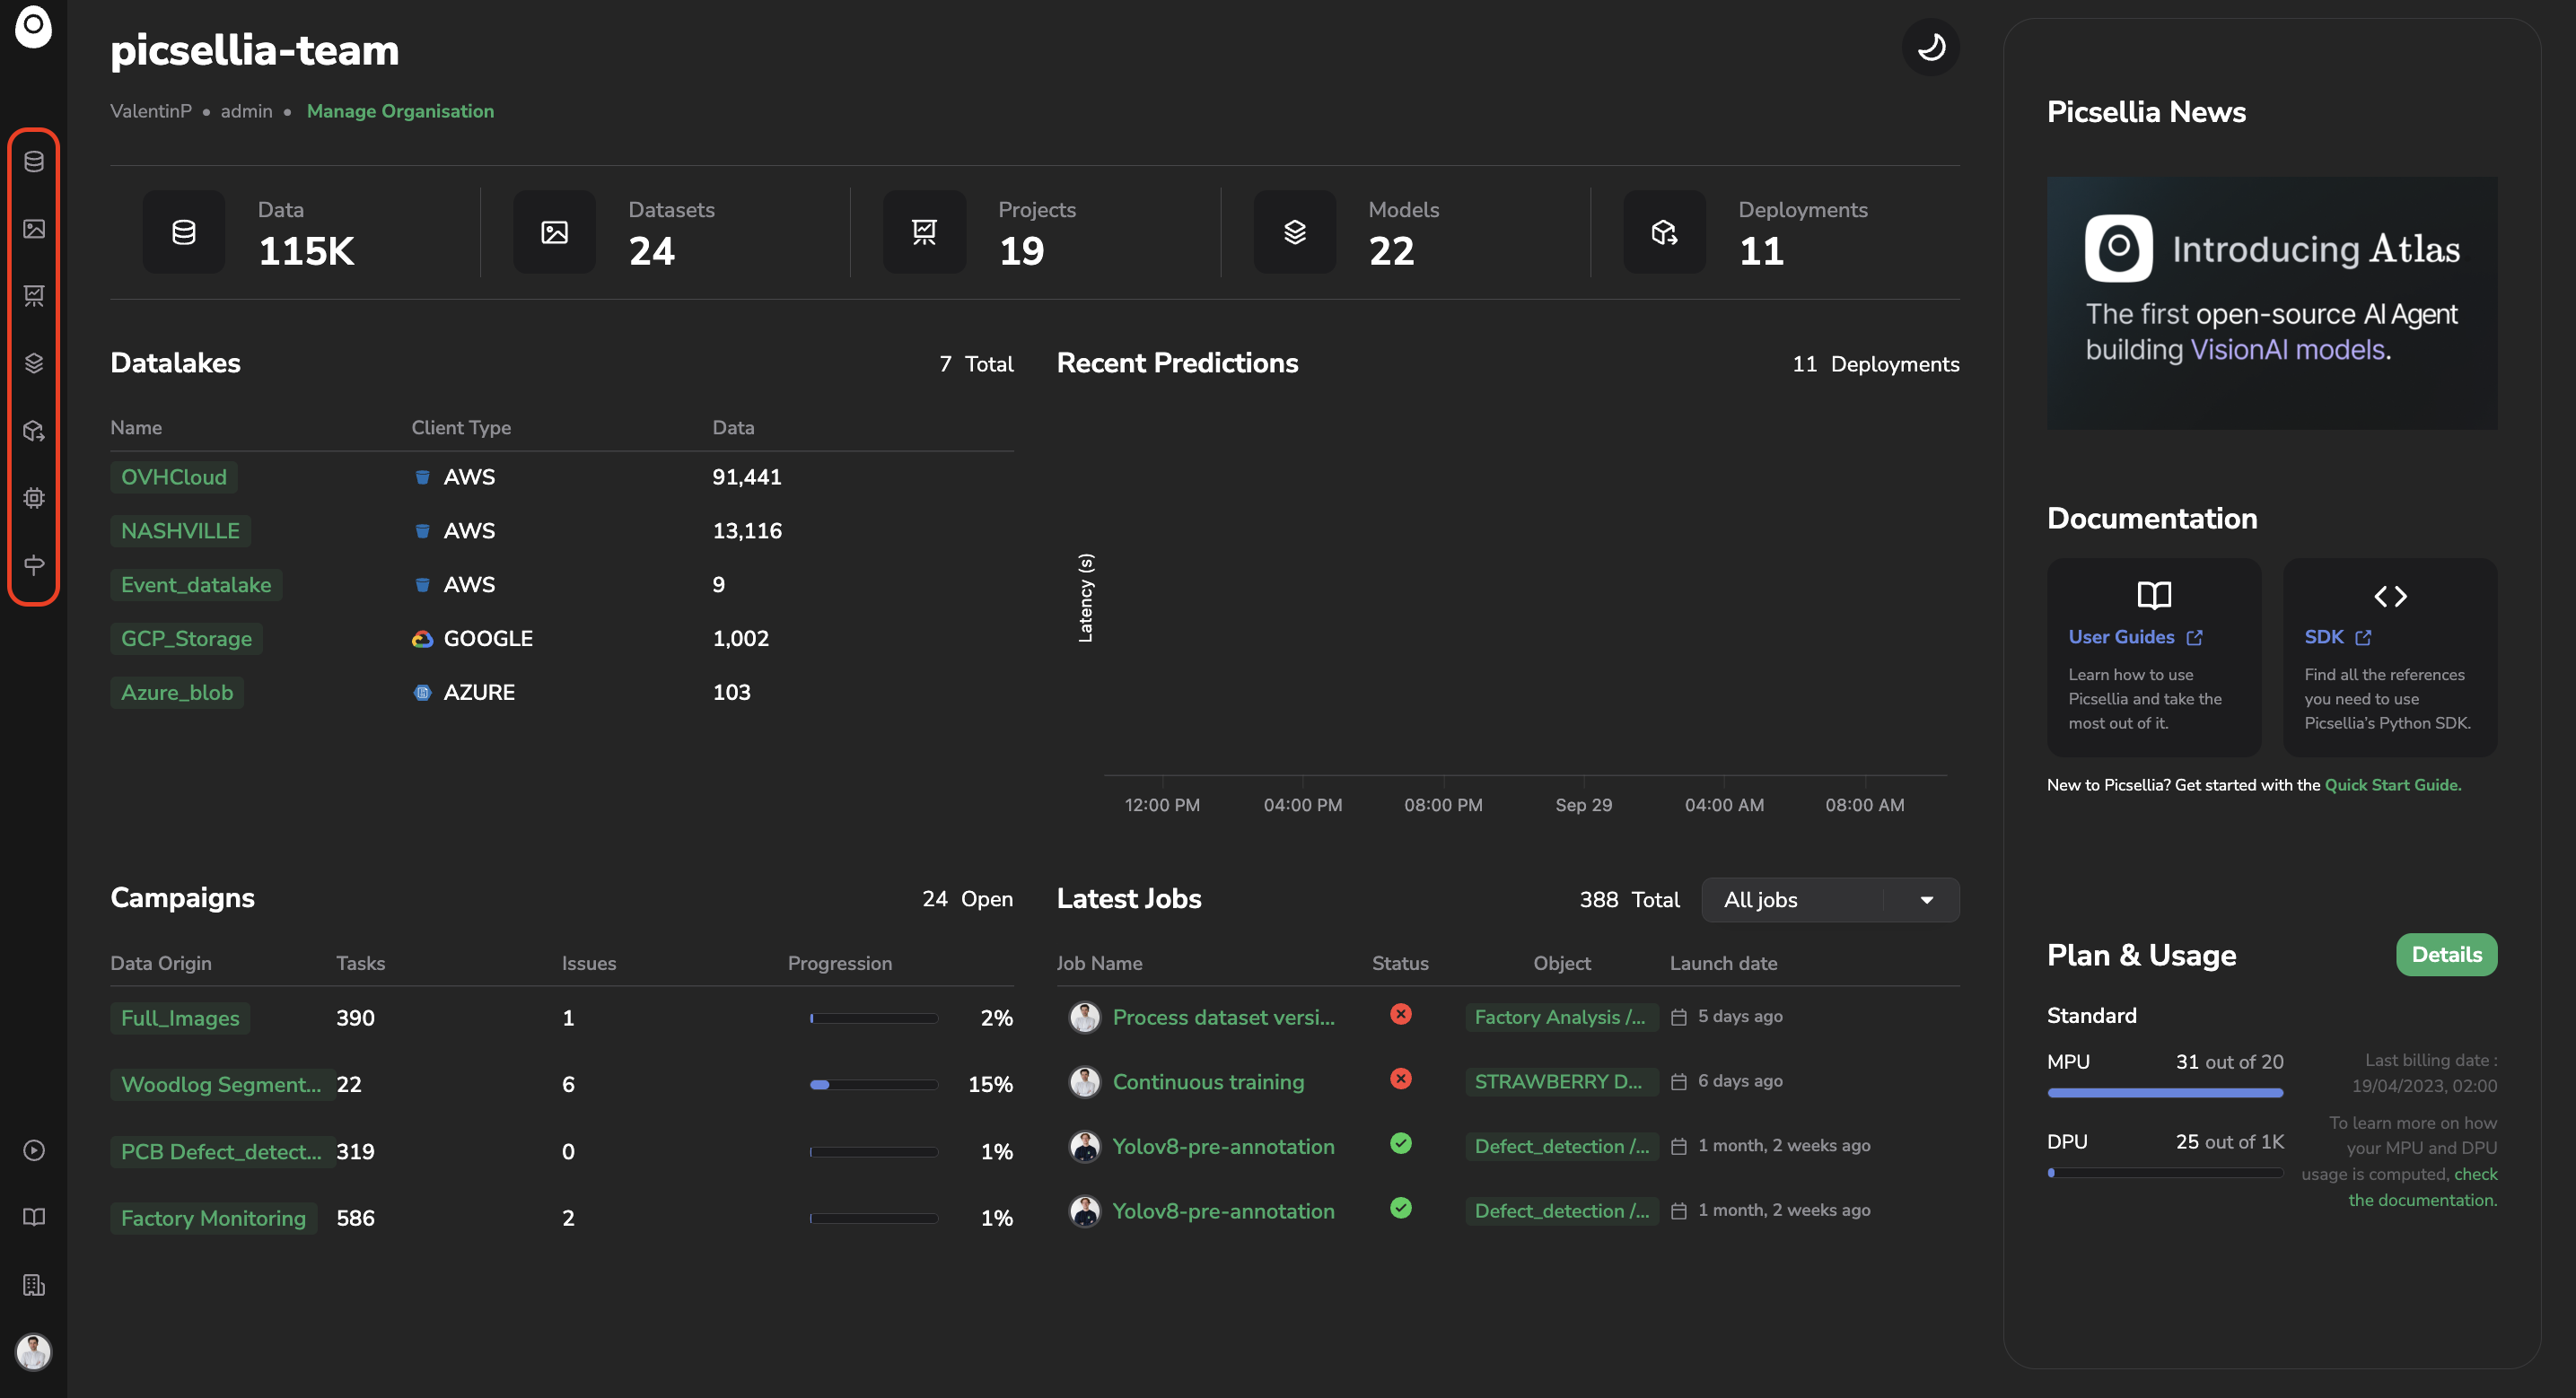
Picsellia Premium plan homepage
Usually there is only one Organization per contract that is elevated to the Premium plan, this Organization becomes the working one for all the members of a given company. Every user from the company would therefore have an access to its own Organization (with a free plan, Community Edition) and the shared Premium Organization.
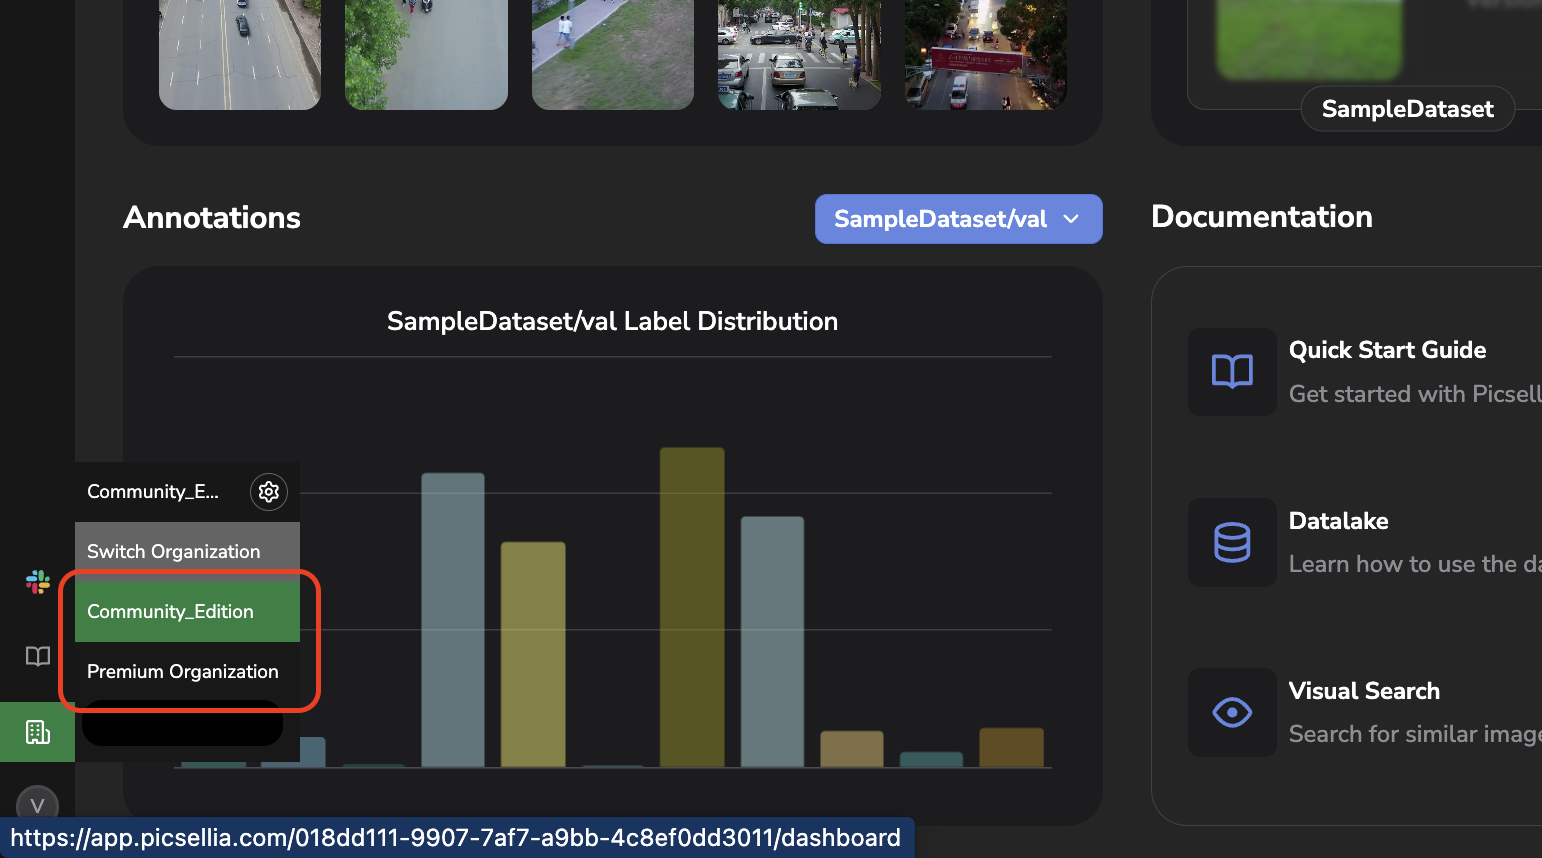
Switch between Free and Premium Organizations
2. Configure an Organization
You can access the settings of the current Organization as shown below.
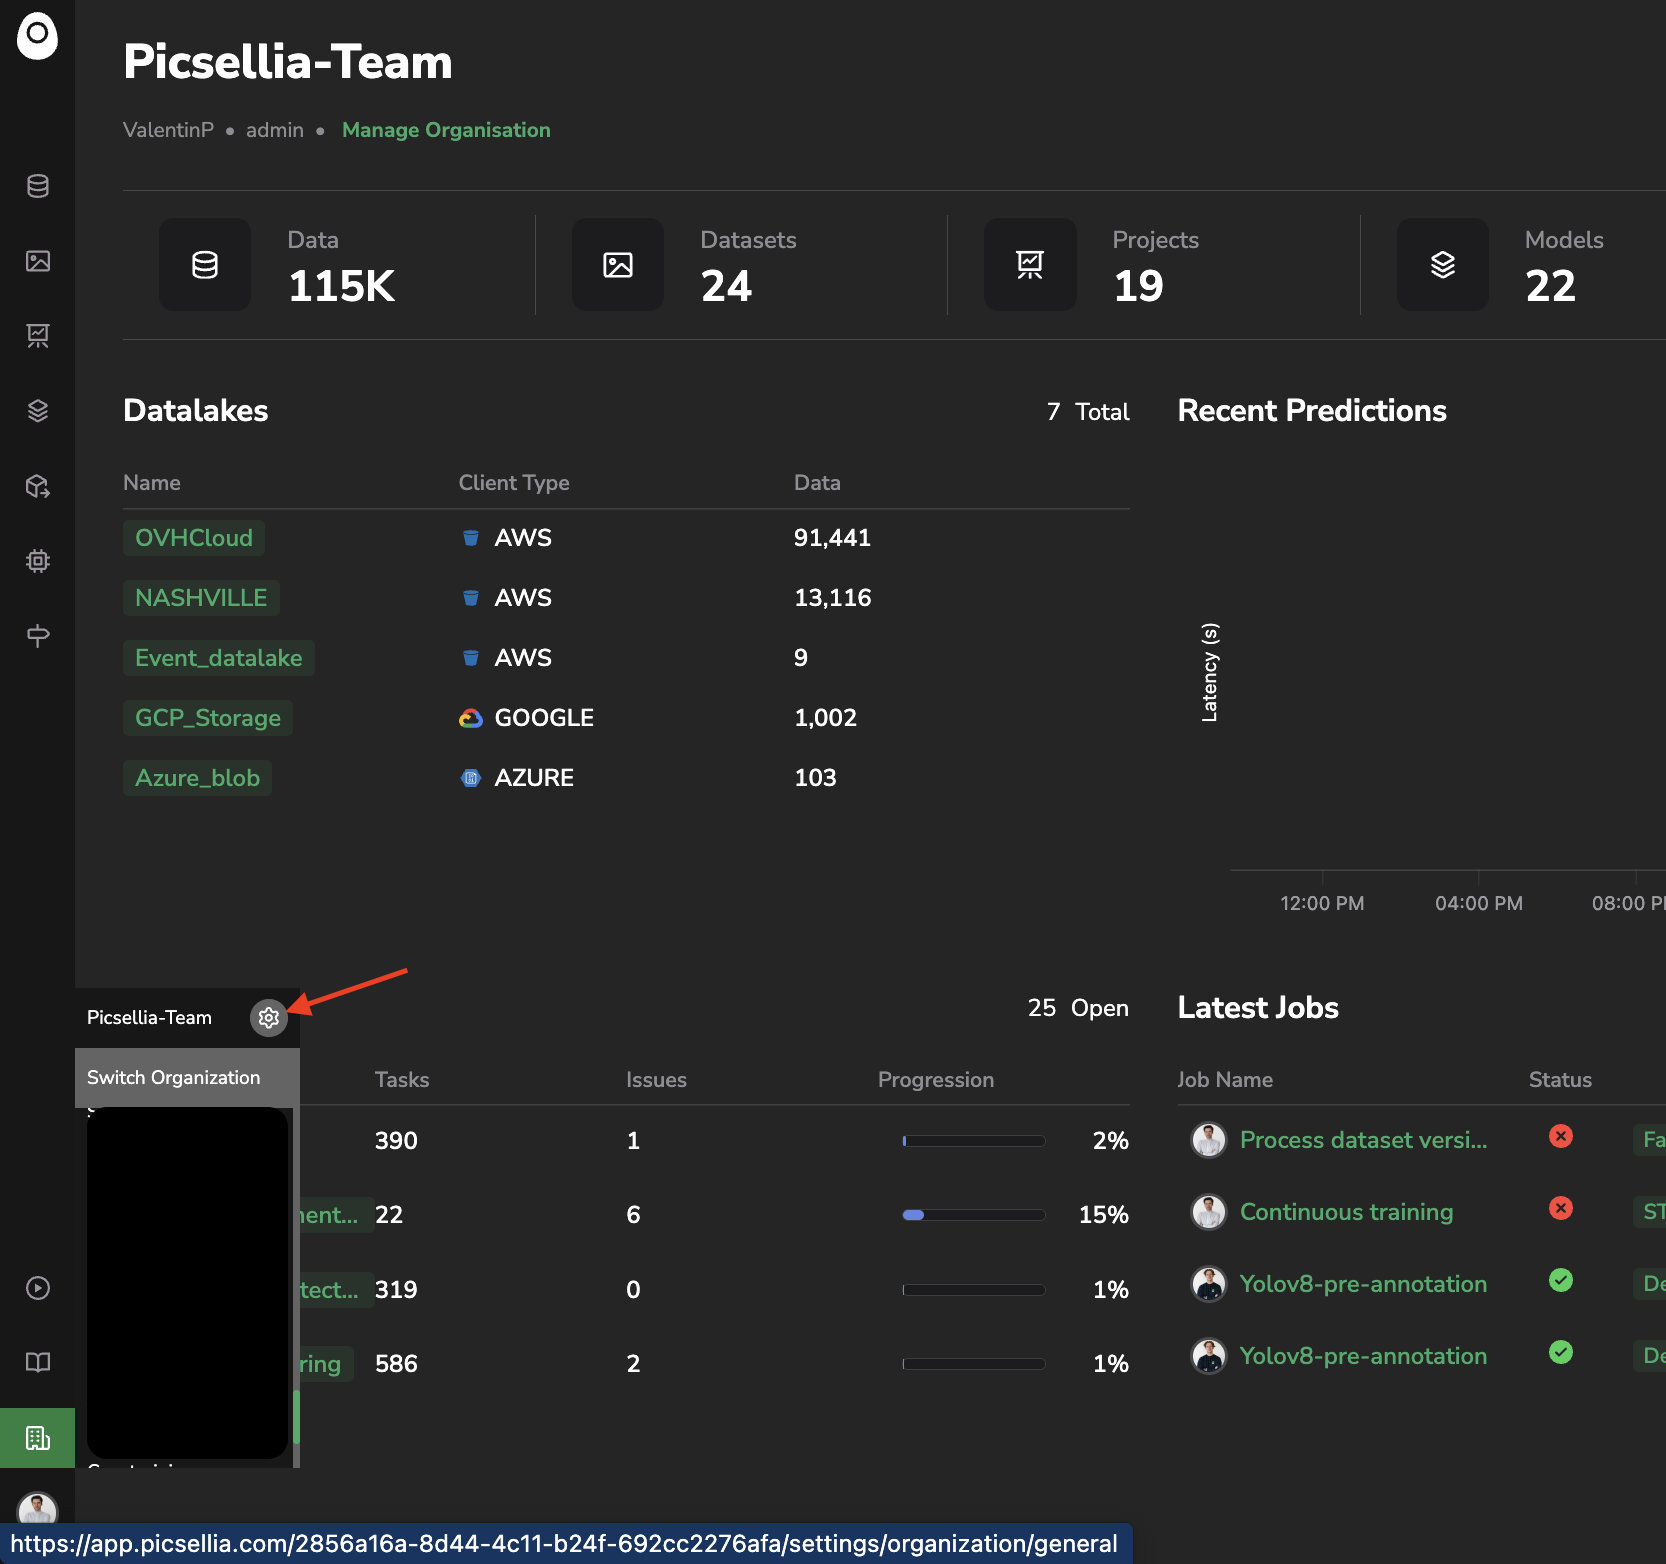
Who can access Organization Settings?Please note that, only users with Admin rights on the current Organization can access its Settings page.
In those settings, you'll retrieve several tabs, grouped by category:
- General: Here, you can retrieve contextual information about your personal Organization. You can also rename it.
- Access:
- Members: It is the place to manage users' access rights to your Organization. Exhaustive documentation is available here.
- Teams: Group Members together to manage their permissions and access at once. Related documentation is available here.
- Plans and usage: Details the features you have access to and your current consumption based on your license. Related documentation is available here.
- Integrations:
- Docker: List and manage the Docker registry integrations in place for your Organization.
- Storages and Datalakes: List and manage the integrations with Object Storages and associated
Datalakes. Related documentation is available here. - Compute Connectors: List and manage the integration with compute resources to use your own infrastructure for Model training and Processings execution. Related documentation is available here.
- Labelling tools: List and manage the integration with external annotation tools such as CVAT.
- Code, planning, and automation:
- Webhooks: Webhooks are automated messages from apps when something happens. You can manage them from your personal Organization settings. Exhaustive documentation is available here.
- Data:
- Projection Names: Register the names of the
Projectionsyou want to be able to select by default in the data grids of yourDatalakeandDataset. Any name is available except "RGB", which is reserved by Picsellia.
- Projection Names: Register the names of the
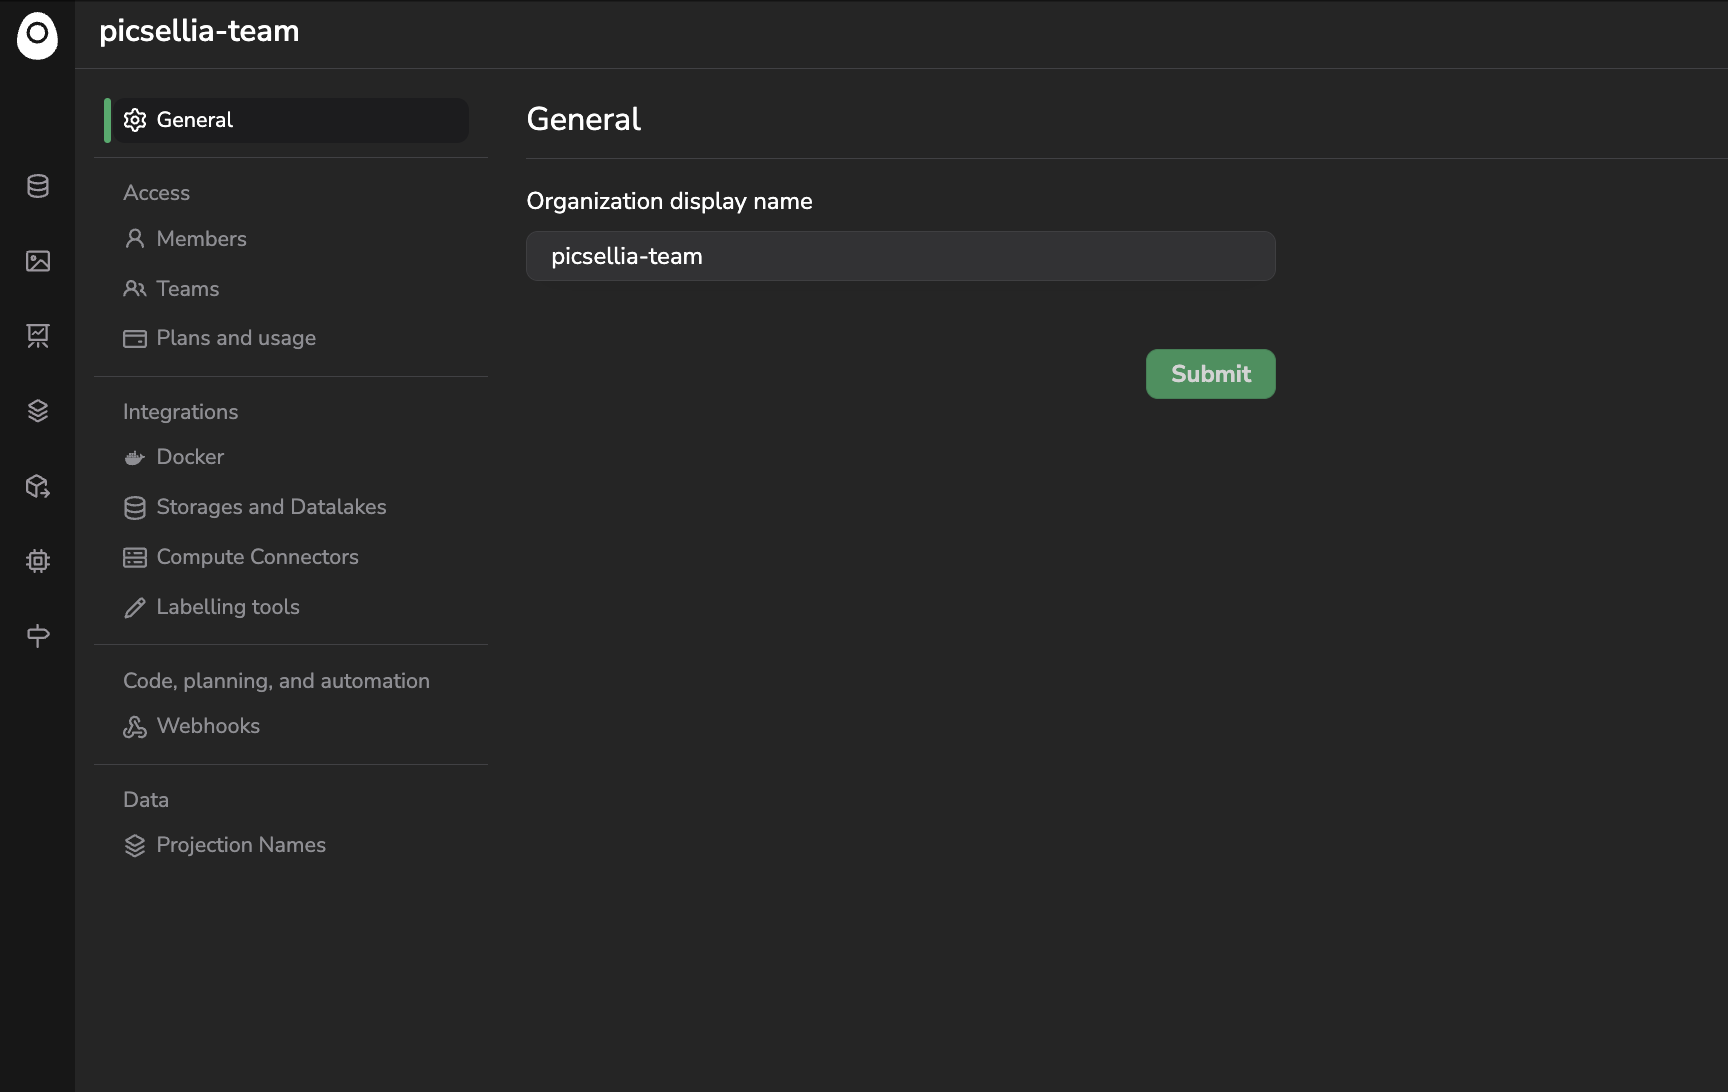
Organization settings
3. Work collaboratively
To efficiently work in a shared workspace, one Organization will be designed as the common workspace for the team, this one will be set as Premium alongside with the consumables contractually defined. The owner of the chosen Organization can invite colleagues through the Members tab in the Organization Settings.
From this view, the owner can:
- Invite users who already have a Picsellia account, using their username.
- Invite colleagues who don't have a Picsellia account yet, using their email addresses. In this case, those colleagues will receive an automatic email from Picsellia with an invitation link to create their account and be automatically added to the Organization of the invite sender.
Overall, this view primarily allows any Member with the Admin right to access the lists of Members of the current Organization and their associated level of right. This list can be filtered by role or by status (Active/Inactive). The total number of seats versus the number of occupied seats is also displayed.
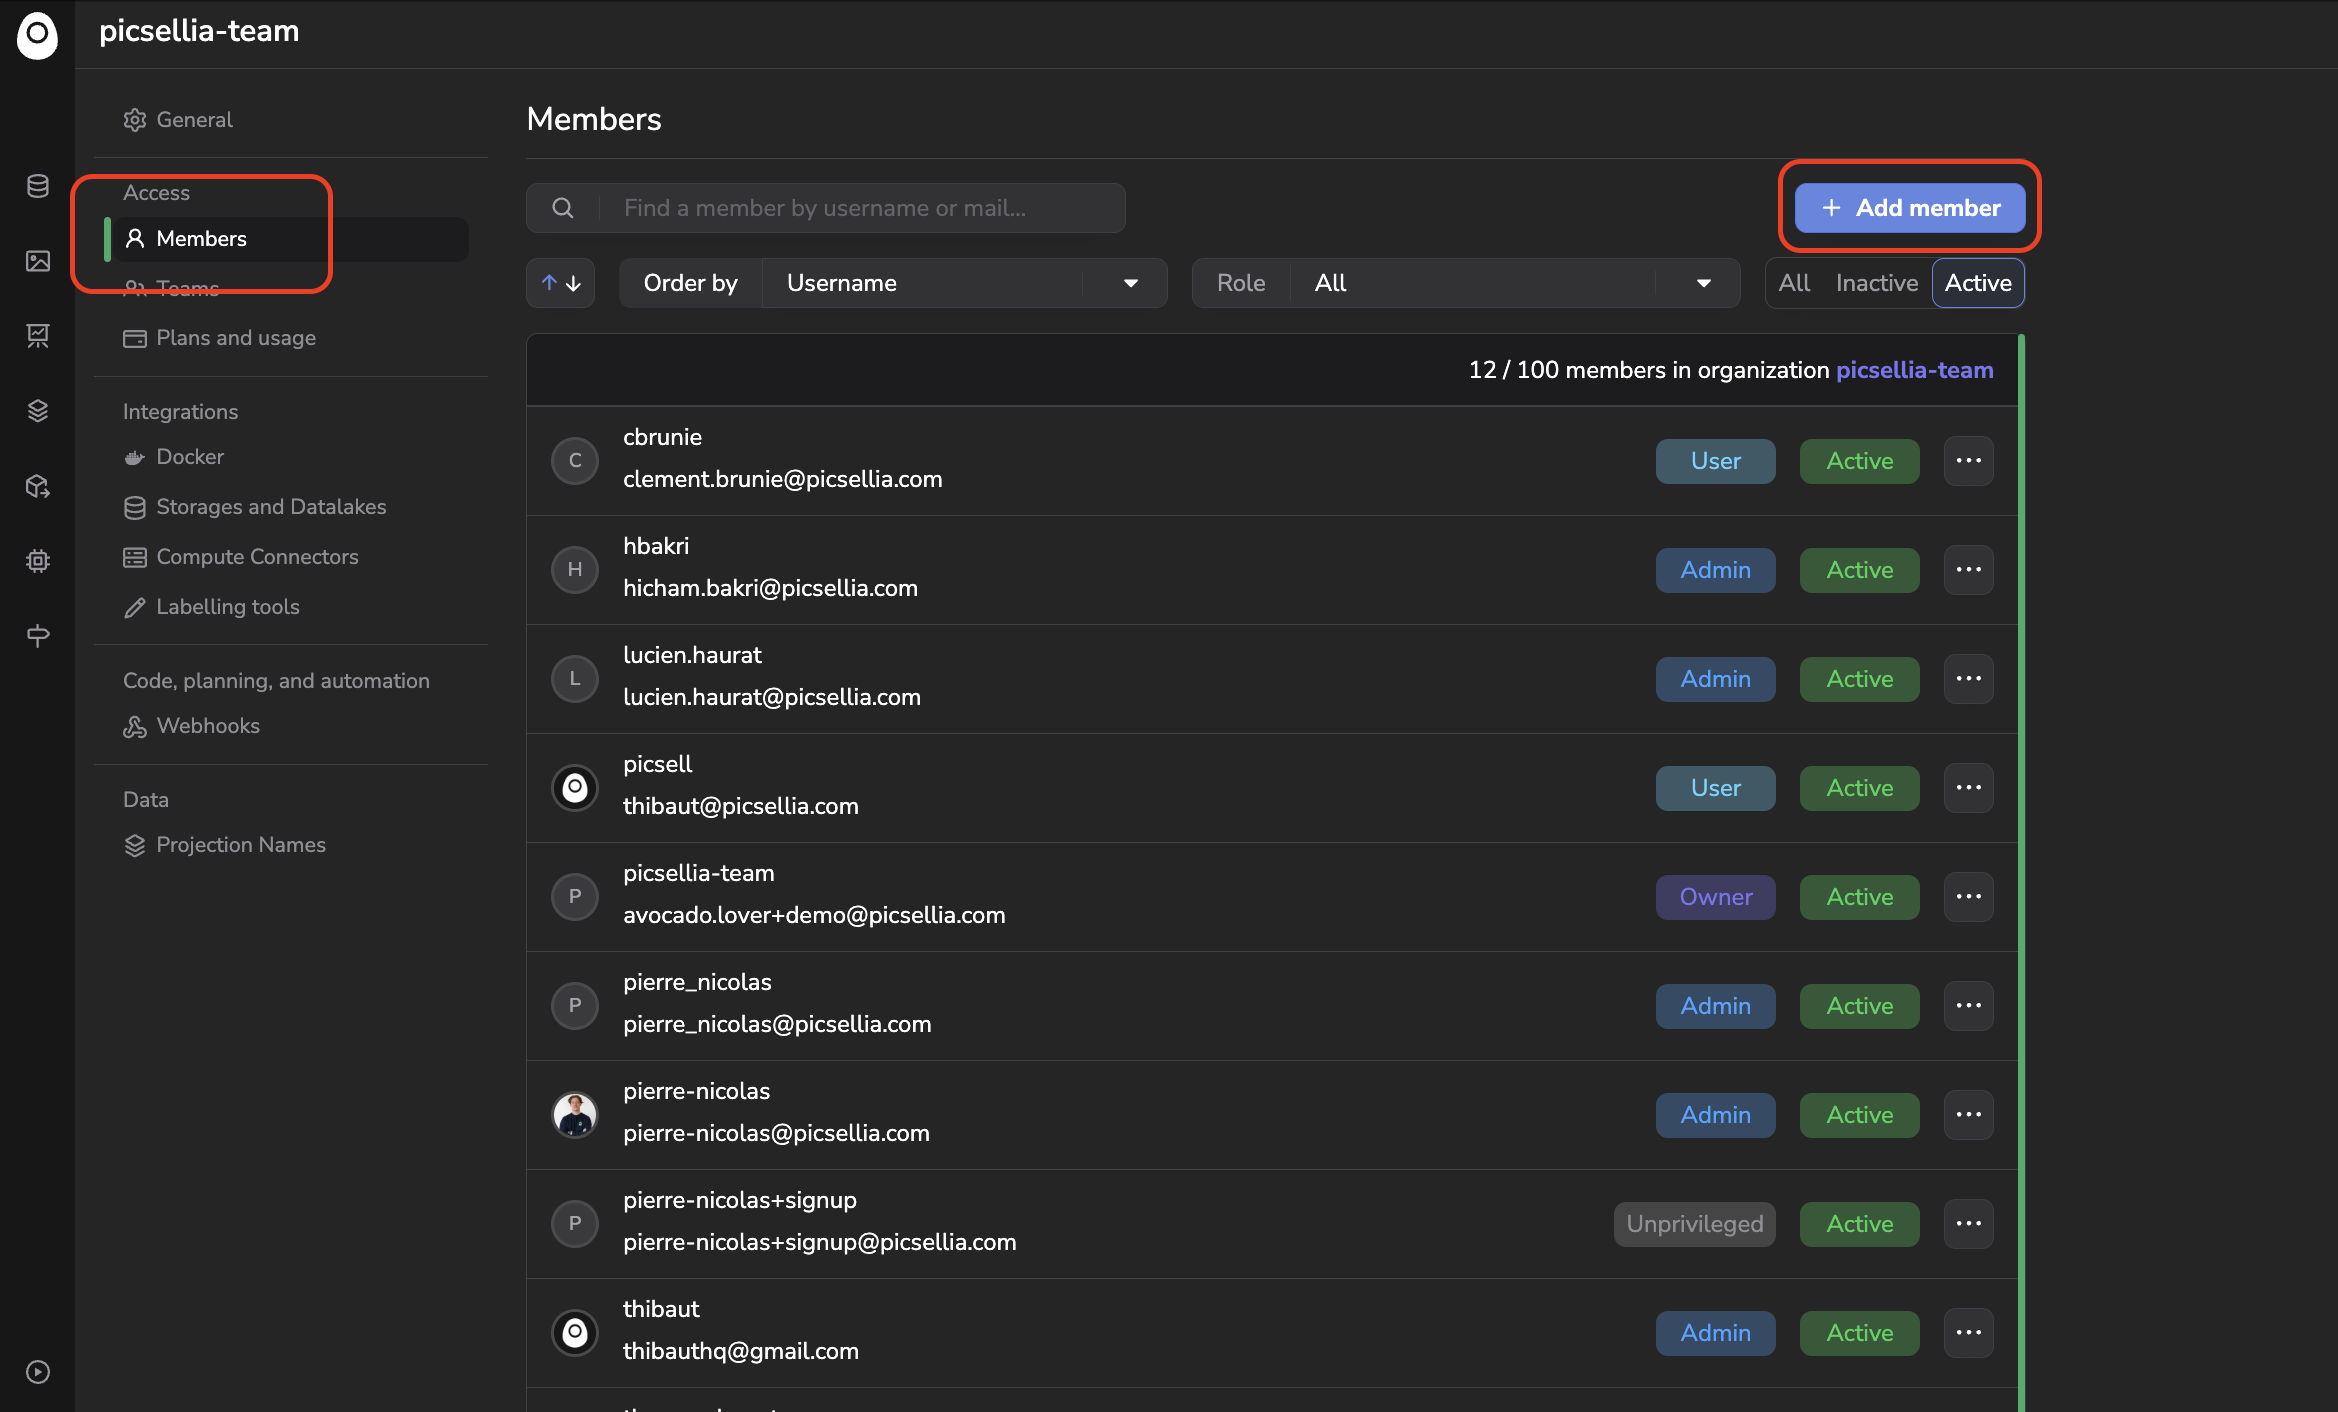
Members tab
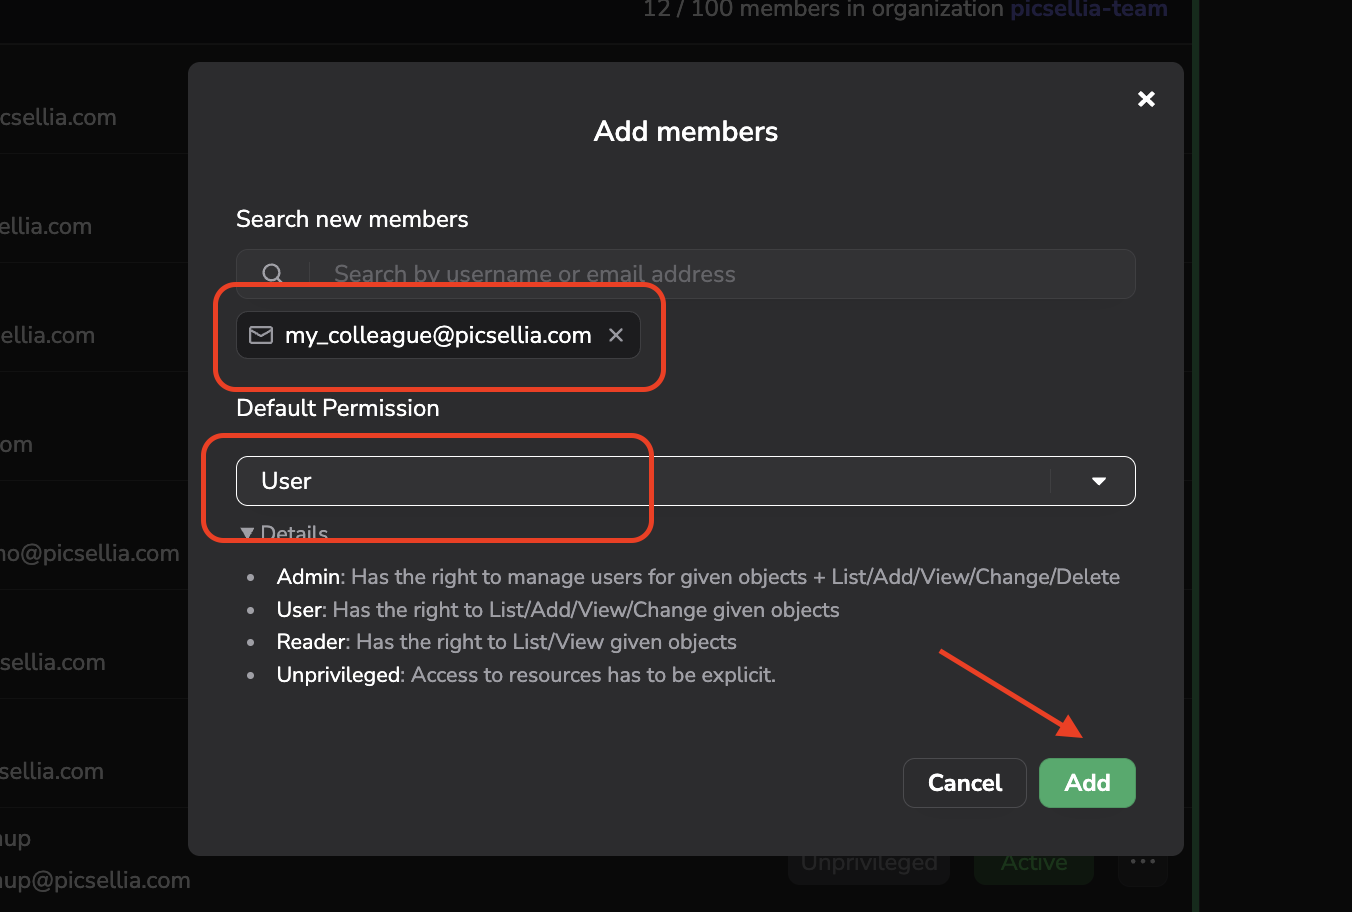
Add Members
Once added, any member can be removed from your personal Organization thanks to the button ... > Remove user. Please note that you cannot remove a user with Admin rights, you first need to downgrade his rights to User.
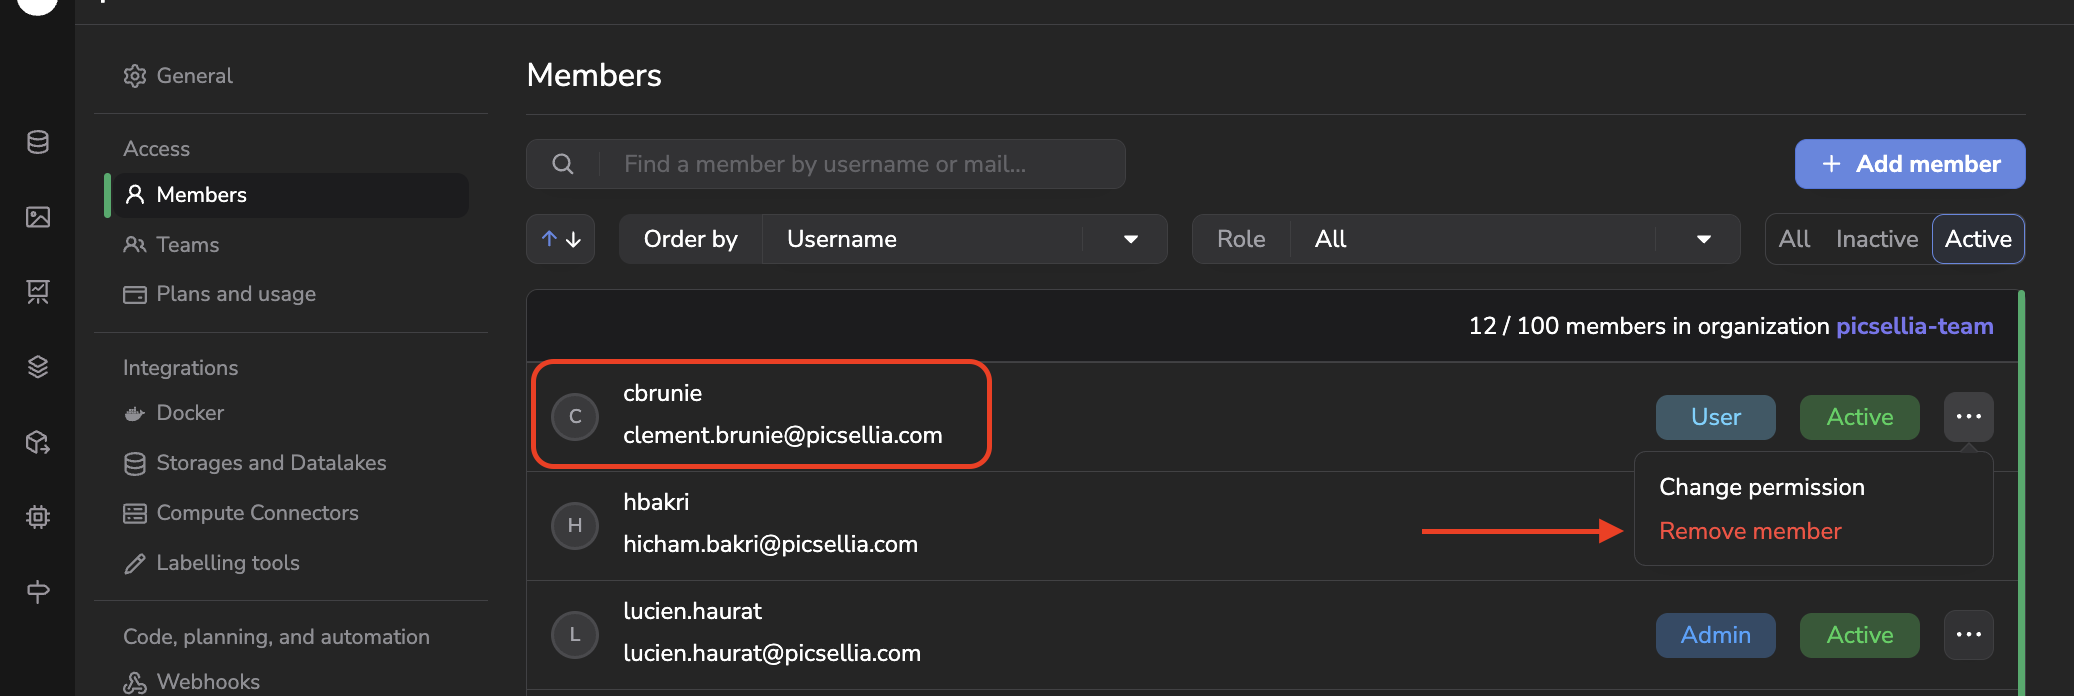
Remove a member from the current Organization
Manage access rightsGranting and managing granular access rights for the Members of your Organization is covered in detail here.
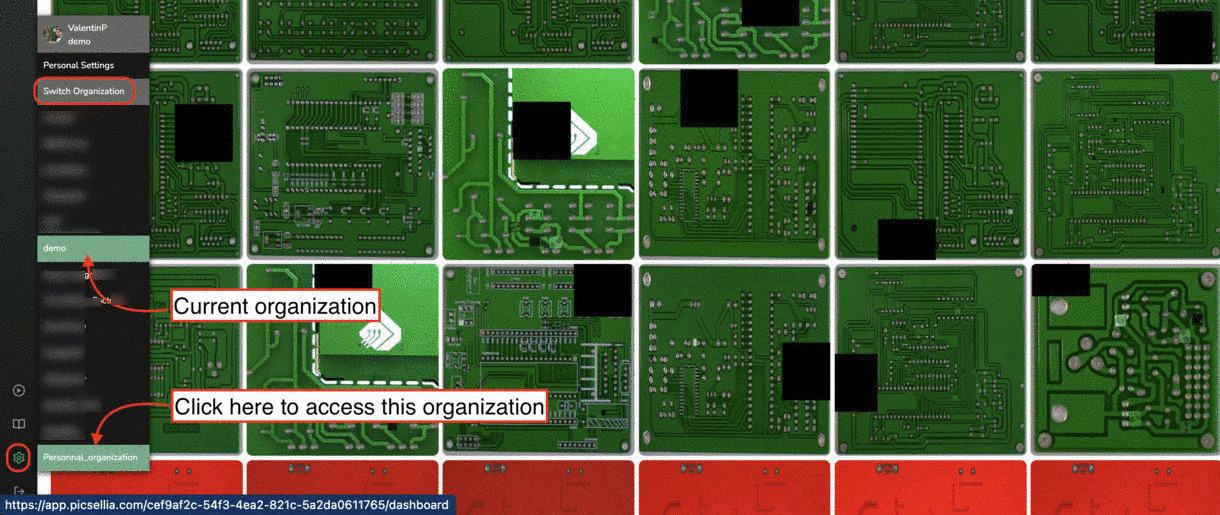
4. Access another Organization
As a Picsellia user, you may also be added to other Organizations.
These Organizations can be accessed through the Settings menu, and Members can access all related objects according to their defined access rights.
Updated 2 months ago