4. Import your Data in the Datalake
Objectives:
- Upload
Datato yourDatalake - Organize
Datawith the tagging system - Sort & filter your
Datain theDatalake
1. Upload your first Data to Picsellia!
Data to Picsellia!The first step is to upload your Data to the platform. To start uploading your Data to Picsellia, access the Datalake.
TheDatalake is the unique & shared place gathering all the Data you and your team will use to create your Computer Vision projects with Picsellia.
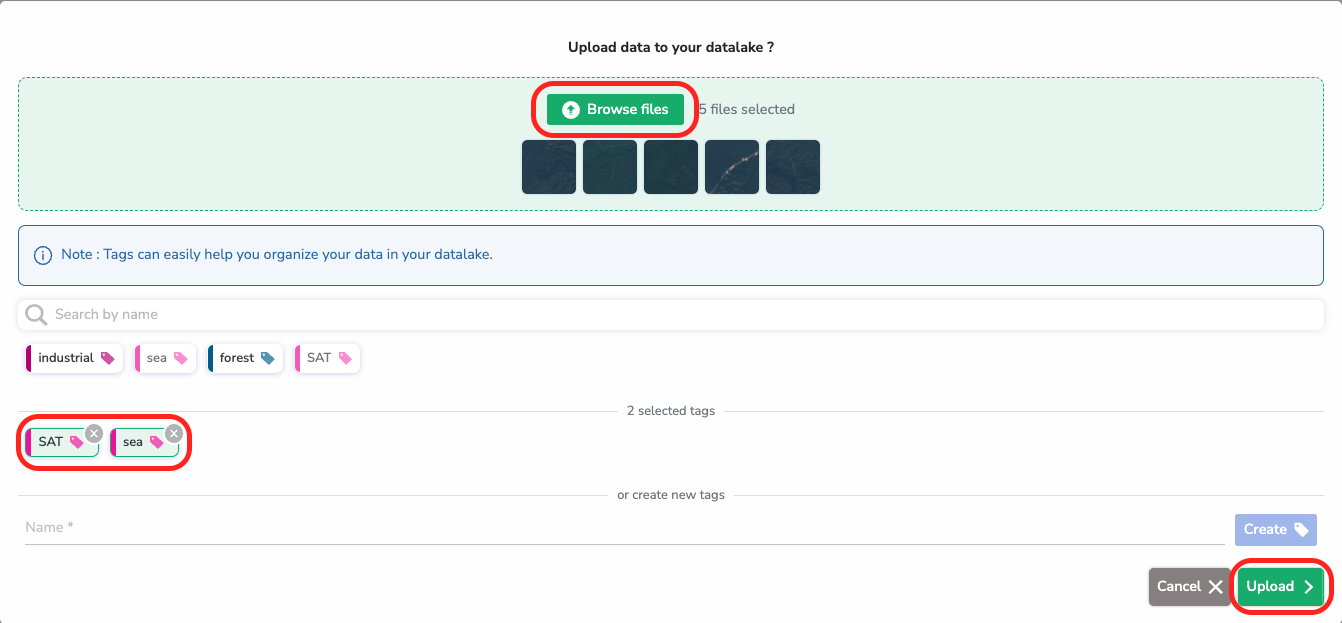
To upload your first Data, you need to go to the Datalake of your organization and select the button Upload data at the top right corner. FYI, the connection to an external Cloud Storage is not available during the trial period.

A modal opens, allowing you to select the Data to be uploaded in your Datalake. We strongly advise you to create aDataTag and assign it to the images you are about to upload, it will be beneficial to organize your Datalake.
DataTagare powerfulPicsellia tagging system is the best way to organize your data in the
Datalakeand make sure you can retrieve them easily. Any data can carry severalDataTag, depending on yourDatamanagement strategy.
Annotations are not handled in theDatalake, they are managed atDatasetlevel!
To do it with the SDK :
2. Visualize and browse through the Data in your Datalake
Data in your DatalakeNow that the Datalake is filled, you can navigate through yourDatalake using our Search Bar. You can use Query Language to retrieve Data based on many criteria (DataTag, Source, dimensions etc).
You can also sort the displayed Data in different ways, as shown here:
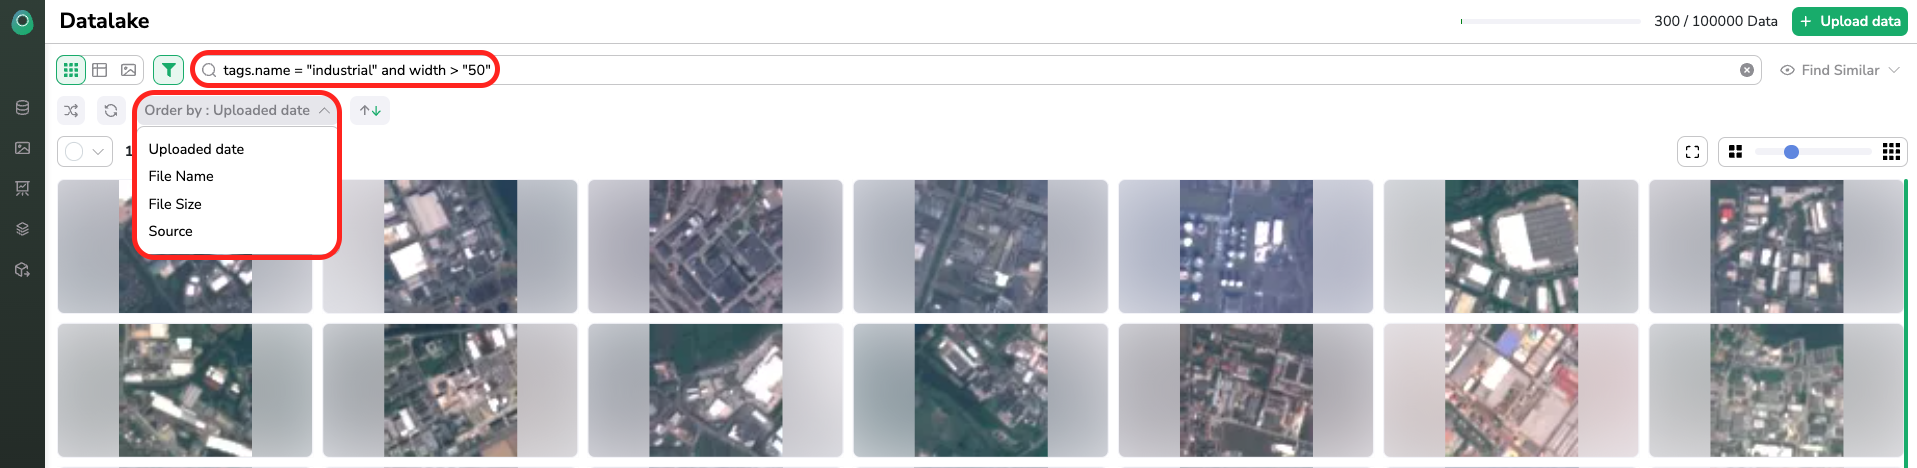
The Query Language offers you many possibilities to navigate yourDatalake , let the autocompletion guide you 😊
Images uploaded into the PicselliaDatalakeare calledData
Updated about 1 year ago