Dockerize your code
Now that we have our training script integrated with the Python SDK (meaning that you can run your scripts and everything is logged and stored automatically to Picsellia) and that our first trained model has been fully registered in the Model Registry, we will just package our code in a Docker image, and attach a reference to this image to our Model in the Registry.
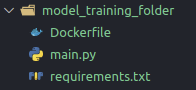
To begin with, you should have a folder with:
- Your training script
- Some python package requirements (create a requirements.txt file)
- a Dockerfile file
Our model is just a Tensorflow classification model so our requirements.txt file will be light
picsellia
tensorflow==2.6.0
keras==2.6.0
These are the minimum requirements in our case, add any packages that you need for your purpose.
Let's have a look at the Dockerfile:
FROM nvidia/cuda:11.4.2-cudnn8-runtime-ubuntu20.04 as base

ENV PYTHONDONTWRITEBYTECODE 1
ENV PYTHONUNBUFFERED 1
ARG DEBIAN_FRONTEND=noninteractive

RUN apt-get update && apt install -y build-essential
RUN apt-get install --no-install-recommends -y python3.6 python3-pip libpq-dev python3-dev python3-wheel libgtk2.0-dev libgl1-mesa-dev && rm -rf /var/lib/apt/lists/*
RUN python3.8 -m pip install --upgrade pip
RUN pip3 install -U setuptools

COPY ./requirements.txt .
RUN pip3 install -r requirements.txt --no-cache-dir
ENV LD_LIBRARY_PATH $LD_LIBRARY_PATH:/usr/local/cuda/lib:/usr/local/cuda/lib64

CMD ["main.py"]
ENTRYPOINT ["python3"]
COPY . .
We will not go in-depth in every line because it's not a Docker tutorial but what this will do is:
- Create an Ubuntu container enabled with recent CUDA drivers (this part can be tricky because you have to find the version that is working for your version of Tensorflow or Pytorch but you have plenty of resources online taking care of this subject)
- Setup the container with all the libraries and dependencies (and obviously a Python interpreter)
- Install the packages from our requirements.txt
- Launch our training script
Before building our Docker image, we certainly have some little adjustments to do on our training script.
Indeed, I believe that when you integrate the Picsellia SDK in your training scripts, it looked like this:
from picsellia import Client

api_token = "...."

client = Client(api_token)

project_name = "my_project"
project = client.get_project(project_name)

experiment_name = "experiment_1"
experiment = project.get_experiment(experiment_name, with_artifacts=True)

# And then use the file from your experiment, launch your training loop etc...
But as the goal is to launch this script inside a Docker container, we don't want to rebuild our Docker image every time we want to change our project, experiment, or even API token.
What we are going to do is we will slightly change our script to this:
from picsellia import Client
import os

api_token = os.environ["api_token"]

client = Client(api_token)

project_name = os.environ["project_name"]
project = client.get_project(project_name)

experiment_name = os.environ["experiment_name"]
experiment = project.get_experiment(experiment_name, with_artifacts=True)

# And then use the file from your experiment, launch your training loop etc...
This way, when we will want to run our Docker container for any experiment, we will be able to do it this way:
docker run my_repo/image_name:1.0 \
	-e api_token=<api_token> \
  -e experiment_name=<experiment_name> \
  -e project_name=<project_name> \
  --gpus all
This way you can just switch experiments, project, anything using only environment variables when you launch your container so everything becomes even easier to reuse 😎
Now that our script is ready, all we have to do is build our Docker image
docker build . my_repo/my_training_image:1.0And we can even push it on Docker HUB (or your private Docker Registry if you have one)
docker push my_repo/my_training_image:1.0Now that we have our image ready to use, we just have to "attach" it to the Model we exported in the previous tutorial using the Python SDK
from picsellia import Client

api_token = "..."

client = Client(api_token)
model = client.get_model("new_model-2")

model.update(docker_image="my_repo/my_training_image:1.0")
And finally, if we try to create a new Experiment with our Model and go to the 'Launch' tab of our experiment:

We can see that a ready-to-use command line is waiting for us so anyone can just copy/paste this line in order to launch an experiment with the code you packaged, congratulations 🎉
Updated 9 months ago