Deploy
With Picsellia 🥑 serverless deployment you can deploy your exported models easily.
Pre-requisite
In order to benefit from our serverless deployment engine, you need to have some exported models in your model registry.
Select the model that you want to deploy
To select the model, browse into your model registry page.
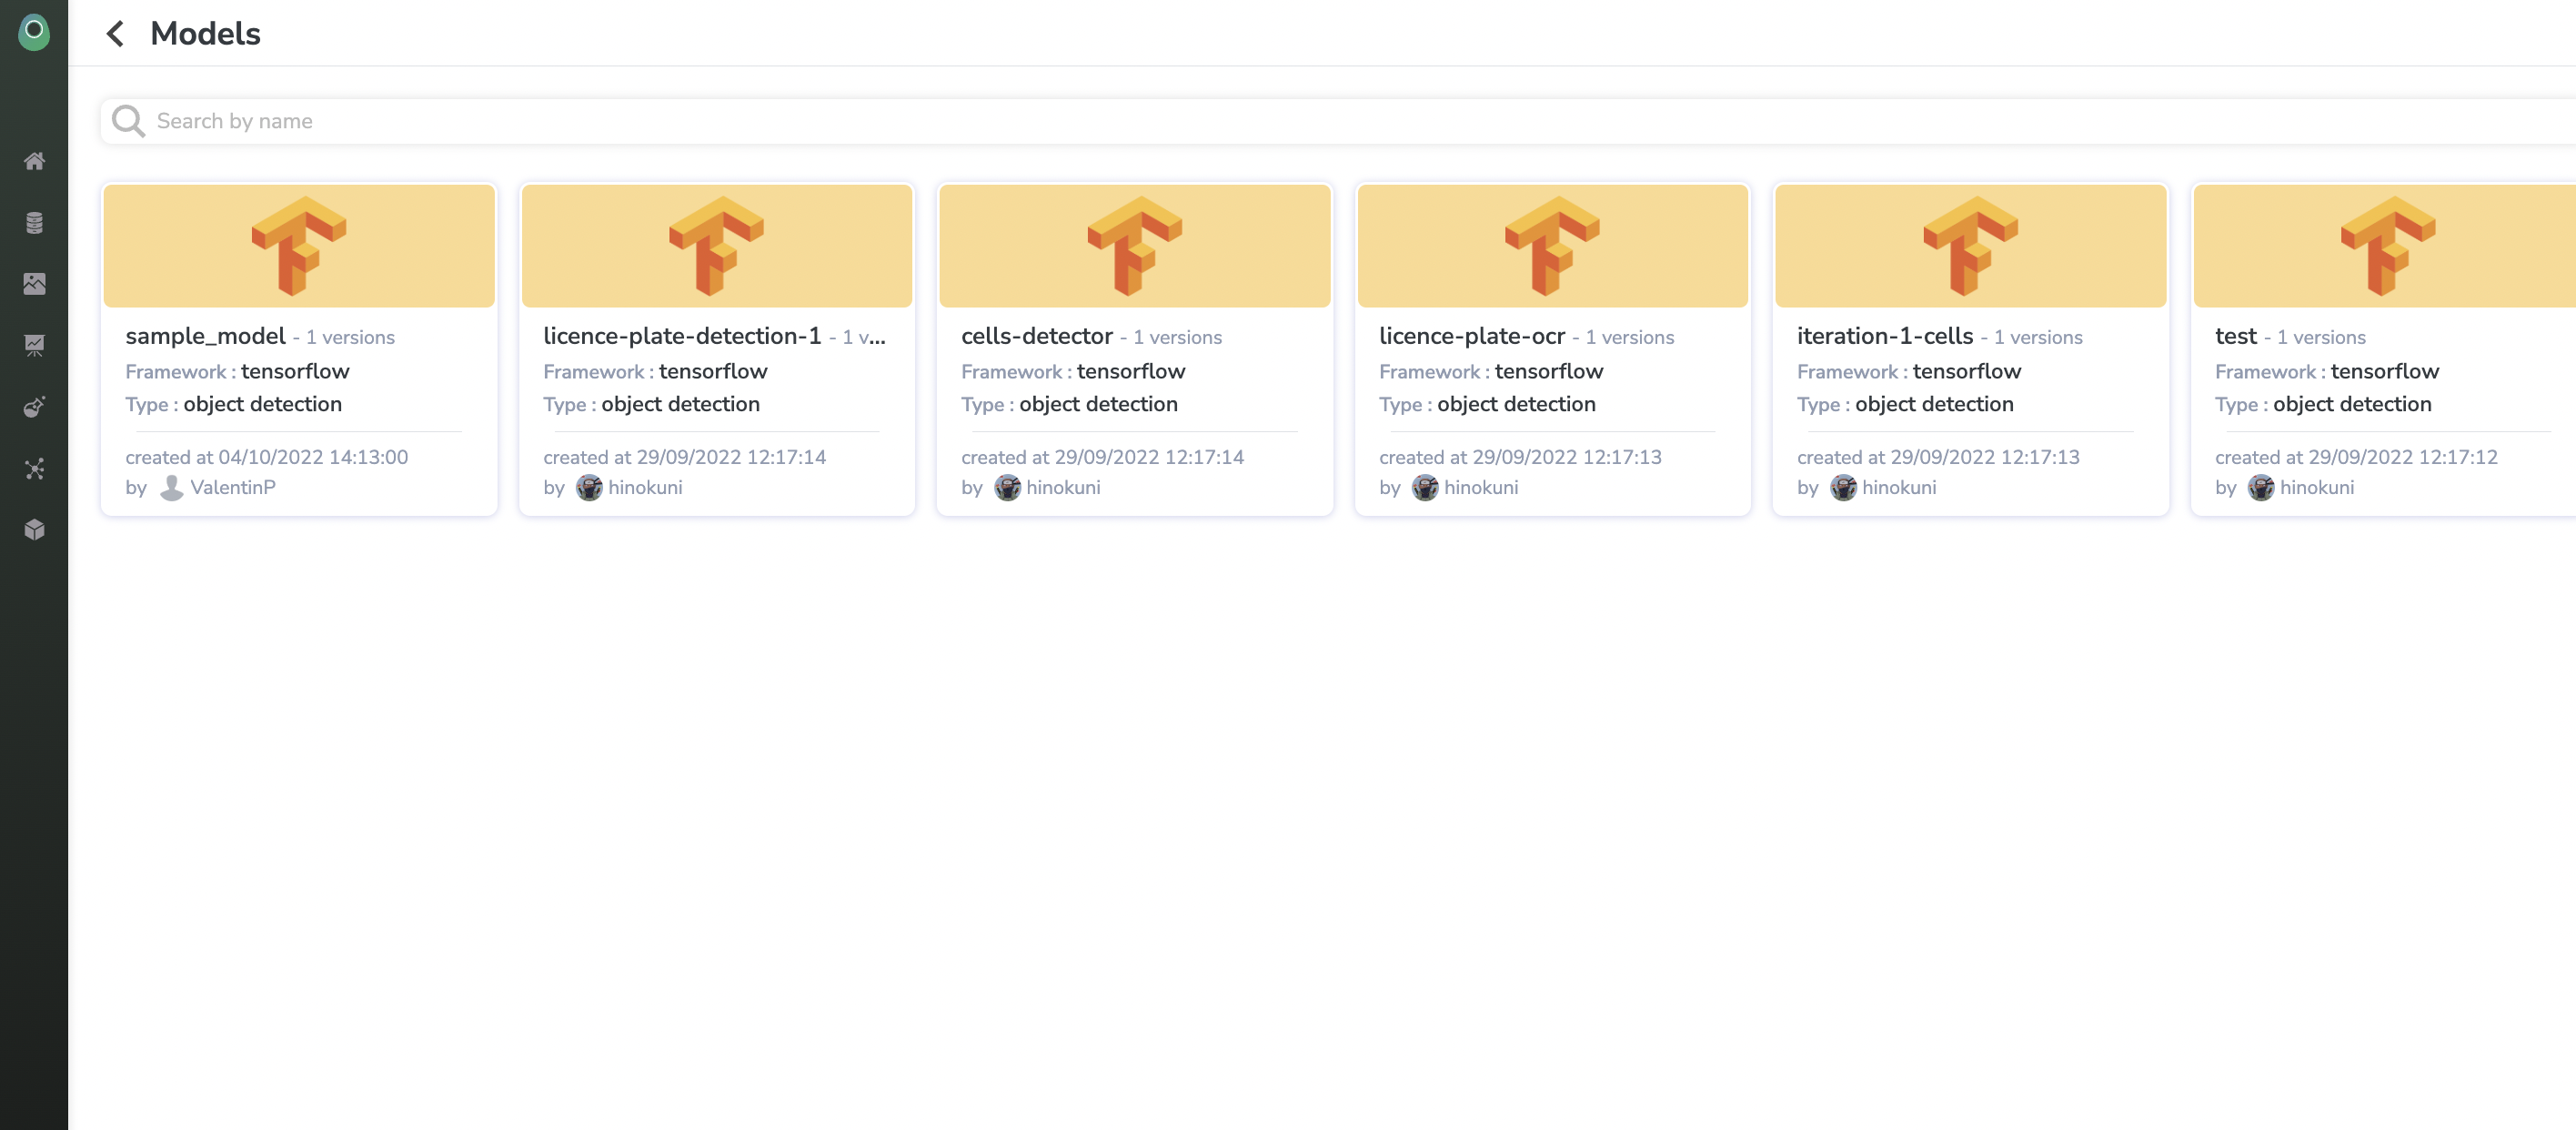
Let's select version 0.0 of our sample-model model 🥑.
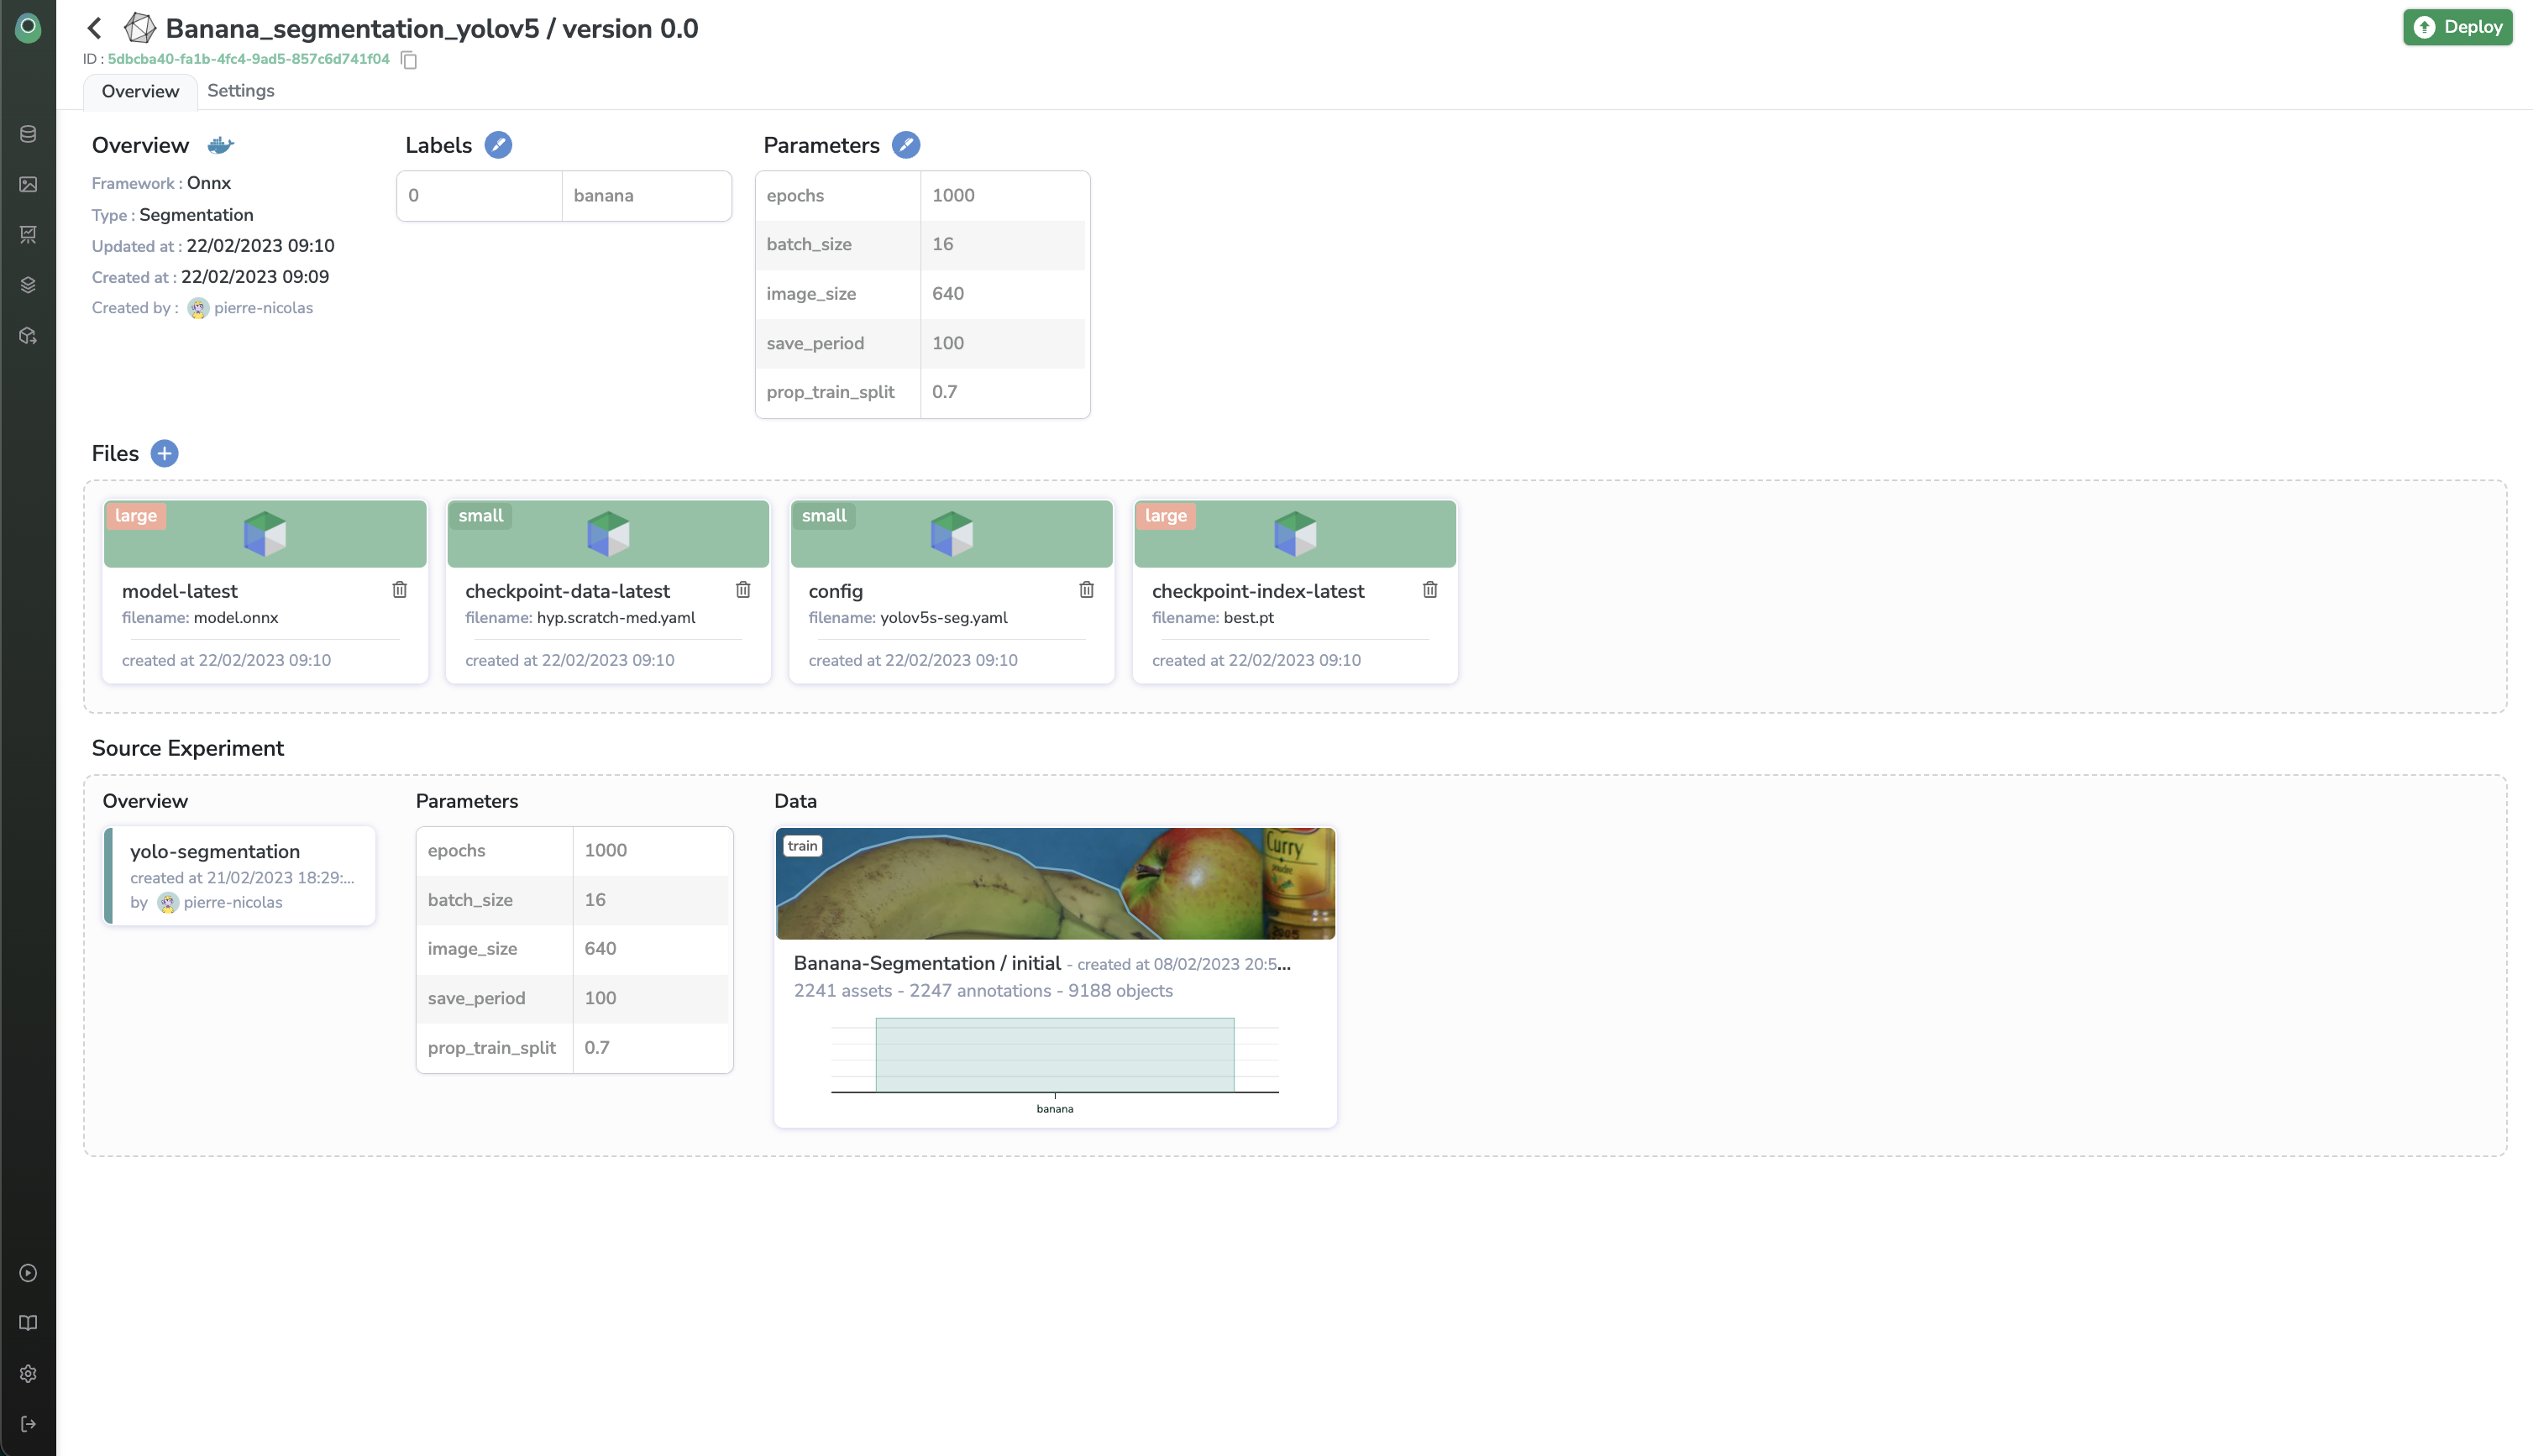
You can quickly see the overview of your exported model i.e the training set used and the experiment that created this model.
Deploy
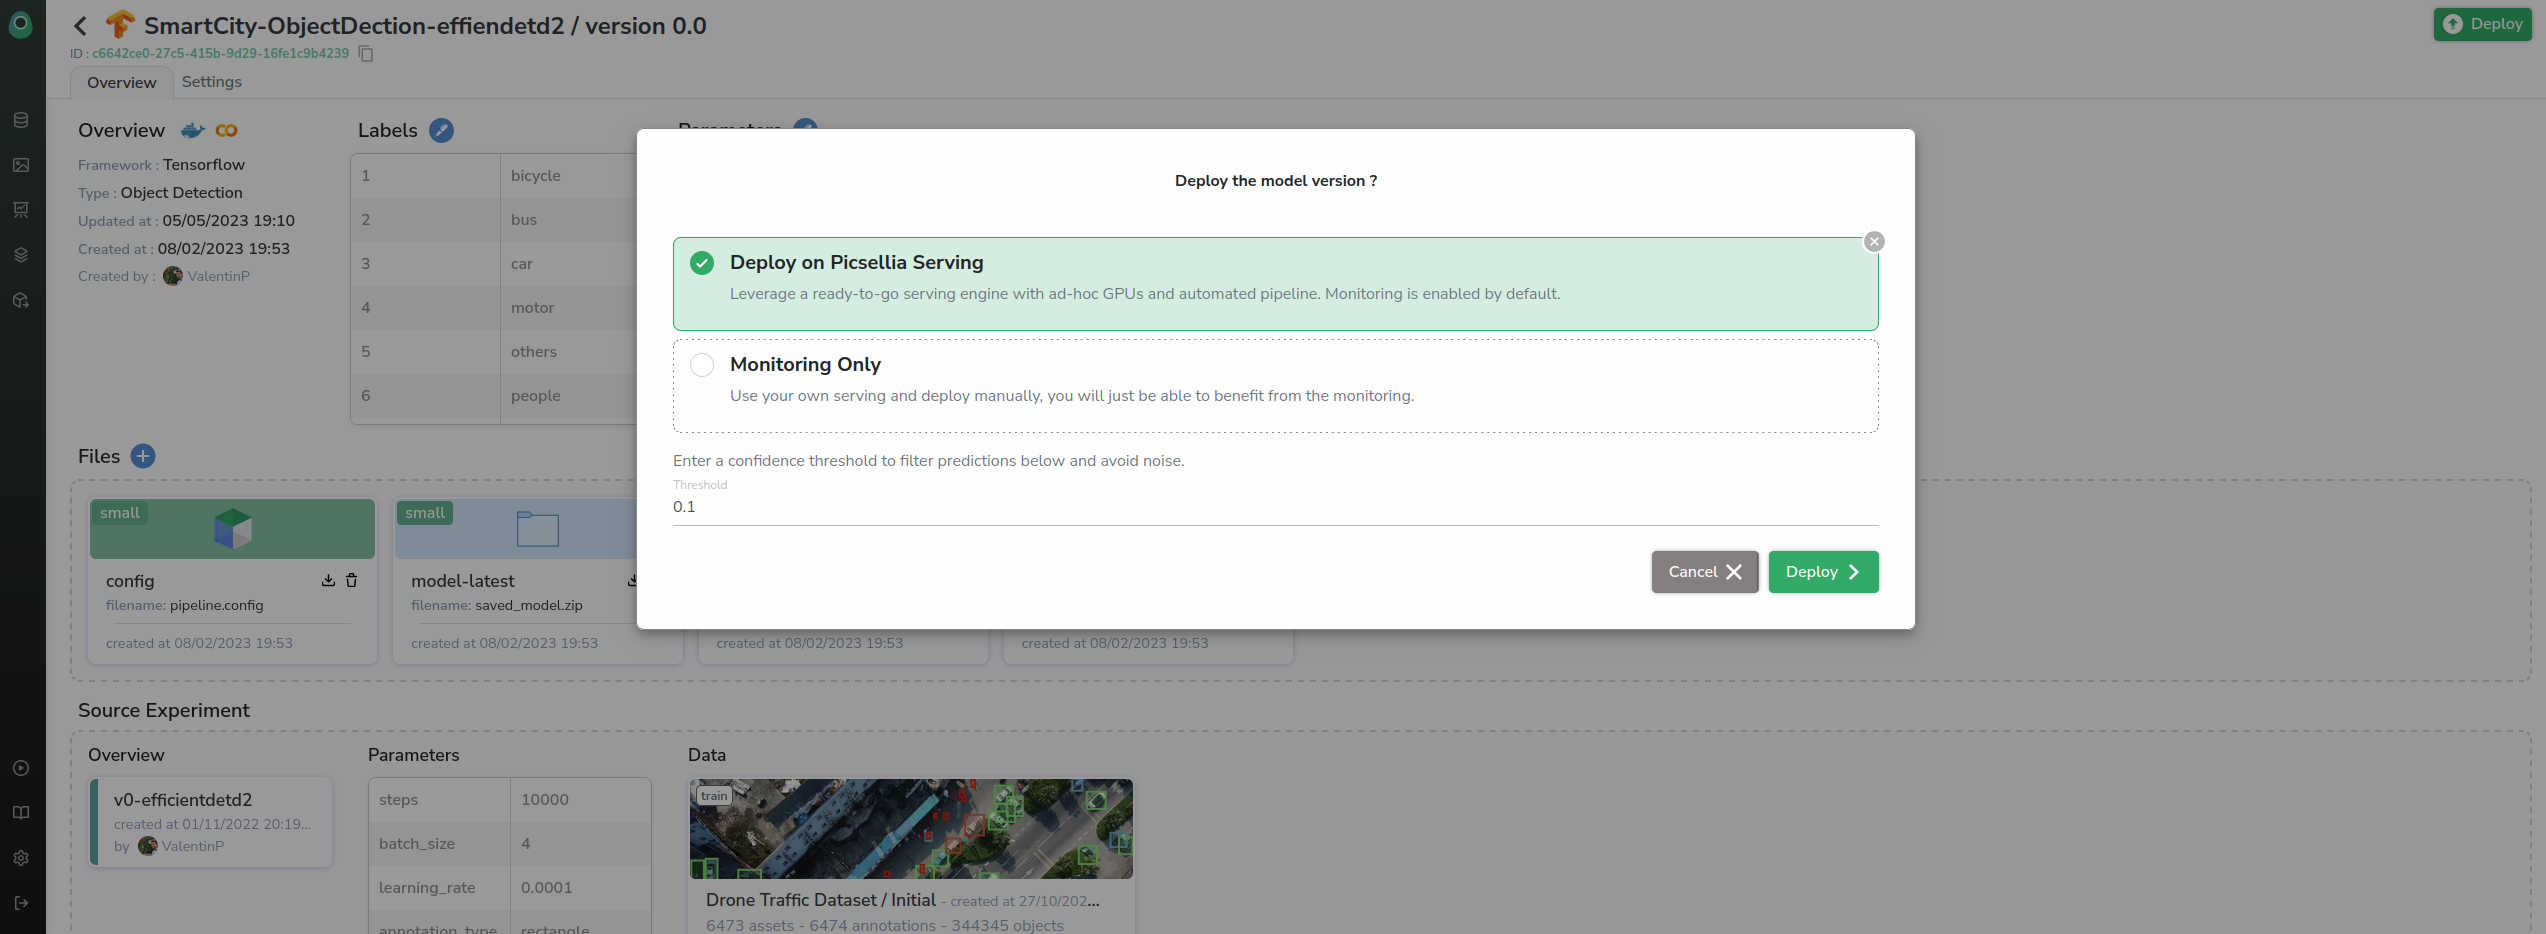
You can deploy on our Picsellia Serving !
Access your deployment dashboard

Your deployment is now created and you can access its name on top-left.
You now have access to your deployment dashboard, this is the one-stop place to:
- Model Management.
- Latency Monitoring.
- Prediction images visualization and review.
- Alerting, etc.
If you want more information about all the monitoring metrics provided in the Picsellia monitoring, please check the Model Monitoring Section of Picsellia's documentation 🥑.
Make predictions
from picsellia import Client
from picsellia.types.schemas_prediction import DetectionPredictionFormat

api_token = "<YOUR_API_TOKEN>"
organization_name = "<ORGANIZATION_NAME>"
deployment_name = "<DEPLOYMENT_NAME>"

# You can also use your organization_id, please be sure it's an UUID if you're in a version < 6.6
client = Client(api_token=api_token, organization_name=organization_name)

deployment = client.get_deployment(deployment_name)

data = deployment.predict(file_path="/path/to/image.png")

print(data)
Now you have a scalable and serverless API endpoint that won't change even if you change your model version :).

Updated about 1 year ago