How to configure Webhooks on Picsellia
Configuration
Now that you know everything about Picsellia webhooks, let's see how to configure them!
First of all, let's reach your Organization Settings and go the the Webhooks tab
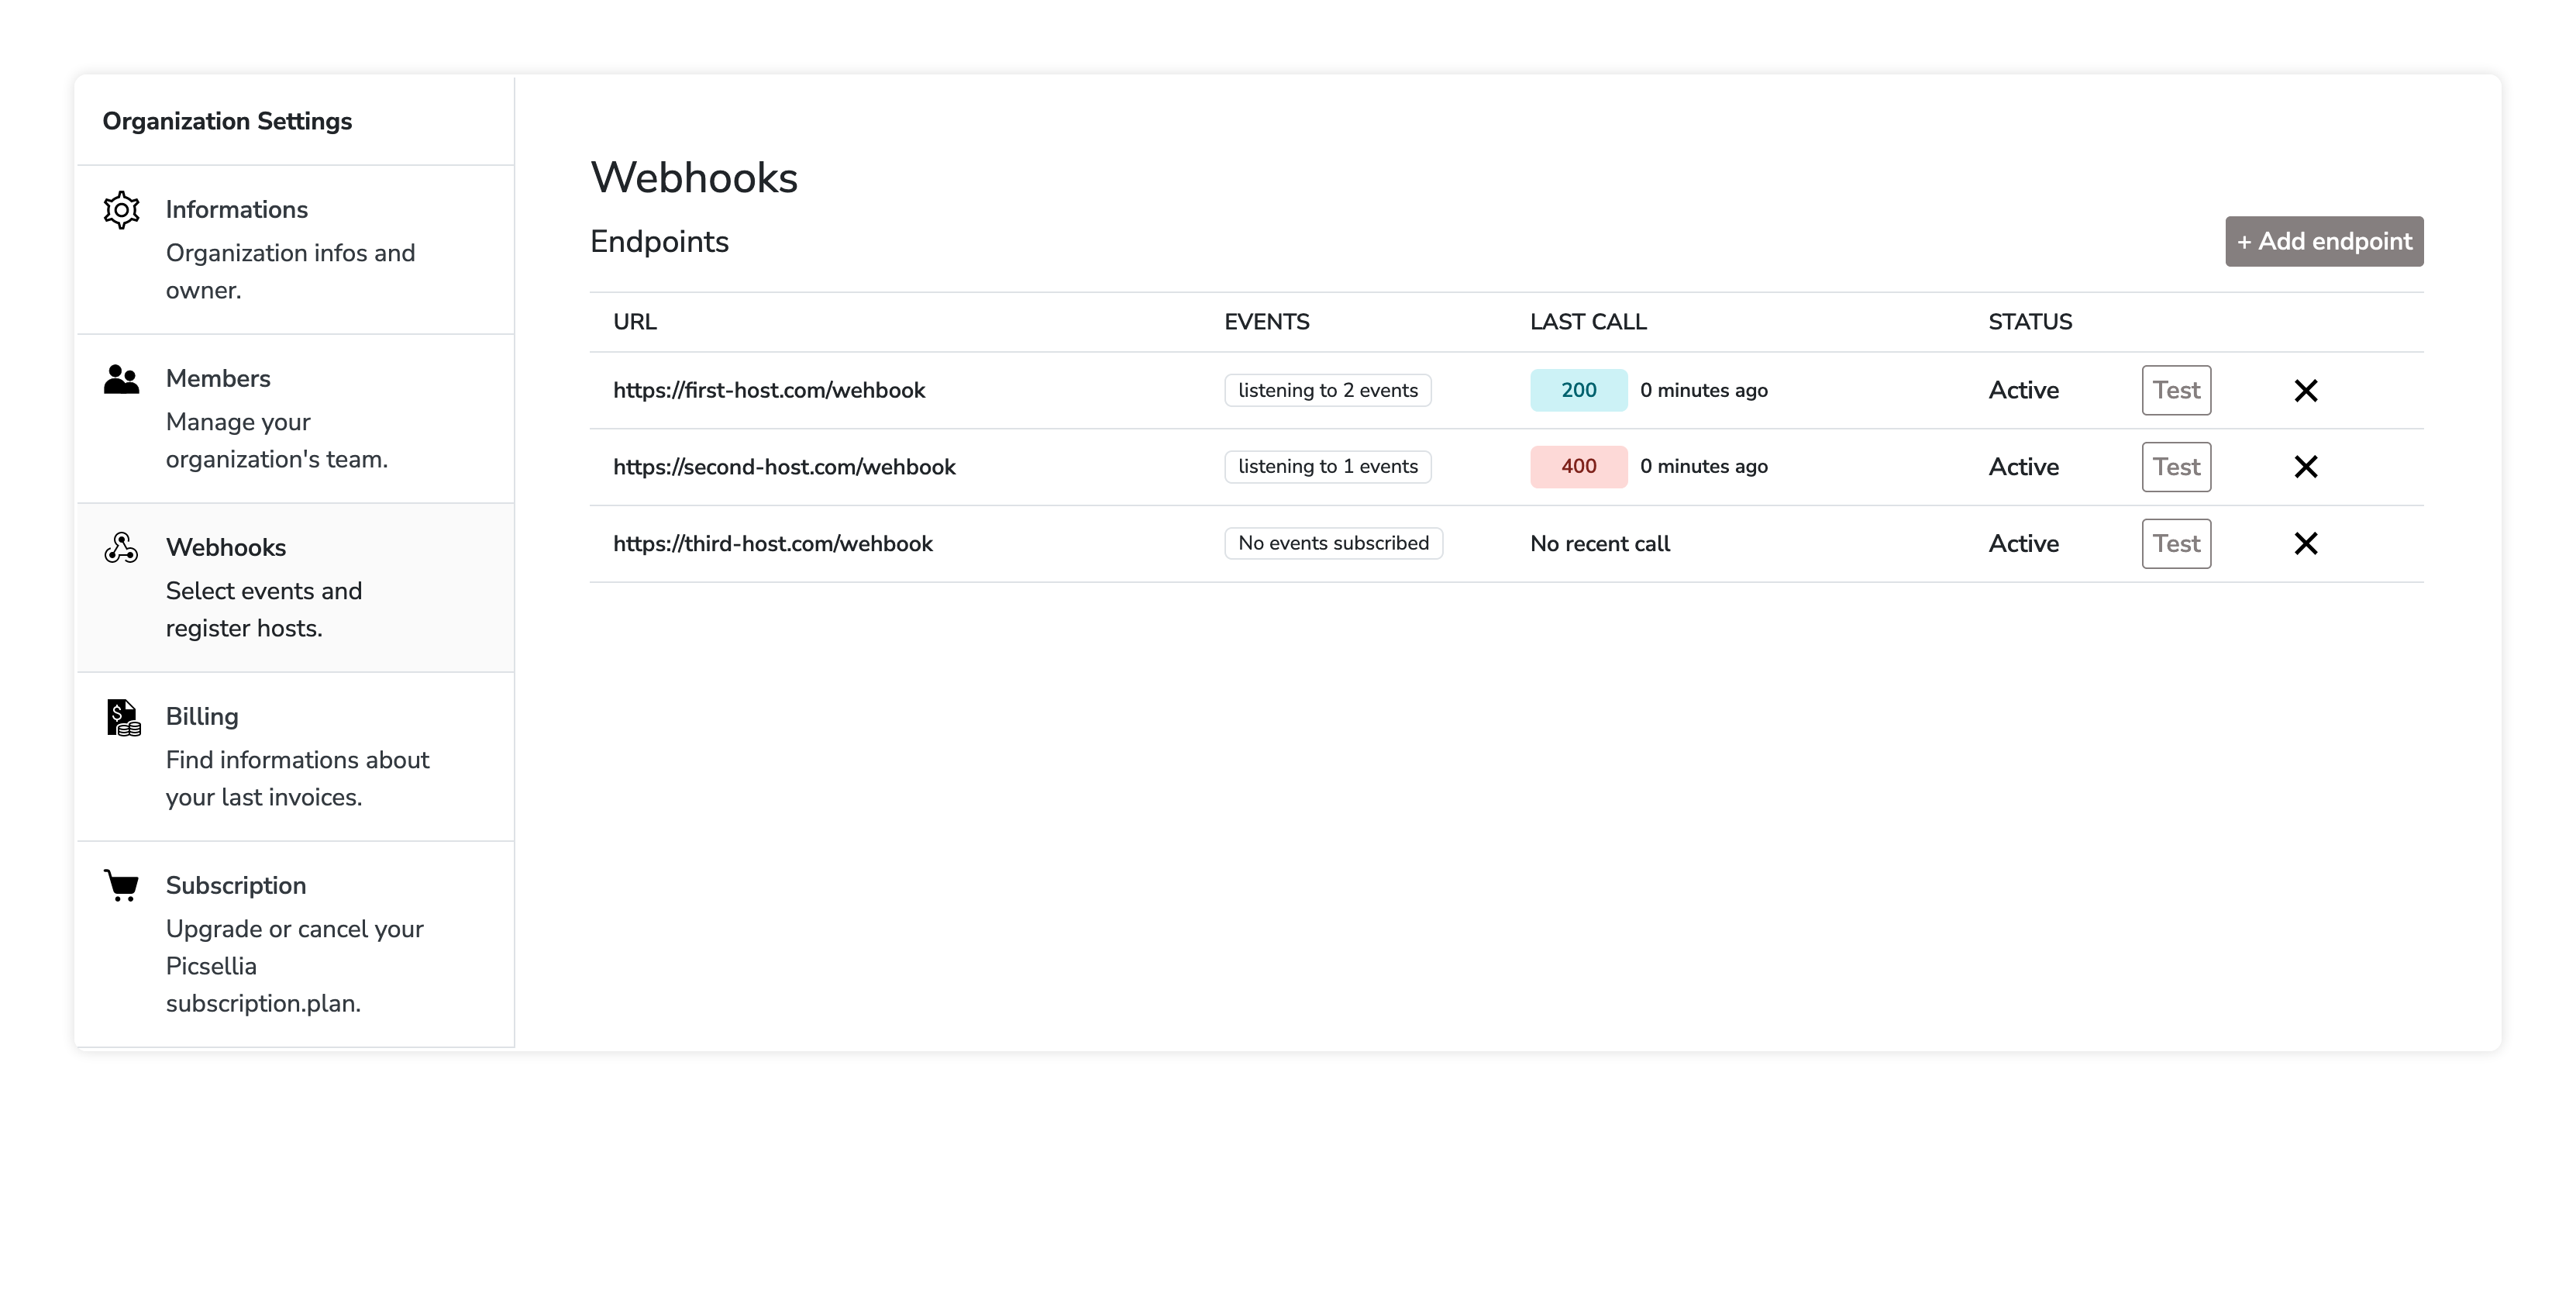
This is what this page looks like when you already have some configured endpoints.
Let's go through all the columns of this table:
- URL: This is the endpoint that we will try to reach for events that you will subscribe later
- EVENTS: This is the list of event that you registered your endpoint for. If you click on the badge, it will open a modal allowing you to select the events you want to subscribe to.
- LAST CALL: This gives you the HTTP status from the last call that we made to your endpoint (across all the events) and the time it happened
- STATUS: This informs you about whether your webhook is active or has been disabled (meaning whether or not you will be contacted on your endpoint)
- The
Testbutton allows you to try your endpoint by sending a test request to it
Add an endpoint
If you want to add a webhook endpoint, you can click on this button:

It will create a new line at the end of the table that allows you to enter your new endpoint

Just click on the Save button when you are done!
Subscribing to Events
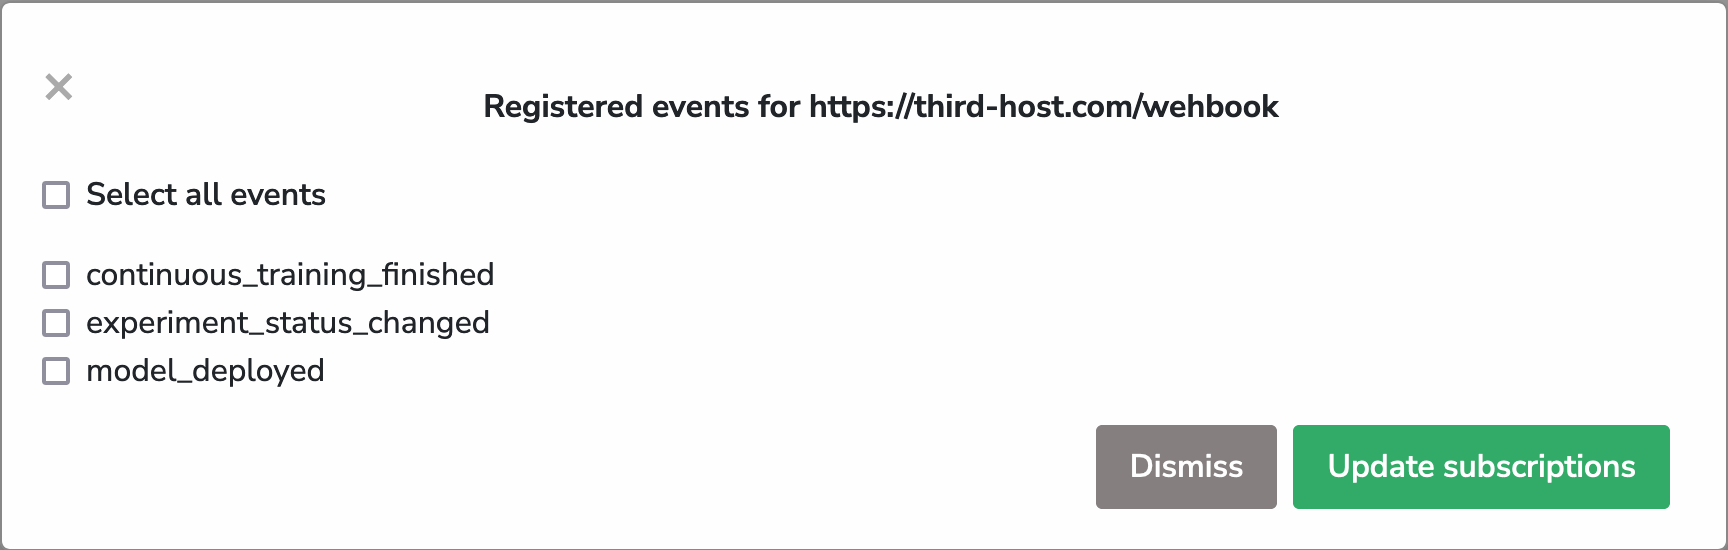
Once you added your endpoint, you can click on the following badge in the EVENTS column:

This will open the following modal where you will be able to select the events you want to subscribe to for this endpoint:
To learn more about when every Event is triggered and what is sent to you, you can look at this page of the documentation.
When you're done, click on the Update subscriptions button.
You will then see that, for example of you registered to only 2 events, the badge change to something like this:

Test your Webhook
You can now click on the Test button on the line of your new endpoint to see if our servers manage to reach the said URL.
And you're now good to go! 🎉
Updated 9 months ago