Use your Model as base
Now that we have a well-registered Model, we can use it as a base for an Experiment, let's see what it means.
First, you will need a Project (with a Dataset attached) where to create your Experiment, then in the Experiments placeholder you can head to the 'With UI' page:
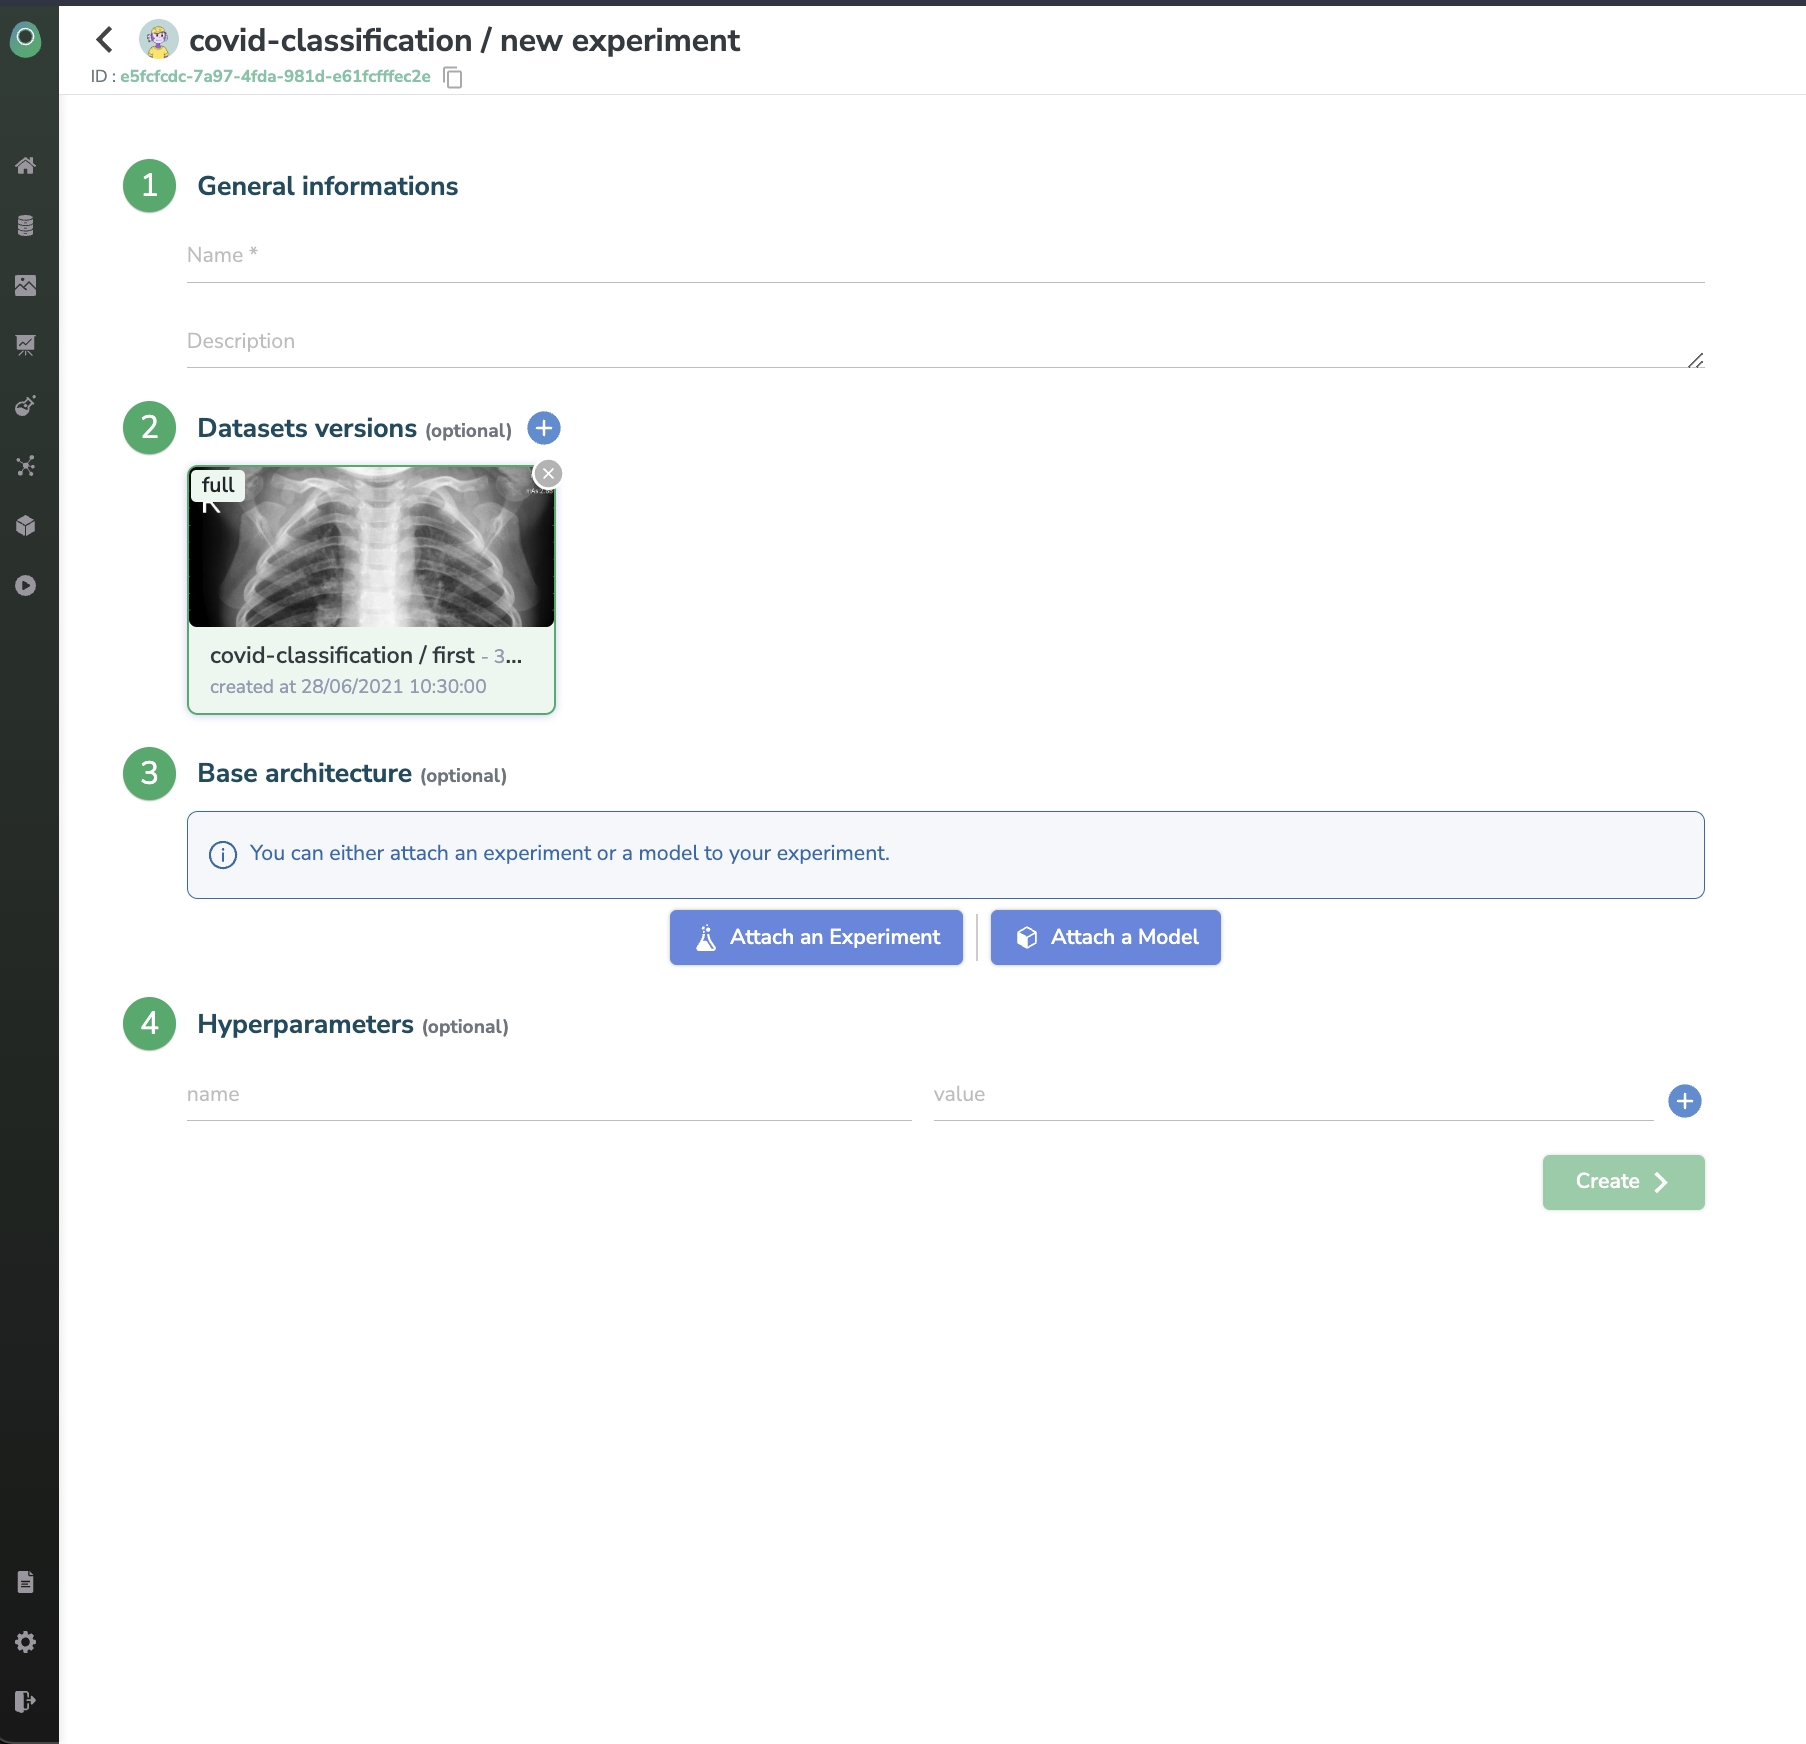
Let's enter a name and then click on the 'Organization HUB' button in the second section, a modal should appear
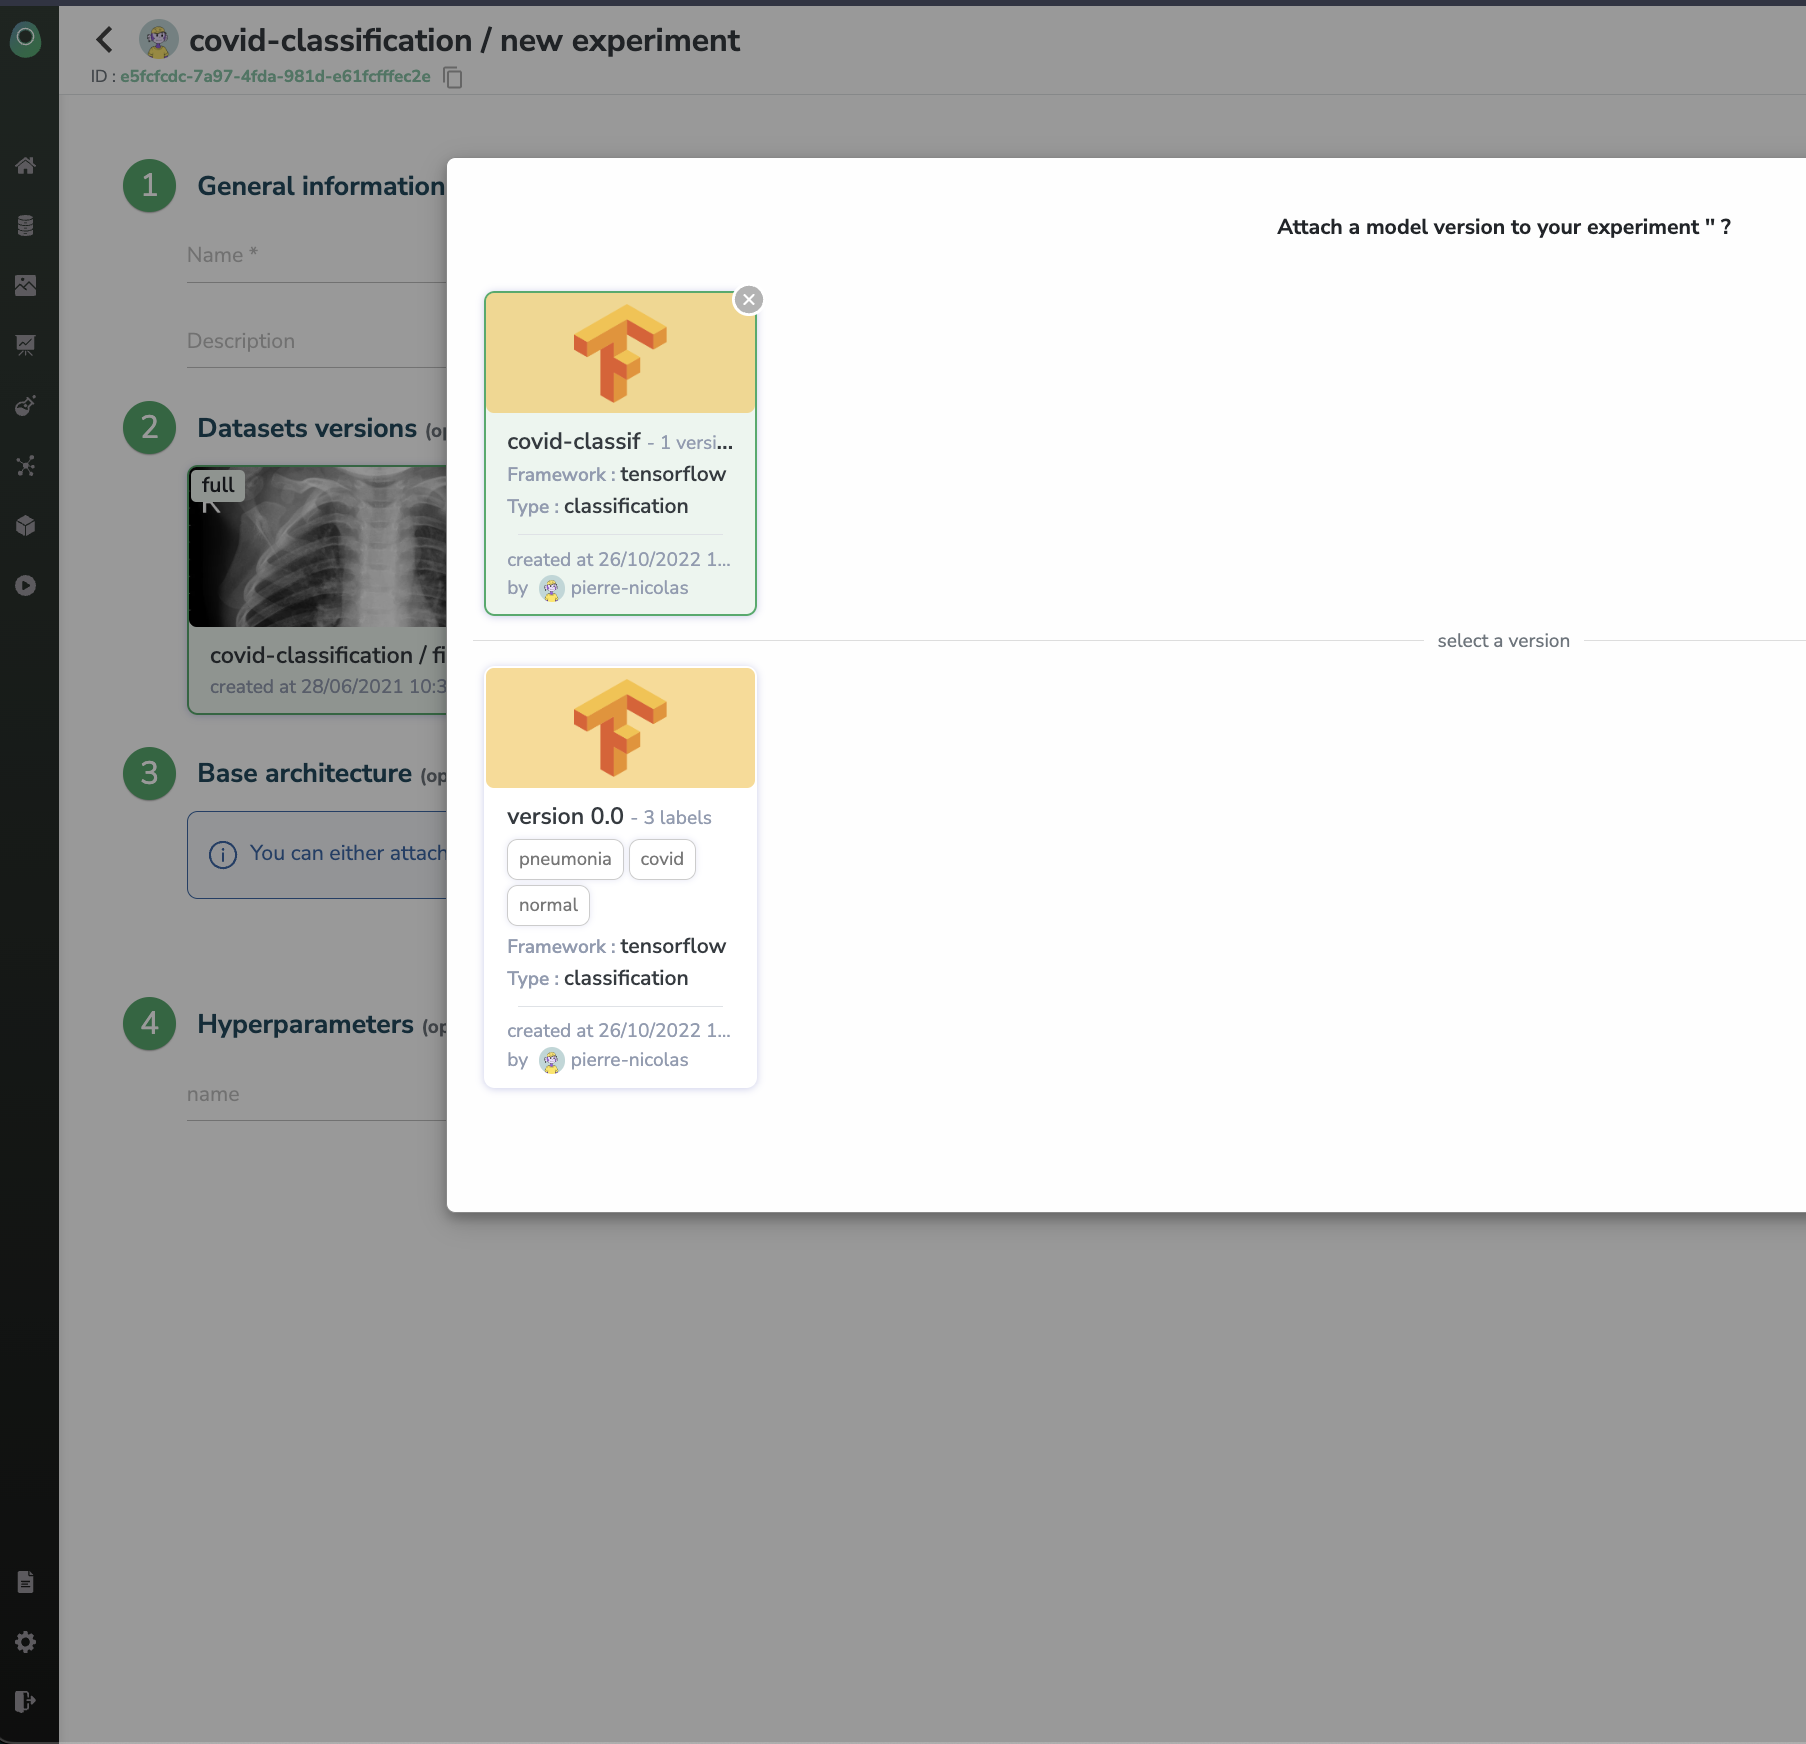
Once you identified your model, let's select it and watch the magic happening
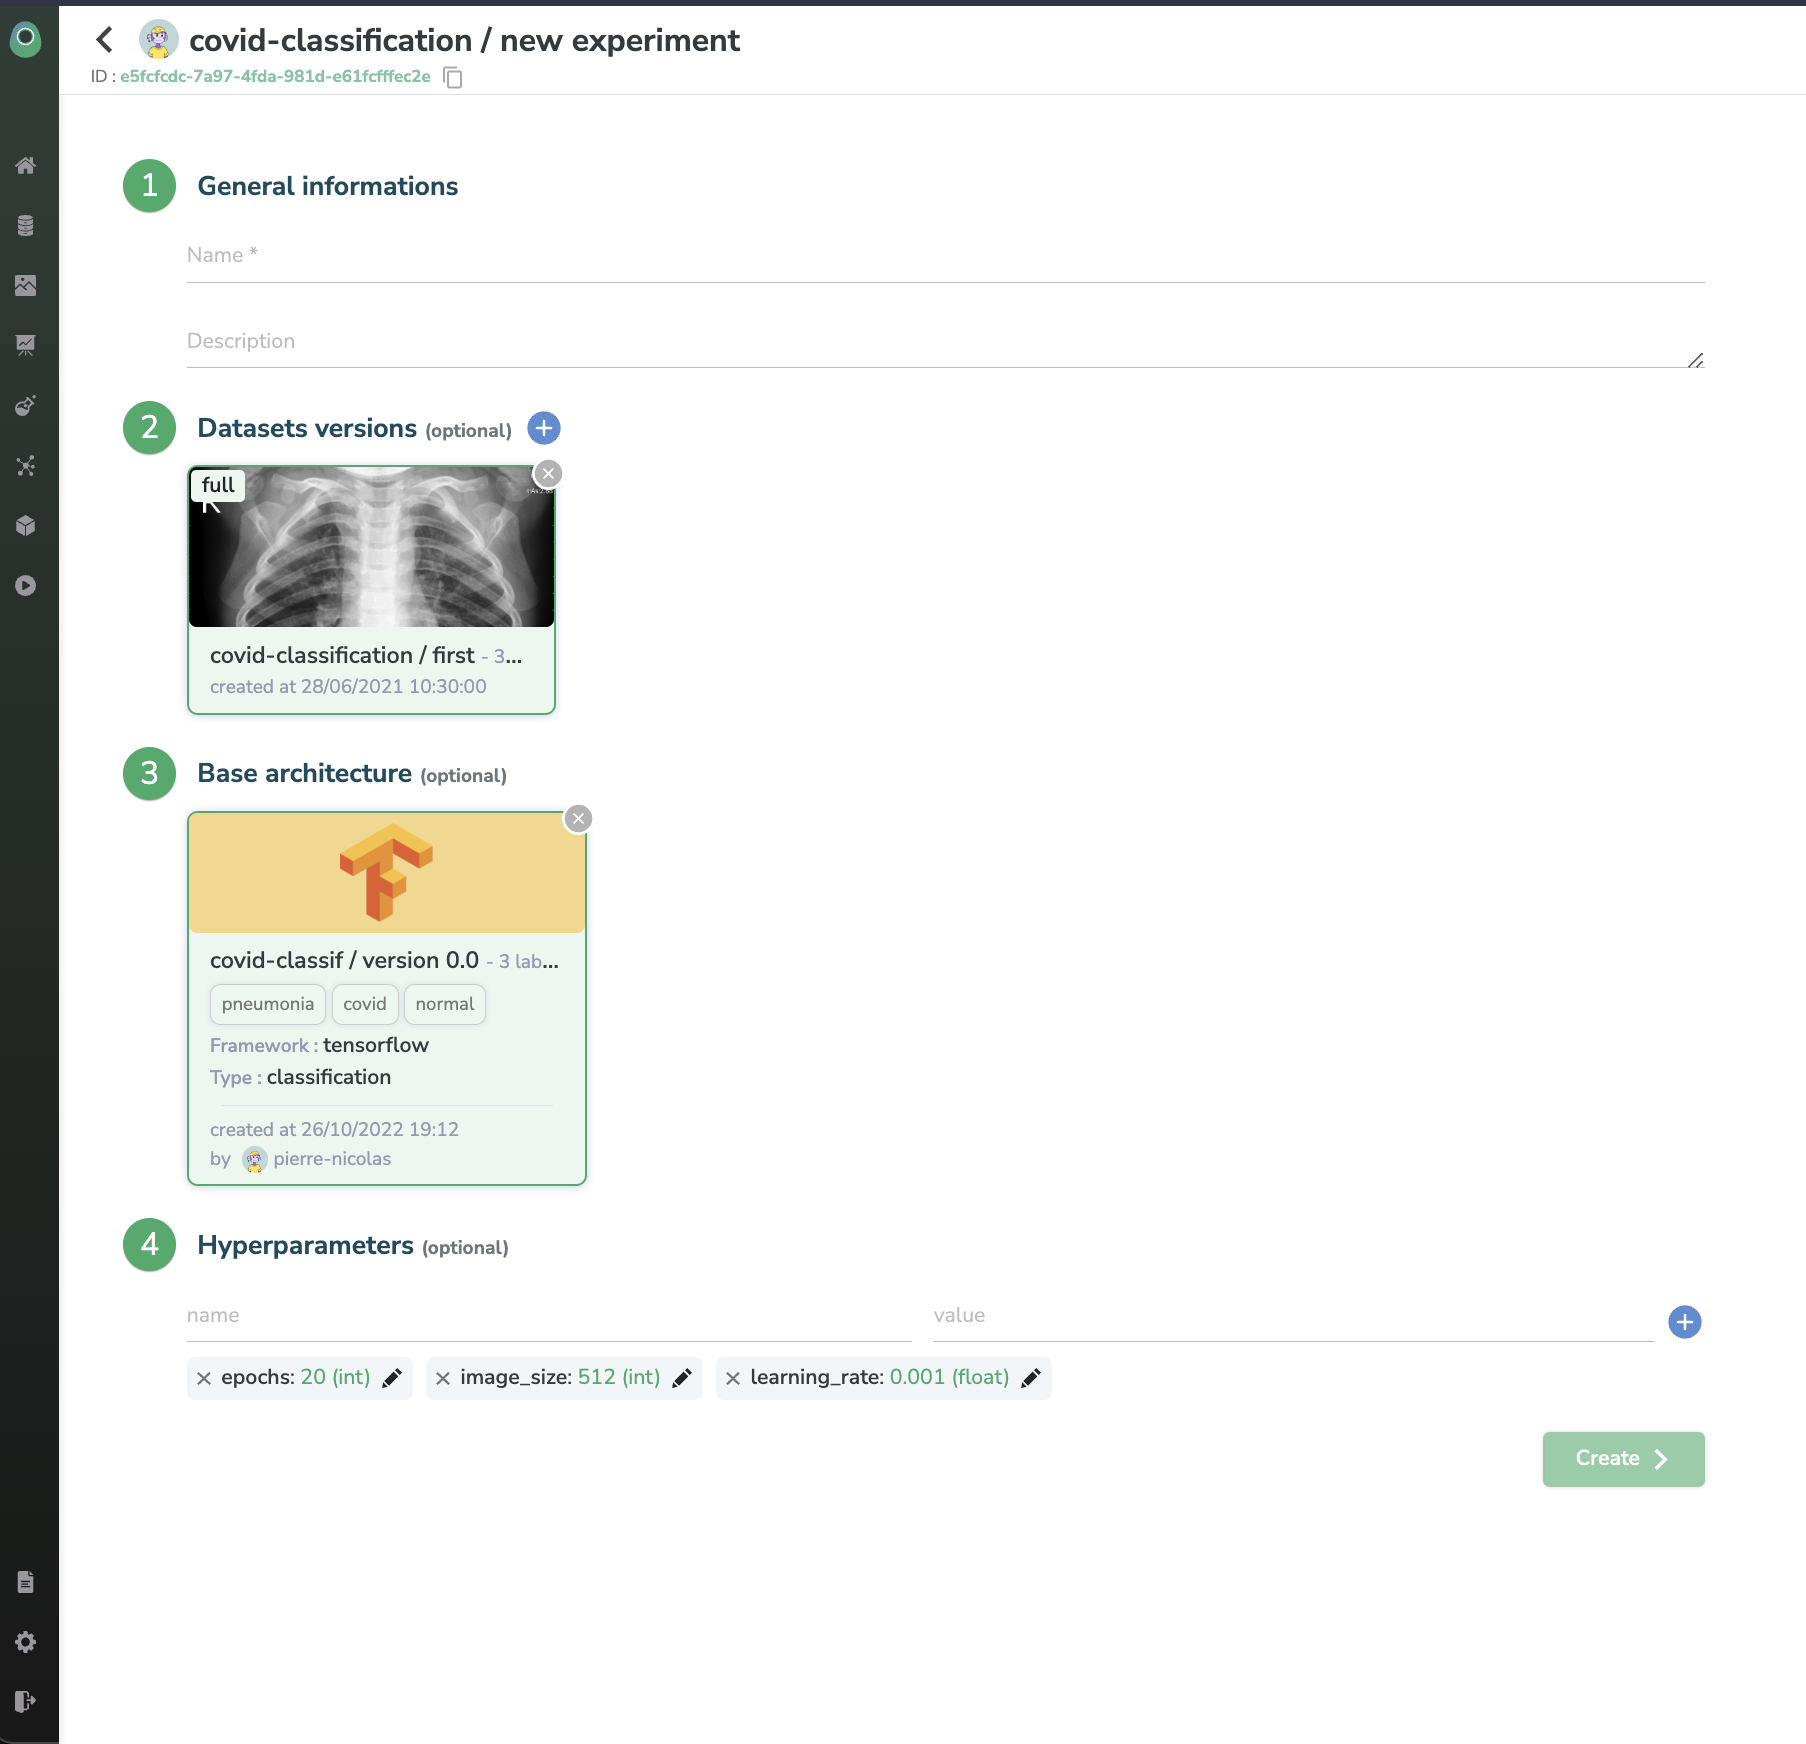
We can see that the 'Hyperparameters' section is automatically filled with the base parameters we set up earlier when registering our model, you can edit them if you want or even add some more.
Then we select the Dataset available in section 4 and click on 'Create experiment'. We are redirected to our Experiment dashboard.
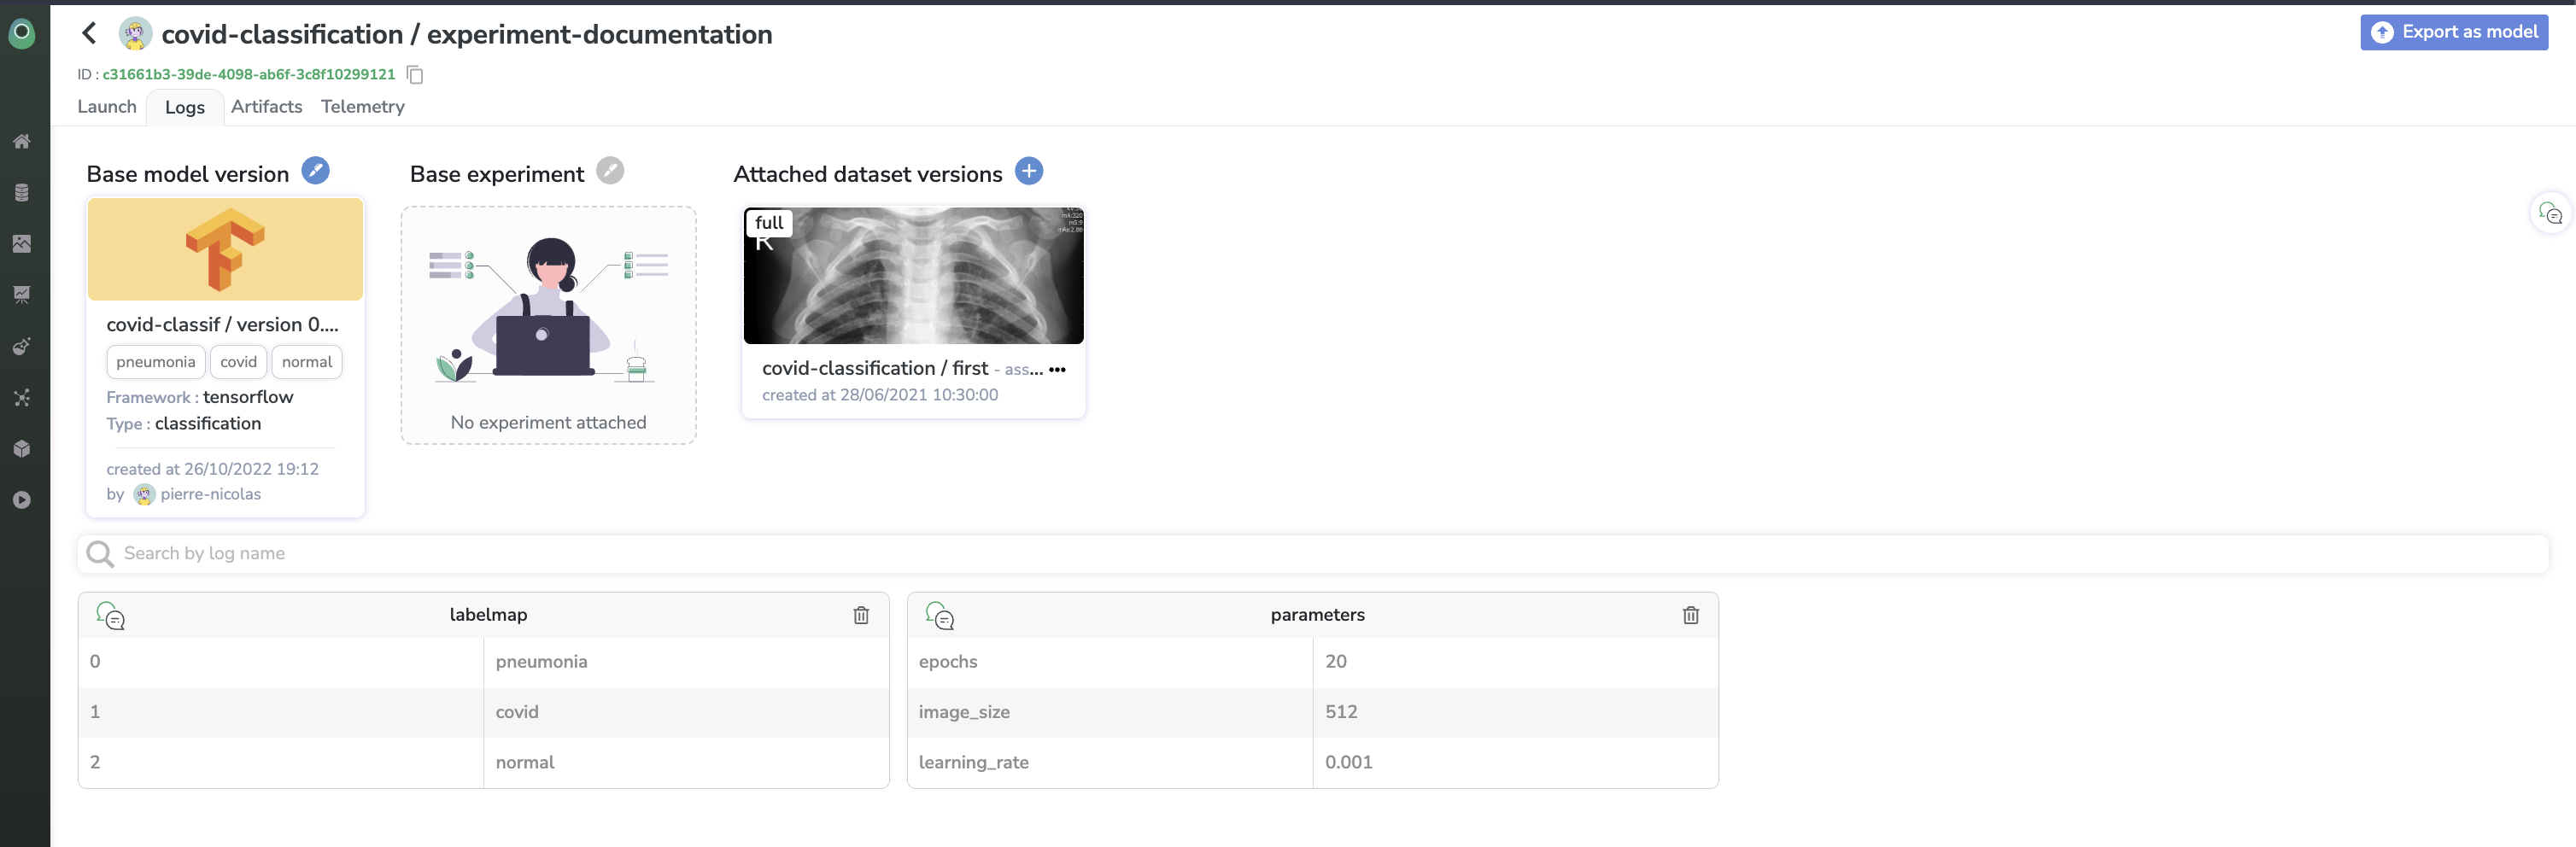
It looks quite empty for now but we can already see what starting from our base model did. Indeed we already have:
- A labelmap
- Some parameters
And if we go check the 'Artifacts' tab
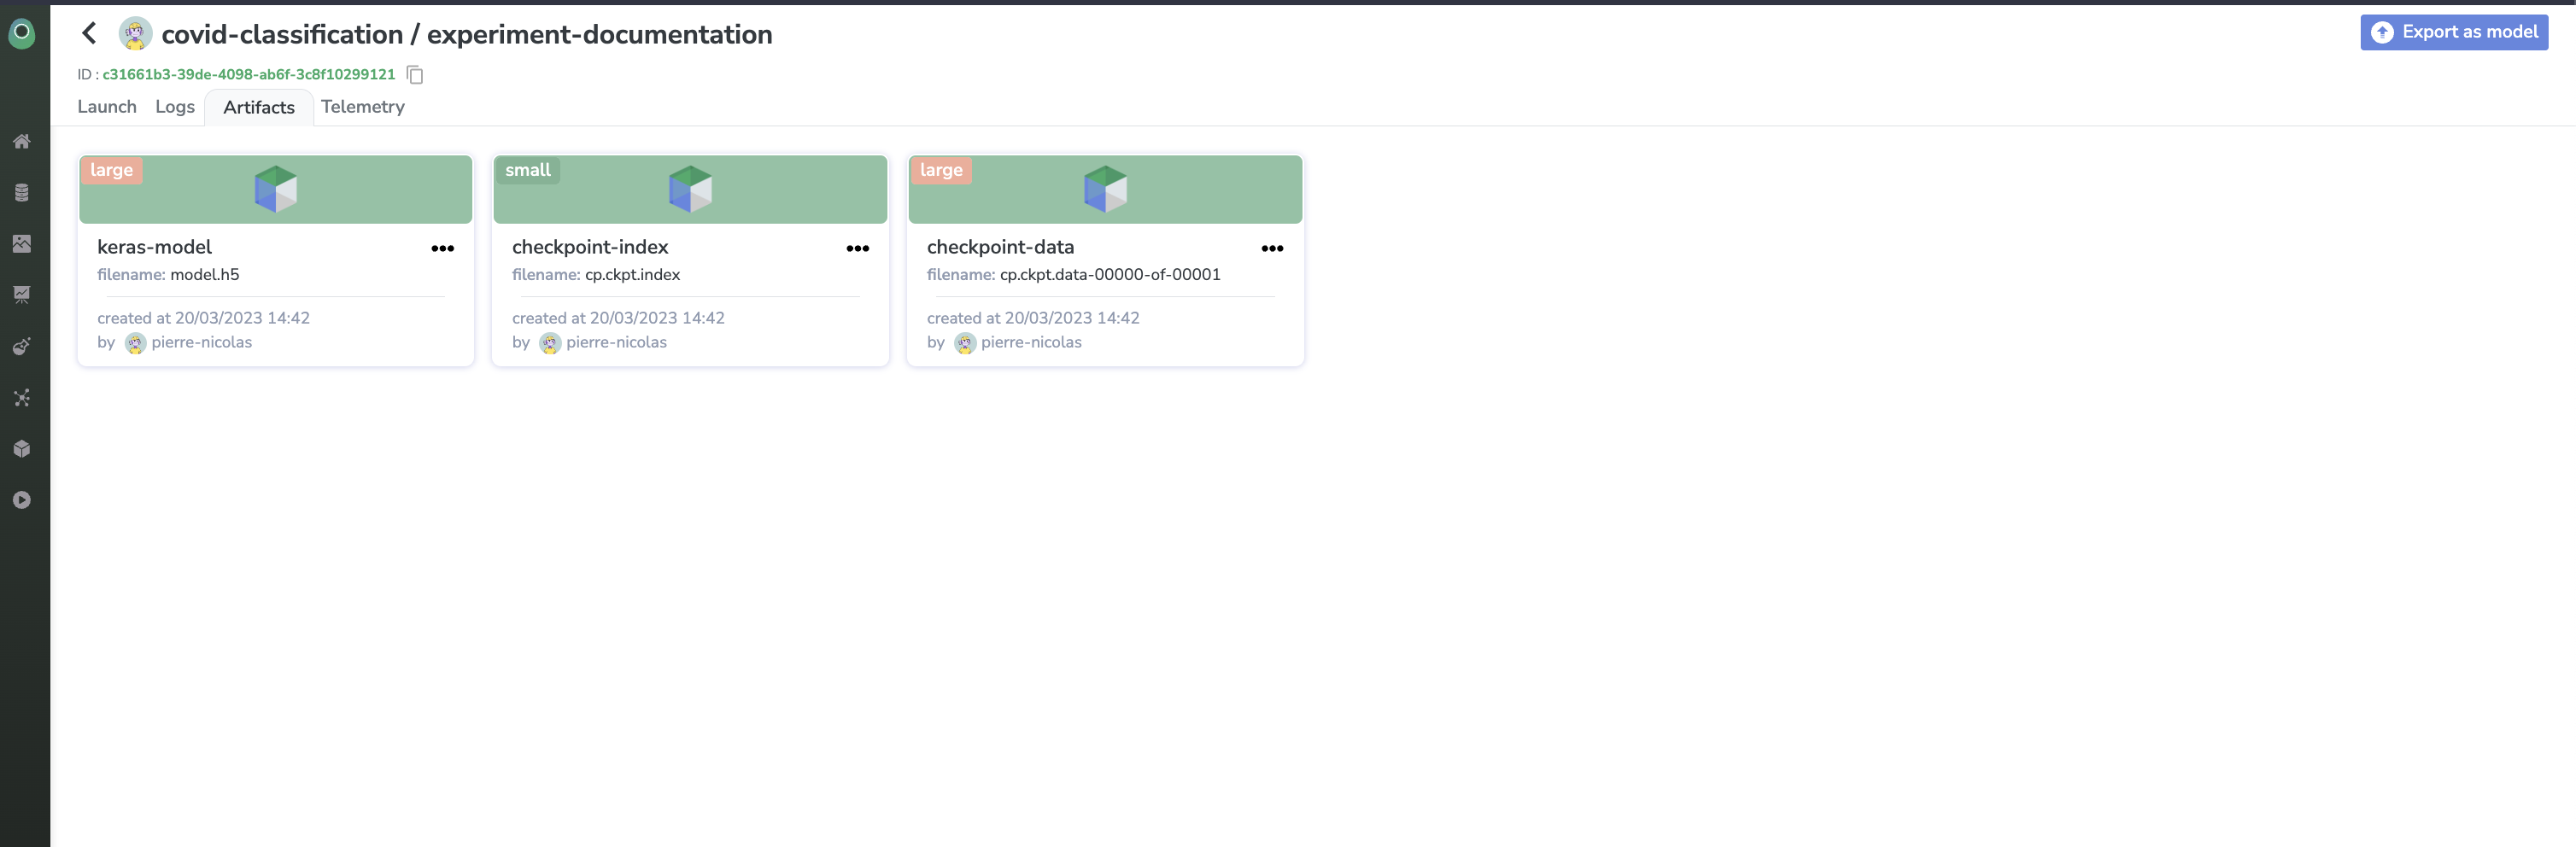
We can find the files we stored along with our Model in the first steps 🎉
Every asset from your base model becomes now available in your experiment which means that you will be able to access it in your code during training seamlessly !
DisclaimerWe are going to skip the steps where you will use everything from the configured experiment in your training because it has already been covered in this section.
Ok now let's assume that your training went well, you have your experiment dashboard filled with metrics and you updated the files with your newly trained weights.
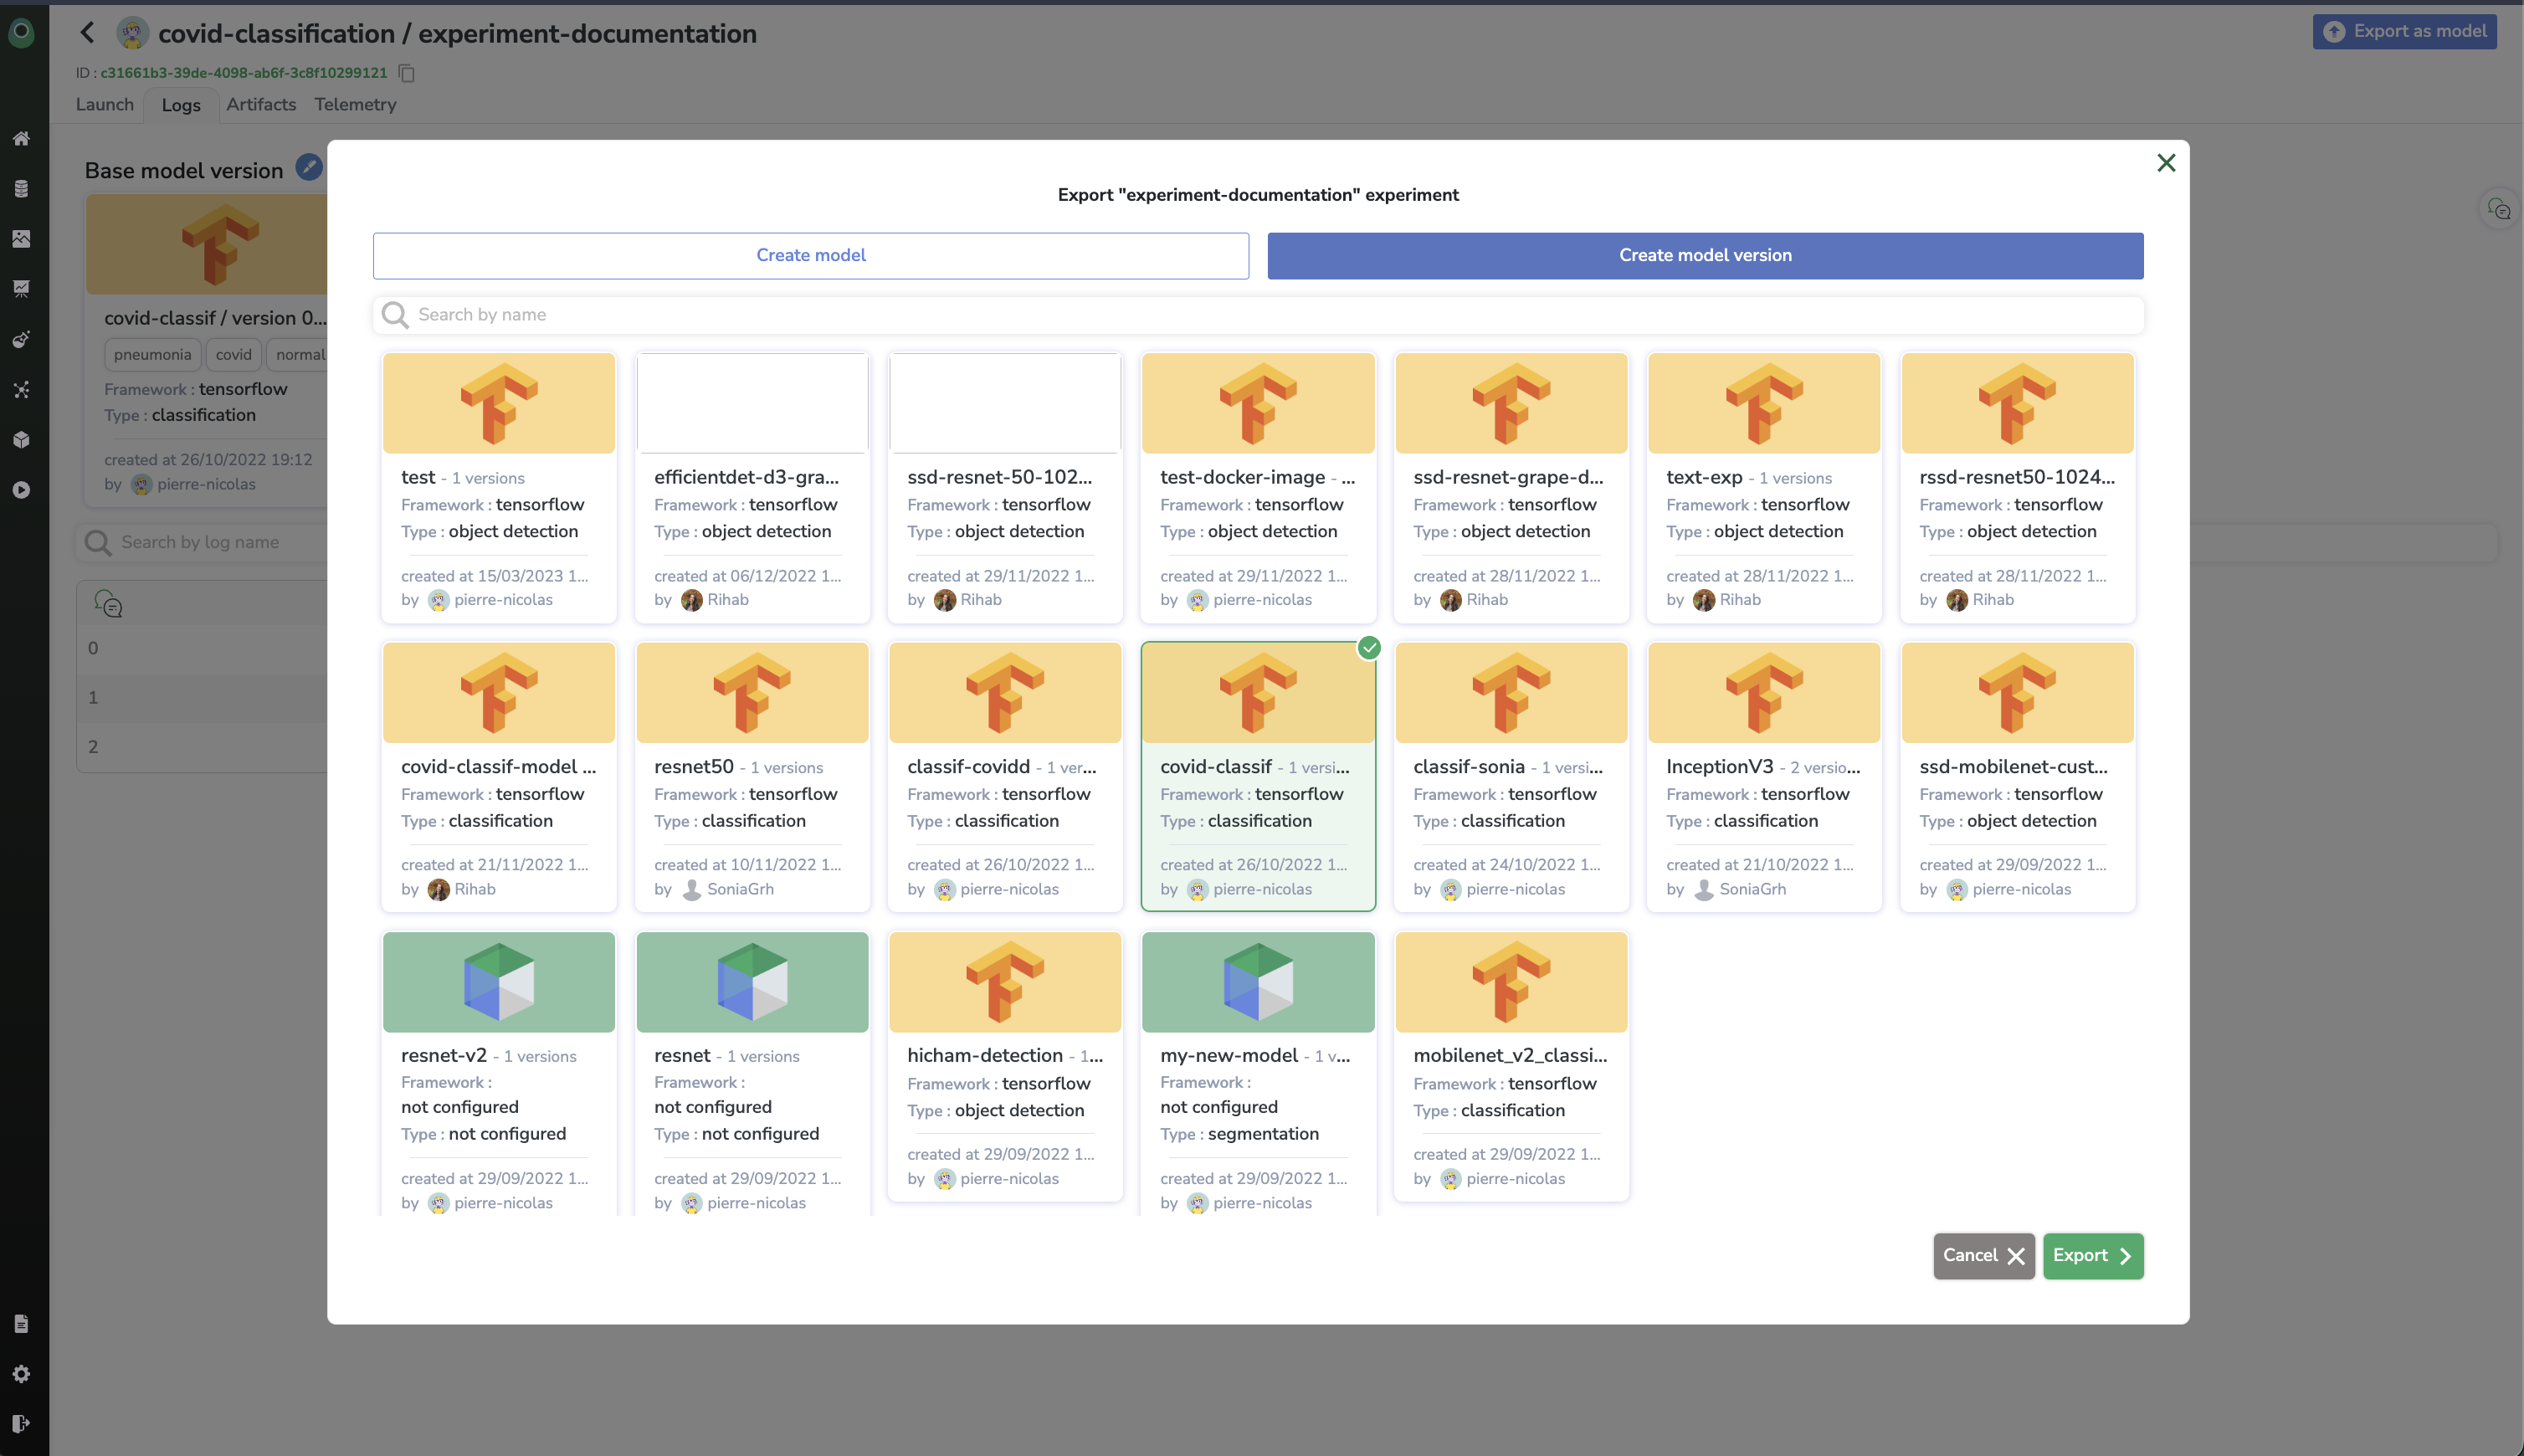
What we are going to do is click on the 'Export as model' button, in our experiment dashboard:

This will register a new Model in your Registry, with all the assets available in the Experiment meaning:
- The training data information
- The source experiment (current experiment)
- The parameters
- The labelmap
- The files
(See how we closed the loop 😏)
Just enter a name for your new model and click on 'Export experiment', you will then be able to either create a new Model or Create a new Model Version, let's create a new model version under the covid-classif model.
this will bring us to the brand new Model page
We can see that, compared to our first model, we now have new information that were automatically added from our source experiment.
From now on, when you come to this page, you can directly click on the 'Training Data' section to check the Dataset that has been used for training or go check the metrics from the training by clicking on the 'Source Experiment' section. This is what we call full reproducibility.
Now that you know how to fully leverage the Registry and the Models in Picsellia, let's see how you can package the code that has been used for training so it becomes fully reusable by anyone using your Model as a base for Experiments.