

Processings
1. What is a Processing?
Processing?A Processing is a piece of code (like a Python script) executed on Picsellia infrastructure that can interact with any object related to your Organization (Datalake, DatasetVersion, ModelVersion..).
This page details how to use a Processing on a Datalake.
To explain this, let's start with a use case:
Let's say you want to perform data augmentation on a Picsellia Datalake.
Normally, the steps to achieve this would be:
- Downloading your images locally
- Running a script with some data-augmentation techniques (like rotating the image for example) on all of your images
- Uploading the augmented images to this new
Datalake
We know it can feel a little bit overwhelming. Although running a script can be considered an automatic task, this process is fully manual. In addition, you must be using a computer that is able to run the code (it has to be in the correct environment, etc...)
This is why we came up with Processing, to let you automate this process and launch it whenever you want, on the data you want, directly from the platform!
So let's see how to use the most common Processing, the auto-tagging of a Datalake.
A Processing can be run on a Datalake, so you can perform any tasks you can imagine, such as:
- Auto-tagging of
Data - Data Augmentation
- Smart
Datasetcreation Metadataauto-completion- ...
2. Access the Processing list
Processing listFirst of all, you can at any moment reach the list of available Processing by clicking on Processings on the Navigation bar as shown below:
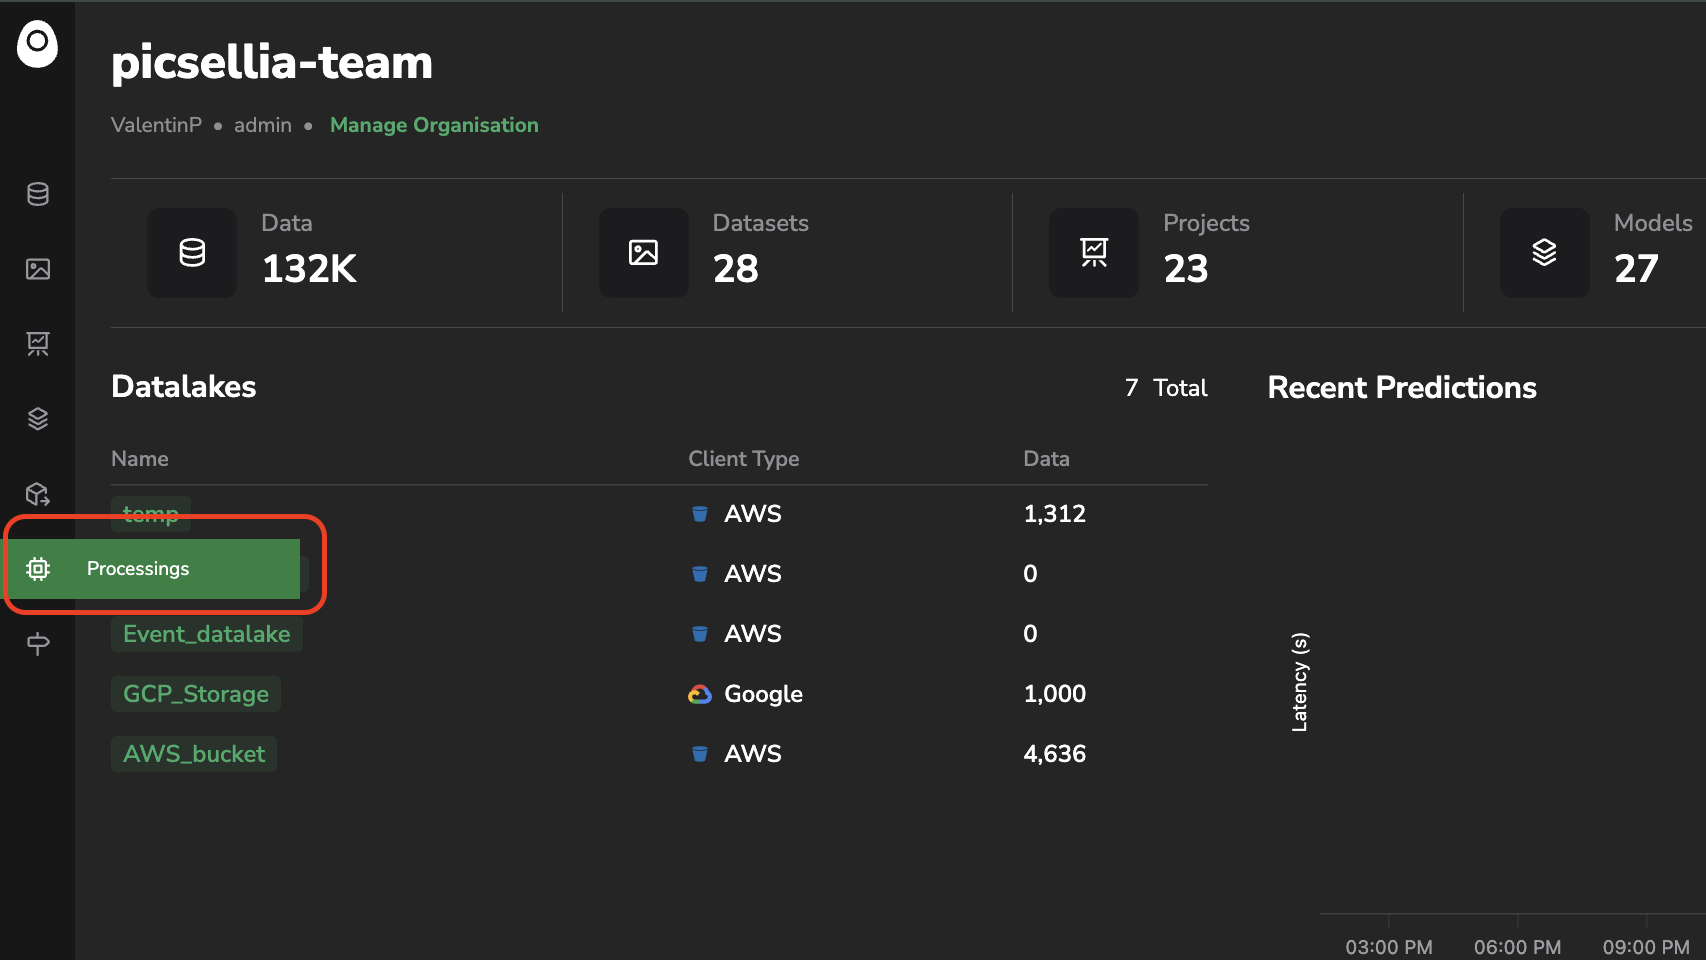
Access the Processing tab
This page provides access to all the Processing available for the current Organization.
They can be filtered by Public (created by the Picsellia DataScience team) or Private (created by you), and by the type of object they can be used on:
DatalakeDatasetVersionModelVersion
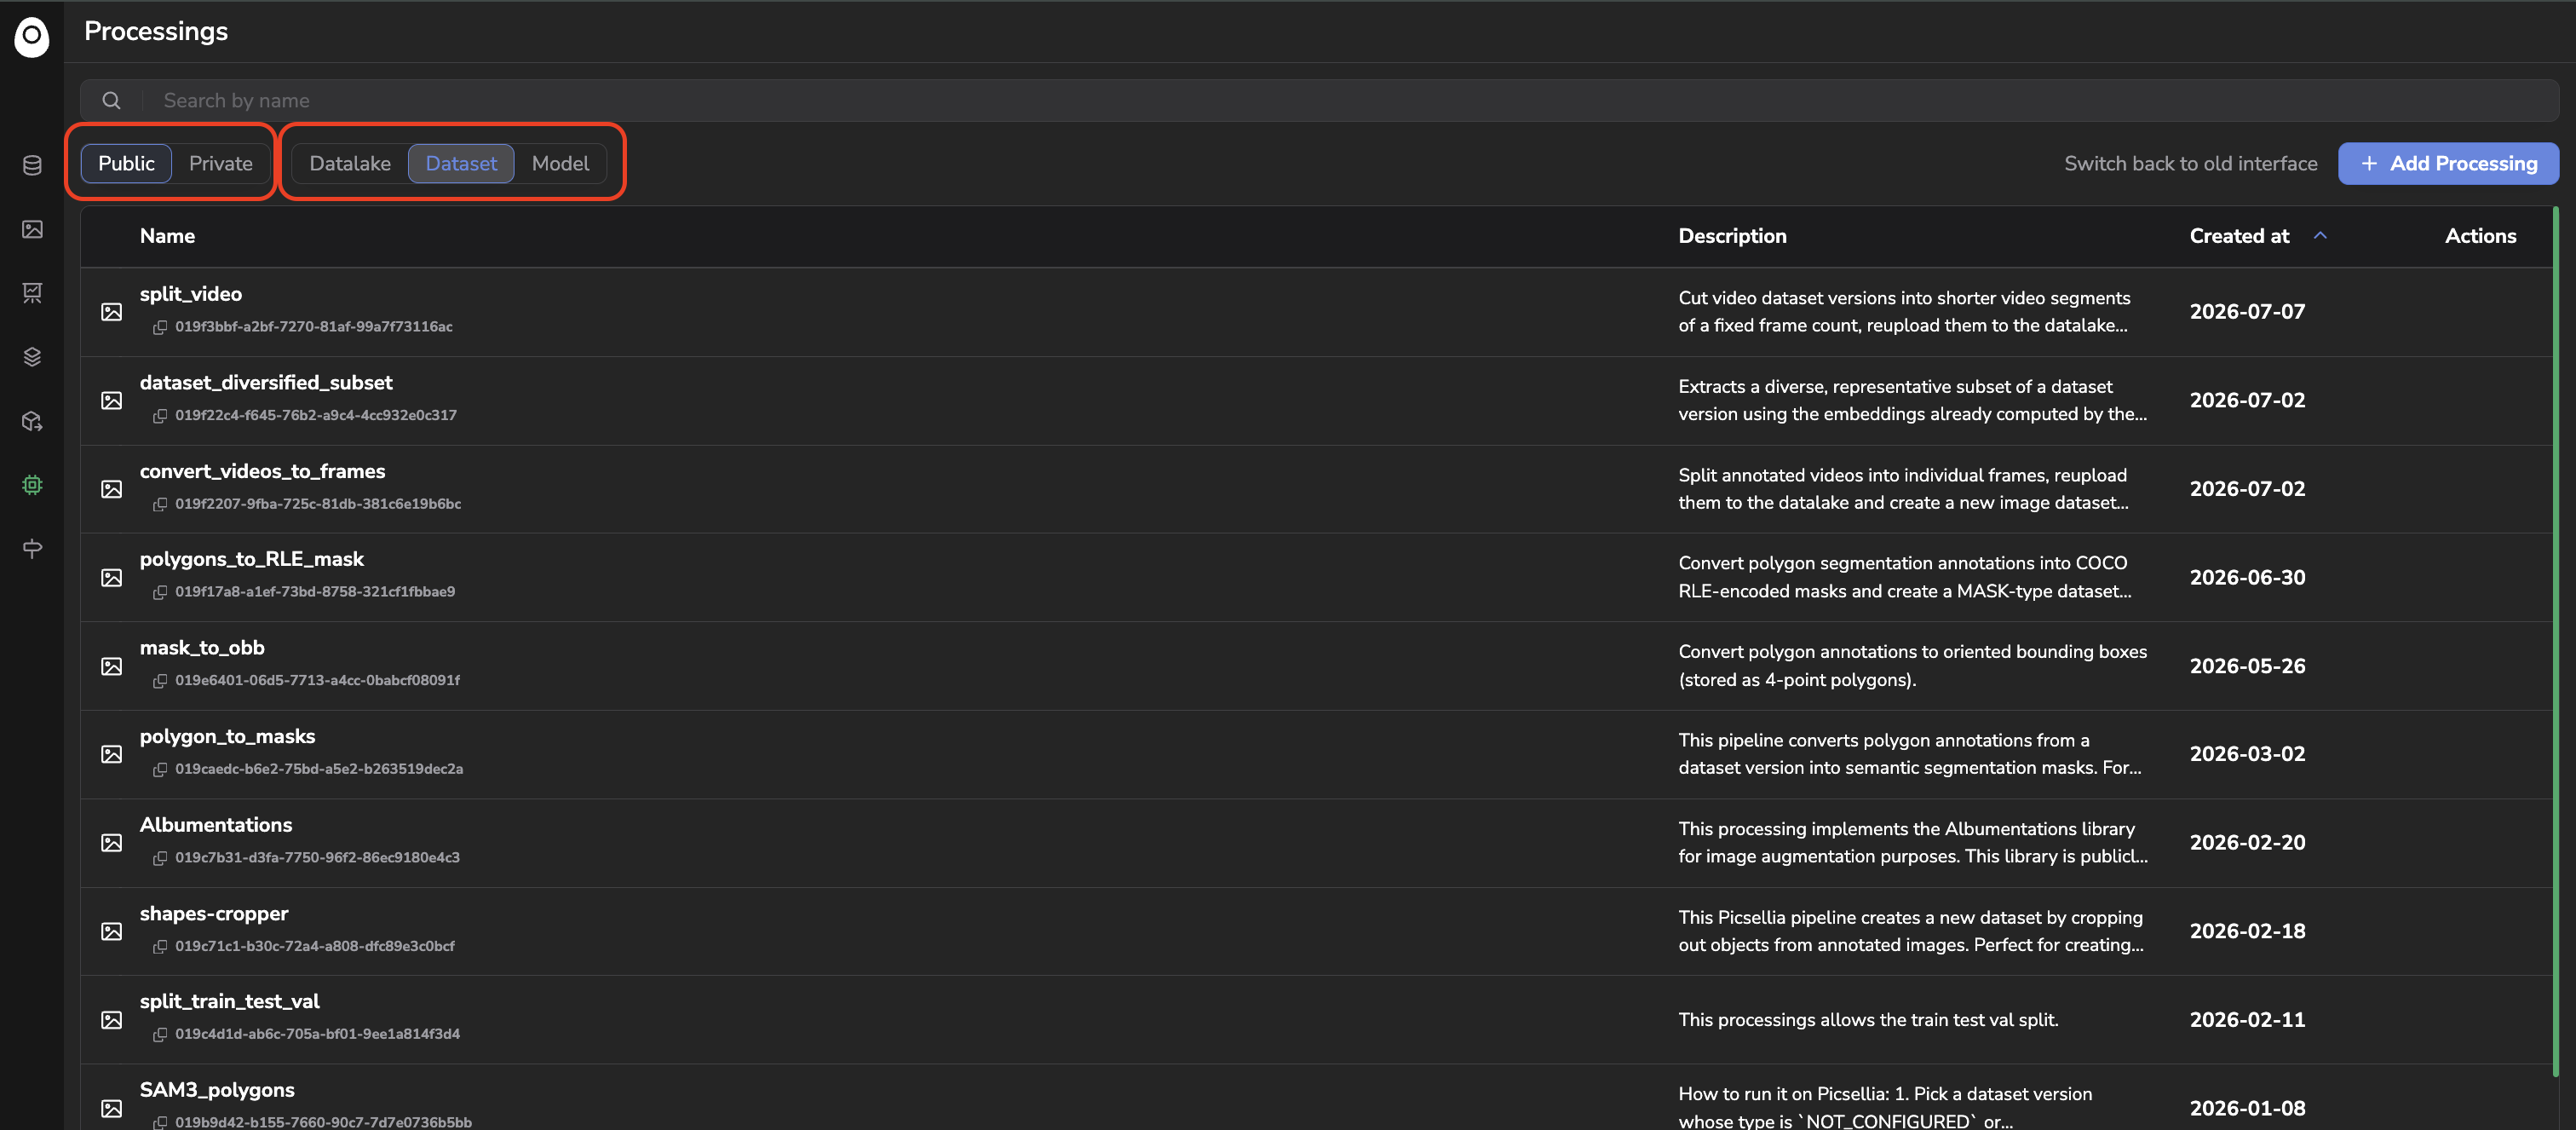
List of Processing
In this view, for each Processing is displayed its Name, Description, and Created at date.
It is also from this view that you can create or update any type of Private Processing by clicking on + Add Processing. More details on this topic are available here.
3. Use a Processing on a Datalake
Processing on a DatalakeNow that we can easily list the available Processing it is high time to use them. In our case, we will use one on a Datalake.
Let's see one of the most useful examples: The auto-tagging of a Datalake with a CLIP ModelVersion stored in your Model Registry.
First of all, let's access the Datalake to which the Processing should be applied to.
Then, select all the Data that will be impacted by the Processing and click on Process as shown below:
A modal will then open letting you choose among the Public and Private Processing, the one to be executed on the current Datalake.
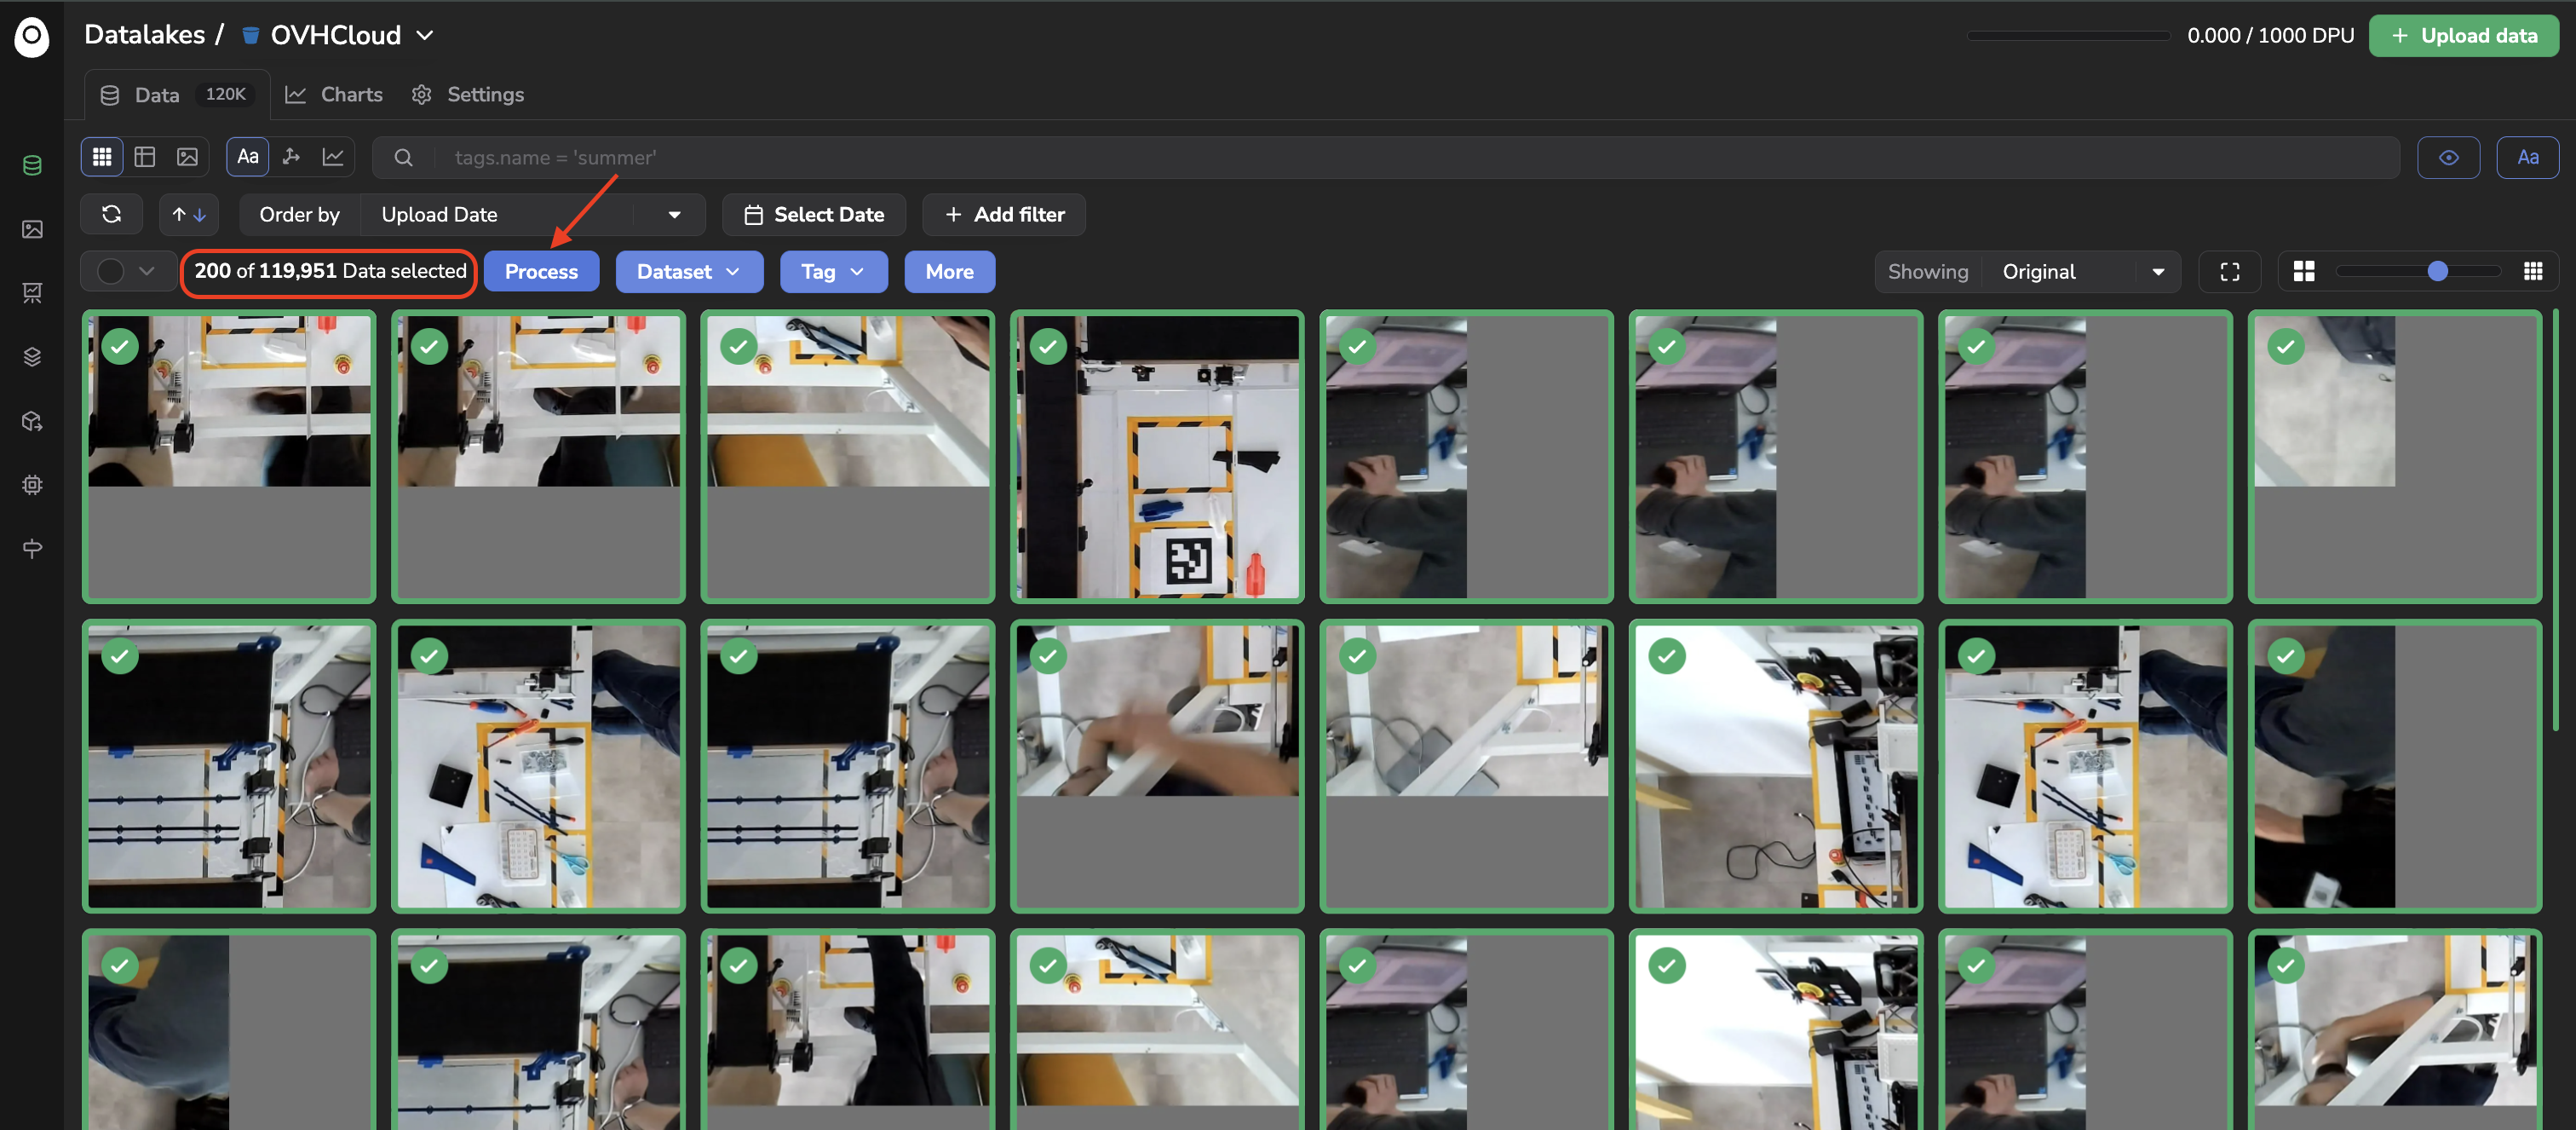
Select Data from Datalake and run a Processing on it
In the frame of our Auto-tagging use case, we will select the clip-auto-tagging Processing available to everyone as a Public Processing:
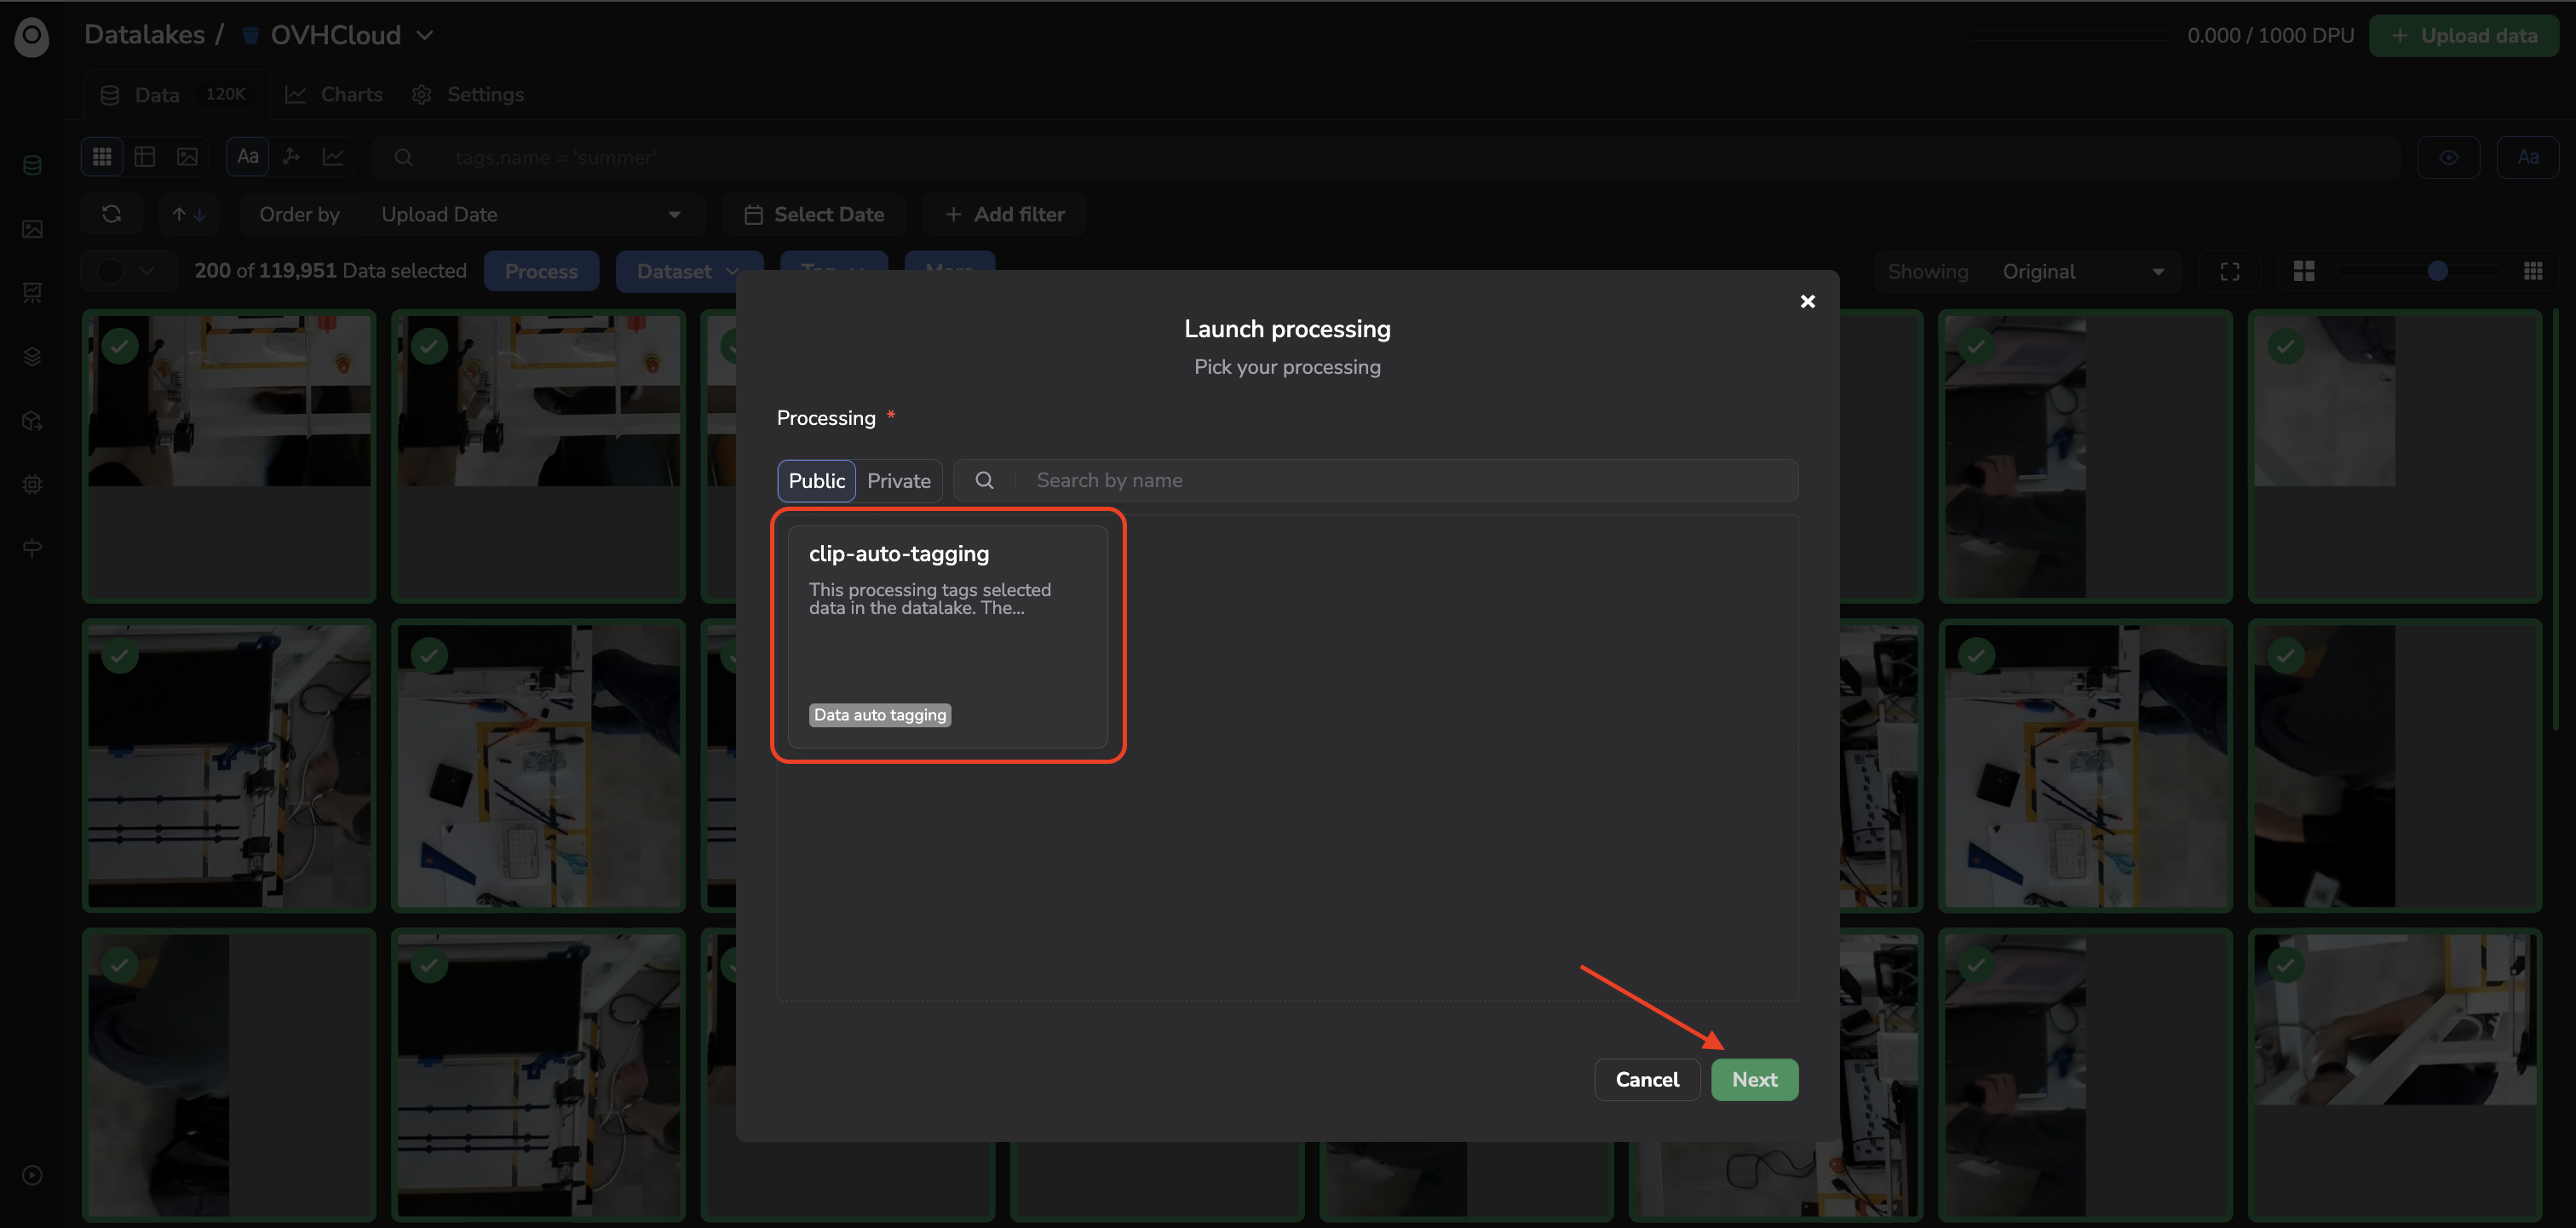
Select the Processing to run; it can be from Public or Private registry
Read theProcessingdescriptionEach
Processinghas to be used in a specific way. Usually, theProcessingdescription provides all the information to properly configure it and avoid the execution to fall into error.
Once the Processing is selected and you click on Next, the modal will show the Inputs and Parameters it was configured with:
- Inputs: named, typed fields declared by the
Processing's author. Each input can be of type Text, Number,DatasetVersion,ModelVersion, orDatalake, and can be flagged as Required. Picsellia renders the matching picker or field for each one, for instance aModelVersionselector (with its own Public/Private toggle) for amodel_versioninput. - Parameters: free-form Key/Value pairs (for instance batch_size & tags_list in our auto-tagging example) that you can edit with the pen icon or add to using the + button.
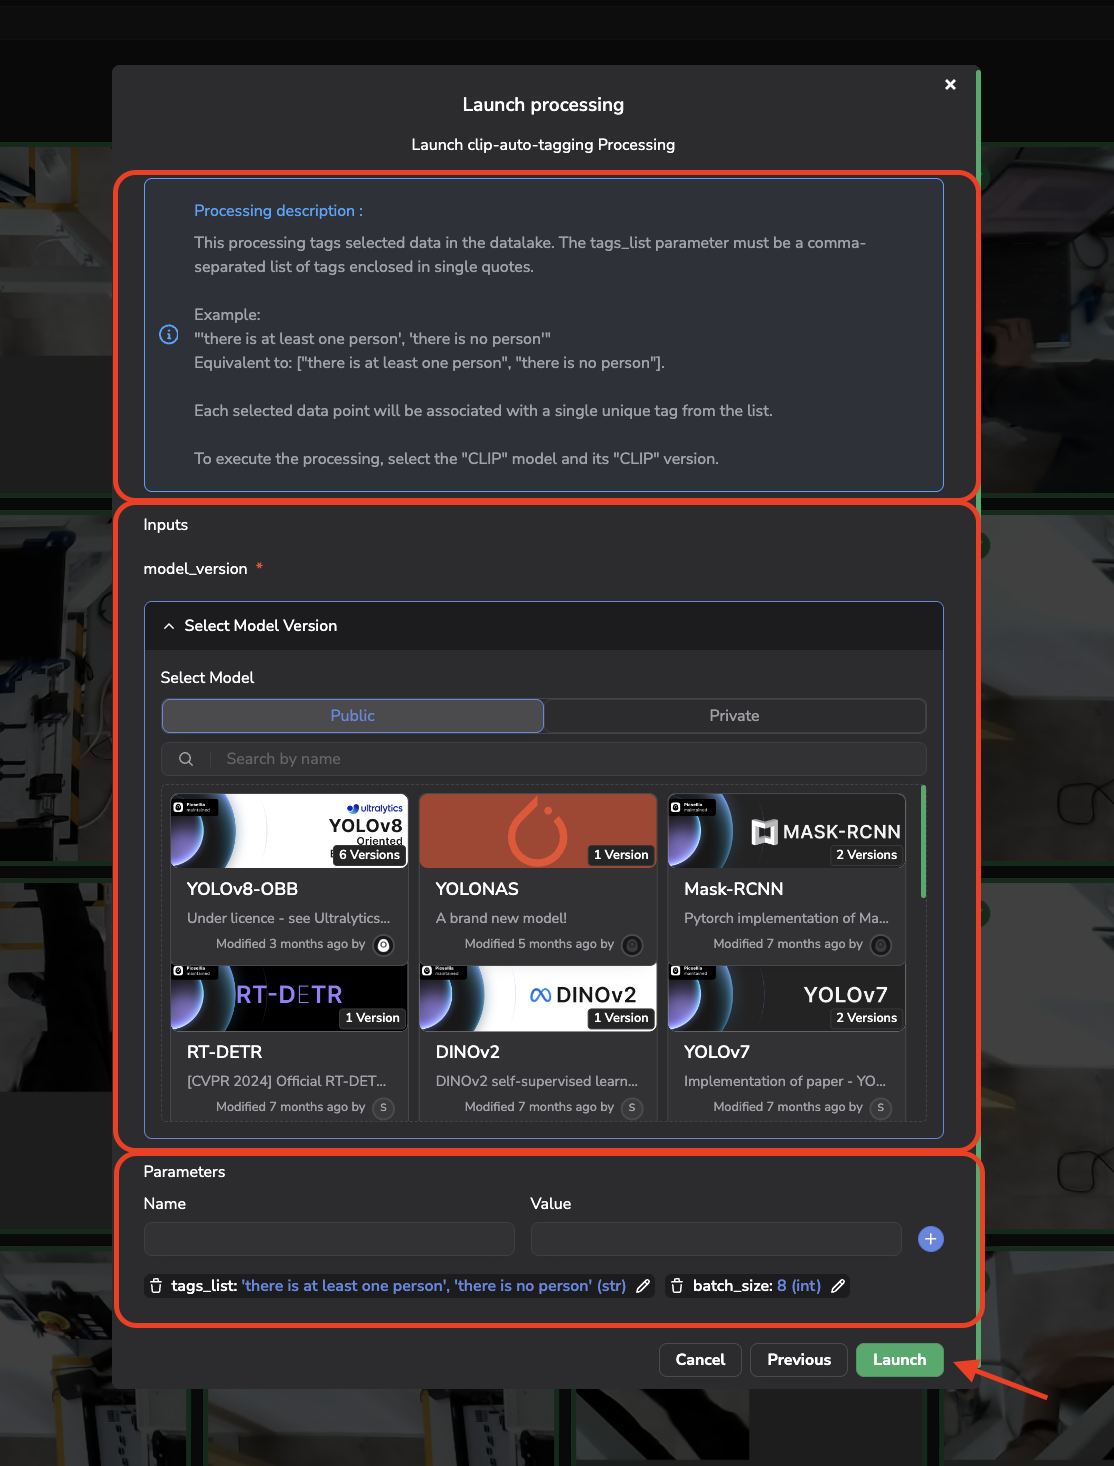
Processing run form
The inputs are never pre-filled and are always mandatory, so it is up to you to complete every input, whatever its type, before launching the Processing; otherwise, the Processing won't be executed properly.
On the contrary, parameters often have a pre-filled value for each key. Parameters are made to adjust the processing behavior in depth, where inputs are mandatory info the Processing needs to run in the right context.
More details on thisProcessingThis particular
Processingwill use the selectedModelVersion(in this case, a large model such as MiniGPT), which will attach aTagto eachDatain yourDatalakeselected among the list of potential tags listed in the parameter tags_list.
Processing TaskA
Processing's Task (for instance Data auto tagging) is only a descriptive tag: it does not restrict whichInputsare requested or how theProcessingbehaves. The availableInputs, their type, and whether they are required are entirely defined when theProcessingwas created.
Once everything is properly set, you can launch the Processing execution by clicking on Launch; the associated Docker image will then be executed on Picsellia's infrastructure according to the configuration (i.e inputs and parameters) defined.
To create your own Processing on the Picsellia platform, you can rely on the documentation available here.
4. Track the Processing progress
Processing progressWhen you launch a Processing, it creates a Job running in the background. You can access the status and many more information about it in the Jobs tab.
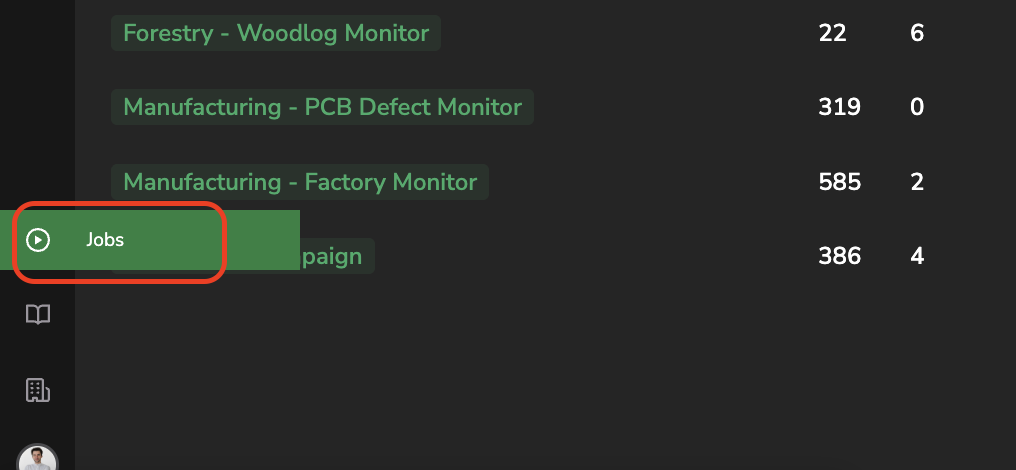
Accessing the Jobs panel
On this page, you can see the history of all the Jobs that ran or are currently running.
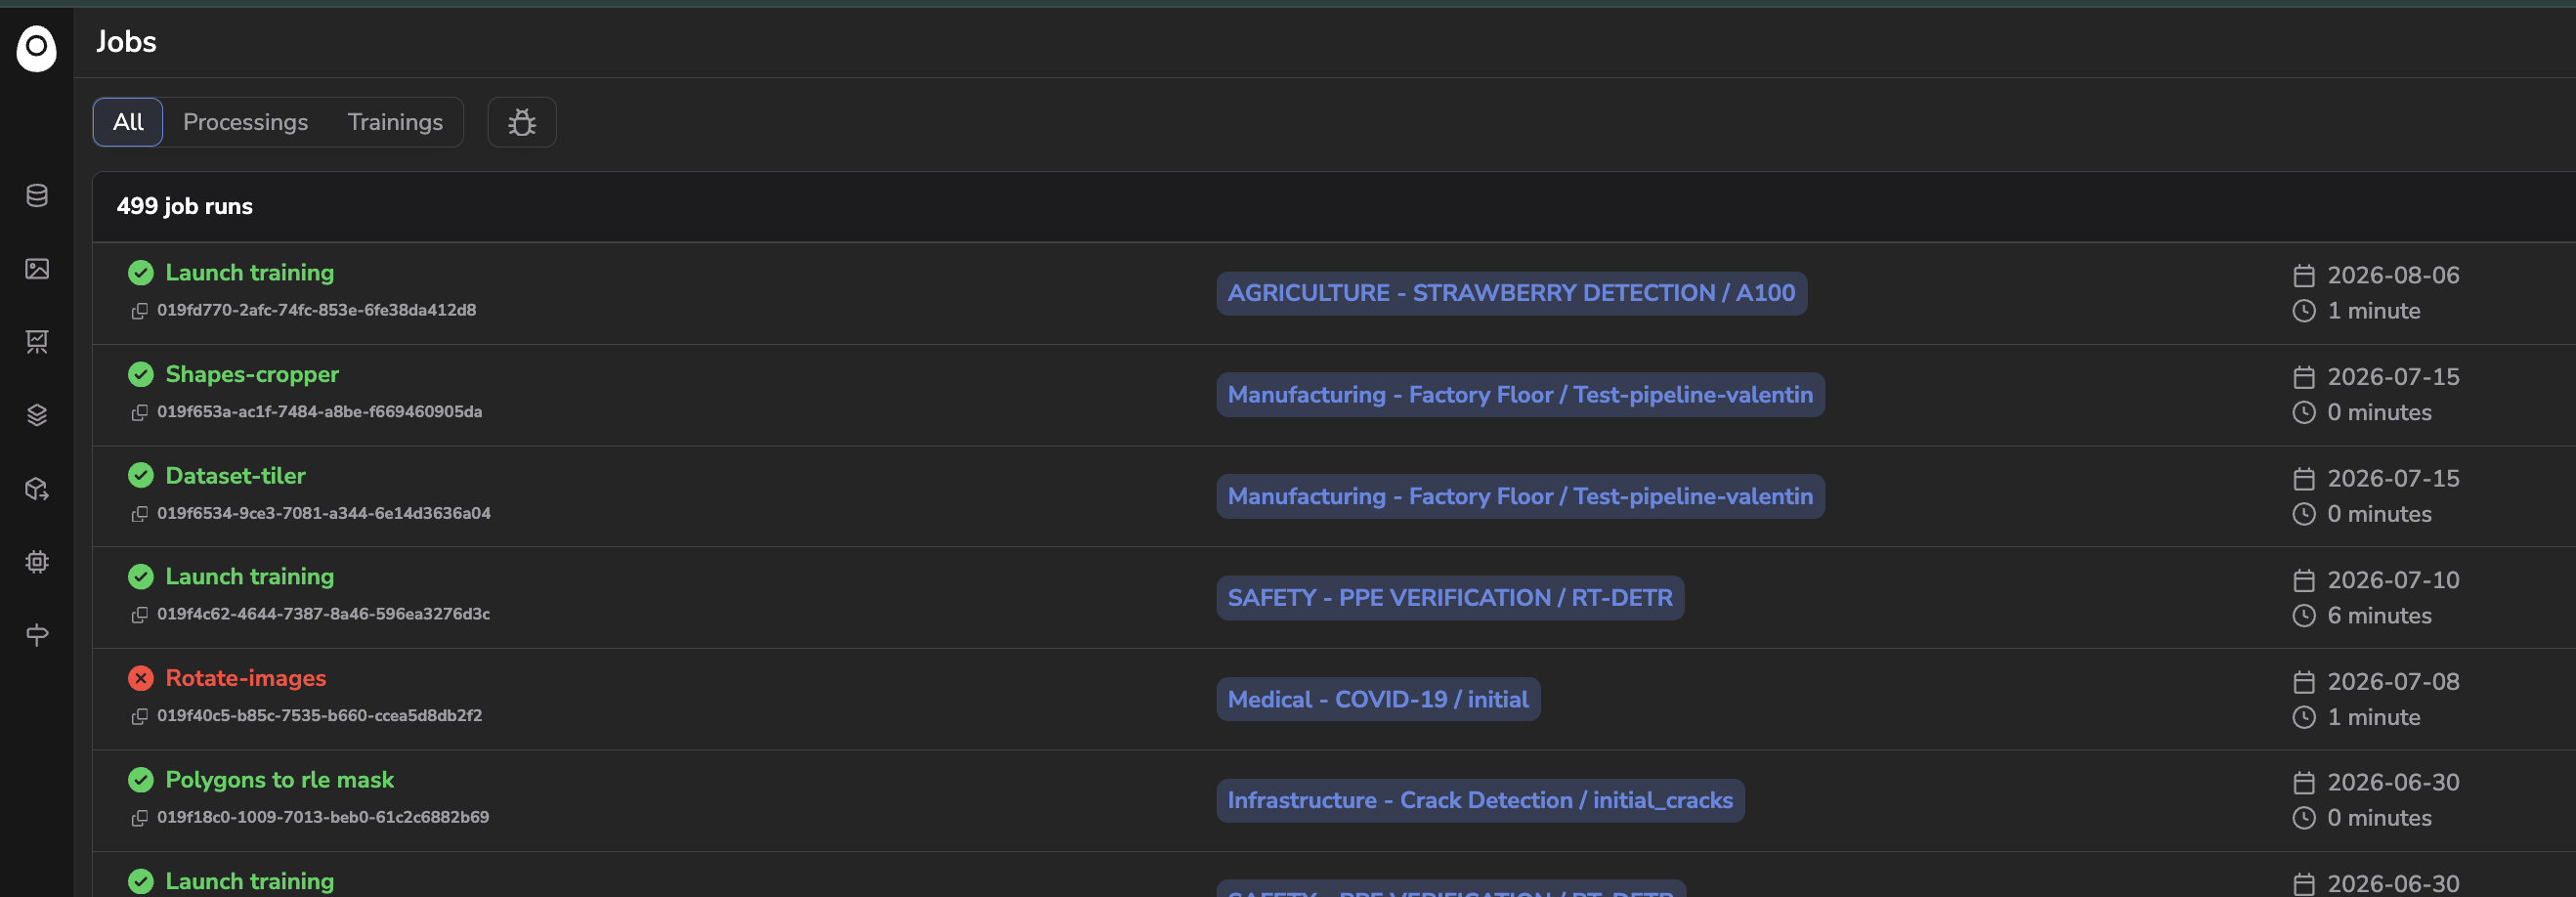
Jobs panel
If you just launched a Processing, you should see it at the top of the list.
When you launch a Processing, there will be a short moment when the status will be Pending. Once your Job has been scheduled, the status will change to Running, and you will see some logs being displayed in real-time (those come from the stdout of the server it runs on)
This way, you can really track the progress and the status of your Job and check that everything is going well. In addition, it is a way to keep track of any performed action on a Datalake, such as what Processing has been executed, when, and by whom.
Once your Job is over, you will have access to the full history of logs, and the total running time, and the status will switch to succeeded (or failed, if there were issues at runtime).
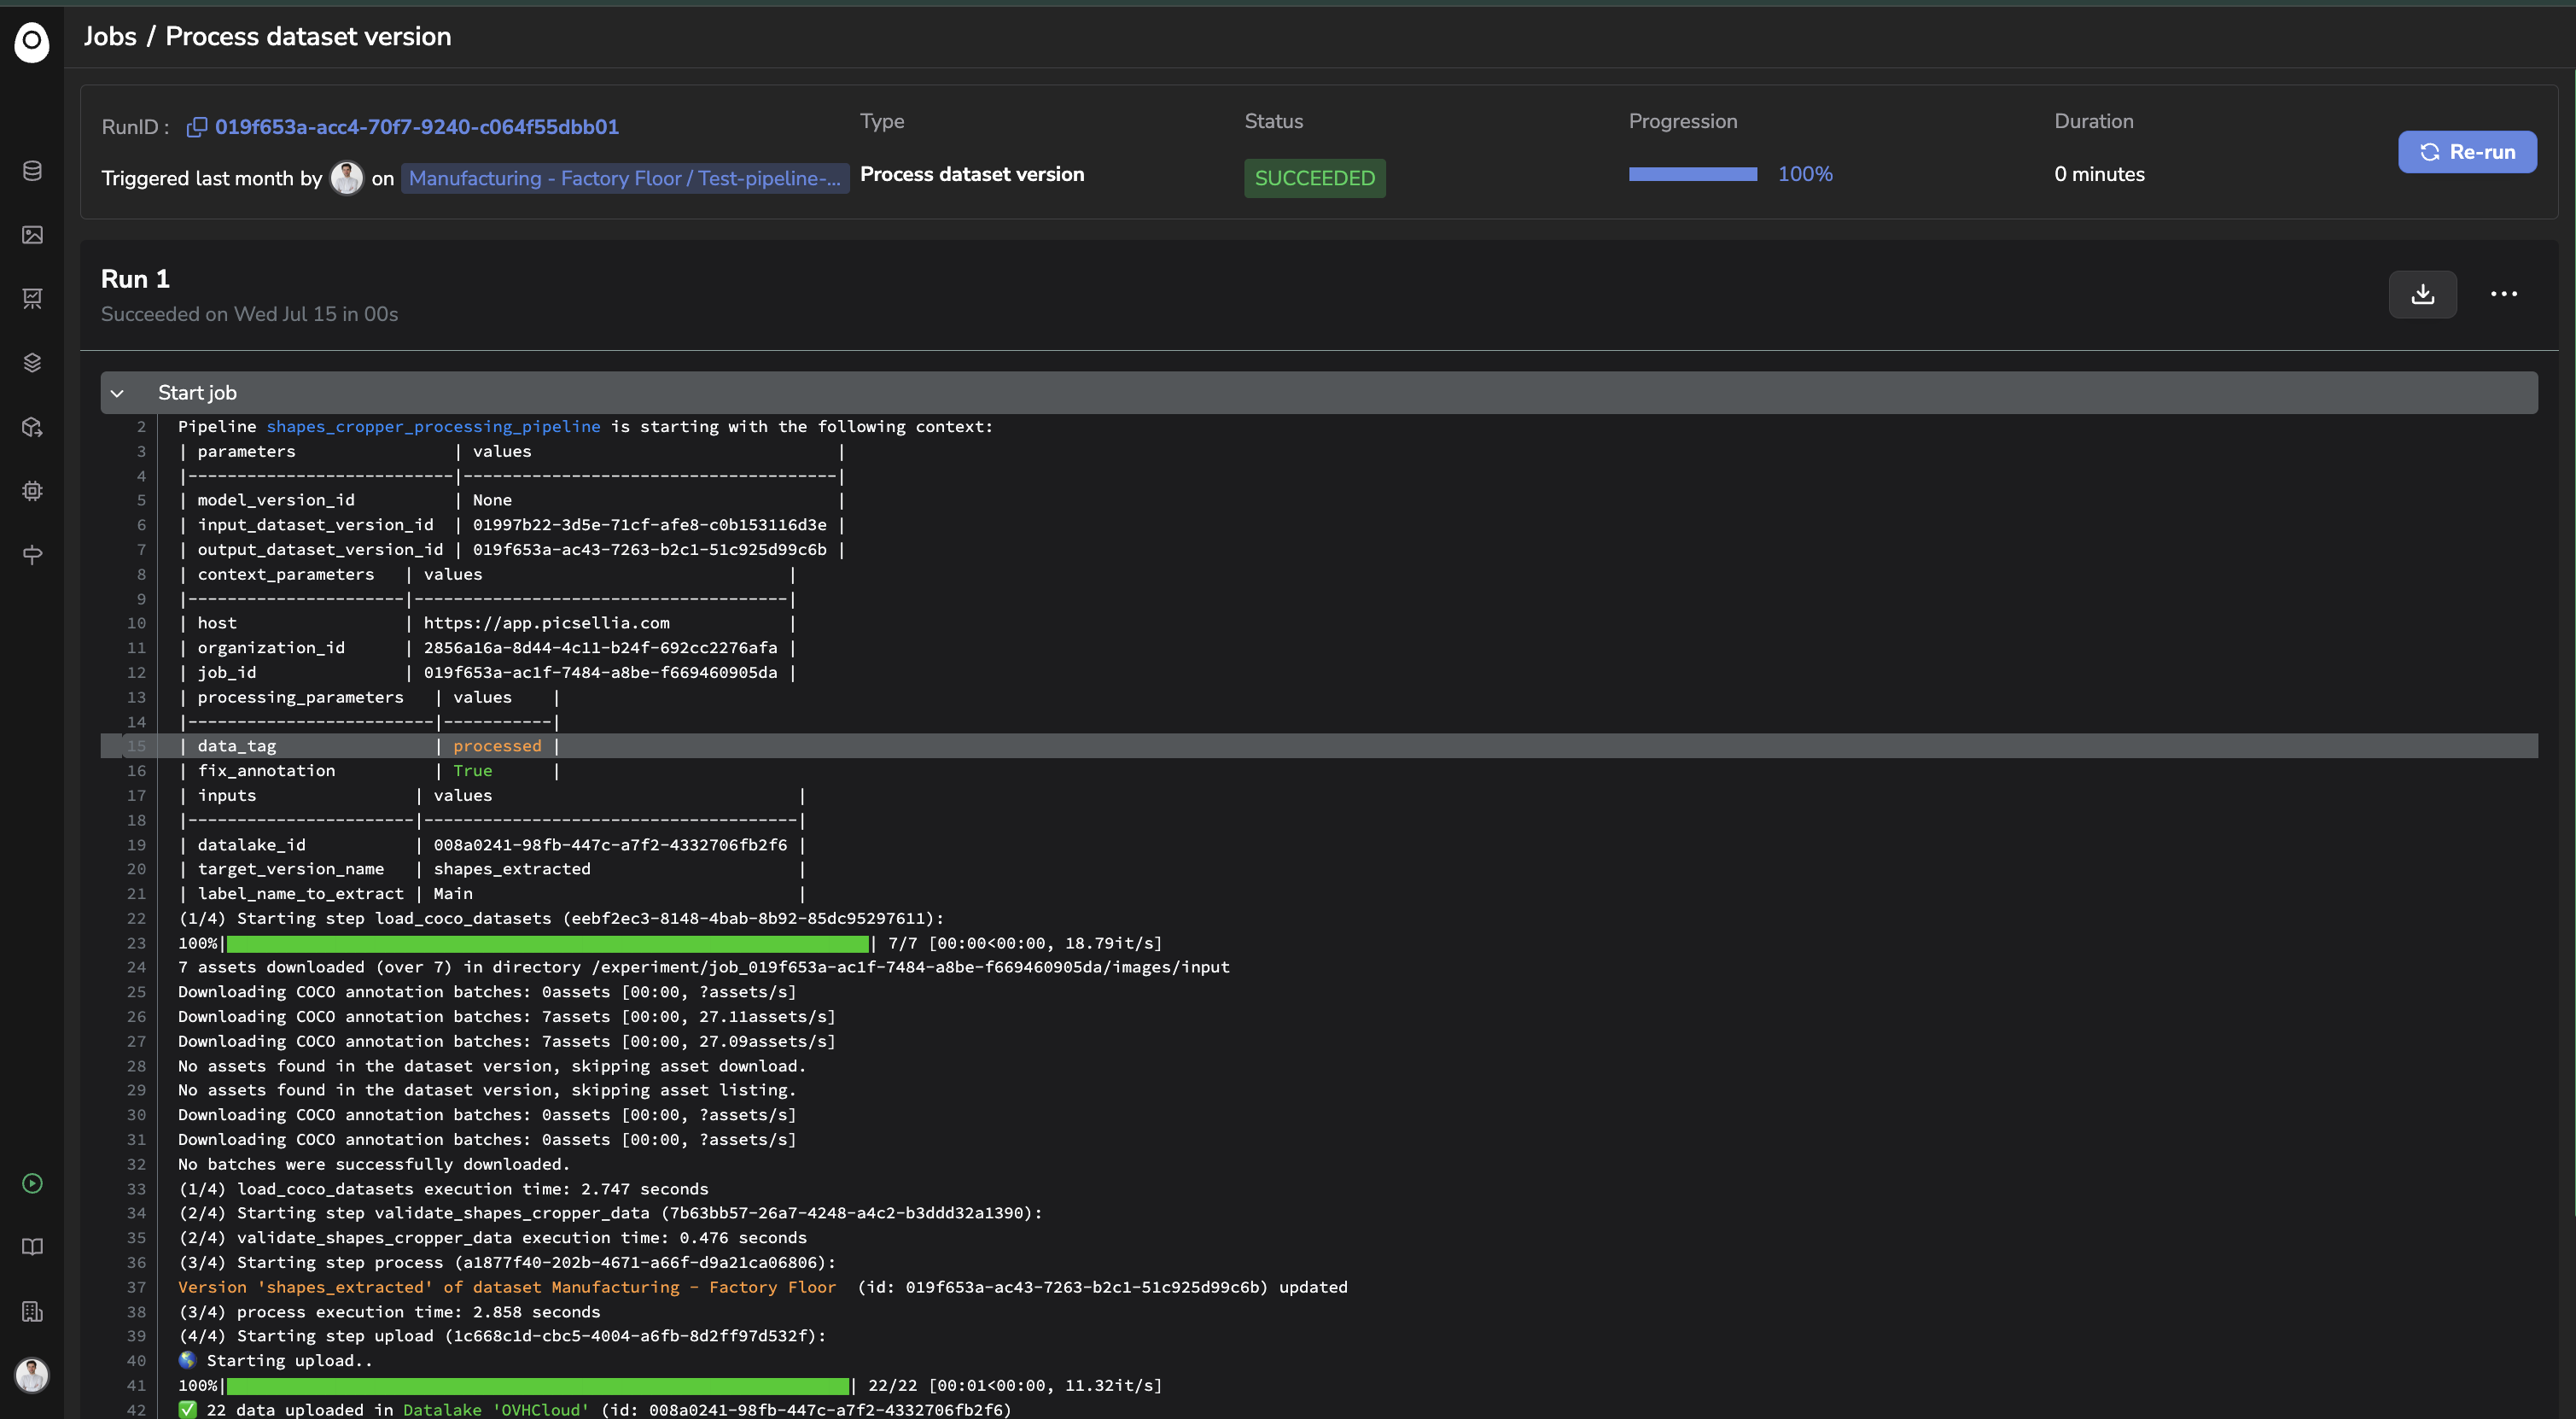
Track a particular Processing execution
Your Job will fail sometimes in that case; its status will be Failed, but you'll be able to find the issue thanks to the stack trace in the Job logs.
Once you have detected the issue, you have fixed it, and you have updated your Processing's Docker Image, you can click on the Re-run Job button. This will create and launch a second run.
Now that our job has finished, let's have a look at our Datalake to analyze the Processing outcome.
If you want to create your ownProcessingyou can follow this guide.
Updated 2 months ago