

Model versioning system
The Model Registry is the library that gathers all the Model created with Picsellia or imported.
1. Model Versioning System
During its lifecycle, a Model in Picsellia continuously evolves. To manage this evolution effectively, Picsellia incorporates a Model Versioning System. This system is essential for ensuring the reproducibility, traceability, and structured organization of different models, allowing meticulous tracking and cataloging of each ModelVersion.
In the Model Registry, a Model is composed of one or several ModelVersion. In Picsellia, what is commonly understood as a model in the field of data science is referred to as a ModelVersion.
To access the Model Registry, navigate to the correct Organization, then click Models in the left navigation bar.
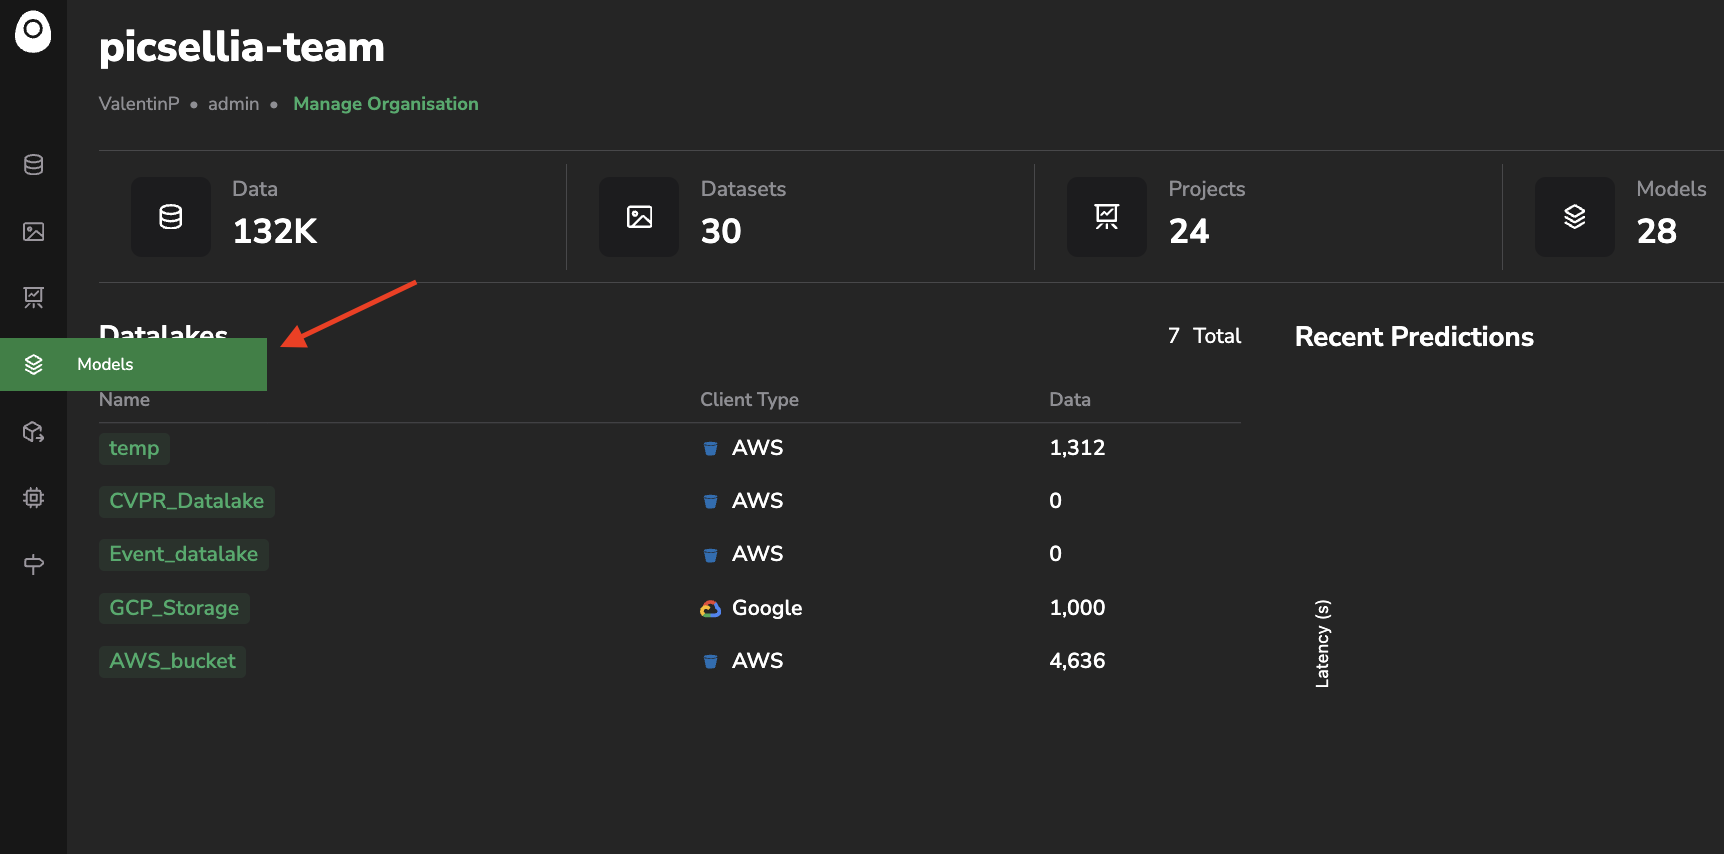
Access Model Registry
You will then land on the Models page, which lists all the Model related to the current Organization in a table, along with their description, number of ModelVersion, creation date, and the Members who can access them.
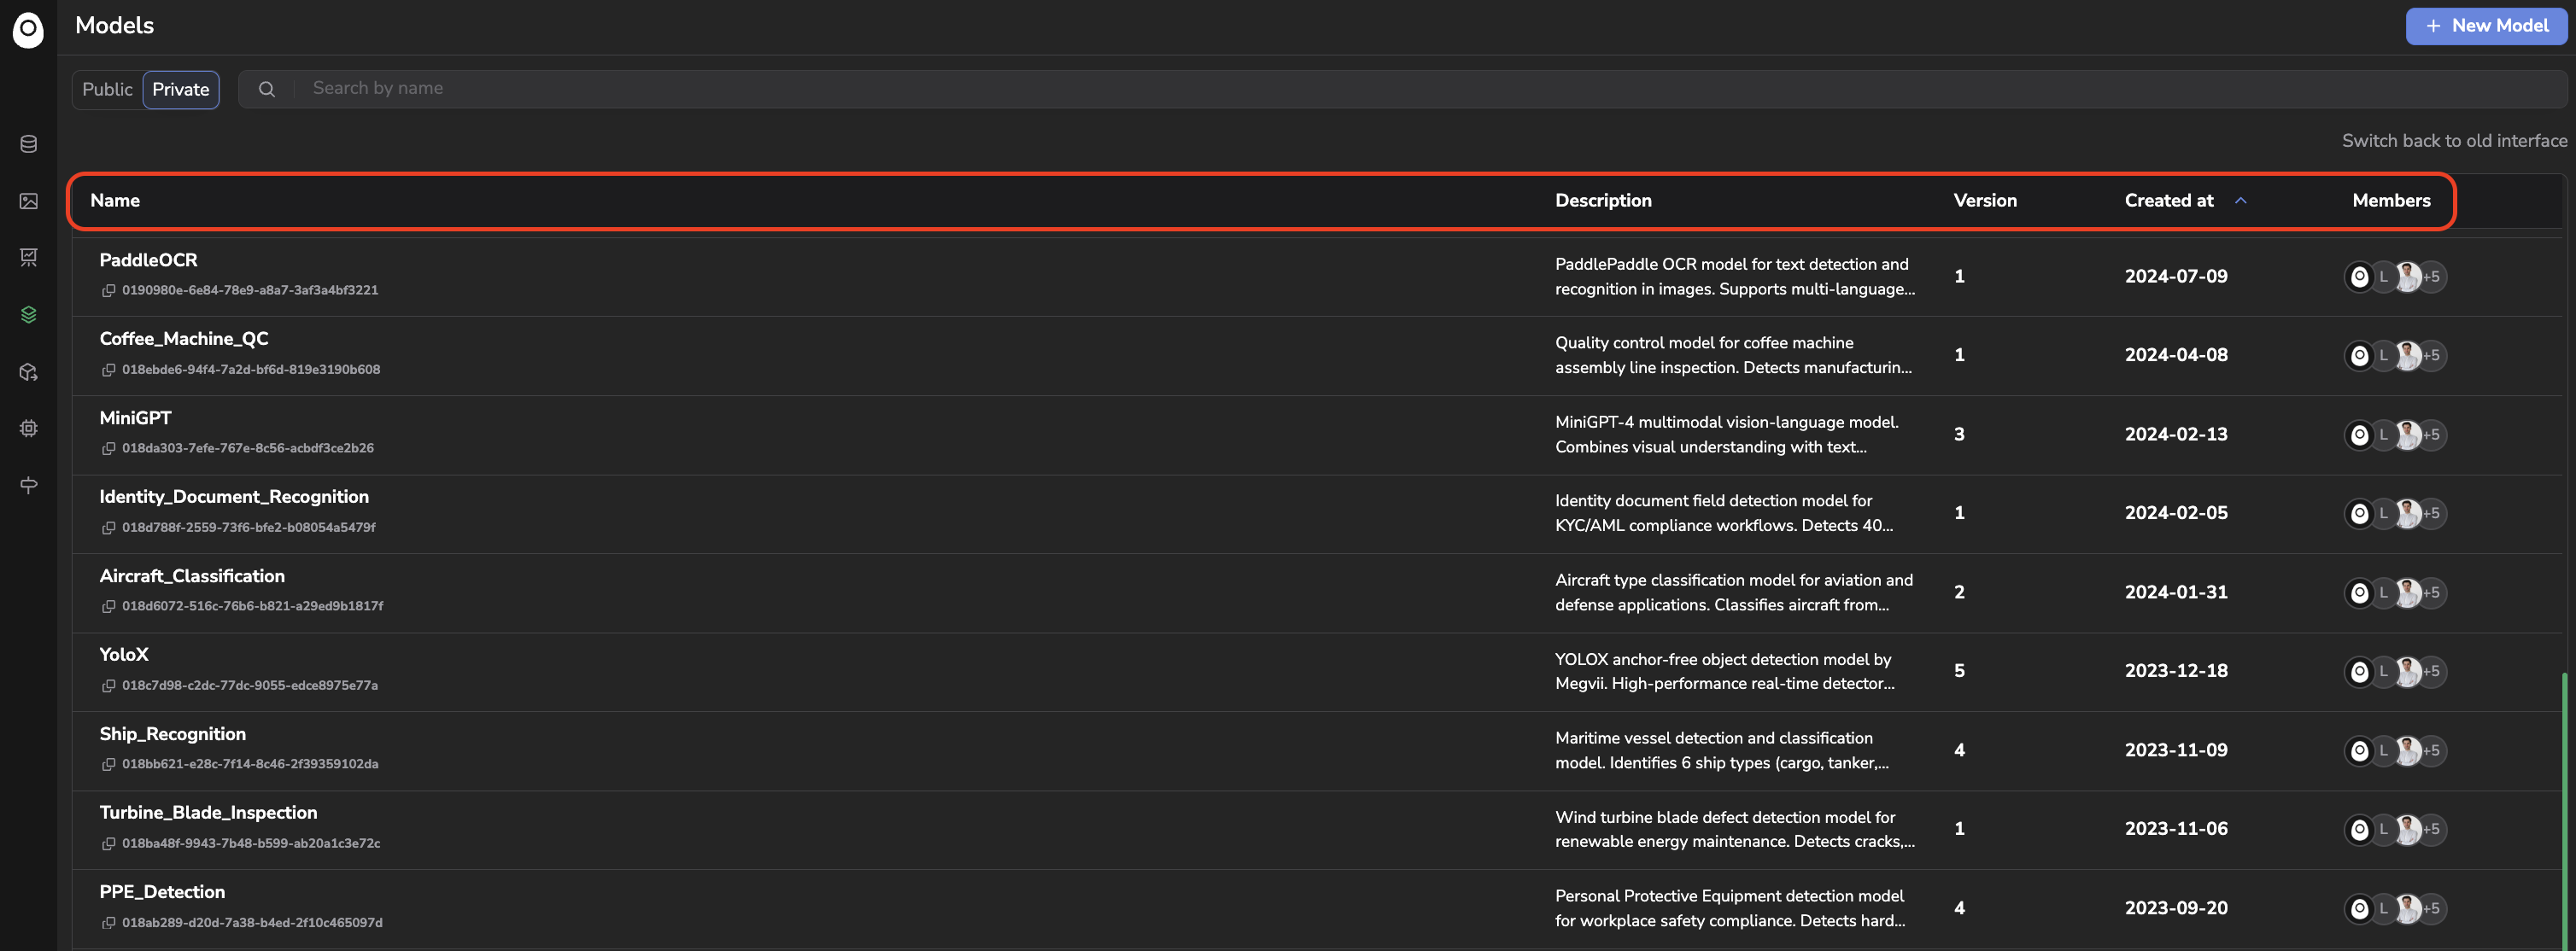
Model Registry
2. Private and Public Models
The Models page is divided into two tabs: Public and Private.
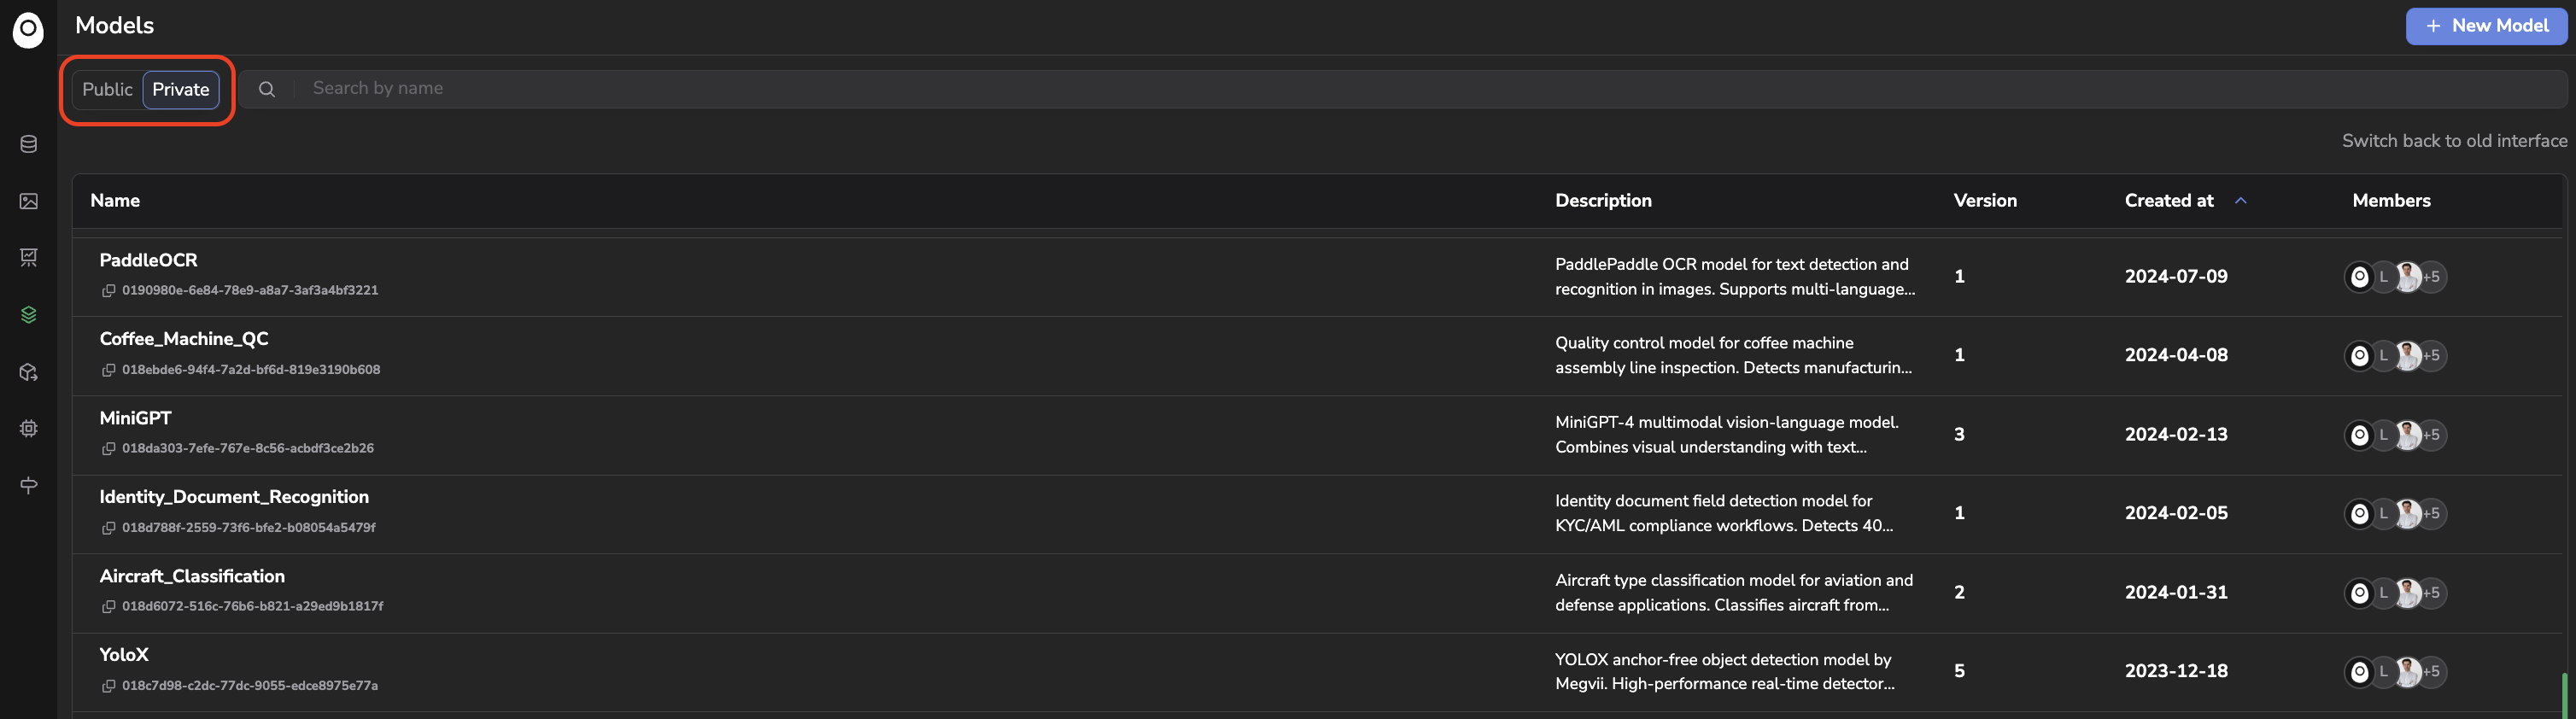
Access Public or Private Registry
A. Public Models
The Public tab is a curated library of Model and ModelVersion packaged by the Picsellia team for users.
Model and ModelVersion listed under Public are accessible to all Picsellia users, primarily as Base architecture when creating an Experiment.
This library is read-only: you can use a ModelVersion from it, but you cannot edit it or add a new Model or ModelVersion to it.
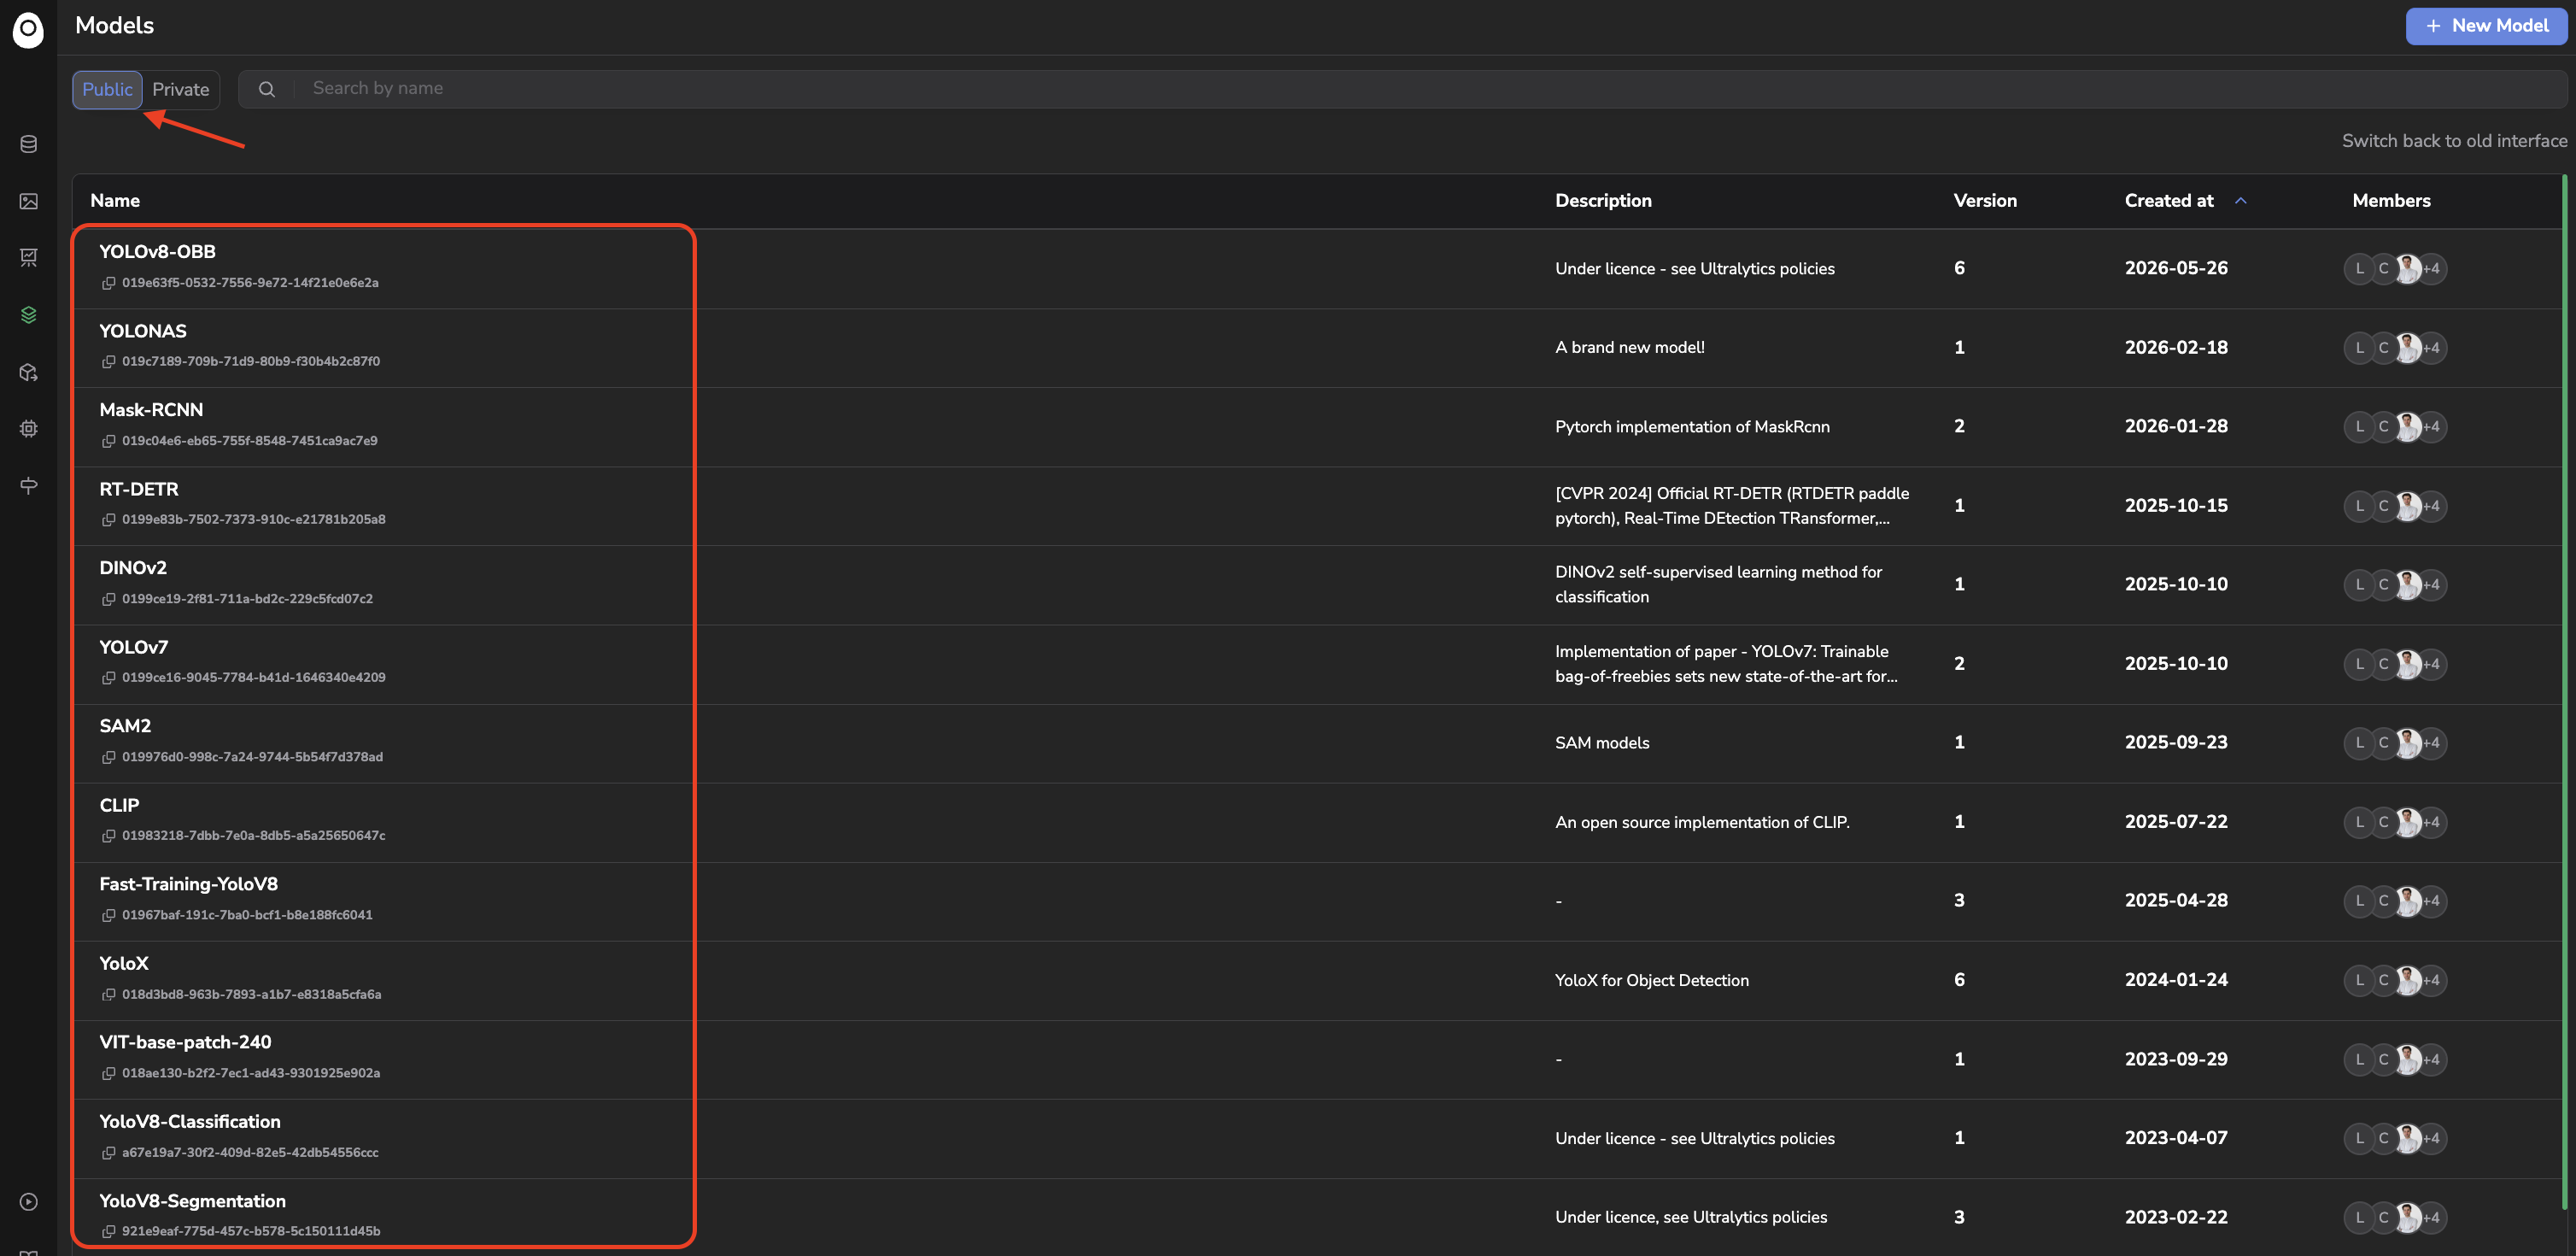
Public Model Registry
B. Private Models
The Private tab lists every Model and ModelVersion related to your Organization — created by you or any other member.
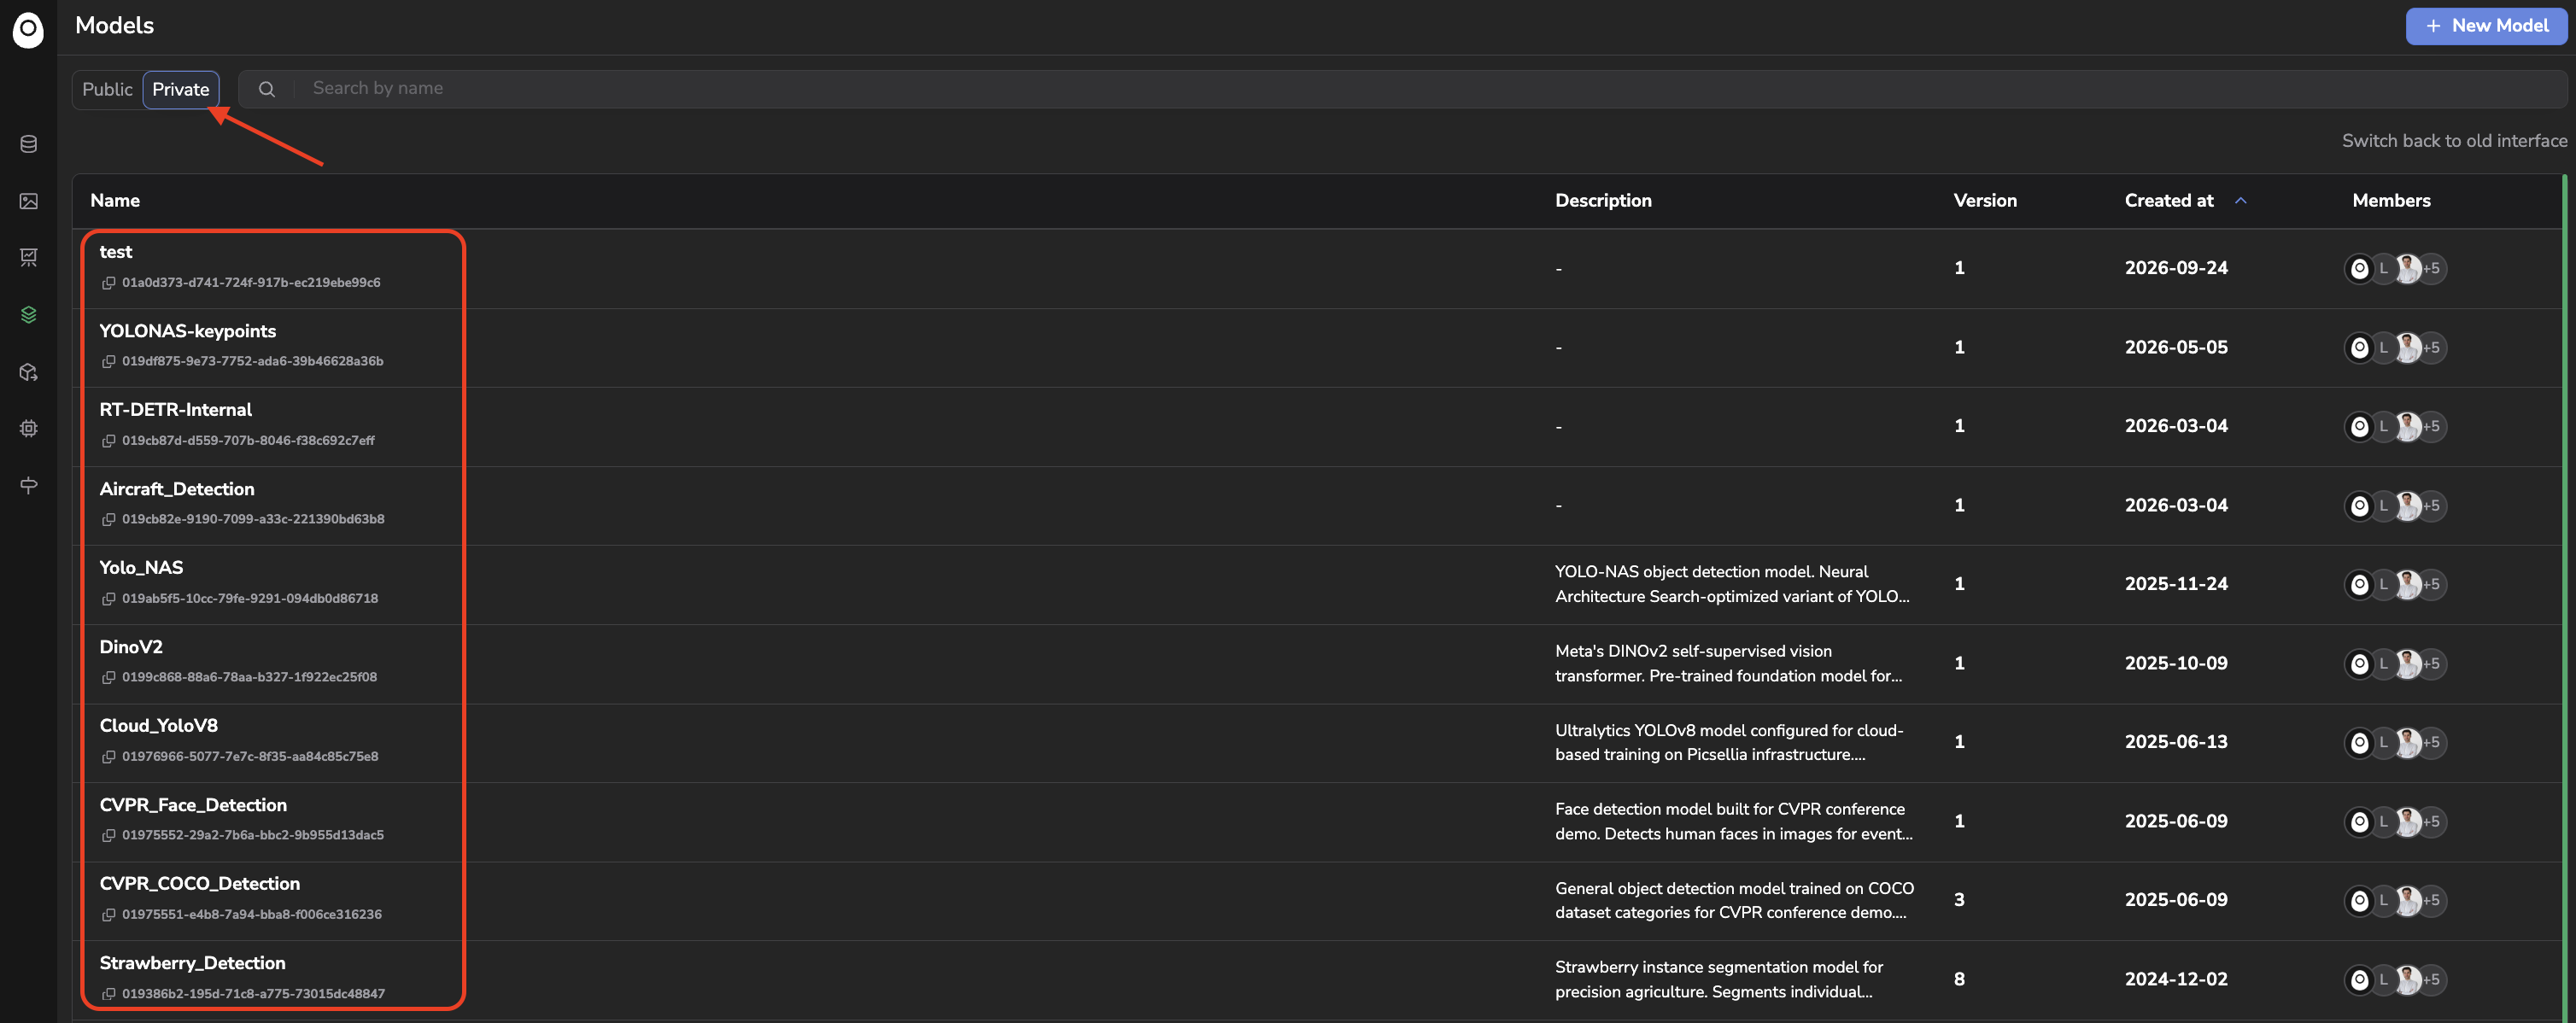
Private Model Registry
Your permissions at the Model level, defined in the Organization settings, may vary: you might or might not have the rights to read, edit, or delete a given Model or ModelVersion. For each Model in your Organization, you can only view it if you have been granted access to it.
3. Create a Model
ModelThere are two ways to create a new Model on Picsellia:
- Automatically, by exporting an
Experiment. - Manually, from the Models page.
In both cases, you can then update the Model settings.
A. Exporting an Experiment
ExperimentOnce an Experiment is ready, you can export it as a Model directly from the Experiment, creating a brand-new Model and its first ModelVersion in the process. This is detailed in Export as a model.
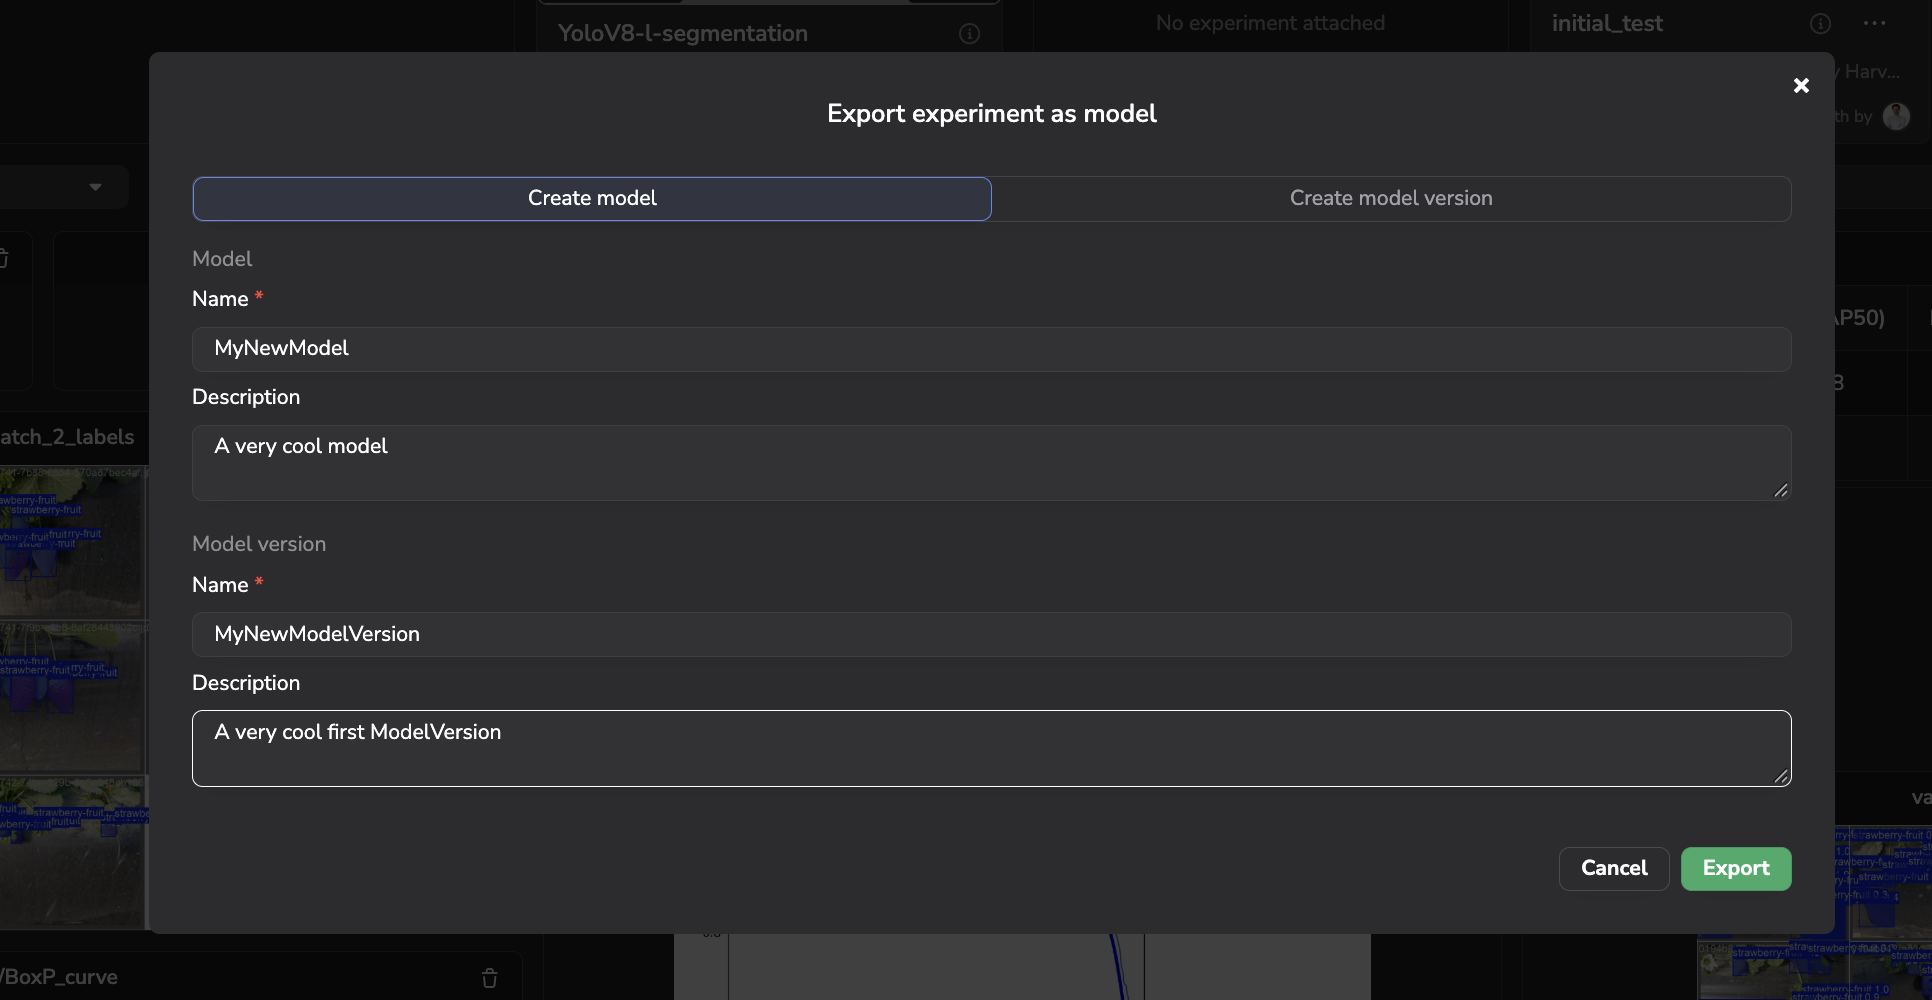
Create a Model and ModelVersion from the Export as a Model modal in Experiment
B. Create an empty Model
ModelFrom the Private tab of the Models page, create a new Model using the + New Model button in the top right corner. A modal opens, letting you define the new Model's Name, Description, and picture.
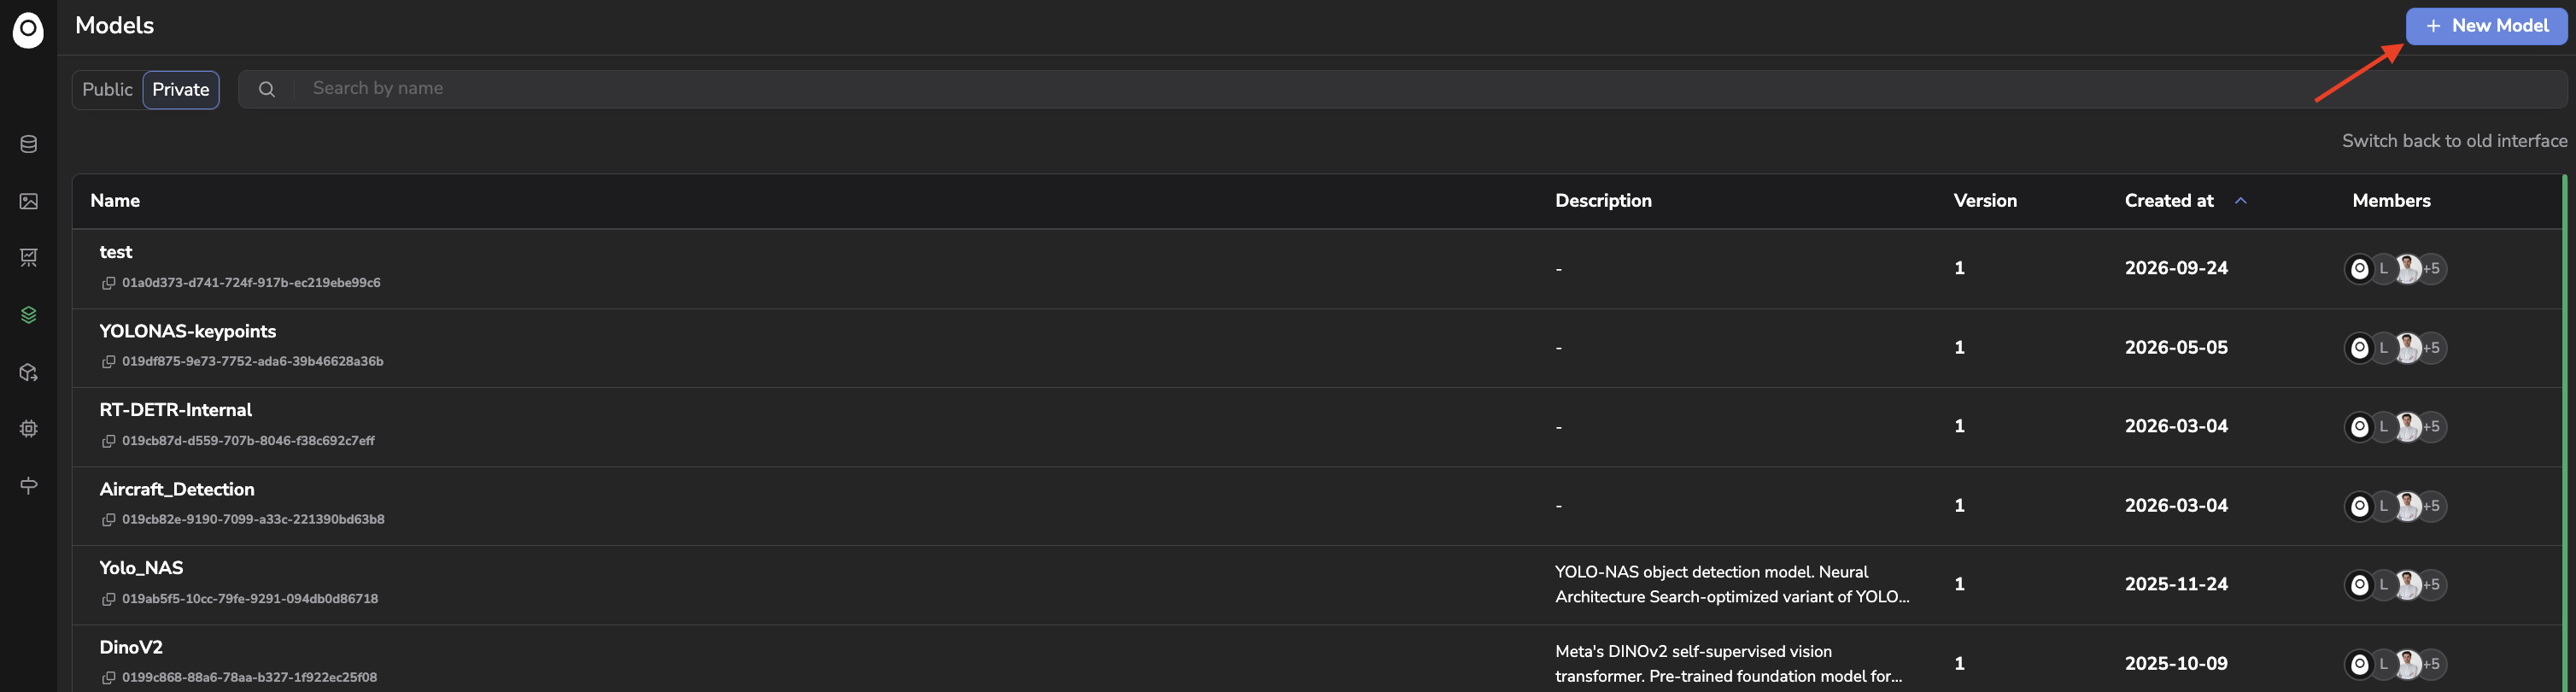
Create a new Model button
After clicking Create, the Model is initialized, free of ModelVersion for the moment.
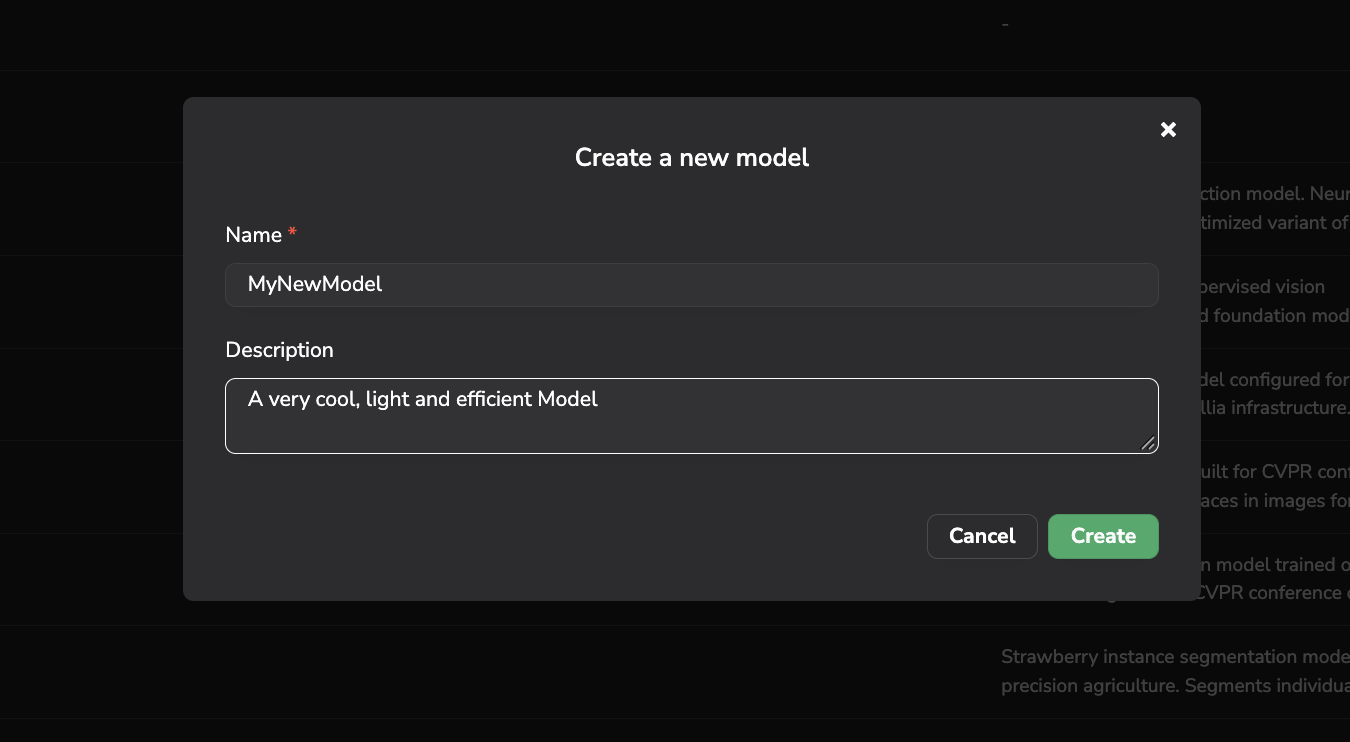
Model creration modal
C. Manage the Model settings
Model settingsClicking a Model opens its own page, with a Versions tab listing every ModelVersion created under it, and a Settings tab.
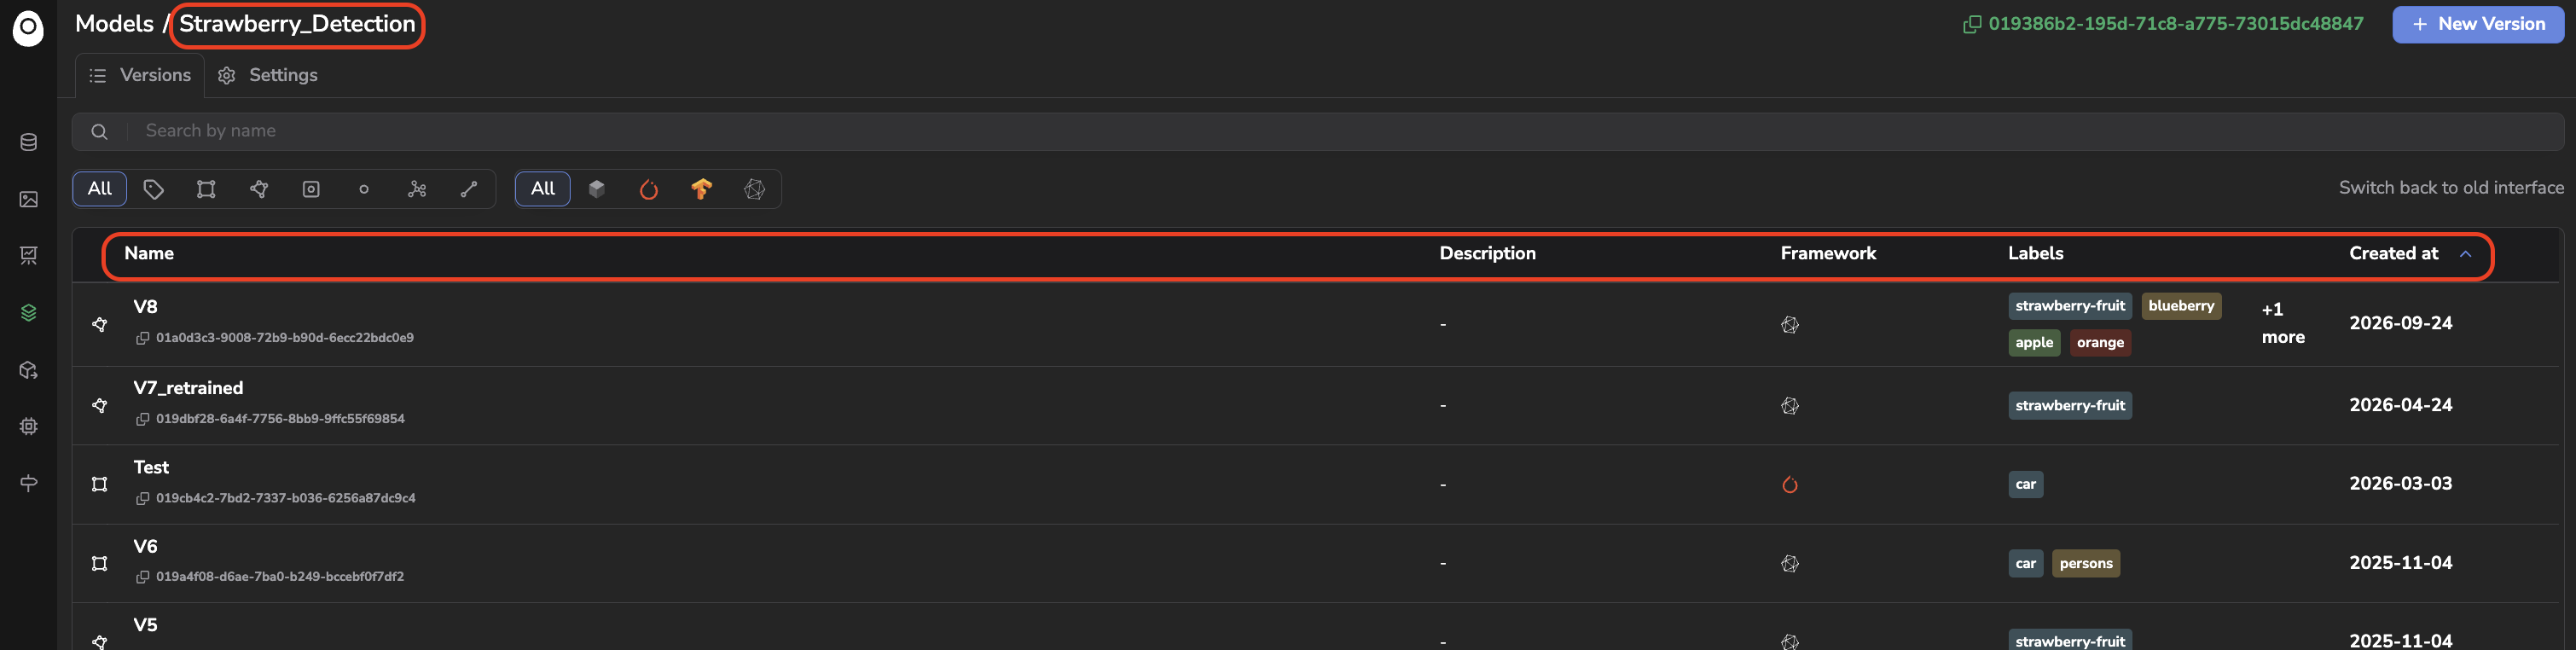
List of ModelVersion avaible under a given Model
From the General tab of Settings, you can update the Model's Name, Description, and picture, and delete the Model from the Danger zone.
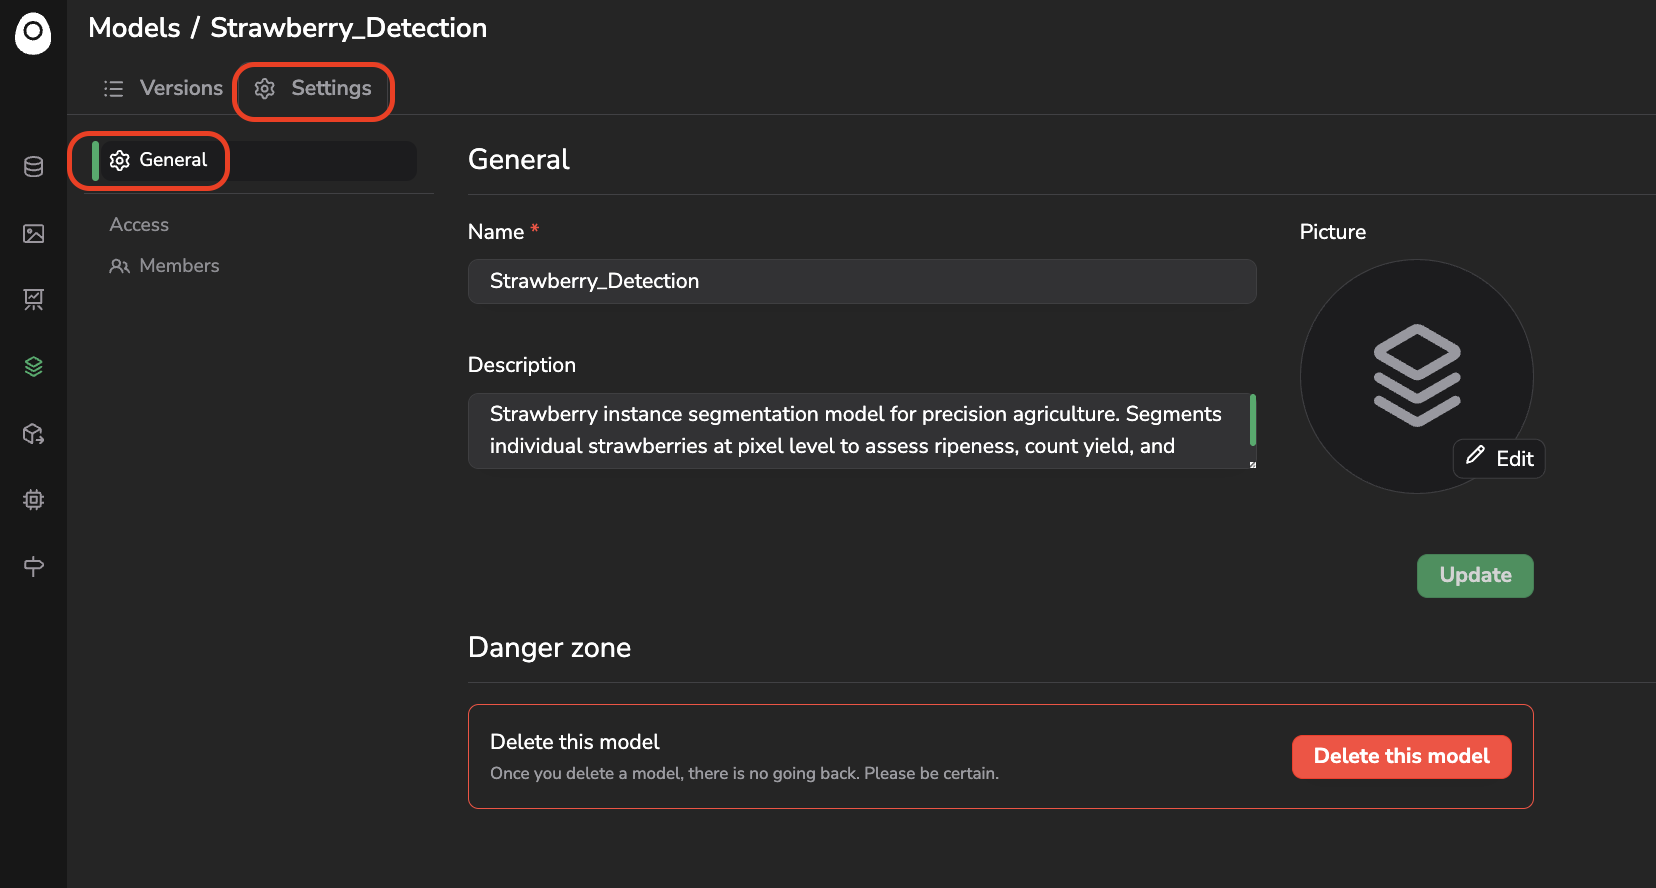
General section in Settings of a Model
From the Access > Members tab, you can manage who can access the Model, following the same Admins, Organization access, and Direct access mechanisms already detailed for a Project in Users Management System:
- Admins of the Organization can always access every
Model. - Organization access shows how many Member and Team can already access the
Modelthrough their own Organization Access. - Direct access lets you grant a Member or a Team a Reader, User, or Admin role on this specific
Model, on top of what their Organization Access already provides — use the + Add Member or + Add Team button to grant one.
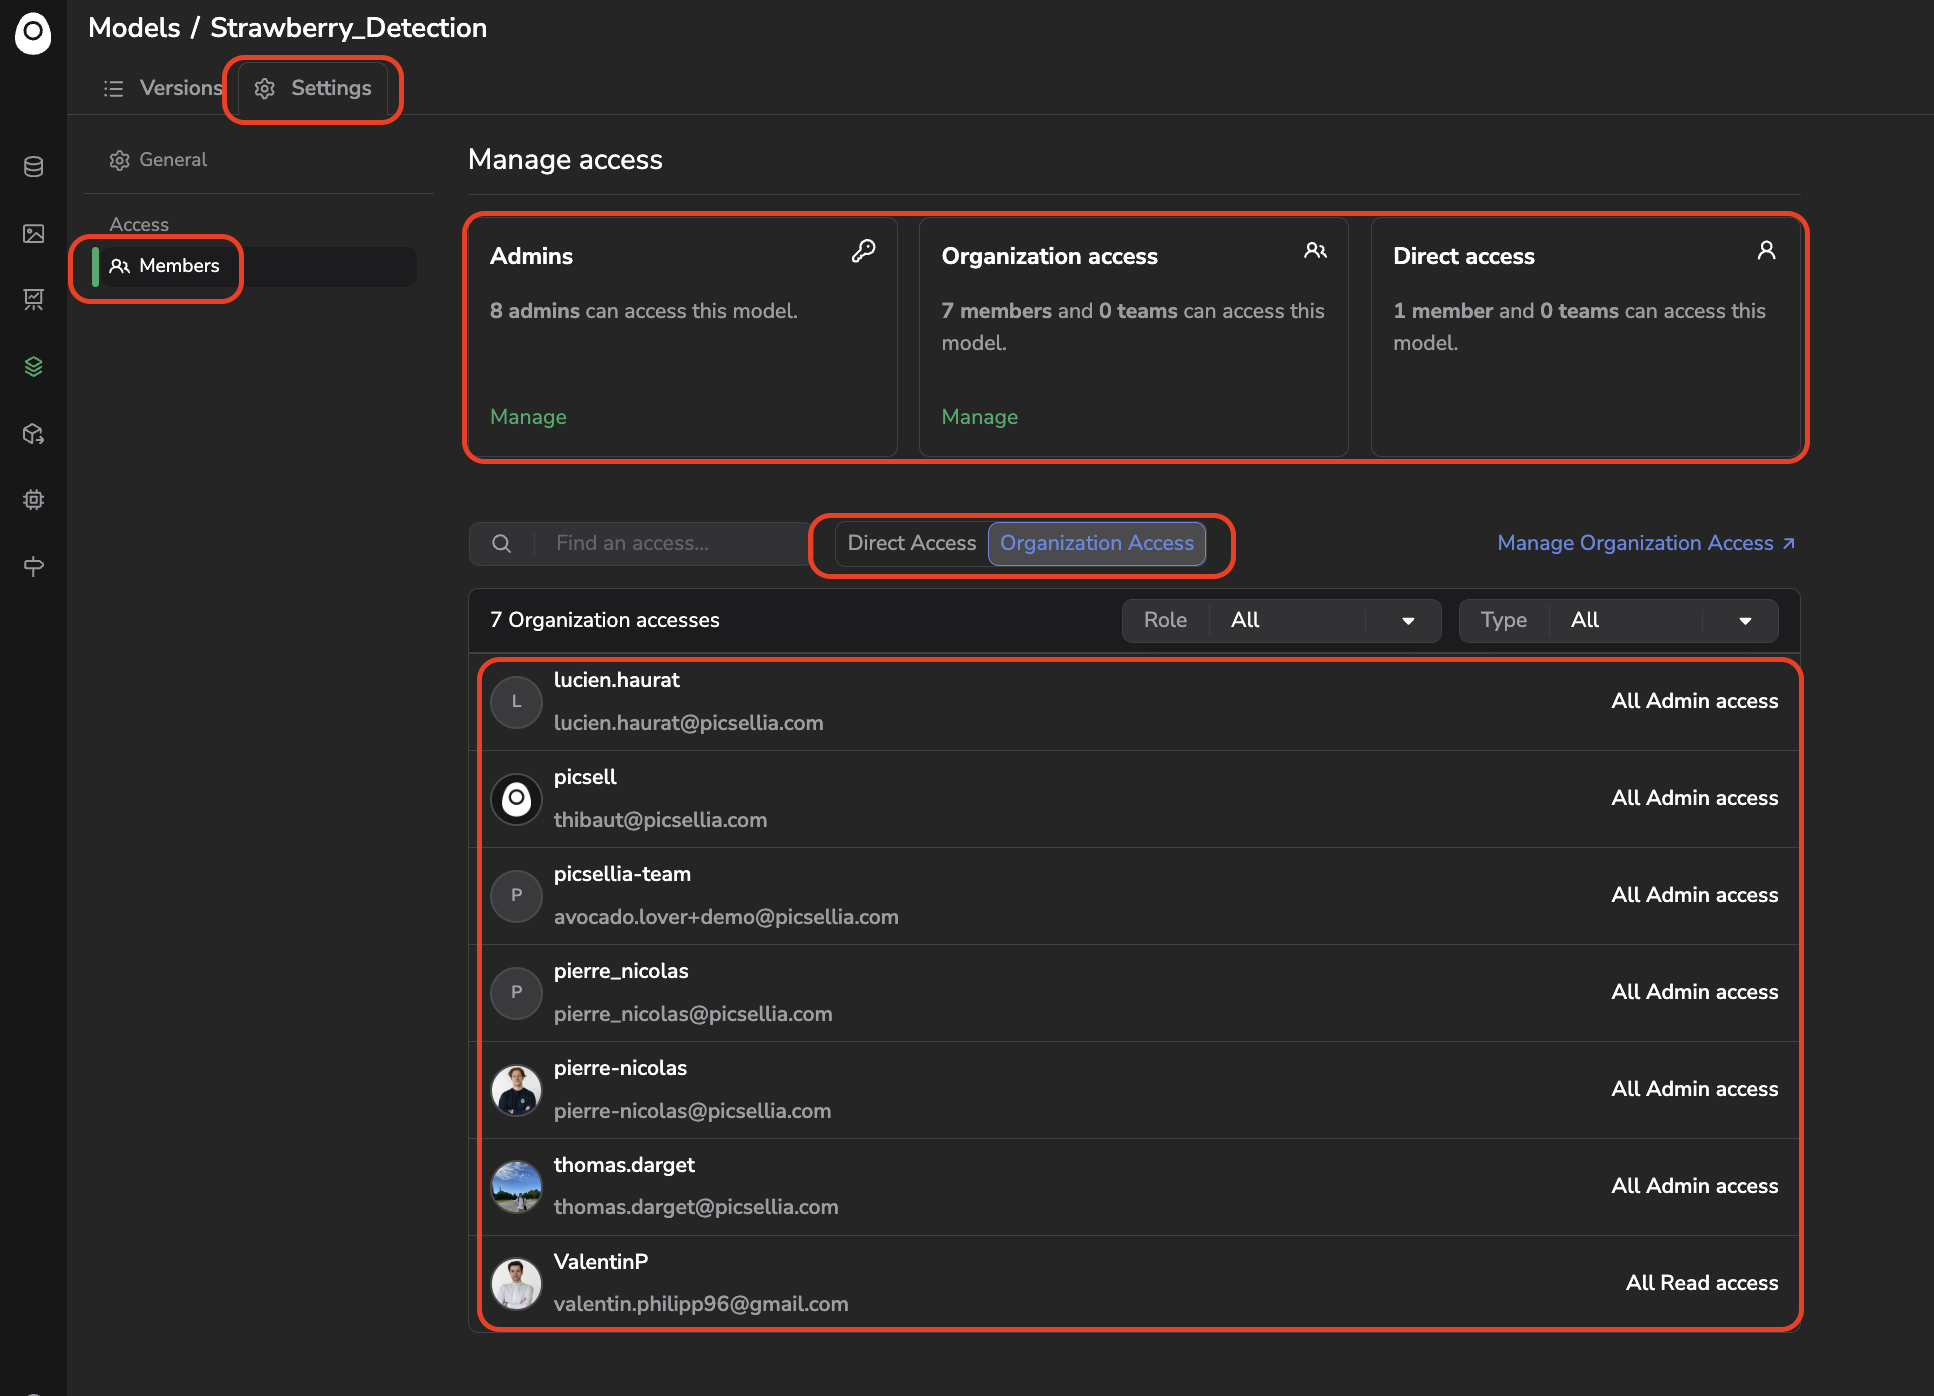
Current Model access Management
Updated 18 days ago
Continue Reading
You can now read more about how to manage your ModelVersion here.